vecna eve of ruin pdf

Overview of Vecna: Eve of Ruin

Vecna: Eve of Ruin is a 256-page Dungeons & Dragons adventure for levels 10-20, featuring a multiversal quest to stop Vecna’s evil plans. Includes a double-sided poster map, 30 terrifying new monsters, and a rich narrative spanning iconic D&D settings. Designed for 4-6 players, it combines epic combat, exploration, and cosmic horror elements, offering a climactic high-level experience.

Vecna: Eve of Ruin is a high-stakes Dungeons & Dragons adventure that pits players against the iconic lich Vecna, a being of unparalleled cosmic malevolence. Designed for characters ranging from level 10 to 20, this 256-page hardcover book challenges players to halt Vecna’s ritual to reshape the multiverse in his image. Featuring a double-sided poster map and 30 terrifying new monsters, the adventure spans diverse D&D settings, offering a mix of epic combat, moral dilemmas, and multiversal exploration. With its rich narrative and climactic battles, Vecna: Eve of Ruin delivers an unforgettable experience for both players and Dungeon Masters.

Key Features of the Adventure

Vecna: Eve of Ruin offers a 256-page hardcover adventure designed for levels 10-20, featuring a double-sided poster map and 30 terrifying new monsters. Players traverse iconic D&D settings, engaging in multiversal exploration and high-stakes combat. The adventure introduces cosmic horror elements, moral dilemmas, and epic set pieces, culminating in a climactic battle to stop Vecna’s ritual. Optimized for 4-6 players, it blends intricate storytelling with challenging encounters, requiring strategic thinking and collaboration. With its expansive scope and immersive design, Vecna: Eve of Ruin delivers a unforgettable high-level experience for both players and Dungeon Masters alike.

Target Audience and Level Range

Vecna: Eve of Ruin is designed for high-level play, catering to characters from level 10 to 20. This adventure is ideal for experienced players and Dungeon Masters seeking a challenging, epic narrative. The campaign’s complexity and themes of cosmic horror make it suitable for mature audiences familiar with D&D’s intricate mechanics. Players will encounter morally ambiguous choices and high-stakes combat, requiring strategic thinking and collaboration. With its multiversal scope, this adventure appeals to fans of immersive storytelling and those eager to face one of D&D’s most iconic villains in a climactic showdown.

Plot and Storyline

Vecna: Eve of Ruin follows the party’s quest to stop Vecna from annihilating the multiverse, exploring themes of cosmic horror and moral dilemmas in an epic showdown.

Vecna’s Plan to Destroy the Multiverse

Vecna’s plan in Eve of Ruin involves a ritual to reshape the multiverse in his image, eradicating free will and imposing lawful evil order. Using ancient relics like the Eye and Hand of Vecna, he seeks to dismantle reality’s fabric, plunging existence into chaos. His scheme threatens countless worlds, forcing the party to race against time across diverse settings to disrupt his dark ceremony. Vecna’s malevolence is unmatched, making him a formidable antagonist in this high-stakes adventure.

The Role of the Party in Stopping Vecna

The party plays a pivotal role in thwarting Vecna’s apocalyptic plan, embarking on a perilous journey across multiple planes to disrupt his dark rituals. As champions of the multiverse, they must unite disparate factions, uncover ancient secrets, and wield powerful artifacts to challenge Vecna’s dominance. Their decisions shape the fate of countless worlds, with opportunities for heroism, sacrifice, and confronting moral dilemmas. The adventure culminates in epic showdowns against Vecna’s minions and the lich himself, requiring strategic combat and creative problem-solving to prevent his catastrophic vision from unfolding.

Key Locations and Settings

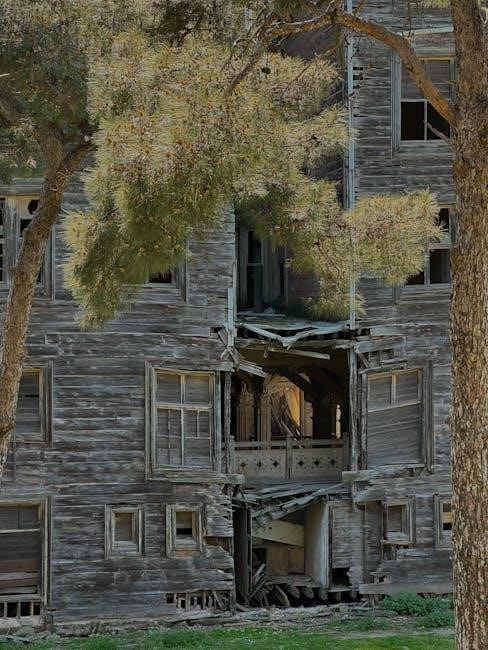
Vecna: Eve of Ruin transports players across a multitude of iconic D&D settings, including the Forgotten Realms and Greyhawk. The adventure features Toril in ruins, a haunting glimpse of Vecna’s triumph, and the Infinite Staircase, a mysterious nexus connecting planes; Players explore diverse environments, from battle-scarred planes to eerie, otherworldly realms. A central focus is a sprawling haunted house, a chilling hub of cosmic horror, while dungeon levels and multiversal landscapes provide rich backdrops for exploration and combat, immersing players in Vecna’s sprawling, apocalyptic vision.

New Monsters and Enemies

Vecna: Eve of Ruin introduces 30 terrifying new monsters, each with unique abilities and lore, expanding D&D’s bestiary and enhancing the adventure’s cosmic horror theme.

Overview of the Bestiary

The bestiary in Vecna: Eve of Ruin is a comprehensive collection of 30 terrifying new monsters, each with detailed stat blocks and descriptions. These creatures are designed to evoke cosmic dread and horror, fitting seamlessly into the adventure’s multiversal theme. From lesser-known minions to formidable legendary foes, the bestiary offers a diverse array of enemies that challenge players in unique ways. Each monster is crafted to enhance the narrative and gameplay, providing Dungeon Masters with tools to create memorable encounters. The bestiary is available in both hardcover and digital formats, including PDF versions for easy reference.

30 Terrifying New Monsters

Vecna: Eve of Ruin introduces 30 terrifying new monsters, each designed to instill cosmic dread and horror. These creatures range from eerie, otherworldly beings to powerful, legendary foes tied to Vecna’s dark legacy. Each monster is meticulously detailed with unique abilities, lore, and stat blocks, ensuring they enhance both combat and narrative experiences. From minor minions to apex threats, these additions enrich the adventure’s multiversal setting. The monsters are crafted to challenge high-level players, offering fresh encounters that align with the adventure’s themes of existential danger and moral complexity. Their inclusion expands the D&D bestiary with unforgettable enemies.

Stat Blocks and Descriptions

Each of the 30 terrifying monsters in Vecna: Eve of Ruin is accompanied by detailed stat blocks and descriptions, providing Dungeon Masters with everything needed to bring these creatures to life. The stat blocks are meticulously crafted, offering clear mechanics and balanced challenges for high-level play. Descriptions delve into the monsters’ origins, behaviors, and roles within Vecna’s multiversal scheme, enhancing immersion. Whether minor foes or legendary threats, each entry is designed to integrate seamlessly into the adventure’s cosmic horror and exploration themes, ensuring encounters are both memorable and mechanically engaging. The depth of these entries underscores the adventure’s commitment to quality and playability.

Adventure Structure and Design

Vecna: Eve of Ruin features a modular chapter design, blending intense combat and exploration across diverse multiversal realms. Each chapter escalates challenges, ensuring a dynamic high-level experience.

Chapter Breakdown

Vecna: Eve of Ruin is divided into distinct chapters, each exploring unique planes and challenges. The adventure begins with an introduction to Vecna’s looming threat, transitioning into high-stakes quests across multiversal realms. Each chapter escalates in difficulty, featuring battles against powerful foes tied to Vecna’s schemes. Players traverse iconic D&D settings, encountering diverse enemies and allies. The narrative unfolds with climactic showdowns, culminating in a final confrontation with Vecna. The chapter breakdown ensures a balanced mix of exploration, combat, and role-playing, providing a dynamic progression for high-level play.

Combat and Exploration Elements

Vecna: Eve of Ruin masterfully blends intense combat encounters with immersive exploration. Battles feature strategic challenges, leveraging Vecna’s minions and environmental hazards. Exploration elements include navigating surreal multiversal landscapes, solving puzzles, and uncovering lore. The adventure emphasizes adaptability, rewarding creative problem-solving and tactical thinking. Each encounter is designed to test players’ abilities, from high-stakes boss fights to dynamic skirmishes. The integration of horror and cosmic dread enhances tension, making both combat and exploration unforgettable experiences in this epic campaign.

Pacing and Difficulty Curve

Vecna: Eve of Ruin offers a carefully structured pacing that escalates challenges as players progress from level 10 to 20. The adventure balances high-stakes combat, exploration, and narrative depth, ensuring a dynamic experience. Difficulty spikes are intentional, with complex encounters and moral dilemmas that demand strategic thinking and creativity. While the pacing is well-designed, the campaign’s multiversal scope and intricate plot require significant preparation from DMs to maintain flow. The gradual introduction of cosmic threats and Vecna’s schemes ensures players remain engaged and challenged throughout their epic quest to save the multiverse.

Resources for Dungeon Masters

Vecna: Eve of Ruin provides a double-sided poster map, a detailed bestiary with stat blocks, and a DM screen with tools for encounter building and world-building tips.

Double-Sided Poster Map

The Vecna: Eve of Ruin adventure includes a double-sided poster map, providing detailed layouts of key locations such as Vecna’s stronghold and various multiversal realms. These maps are designed to enhance gameplay by visually representing the adventure’s epic settings. The poster map is a valuable resource for Dungeon Masters, helping to immerse players in the story and navigate complex encounters. The maps are artistically crafted, offering both functionality and aesthetic appeal, making them an essential tool for running the campaign effectively.

Dungeon Master Screen and Tools

The Dungeon Master screen for Vecna: Eve of Ruin provides essential tools and reference materials to enhance gameplay. It includes quick-access charts for conditions, skills, and combat rules, streamlining the DM’s experience. The screen is designed to help manage the adventure’s complex encounters, multiversal travel, and high-level gameplay. Additional tools, such as encounter builders and NPC stat trackers, are included to assist DMs in preparing and running the campaign effectively. These resources ensure a smooth and immersive experience, allowing DMs to focus on storytelling and player engagement without unnecessary complications.

Homework and Preparation Requirements

Vecna: Eve of Ruin demands significant preparation from Dungeon Masters due to its intricate plot and high-level gameplay. DMs must thoroughly study the adventure’s multiversal settings, key NPCs, and epic encounters. The campaign’s complexity requires familiarity with its unique mechanics and themes. While the book provides tools like encounter builders and stat blocks, DMs should expect to invest time in adapting the story to their party’s choices. Additional prep includes managing pacing, balancing combat, and integrating the 30 new monsters effectively. The adventure’s depth and scale ensure that thorough preparation is essential for a seamless and engaging experience.

Themes and Tone

Vecna: Eve of Ruin blends cosmic horror, existential dread, and moral ambiguity, creating a tense, high-stakes narrative. The tone is dark and ominous, reflecting Vecna’s malevolent influence.

Horror and Cosmic Dread Elements

Vecna: Eve of Ruin masterfully incorporates horror and cosmic dread, immersing players in a chilling narrative. The lich Vecna’s malevolent presence permeates every setting, evoking existential fear. Players confront unsettling environments, eerie encounters, and unimaginable threats that challenge their sanity and resolve. The adventure’s tone is dark and foreboding, with a focus on the impending doom of the multiverse. These elements create a tense atmosphere, making the stakes feel personal and the consequences of failure catastrophic. The horror themes are deeply intertwined with Vecna’s lore, enhancing the sense of dread and urgency.

Multiversal Travel and Exploration

Vecna: Eve of Ruin offers an expansive multiversal journey, allowing players to traverse iconic D&D settings and uncharted planes. The adventure seamlessly weaves together diverse locales, creating a cohesive narrative that spans the multiverse. From forgotten realms to otherworldly dimensions, players explore a vast array of environments, each rich in lore and immersion. This multiversal travel adds depth and complexity to the storyline, enabling players to experience the grandeur and mystery of D&D’s infinite worlds. The adventure’s interconnected design ensures that each location feels integral to the overarching quest, making exploration both thrilling and purposeful.

Moral and Ethical Dilemmas

Vecna: Eve of Ruin presents players with profound moral and ethical dilemmas, challenging their alignment and beliefs. The adventure’s multiversal scope forces tough decisions, such as balancing the greater good versus personal sacrifice. Players must confront questions of justice, mercy, and the consequences of their choices, which ripple across entire planes. Vecna’s manipulations amplify these dilemmas, testing the party’s resolve and unity; The narrative’s depth encourages introspection, making the adventure as much a journey of character growth as it is a quest to save the multiverse from ruin. These dilemmas add emotional weight, enriching the storytelling experience for all involved.

Reception and Reviews

Players and DMs praise Vecna: Eve of Ruin for its epic scope and multi-planar battles, though some note uneven combat creativity and underdeveloped story elements. A memorable experience despite flaws.

General Feedback from Players and DMs

Players and DMs have shared mixed yet enthusiastic feedback about Vecna: Eve of Ruin. Many praise the adventure’s ambitious scope, multi-planar exploration, and epic showdown with Vecna, calling it a memorable high-level experience. The inclusion of 30 new terrifying monsters and detailed settings has been particularly well-received. However, some critics note uneven combat encounters and underdeveloped story elements. DMs highlight the need for significant preparation due to the adventure’s complexity. Despite these challenges, the consensus is that Vecna: Eve of Ruin delivers a thrilling, if flawed, campaign that showcases D&D’s storytelling potential.

Strengths and Weaknesses

Strengths: Vecna: Eve of Ruin excels in its epic scope, offering a multi-planar adventure that immerses players in diverse D&D settings. The inclusion of 30 terrifying new monsters enhances the horror theme, while the double-sided poster map and detailed narrative provide rich storytelling. High-level combat and cosmic dread elements appeal to experienced players seeking a challenge.

Weaknesses: Critics point to uneven combat encounters and underdeveloped story elements. The adventure demands significant DM preparation, which may deter less experienced Dungeon Masters. Despite these flaws, the adventure remains a standout for its ambitious design and memorable climax.

Comparison to Other D&D Adventures

Vecna: Eve of Ruin stands out among D&D adventures with its high-level, multiversal scope, surpassing even epic campaigns like The Tomb of Annihilation and Curse of Strahd. Its cosmic horror and dread elements set it apart, offering a darker, more intense experience. While other adventures focus on specific settings, Vecna: Eve of Ruin spans multiple planes, delivering unparalleled narrative depth. Critics argue its combat sections lack creativity compared to Icewind Dale: Rime of the Frostmaiden, but its bestiary and climactic conclusion make it a memorable high-level adventure, appealing to experienced players seeking a grand challenge.

Availability and Formats

Vecna: Eve of Ruin is available as a 256-page hardcover and digital PDF. It can be purchased on D&D Beyond, Roll20, and official D&D distributors.

Hardcover Edition

The hardcover edition of Vecna: Eve of Ruin is a 256-page book, offering a premium format for players and DMs. It features high-quality artwork, detailed maps, and a sturdy binding. The hardcover is available through official D&D distributors, including local game stores and online retailers like Amazon. This physical copy is ideal for those who prefer a tangible experience, allowing easy reference during gameplay. The hardcover edition is a must-have for collectors and fans of high-level D&D adventures, providing a durable and visually appealing format for the epic multiversal quest.

Digital PDF Version

The digital PDF version of Vecna: Eve of Ruin is available for purchase on platforms like D&D Beyond, DriveThruRPG, and Roll20. This format offers convenience, allowing players and DMs to access the adventure on multiple devices. The PDF includes bookmarks, a searchable index, and high-quality artwork. It is ideal for digital enthusiasts and those who prefer space-saving options. Additionally, some websites offer free downloads, though these may not be officially sanctioned. The PDF version ensures easy navigation and preparation for high-level play, making it a versatile choice for modern D&D enthusiasts.

Official Platforms and Distributors

Vecna: Eve of Ruin is officially distributed through platforms like D&D Beyond, DriveThruRPG, and Roll20. These platforms offer the adventure in digital formats, ensuring high-quality PDFs optimized for virtual play. The official hardcover and double-sided poster map are available through Wizards of the Coast’s website and partner retailers. Purchasing from these sources guarantees authenticity and supports the creators. Fans can also access the PDF on official D&D platforms, making it easy to integrate into digital campaigns. This ensures a seamless experience for both players and Dungeon Masters alike.

Additional Content and Supplements

Custom battlemaps, Vecna’s Secrets as Adventures, and community-created resources complement the core adventure. Supplements are available on Roll20 and official D&D platforms, enhancing gameplay.

Vecna’s Secrets as Adventures

Vecna’s Secrets as Adventures is a bundle that expands the core campaign with additional scenarios, characters, and plot twists. It includes detailed encounters, NPCs, and hidden lore, offering DMs fresh ways to deepen the story. Available as a PDF, this supplement integrates seamlessly with the main adventure, providing new challenges and narrative arcs. Players and DMs alike will uncover Vecna’s hidden motives and face unexpected threats. This resource enriches the multiversal journey, ensuring a unique experience for all. Perfect for enhancing the epic quest to stop Vecna’s destruction.

Custom Battlemaps and Resources

Custom battlemaps for Vecna: Eve of Ruin enhance gameplay with detailed, high-resolution designs. Available as PDFs, these maps include multiversal locations like the Infinite Staircase and Vecna’s stronghold. Scalable for parties of 4-6, they offer versatility for epic encounters. Additional resources, such as 300dpi images for printing, are included. These tools allow DMs to create immersive environments, bringing Vecna’s lair and other cosmic settings to life. Available on platforms like Roll20 and official distributors, these resources elevate the adventure’s visual and tactical depth, ensuring unforgettable multiversal battles.

Community-Created Content

The community has embraced Vecna: Eve of Ruin by creating a wealth of fan-made content. From custom battlemaps to unique supplements, players and DMs alike have shared their creativity. PDFs featuring alternate storylines, additional monsters, and expanded settings are widely available. Platforms like Roll20 and online forums host these resources, allowing for enhanced gameplay experiences. These community-driven additions offer fresh perspectives and tools, enriching the adventure for both new and veteran players. The shared passion for Vecna’s multiversal quest continues to grow, ensuring no two campaigns are alike.

Vecna: Eve of Ruin delivers an epic, multiversal adventure, blending cosmic horror with high-stakes combat. Its intricate design and terrifying elements leave a lasting impression on players and DMs alike.

Final Thoughts on Vecna: Eve of Ruin

Vecna: Eve of Ruin offers a monumental adventure, blending cosmic horror and epic multiversal exploration. While its ambitious scope and terrifying monsters shine, some players and DMs note uneven pacing and less creative combat sections. The adventure’s themes of existential dread and moral dilemmas add depth, but the heavy preparation required may deter some DMs. Despite these flaws, it remains a standout experience for high-level play, delivering unforgettable moments and a climactic showdown against one of D&D’s most iconic villains. For fans of high-stakes, multiversal storytelling, Vecna: Eve of Ruin is a must-play, though it demands dedication from both players and DMs alike.

Recommendation for Players and DMs

Vecna: Eve of Ruin is a must-play for experienced players and DMs who enjoy high-level challenges and cosmic horror themes. Ideal for fans of Vecna’s lore and multiversal adventures, it offers a unique narrative with terrifying enemies and moral dilemmas. However, DMs should prepare for significant homework due to the adventure’s complexity. Players will find the epic stakes and multiverse-spanning story engaging, but combat sections may feel repetitive. Overall, it’s a memorable experience for those who enjoy complex, high-stakes storytelling, though it may not suit all groups due to its demanding nature and pacing issues.

Future of Vecna in D&D

Vecna’s resurgence in Vecna: Eve of Ruin solidifies his iconic status as D&D’s ultimate villain, suggesting a continued focus on high-level, multiverse-spanning adventures. The success of this module may pave the way for more Vecna-centric content, including expansions on his lore and additional cosmic horror elements. Future campaigns could explore Vecna’s influence across different D&D settings, offering players and DMs deeper dives into his legacy. Additionally, the popularity of this adventure may inspire new Vecna-related supplements, ensuring his enduring presence in the world of Dungeons & Dragons for years to come.

ninja cm401 manual

Product Overview

The Ninja CM401 Specialty Coffee Maker is a versatile 10-cup coffee maker with a glass carafe, designed for brewing a variety of coffee styles.

It features thermal flavor extraction, customizable settings, and an integrated milk frother for creating café-quality drinks at home, perfect for coffee enthusiasts seeking convenience and quality.

1.1 Key Features of the Ninja CM401

The Ninja CM401 Specialty Coffee Maker offers a range of innovative features designed to enhance your coffee-making experience. It includes multiple brew styles such as Classic, Rich, and Over Ice, allowing you to customize your coffee to your liking. The machine also features customizable settings for brew strength and cup size, providing flexibility for different preferences. Additionally, it comes with an integrated milk frother, perfect for creating lattes and cappuccinos at home. The 60-ounce water reservoir is detachable for easy refilling, and the thermal flavor extraction technology ensures optimal flavor in every cup. These features make the Ninja CM401 a versatile and user-friendly coffee maker for coffee enthusiasts seeking convenience and quality in their daily brewing routine.

1.2 Design and Build Quality

The Ninja CM401 Specialty Coffee Maker boasts a sleek and compact design, making it a stylish addition to any kitchen countertop. Its durable construction features high-quality materials, ensuring longevity and reliability. The coffee maker includes a glass carafe with a thermal flavor profile, designed to retain heat and preserve the aroma of your brewed coffee. The intuitive control panel offers easy navigation, with clearly marked buttons for different brewing options and customizable settings. The machine’s built-in milk frother is seamlessly integrated, allowing for a smooth transition between brewing and frothing. Overall, the CM401 combines functionality with a modern aesthetic, appealing to both casual users and coffee connoisseurs alike.

Safety Precautions

Read all instructions before use. For household use only. Keep out of children’s reach. Avoid exposure to water or extreme temperatures. Use the polarized plug safely.

2.1 General Safety Guidelines

Always read and follow the instructions carefully before using the Ninja CM401. This appliance is intended for household use only. Keep it out of reach of children and pets. Avoid exposing the machine to water or extreme temperatures. Use the polarized plug provided, as it is a safety feature. Ensure the coffee maker is placed on a stable, heat-resistant surface. Never leave the appliance unattended while in operation. Avoid touching hot surfaces, such as the carafe or brew basket. If the machine malfunctions, unplug it immediately. Regularly inspect the power cord and plugs for damage. Do not operate the Ninja CM401 with a damaged cord or plug. Follow all basic safety precautions when using electrical appliances to ensure safe and effective operation.

2.2 Specific Warnings and Cautions

Do not submerge the Ninja CM401 in water or expose electrical components to moisture. Avoid using abrasive cleaners, as they may damage the surfaces. Ensure the carafe is securely placed on the warming plate to prevent spills. When using the milk frother, always hold the cup and whisk firmly to avoid splashing. Never insert metal objects into the machine, as this may cause electrical shock. Keep the brew basket and carafe clean to prevent clogging and mold growth. Descale the machine regularly to maintain performance and prevent mineral buildup. If you notice any unusual odors or smoke, unplug the machine immediately and contact customer support. Always follow the recommended cleaning and maintenance procedures outlined in the manual to ensure optimal functionality and safety. Proper care will extend the lifespan of your Ninja CM401 and ensure consistent brewing results. Follow these precautions to avoid potential hazards and maintain safety during operation.

Initial Setup and Preparation

Unbox and identify all parts, including the water reservoir, brew basket, and carafe. Rinse each component thoroughly before first use to ensure cleanliness and hygiene.

Plug in the machine and perform a brief initial rinse cycle to prime the system for brewing. This step ensures optimal performance and flavor in your first brew.

3.1 Unboxing and Parts Identification

When unboxing the Ninja CM401, carefully remove all components, including the coffee maker, glass carafe, brew basket, water reservoir, and user manual. Ensure no parts are missing or damaged.

Identify each part: the water reservoir holds up to 60 ounces, the brew basket filters coffee grounds, and the carafe keeps coffee hot. Familiarize yourself with the control panel, featuring brew style and cup size options. The milk frother, if included, is located on the side for creating lattes and cappuccinos. Take time to understand each piece to ensure proper assembly and use. This step is crucial for a smooth setup and first-time brewing experience. Proper identification prevents confusion and ensures all functions are utilized effectively.

3.2 First-Time Use Preparation

Before first use, wash the glass carafe, brew basket, and other detachable parts with mild soap and warm water. Rinse thoroughly to remove any manufacturing residue.

Plug in the Ninja CM401 and ensure all parts are properly assembled. Prime the machine by running a brew cycle with just water to cleanse the system. Discard the water after this process.

Refer to the manual for specific priming instructions. Ensure the water reservoir is filled to the recommended level. Familiarize yourself with the control panel and settings before brewing your first cup. Proper preparation ensures optimal performance and flavor. Always follow safety guidelines and manufacturer recommendations for initial setup. This step is essential for a smooth and enjoyable brewing experience with your Ninja CM401 Specialty Coffee Maker.

Brewing Options

The Ninja CM401 offers versatile brewing options, including Classic, Rich, Over Ice, and Specialty styles, allowing customization of strength and cup size to suit every coffee preference.

4.1 Brew Styles (Classic, Rich, Over Ice, etc.)

The Ninja CM401 offers multiple brew styles to cater to diverse coffee preferences. The Classic style delivers a smooth, balanced cup, while the Rich option enhances flavor intensity. For a refreshing summer drink, the Over Ice setting brews hot coffee concentrated enough to pour over ice without dilution. Additionally, the machine supports Specialty brewing, ideal for crafting lattes, cappuccinos, and other premium coffee drinks. These styles ensure that every cup meets your unique taste, whether you prefer a traditional brew or a modern specialty drink. The versatility of the CM401 makes it perfect for both casual coffee drinkers and enthusiasts alike.

4.2 Customization Options (Strength, Cup Size)

The Ninja CM401 allows users to tailor their coffee experience with adjustable strength and cup size settings. The machine offers four brew strength options: Classic, Rich, Over Ice, and Specialty, each delivering a distinct flavor profile. Additionally, the CM401 supports multiple cup sizes, ranging from a single-serve to a full 10-cup carafe, ensuring flexibility for various needs. This customization enables users to brew coffee that matches their preferences, whether they prefer a strong, bold cup or a more balanced flavor. The machine’s intelligent design ensures consistent extraction across all settings, guaranteeing a perfect cup every time. These features make the Ninja CM401 a versatile and user-friendly choice for coffee lovers seeking personalized brewing options.

Maintenance and Cleaning

Regular cleaning and descaling are essential to maintain the Ninja CM401’s performance. Follow the manual’s instructions for removing mineral buildup and ensuring optimal functionality over time.

5.1 Cleaning the Machine

Regular cleaning of the Ninja CM401 is essential to maintain its performance and hygiene. Start by turning off and unplugging the machine to ensure safety. Clean the exterior with a damp cloth, avoiding abrasive cleaners that might damage the finish. For the water reservoir, filter holder, and carafe, wash them with warm soapy water after each use. Descaling is recommended every 1-3 months to remove mineral buildup, using a mixture of water and white vinegar. Run a cleaning cycle or manually flush the system to ensure all internal parts are clear. After cleaning, rinse thoroughly and dry all components to prevent water spots and bacterial growth. Proper maintenance ensures optimal flavor and extends the machine’s lifespan. Always refer to the manual for specific cleaning instructions tailored to the CM401 model. Regular cleaning prevents residue and maintains the machine’s efficiency and longevity.

5.2 Descaling and Maintenance Tips

Descaling the Ninja CM401 is crucial to remove mineral buildup and ensure optimal performance. Mix equal parts water and white vinegar, then run a cleaning cycle or manually flush the system. Repeat until the solution is fully drained. After descaling, rinse thoroughly by running fresh water through the machine to eliminate any vinegar taste. Regularly check and replace the water filter to maintain water quality and flavor. Lubricate moving parts if necessary to prevent wear and tear; Store the machine in a dry place when not in use to avoid moisture buildup. Follow these maintenance tips to keep your Ninja CM401 functioning efficiently and prolong its lifespan. Always refer to the manual for specific descaling instructions tailored to your model. Proper upkeep ensures consistent brewing results and prevents scaling issues. Regular maintenance is key to preserving the machine’s performance and durability.

Accessories and Additional Features

The Ninja CM401 includes a glass carafe, thermal flavor technology, and a built-in milk frother for creating café-style drinks. Additional accessories like a measuring spoon and detailed guides enhance usability.

6.1 Milk Frother Usage

To use the milk frother on the Ninja CM401, pour milk into a cup, submerge the whisk just below the surface, and froth until desired consistency is achieved. This creates creamy foam for lattes and cappuccinos. Ensure the whisk is fully submerged to incorporate air evenly. For best results, use cold milk and avoid over-filling the cup. Cleaning the frother after each use is essential to prevent milk residue buildup. Refer to the manual for specific guidelines on frother maintenance and troubleshooting. The frother is a key accessory, enabling users to craft professional-quality coffee drinks effortlessly at home. Regular cleaning ensures optimal performance and longevity of the frother. Always follow safety precautions when handling electrical components.

6.2 Glass Carafe and Thermal Flavor

The Ninja CM401 features a 10-cup glass carafe designed for durability and ease of use. Unlike thermal carafes, the glass carafe allows for clear visibility of the brewed coffee, making it easy to monitor the brewing process. The carafe is dishwasher-safe, simplifying cleanup, and its compact design fits neatly on most countertops. The glass material ensures no residual flavors are transferred between brews, maintaining the pure taste of your coffee.

The thermal flavor extraction technology in the CM401 ensures even heating and optimal extraction, preserving the coffee’s natural flavors. While the carafe itself is not thermal, it works in tandem with the machine’s heating element to deliver hot, flavorful coffee. Regular rinsing and cleaning of the carafe are recommended to prevent any buildup and maintain its clarity.

Quick Start Guide

The Quick Start Guide provides step-by-step instructions for unboxing, parts identification, and initial setup to ensure a smooth first-time brewing experience with your Ninja CM401.

7.1 Basic Brewing Instructions

Start by adding fresh, cold water to the reservoir, ensuring it doesn’t exceed the max level. Measure and grind your coffee beans to the recommended medium-coarse grind. Place a paper or metal filter in the filter basket and pour the grounds. Select your desired brew size and style using the control panel. Choose from options like Classic, Rich, or Over Ice. Press the Brew button to begin. The machine will heat the water and distribute it evenly over the grounds. Once complete, remove the carafe and pour your freshly brewed coffee. For optimal flavor, serve immediately and clean up any drips from the machine.

7.2 Advanced Brewing Methods

For advanced brewing, experiment with customizable settings like brew strength and cup size. Use the Over Ice feature for a refreshing cold brew or the Rich setting for a bolder flavor. To make specialty drinks, froth milk using the integrated frother and layer it over brewed coffee for lattes or cappuccinos. Adjust the thermal carafe to maintain optimal temperature. Preheat the carafe before brewing for best results. Explore the machine’s smart features, such as scheduling, to brew coffee exactly when you want it. These methods unlock the full potential of your Ninja CM401, allowing you to craft professional-quality beverages at home effortlessly.

Advanced Features

The Ninja CM401 offers customizable settings, a built-in timer, and smart features for tailored brewing experiences. These features enhance convenience and personalization for coffee enthusiasts.

8.1 Customizable Settings

The Ninja CM401 allows users to tailor their coffee experience with customizable settings. These include adjustable brew strength, cup size options, and temperature control, ensuring each cup meets personal preferences. The machine also features pre-programmed settings for classic, rich, and over-ice brews, making it versatile for various tastes. Additionally, the integrated milk frother can be adjusted to create different levels of foam, from silky to creamy, perfect for specialty drinks like lattes and cappuccinos. These customization options provide flexibility, enabling users to experiment with different flavors and brewing methods without compromising on quality. This feature-rich design makes the CM401 a standout choice for coffee enthusiasts seeking precision and variety in their daily brews.

8.2 Smart Features and Timer

The Ninja CM401 features a 24-hour programmable timer, allowing users to schedule their coffee brewing in advance for added convenience. This smart feature ensures your coffee is ready exactly when you need it. The machine also includes a delay brew option, enabling you to set brewing times up to 24 hours ahead. Additionally, the CM401 has a memory function that recalls your last settings, making repeated use seamless. The intuitive interface and LED display make it easy to navigate and set timers or adjust preferences. These smart features combine with the machine’s versatility to provide a hassle-free and personalized coffee-making experience, perfect for busy households or coffee lovers who value convenience and consistency.

Warranty Information

The Ninja CM401 comes with a limited one-year warranty covering defects in materials and workmanship. For details, visit the official Ninja website or contact customer support.

9.1 Warranty Coverage and Duration

The Ninja CM401 Specialty Coffee Maker is backed by a limited one-year warranty, effective from the purchase date. This warranty covers defects in materials and workmanship under normal household use. It does not apply to damage caused by misuse, neglect, or unauthorized modifications. During the warranty period, Ninja will repair or replace defective parts free of charge. For warranty claims, customers must provide proof of purchase and contact Ninja’s customer support team. Extended warranties may be available through third-party providers, though details vary and are not covered under the standard manufacturer’s warranty. Always refer to the official documentation for precise terms and conditions.

9.2 Customer Support and Service

Ninja offers comprehensive customer support for the CM401 Specialty Coffee Maker. Users can access assistance through multiple channels, including phone, email, and live chat on the official Ninja website. The support team is available to address inquiries, troubleshooting, and warranty-related issues. Additionally, the Ninja website provides a wealth of resources, such as FAQs, user manuals, and instructional videos, to help customers resolve common issues independently. For warranty claims, customers are advised to contact the support team directly, providing proof of purchase and a detailed description of the issue. Ninja’s commitment to customer satisfaction ensures that users receive timely and effective assistance, enhancing their overall ownership experience with the CM401 model.

Downloading the Manual

The Ninja CM401 manual is available for free download on the official Ninja website. It falls under the coffee makers category and has been rated by 10 people with an average of 8.9. To download, select the desired file, click the download button, and enter the verification code from the image. This ensures secure and quick access to the manual.

10.1 Sources for PDF Download

The Ninja CM401 manual is available for free download on the official Ninja website and other trusted sources; Visit the Ninja website and navigate to the support section. Select the CM401 model from the product list to access the download page. Additionally, the manual can be found on popular manual-sharing platforms like ManualsLib and ManualsOnline. Ensure you download from reputable sources to avoid unauthorized content. The manual is provided in PDF format, making it easy to read and print. It covers all essential information, including setup, usage, and troubleshooting. By downloading the manual, you can explore detailed guides for optimal use of your Ninja CM401 Specialty Coffee Maker.

10.2 Reading the Manual (Table of Contents)

The Ninja CM401 manual is structured with a detailed table of contents for easy navigation. It begins with an overview of the product, followed by safety precautions and initial setup instructions. The manual covers brewing options, customization settings, and maintenance tips; Accessories like the milk frother and glass carafe are also explained. A quick start guide is included for first-time users, while advanced features and troubleshooting sections provide in-depth assistance. The table of contents ensures users can quickly locate specific information, making the manual a comprehensive resource for optimal use of the Ninja CM401 Specialty Coffee Maker.

  • Product Overview
  • Safety Precautions
  • Initial Setup
  • Brewing Options
  • Maintenance
  • Accessories
  • Quick Start Guide
  • Advanced Features
  • Warranty Information
  • Troubleshooting

kenmore 665 dishwasher manual

Welcome to the Kenmore 665 Dishwasher Manual! This comprehensive guide provides essential information for safe and efficient operation, maintenance, and troubleshooting of your dishwasher.

Discover key features, installation steps, and best practices to maximize performance and longevity of your appliance.

Your go-to resource for optimal usage and care of the Kenmore 665 dishwasher, ensuring sparkling clean dishes every time!

Overview of the Kenmore 665 Dishwasher Models

The Kenmore 665 dishwasher series includes various models, such as the Ultra Wash and Elite, designed for efficient cleaning and durability. These models offer advanced features like multiple wash cycles, soil removal systems, and energy-efficient operation. The Ultra Wash Elite model 665.15659, for example, features upper and lower spray arms, a heating element, and detergent dispensers. Other models, such as the 665.13223 and 665.16632, provide similar functionality with slight variations in design and components. Each model is tailored to meet different household needs, ensuring reliable performance and clean results.

  • Models vary in features but share a focus on efficiency and effectiveness.
  • Specific models like 665.15659 and 665.16632 are known for their robust cleaning capabilities.

Refer to the manual for detailed specifications and model-specific instructions.

Importance of the Manual for Optimal Usage

The Kenmore 665 dishwasher manual is essential for understanding proper operation, maintenance, and troubleshooting. It provides detailed guidance on using advanced features, ensuring efficiency and longevity.

  • Explains optimal detergent and rinse aid usage for better cleaning results.
  • Outlines safety precautions to prevent accidents and appliance damage.
  • Includes troubleshooting tips for common issues, reducing repair needs.

Referencing the manual ensures you maximize your dishwasher’s performance and maintain its durability over time.

Key Features of the Kenmore 665 Dishwasher

The Kenmore 665 dishwasher boasts advanced features like the Ultra Wash system, multiple cycles for varying soil levels, and an efficient soil removal mechanism.

  • Energy-saving design with quiet operation for minimal noise.
  • Durable construction and modern design to fit seamlessly into any kitchen.
  • Advanced rinse aid and detergent dispensers for optimal cleaning.

These features ensure superior cleaning performance while maintaining energy efficiency and user convenience.

Ultra Wash and Elite Models

The Kenmore 665 Ultra Wash and Elite models are designed for superior cleaning performance, offering advanced features like multiple wash cycles and a robust soil removal system.

  • The Ultra Wash system ensures thorough cleaning with powerful water jets and precise temperature control.
  • Elite models feature energy-efficient operation, quiet performance, and a durable design for long-lasting reliability.
  • These models also include components like upper and lower spray arms, a heating element, and a rinse aid dispenser for optimal results.

Together, these features provide a combination of efficiency, power, and convenience, making the Ultra Wash and Elite models top choices for modern kitchens.

Soil Removal System and Multiple Wash Cycles

The Kenmore 665 dishwasher features an advanced soil removal system, designed to tackle tough food residue efficiently; This system works in tandem with multiple wash cycles.

  • The heavy-duty cycle is ideal for heavily soiled dishes, while the normal and light cycles handle everyday messes.
  • A quick wash option saves time for lighter loads, ensuring optimal cleaning without extended cycles.
  • Customizable settings allow users to tailor wash intensity and water temperature for specific needs.

These features ensure thorough cleaning, energy efficiency, and adaptability to various dishwashing requirements.

Energy Efficiency and Design Components

The Kenmore 665 dishwasher is engineered for energy efficiency, featuring components like upper and lower spray arms, a heating element, and dispensers for detergent and rinse aid.

These design elements ensure thorough cleaning while minimizing water and energy consumption, making it an eco-friendly choice.

The dishwasher’s construction and advanced sensors optimize performance, providing a balance between powerful cleaning and energy savings.

Installation Guide for Kenmore 665 Dishwasher

Install your Kenmore 665 dishwasher with ease by following the manual’s detailed instructions, ensuring proper water, drain, and electrical connections for safe and efficient operation.

Tools and Parts Required for Installation

To install your Kenmore 665 dishwasher, gather the necessary tools and parts. Essential tools include an adjustable wrench, screwdrivers, pliers, and Teflon tape for secure connections.

Required parts comprise water supply lines, drain hoses, power cords, mounting brackets, and gaskets to ensure leak-proof and stable installation.

Refer to the manual for a detailed list to avoid missing any components, ensuring a smooth and proper setup of your dishwasher.

Preparation and Safety Precautions

Before installing your Kenmore 665 dishwasher, ensure the installation area is clear and has adequate space. Turn off the water supply and electricity to prevent accidents. Check if your model is part of any safety recalls. Ensure the floor is level to avoid tipping hazards. Always follow safety guidelines to prevent injury or damage. Proper preparation ensures a safe and successful installation process.

Connecting Water and Drain Lines

Connect the water supply line to the dishwasher’s inlet valve, ensuring a secure fit to prevent leaks. Use Teflon tape on threaded connections for a watertight seal. Attach the drain line to the dishwasher’s drain port and secure it to the garbage disposal or drain line under the sink. Ensure all connections are tight and properly aligned to avoid water damage or drainage issues. Double-check for leaks before finalizing the setup. Properly connected water and drain lines are essential for efficient and leak-free operation of your Kenmore 665 dishwasher.

Electrical Connections and Final Setup

Connect the dishwasher to a grounded electrical outlet rated for 120V, 60Hz. Ensure the circuit can handle the appliance’s power requirements. Follow the manual’s wiring diagram for proper connections. Once all lines are secured, level the dishwasher to prevent vibration and noise. Tighten the mounting brackets to the surrounding counters for stability. Double-check all connections for tightness and test the dishwasher to ensure smooth operation. Proper electrical setup ensures safety and efficiency, completing the installation process effectively.

Operating the Kenmore 665 Dishwasher

Operating the Kenmore 665 Dishwasher involves understanding the control panel, selecting appropriate wash cycles, using the right detergent, and monitoring the cycle progress for optimal results.

Understanding the Control Panel

The control panel is the command center of your Kenmore 665 dishwasher, featuring a display and buttons for selecting cycles and options. It includes a cycle selector, option buttons, and indicators for status updates. The panel is designed to be user-friendly, allowing easy navigation through settings; Familiarize yourself with the layout to customize wash cycles, monitor progress, and access diagnostic features. Refer to the manual for detailed explanations of each button and function. Proper use of the control panel ensures efficient operation and optimal cleaning performance for your dishes.

Wash Cycles and Options

Your Kenmore 665 dishwasher offers a variety of wash cycles tailored to different cleaning needs. Choose from options like Heavy Duty for tough messes, Normal for everyday use, and Light/China for delicate items. Additional features include delayed start, sanitize, and steam cleaning. These options ensure your dishes receive the right treatment. Customize each cycle with specific settings to tackle grease, food residue, or fragile glassware. The manual details each cycle and option, helping you select the perfect setting for every load.

Detergent and Rinse Aid Usage

For optimal cleaning, use the recommended amount of dishwasher detergent in the dispenser. The Kenmore 665 dishwasher is designed to work with standard dishwasher detergents. Fill the detergent dispenser according to the manual’s guidelines, typically 1-2 tablespoons per cycle. For tough grease, pre-treating large food particles is advised. Rinse aid enhances drying performance by reducing water spots. Ensure the rinse aid dispenser is filled and adjust the setting if necessary. Proper detergent and rinse aid usage ensures sparkling dishes and prevents residue buildup, optimizing your dishwasher’s performance.

Starting and Monitoring the Dishwasher

To start the dishwasher, close the door securely and press the Start/Resume button. Ensure the cycle selector is set to the desired option. The control panel lights will indicate the selected cycle and status. Monitor the dishwasher during operation to ensure it runs smoothly. Check the detergent dispenser and rinse aid levels before starting a cycle. If issues arise, refer to the troubleshooting section. Regular monitoring helps maintain performance and prevents interruptions. Always follow the manual’s guidance for optimal results and safety.

Maintenance and Care

Regular maintenance ensures optimal performance and longevity of your Kenmore 665 dishwasher. Clean the filter, inspect spray arms, and check detergent dispensers. Adhere to manual recommendations for routine upkeep and efficiency.

Cleaning the Filter and Spray Arms

Cleaning the filter and spray arms is essential for maintaining your Kenmore 665 dishwasher’s performance. The filter, located at the bottom, should be removed and rinsed monthly to prevent food debris buildup. Soak it in warm soapy water if heavily clogged. For spray arms, check for blockages and remove any food particles; Regular cleaning ensures proper water flow and optimal cleaning results. Refer to your manual for specific guidance on disassembling and reassembling these components. A clean filter and spray arms guarantee better dishwashing efficiency and hygiene.

Checking and Replacing Parts

Regularly inspect and replace worn or damaged parts to ensure optimal performance of your Kenmore 665 dishwasher. Check the door seals for cracks, the spray arms for blockages, and the detergent dispenser for proper function. If damaged, replace these parts promptly to avoid leaks or poor cleaning results. Refer to your manual for guidance on identifying and replacing components. Genuine replacement parts are available through Sears Parts Direct or authorized dealers. Routine inspections and timely replacements will extend the lifespan of your dishwasher and maintain its efficiency.

Regular Maintenance Tips

Perform regular maintenance to keep your Kenmore 665 dishwasher running efficiently. Clean the filter and spray arms periodically to ensure proper water flow and soil removal. Check door seals for wear and tear to prevent leaks. Run a cleaning cycle with dishwasher cleaner every 1-2 months to remove grease and odors. Leave the door slightly open after cycles to dry the interior and prevent mold. Regularly inspect and clean the detergent dispenser to ensure proper dosage. These simple steps will help maintain your dishwasher’s performance and extend its lifespan.

Troubleshooting Common Issues

Identify error codes and resolve common problems like poor cleaning, no start, or draining issues. Check door alignment, water supply, and filter cleanliness. Consult the manual for solutions or contact support if issues persist.

Identifying Error Codes

Kenmore 665 dishwashers display error codes like E1, E2, or C0 to indicate specific issues. These codes help diagnose problems such as faulty sensors, heating element failures, or drainage issues. Refer to the manual to interpret the meaning of each code. Blinking lights on the control panel may also signal errors. Common codes include issues with water temperature, door alignment, or blocked filters. Addressing these codes promptly ensures optimal performance and prevents further damage. Always consult the troubleshooting section of the manual for detailed solutions and repair guidance.

Resolving Common Problems

Common issues with the Kenmore 665 dishwasher include error codes, poor cleaning performance, and noisy operation. For error codes like E1 or C0, refer to the manual for specific solutions. Poor cleaning may result from clogged filters or incorrect detergent use. Check and clean the filter regularly. Noise issues could indicate blocked spray arms or a faulty pump. Inspect and clear obstructions. For leakage, ensure all connections are secure. If problems persist, consult the troubleshooting section or contact customer support for professional assistance. Regular maintenance can prevent many of these issues.

Diagnosing and Repairing Faults

Diagnosing faults in the Kenmore 665 dishwasher involves checking error codes and identifying issues like clogged filters or faulty sensors. Refer to the manual for code meanings. Common faults include blocked spray arms, worn-out seals, or malfunctioning heating elements. Regularly inspect and clean filters, and replace worn parts. For complex issues, consult the troubleshooting guide or contact authorized service centers. Ensure all repairs are done by qualified technicians to avoid further damage. Proper diagnosis and timely repairs ensure optimal performance and extend the dishwasher’s lifespan. Always follow safety precautions when attempting repairs.

Safety Information

Adhere to safety guidelines to prevent accidents and ensure safe operation. Follow precautions like avoiding hot surfaces and keeping children away. Refer to the manual for detailed emergency procedures and child safety features.

General Safety Precautions

Always follow safety guidelines to ensure safe operation of your Kenmore 665 dishwasher. Avoid hot surfaces and keep children away from moving parts. Ensure the door is closed properly before starting a cycle. Never insert hands or utensils during operation. Keep detergent and rinse aid out of reach of children. Avoid overloading the dishwasher to prevent spills. Regularly inspect and maintain the appliance to prevent malfunctions. Disconnect power before servicing. Follow installation and usage instructions carefully to avoid accidents and ensure optimal performance. Refer to the manual for detailed safety measures and emergency procedures.

Child Safety Features

The Kenmore 665 dishwasher includes child safety features to prevent accidental operation. Use the child lock to secure the controls, ensuring children cannot start the cycle. Store detergent and rinse aid in a safe location to avoid ingestion. Keep children away from hot surfaces and moving parts. Regularly inspect the dishwasher for any wear or damage. Always supervise children near the appliance to prevent accidents. These features help create a safer environment while maintaining efficient dishwasher performance.

Emergency Procedures

In case of an emergency, such as a water leak or electrical issue, immediately turn off the power and water supply to the dishwasher. Open the door carefully to avoid hot steam. If the dishwasher won’t stop running, press and hold the Start/Resume button to cancel the cycle. For severe malfunctions, unplug the appliance or switch off the circuit breaker. Ensure the area is well-ventilated and avoid hazards like slipping on water. Refer to the manual for specific guidance or contact customer support for professional assistance. Always prioritize safety to prevent further issues or injuries.

Warranty and Support

Your Kenmore 665 dishwasher is backed by a comprehensive warranty, offering coverage for parts and labor. Sears Parts Direct provides genuine replacement parts, diagrams, and repair guides. For assistance, contact Kenmore’s customer support or visit authorized service centers for professional help. Download the manual for detailed warranty terms and support options to ensure your appliance runs smoothly for years to come.

Understanding the Warranty

The Kenmore 665 dishwasher is covered by a comprehensive warranty that protects your investment. This warranty typically includes coverage for parts and labor, with specific durations depending on the model and components. For example, key components like the tub and motor may have extended coverage, while other parts may be covered for one year. Sears Parts Direct offers genuine replacement parts and repair guides to help maintain your appliance. Always refer to your specific model’s warranty document, available in the manual, for precise terms and conditions. This ensures you understand what is covered and for how long, providing peace of mind for years of reliable service.

Contacting Customer Support

For assistance with your Kenmore 665 dishwasher, contacting customer support is straightforward. Visit the official Sears Parts Direct website or call their customer service hotline for expert guidance. Ensure you have your model number ready for quick resolution. Additionally, online forums and communities provide valuable resources and troubleshooting tips from experienced users. Sears also offers live chat support for immediate inquiries. Remember to reference your manual or warranty document for specific information to help representatives assist you effectively. Reaching out for support ensures your appliance performs optimally and addresses any concerns promptly.

Service Centers and Repair Options

For professional assistance, visit Sears Parts Direct or authorized Kenmore service centers. These centers offer certified technicians and genuine parts for reliable repairs. Ensure to use only approved parts to maintain warranty coverage. Online resources provide part diagrams and repair guides for DIY solutions. Sears also offers comprehensive repair services, covering common issues like faulty sensors or worn-out seals. Contact customer support to locate the nearest service center or schedule a home visit. Regular maintenance and timely repairs ensure optimal performance and extend the lifespan of your Kenmore 665 dishwasher.

Additional Resources

Access online forums, authorized dealers, and downloadable manuals for further assistance. Sears Parts Direct offers parts and guides, while Kenmore’s official website provides warranty details and support.

Downloading the Manual

The Kenmore 665 dishwasher manual is readily available for download in PDF format from various online sources, including Sears Parts Direct and Kenmore’s official website. Simply search for your specific model number, such as 665.13223 or 665.16632, to access the manual. This document provides detailed instructions for installation, operation, and troubleshooting. Users can also find guides for maintenance, error codes, and warranty information. Downloading the manual ensures you have all the necessary information to optimize your dishwasher’s performance and address any issues promptly. Links to download the manual are available on trusted appliance websites.

Online Forums and Communities

Online forums and communities are invaluable resources for Kenmore 665 dishwasher owners. Websites like Sears Parts Direct, Appliance Factory Parts, and specialized appliance forums offer extensive discussions, troubleshooting tips, and user experiences. These platforms allow you to connect with experts and other users, addressing specific issues or questions about your dishwasher. Many forums provide links to manuals, repair guides, and parts suppliers, making them a one-stop solution for maintenance and repair needs. Engaging with these communities can help you resolve problems quickly and gain insights from real users.

Authorized Dealers and Parts Suppliers

Authorized dealers and parts suppliers are your go-to sources for genuine Kenmore 665 dishwasher components and accessories. Sears Parts Direct and Appliance Factory Parts are trusted platforms offering a wide range of parts, from spray arms to detergent dispensers. These suppliers ensure compatibility and quality, guaranteeing your dishwasher performs optimally. Use the model number to find specific parts, and follow the manual’s guidelines for installation. Many suppliers also provide detailed diagrams and repair tips, making maintenance easier. For reliable service, always choose authorized dealers to ensure authenticity and warranty compliance, keeping your dishwasher in top condition for years.

panasonic kx dt543 operating manual

Welcome to the Panasonic KX-DT543 operating manual, your comprehensive guide to understanding and utilizing the advanced features of this digital proprietary telephone system effectively.

1.1 Overview of the Panasonic KX-DT543 Phone

The Panasonic KX-DT543 is a sophisticated digital proprietary telephone designed to integrate seamlessly with Panasonic phone systems, offering enhanced communication capabilities for businesses. This phone features a user-friendly interface, including a high-resolution 3-line display and 24 programmable keys, allowing for customization to meet specific workplace needs. It supports hands-free functionality via its built-in speakerphone, ensuring efficient call management; The KX-DT543 is compatible with Panasonic’s advanced systems, such as KX-TDA, KX-TDE, and KX-NCP series, making it a versatile solution for modern office environments. This section provides a foundational understanding of the phone’s design, functionality, and integration capabilities, preparing users for detailed exploration in subsequent sections.

1.2 Compatibility with Panasonic Phone Systems

The Panasonic KX-DT543 is specifically designed to operate seamlessly with Panasonic’s digital phone systems, including the KX-TDA, KX-TDE, KX-NCP, and KX-NS series. This compatibility ensures that the phone can leverage advanced features such as call conferencing, voicemail integration, and programmable keys. The KX-DT543 also supports SIP functionality, allowing it to work with Panasonic’s SIP-based telephones like the KX-HDV230, KX-HDV330, and KX-HDV430. Its flexibility makes it suitable for both small and large office environments, providing a reliable communication solution; This section highlights the phone’s seamless integration with Panasonic systems, enabling users to fully utilize its capabilities within their existing infrastructure.

1.3 Importance of Reading the Manual

Reading the Panasonic KX-DT543 operating manual is essential for understanding its features, troubleshooting common issues, and optimizing its performance. The manual provides detailed instructions for setup, customization, and advanced functionalities, ensuring users can fully utilize the phone’s capabilities. By following the guidelines, users can avoid potential errors and ensure compatibility with Panasonic systems. The manual also serves as a reference for maintenance and updating firmware, helping to extend the device’s lifespan. Whether you’re a new or experienced user, the manual offers clear, step-by-step guidance to enhance your communication experience and make the most of the KX-DT543’s advanced features.

Key Features of the Panasonic KX-DT543

The Panasonic KX-DT543 features a 3-line LCD display, 24 programmable keys, and hands-free functionality. It offers customizable settings and intuitive navigation via the jog dial, enhancing office communication efficiency.

2.1 Display and Navigation

The Panasonic KX-DT543 boasts a 3-line LCD display, providing clear visibility of call information, phonebook entries, and system messages. The intuitive jog dial allows seamless navigation through menus and settings, enabling quick access to desired features. This user-friendly interface ensures efficient operation, making it easy to manage calls and customize preferences. The display’s clarity and the dial’s responsiveness contribute to a smooth user experience, enhancing productivity in office environments.

2.2 Programmable Keys and Customization

The Panasonic KX-DT543 features 24 programmable keys, allowing users to tailor the phone to their specific needs. These keys can be configured for speed dialing, call forwarding, or accessing advanced features like voicemail and call conferencing. The phone supports customizable labels for each key, displayed on the LCD screen, ensuring easy identification of assigned functions. Users can also personalize settings such as ring tones, display contrast, and language preferences. This high level of customization enhances efficiency and streamlines workflows, making the KX-DT543 adaptable to diverse office environments and user preferences. The intuitive interface ensures that configuring these features is both straightforward and efficient.

2.3 Hands-Free (Speakerphone) Functionality

The Panasonic KX-DT543 includes a high-quality speakerphone, enabling hands-free communication for enhanced productivity. The speakerphone is activated with a single button, allowing users to manage calls without lifting the handset. This feature is ideal for meetings, multitasking, or situations where hands-free operation is preferred. The phone also supports noise reduction and echo cancellation, ensuring clear audio quality during speakerphone use. Additionally, the volume can be adjusted to accommodate different environments, making it suitable for both quiet offices and bustling workspaces. This functionality streamlines communication, allowing users to focus on other tasks while maintaining clear and professional call interactions. The speakerphone enhances the overall versatility of the KX-DT543, catering to diverse workplace needs.

Installation and Setup

This section guides you through the process of unboxing, physically setting up, and connecting your Panasonic KX-DT543 phone to a Panasonic PBX system, ensuring proper power setup and safety precautions are followed for optimal functionality.

3.1 Unboxing and Physical Setup

Begin by carefully unpacking the Panasonic KX-DT543 phone, ensuring all components, including the handset, base unit, and power cord, are included. Place the phone on a flat, stable surface. Connect the handset to the base unit, ensuring it clicks securely into place. Next, plug in the power cord, making sure it is securely connected to both the phone and the power source. Avoid exposing the device to moisture or extreme temperatures. Follow the provided safety guidelines to prevent damage. Once physically set up, proceed to connect the phone to your Panasonic PBX system for network integration. Proper installation ensures optimal performance and functionality. Always refer to the manual for specific instructions tailored to your setup.

3.2 Connecting to Panasonic PBX Systems

To connect your Panasonic KX-DT543 phone to a Panasonic PBX system, start by identifying the appropriate ports on both the phone and the PBX. Locate the Ethernet port on the KX-DT543 and use an Ethernet cable to connect it to the corresponding port on the PBX. Ensure the other end of the Ethernet cable is securely plugged into the PBX system, typically into a designated switch or slot for phone connections. If your PBX requires specific settings, such as an IP address or VLAN configuration, refer to the PBX manual for guidance. Next, check if the phone requires power over Ethernet (PoE) or a separate power adapter. If using PoE, connecting the Ethernet cable should suffice. Otherwise, plug in the power cord, ensuring all connections are secure and properly grounded. For network settings, access the phone’s menu or web interface to configure IP addresses, subnet masks, gateways, and DNS settings as needed. If the phone doesn’t connect automatically, consult the PBX manual for any registration or authentication processes. Additionally, verify if firmware updates are necessary for compatibility. After setting up, test the connection by making a call to another extension or external number. If issues arise, review the connections, settings, or consult the manual for troubleshooting common problems. By following these steps carefully, you can successfully integrate the KX-DT543 into your Panasonic PBX system.

3.3 Power Requirements and Safety Precautions

The Panasonic KX-DT543 requires a stable power supply to function properly. Use only the approved power adapter provided by Panasonic or a certified third-party supplier to avoid damage. Ensure the device is placed in a well-ventilated area to prevent overheating. Avoid exposing the phone to liquids or extreme temperatures, as this may cause permanent damage. Do not disassemble the device, as this could lead to electrical shock or malfunction. Always unplug the power cord before performing any maintenance or cleaning. To prevent power surges, use a surge protector if necessary. Follow all safety guidelines outlined in the manual to ensure optimal performance and longevity of the device. Regularly inspect the power cord for signs of wear and replace it if damaged. For additional safety, keep the phone out of reach of children and pets. If unsure about any aspect of power usage, consult the official Panasonic documentation or contact a certified technician. Proper power management and safety precautions are essential for maintaining the reliability and functionality of your Panasonic KX-DT543 phone.

Basic Operations

This section covers essential functions for daily use, including making and receiving calls, using the speakerphone, and managing basic call features like transfer and parking.

4.1 Making and Receiving Calls

Making and receiving calls on the Panasonic KX-DT543 is straightforward. To place a call, press the intercom key, lift the handset, and dial the extension or external number. For internal calls, simply press the desired key or dial the extension directly. When receiving a call, the phone will ring, and you can answer by lifting the handset or using the speakerphone. The LCD screen displays caller information, allowing you to identify incoming calls. If programmed, you can also use programmable keys for quick access to frequently dialed numbers. Ensure the phone is properly connected and configured to your PBX system for seamless communication. This section provides clear instructions for efficient call management.

4.2 Using the Speakerphone

The Panasonic KX-DT543 features a built-in speakerphone, enabling hands-free communication. To activate the speakerphone, press the SP-PHONE key or the speakerphone button during an active call. Ensure the surrounding environment is quiet for optimal audio quality. Adjust the volume using the volume controls to achieve the desired sound level. The speakerphone function allows you to manage calls without using the handset, providing convenience during meetings or multitasking. You can switch between the speakerphone and handset during a call by pressing the SP-PHONE key again. This feature enhances productivity and comfort, making it ideal for office settings. Always ensure proper configuration and volume settings for clear communication.

4.3 Call Transfer and Call Parking

The Panasonic KX-DT543 allows seamless call transfer and parking, enhancing call management efficiency. To transfer a call, press the Transfer key, dial the target extension, and press Transfer again. For call parking, press Park, choose a parking orbit, and announce the call. Retrieve parked calls by dialing the parking orbit number. These features streamline call handling, enabling effective communication and reducing wait times. Regular updates ensure optimal performance. Explore these functions to maximize your phone’s potential. Refer to the manual for detailed instructions. Panasonic’s support resources are available for further assistance. Mastering these features enhances your communication experience. Happy exploring!

Advanced Features

Explore advanced functionalities like call conferencing, voicemail setup, and custom ring tones. These features enhance communication efficiency and personalization, tailored for professional environments. Discover more in the following sections.

5.1 Call Conferencing

The Panasonic KX-DT543 supports call conferencing, enabling seamless communication with multiple parties. To initiate a conference, press the intercom key, dial the first extension, then add additional participants using the CONF key. This feature streamlines collaboration, making it ideal for team discussions or client meetings. The system ensures clear audio quality, even with several participants. For detailed steps, refer to the manual, which provides instructions on setting up and managing conferences effectively. This advanced capability enhances productivity, making the KX-DT543 a versatile tool for professional environments.

5.2 Voicemail Setup and Access

The Panasonic KX-DT543 allows users to set up and access voicemail seamlessly. To initialize your mailbox, press the voicemail key or dial the designated code, then follow the prompts to create a PIN and record your greeting. Once set up, you can access messages by pressing the voicemail key or dialing the voicemail extension. The system supports multiple mailboxes, allowing personalized message management. For detailed instructions, refer to the manual, which provides step-by-step guidance on voicemail configuration and advanced features like message retrieval and notification settings. This feature enhances communication efficiency, ensuring you never miss important messages.

5.3 Customizing Ring Tones and Alerts

The Panasonic KX-DT543 allows users to customize ring tones and alerts to personalize their communication experience. You can choose from a variety of built-in ring tones or upload custom melodies to suit your preferences. To customize, access the phone’s menu, navigate to the Settings section, and select Ring Tones. From there, you can assign specific tones to different callers or set a default tone for all incoming calls. Additionally, you can enable visual alerts, such as flashing lights, to notify you of incoming calls or messages. This feature ensures you can tailor notifications to your needs, enhancing productivity and convenience. Refer to the manual for detailed steps on uploading custom tones and managing alert settings.

Programming and Customization

Program and customize your Panasonic KX-DT543 to meet your specific needs. Tailor settings, program function keys, and customize preferences for enhanced functionality and personalization.

6.1 Programming Function Keys

The Panasonic KX-DT543 allows you to program function keys to streamline your workflow. These keys can be customized for line access, feature activation, or custom settings. By programming these keys, you can easily access frequently used functions, improving efficiency. To program a function key, press the “Program” button, select the desired key, and choose the function from the menu. Options include call forwarding, do-not-disturb, and speed dial. You can also assign labels to keys for clarity. This feature ensures personalized convenience, enabling you to tailor your phone to your specific needs. Refer to the manual for detailed instructions and explore the full range of programmable options available.

6.2 Setting Up Speed Dials

Setting up speed dials on the Panasonic KX-DT543 simplifies communication by allowing quick access to frequently called numbers. To configure speed dials, access the programming mode by pressing the “Program” button. Use the navigation keys to select the desired key or directory entry. Enter the phone number and assign a label if needed. Save the settings to complete the process. You can store multiple contacts for easy dialing. This feature enhances productivity by reducing time spent on manual dialing. Refer to the manual for additional details on managing and editing speed dial settings to suit your preferences and streamline your workflow effectively.

6.3 Configuring User Preferences

Configuring user preferences on the Panasonic KX-DT543 allows you to personalize your phone settings for enhanced usability. Navigate to the user preferences menu to adjust options such as display contrast, ring tone selection, and volume levels for the handset and speakerphone. You can also customize language settings and other personalization features to suit your needs. These settings can be accessed through the phone’s menu system, ensuring a tailored experience for each user. Refer to the manual for detailed instructions on configuring these preferences to optimize your communication experience and improve productivity. Properly setting up user preferences ensures a seamless and efficient interaction with the phone’s features.

Maintenance and Troubleshooting

Regularly clean the phone to prevent dust buildup and ensure optimal performance. Check for firmware updates and proper network connections. Refer to the manual for troubleshooting common issues like call quality problems or system errors. Follow Panasonic’s guidelines for maintenance to extend the phone’s lifespan and maintain reliability. Addressing issues promptly ensures uninterrupted communication and smooth operation of the KX-DT543 system. Always adhere to safety precautions when performing any maintenance or repairs. Proper care and timely troubleshooting are essential for maximizing the phone’s functionality and user satisfaction. Use genuine Panasonic parts and follow authorized service procedures to avoid voiding the warranty. Keep the manual handy for quick reference and guidance on resolving technical difficulties efficiently. Regular system checks and updates are crucial for maintaining peak performance and compatibility with your Panasonic phone system. If issues persist, contact Panasonic support for professional assistance and ensure your phone remains in optimal condition. By following these steps, you can ensure your Panasonic KX-DT543 operates smoothly and efficiently, providing reliable communication for years to come.

7.1 Routine Maintenance Tips

Regular maintenance ensures optimal performance of your Panasonic KX-DT543 phone. Clean the handset and display with a soft, dry cloth to prevent dust buildup. Check and update the firmware periodically to access the latest features and improvements. Inspect the cables and connections for damage or loose links, ensuring they are securely plugged in. Avoid exposing the phone to extreme temperatures or moisture, as this can damage internal components. Use only approved Panasonic accessories to maintain compatibility and functionality. Refer to the manual for detailed cleaning instructions and maintenance schedules. Routine checks help prevent issues and ensure your phone operates efficiently. By following these tips, you can extend the lifespan of your Panasonic KX-DT543 and maintain its reliability for consistent communication.

7.2 Common Issues and Solutions

Familiarize yourself with common issues and their solutions to troubleshoot the Panasonic KX-DT543 effectively. If the phone has no dial tone, check the connection to the PBX system and ensure proper registration. For poor sound quality, clean the handset or speakerphone and verify that the volume is adjusted correctly. If calls are not connecting, ensure the extension number is dialed correctly and check for any network issues. Restart the phone or consult the PBX administrator for system-wide problems. For display issues, ensure brightness settings are adjusted and no obstructions block the screen. Refer to the manual for detailed troubleshooting steps or contact Panasonic support for persistent issues. Regular maintenance can help prevent many common problems and ensure smooth operation.

7.3 Updating Firmware

Regularly updating the firmware of your Panasonic KX-DT543 ensures optimal performance, security, and access to the latest features. To check for updates, access the phone’s system menu and navigate to the firmware version section. If an update is available, download the latest version from Panasonic’s official website. Use a compatible PC and follow the on-screen instructions to complete the update process. Ensure the phone is connected to the PBX system and has administrator rights before proceeding. After updating, restart the phone to apply changes. If issues arise during the update, refer to the troubleshooting guide or contact Panasonic support for assistance. Keeping the firmware up to date is essential for maintaining functionality and resolving potential bugs.

Reference Guides and Additional Resources

This section provides access to the Service Manual, Quick Reference Guide, and Training Manual for the Panasonic KX-DT543. Visit the official Panasonic website for downloads and support resources.

8.1 Quick Reference Manual

The Quick Reference Manual for the Panasonic KX-DT543 is designed to provide users with a concise guide to the phone’s essential features and operations. It covers basic functions such as making and receiving calls, using the speakerphone, and navigating the menu system; The manual also includes instructions for call transfer, parking, and conferencing, as well as tips for customizing settings like ring tones and programmable keys. Additionally, it offers troubleshooting advice for common issues and highlights key shortcuts for efficient use. This manual is ideal for users who want to quickly familiarize themselves with the phone’s core capabilities without diving into advanced configurations. It is available for download on the official Panasonic website, ensuring easy access to the information you need to maximize your phone’s performance.

8.2 Training Manual and User Guides

The Training Manual and User Guides for the Panasonic KX-DT543 are essential resources for mastering the phone’s advanced features and ensuring optimal performance. These documents provide detailed step-by-step instructions for configuring settings, utilizing programmable keys, and leveraging features like call conferencing and voicemail. The training manual is particularly useful for new users, offering practical exercises and real-world scenarios to enhance learning. User guides complement the manual by focusing on specific tasks, such as customizing ring tones or setting up speed dials. Both resources are designed to empower users with the knowledge needed to fully exploit the phone’s capabilities. They are available for download on Panasonic’s official website, ensuring easy access to comprehensive support materials.

8.3 Official Panasonic Support and Documentation

For comprehensive assistance, Panasonic provides official support and extensive documentation for the KX-DT543. The Service Manual, Quick Reference Manual, and Training Manual are available for free download on Panasonic’s website. These resources cover installation, operation, and troubleshooting, ensuring users can resolve issues and maximize the phone’s potential. The Reference Manual offers in-depth technical details, while the Quick Reference Guide provides quick access to essential features. Panasonic’s official support ensures users have access to reliable and up-to-date information, making it easier to customize and maintain their KX-DT543 phone effectively. These materials are designed to support both beginners and advanced users, ensuring a seamless experience with the Panasonic KX-DT543 system.

The Panasonic KX-DT543 offers advanced features, ease of use, and customization options, making it a powerful communication tool. Explore its potential to enhance your productivity.

9.1 Summary of Key Features and Benefits

The Panasonic KX-DT543 phone is a versatile communication device designed for seamless integration with Panasonic PBX systems. It features a 3-line display, 24 programmable keys, and hands-free functionality, ensuring efficient call management. The phone supports advanced features like call conferencing, voicemail, and customizable ring tones, enhancing user productivity. Its compatibility with SIP technology and hybrid systems makes it adaptable to modern office environments. With a user-friendly interface and robust customization options, the KX-DT543 is ideal for businesses seeking reliable and flexible telephony solutions. This manual has guided you through its setup, operations, and troubleshooting, ensuring optimal performance.

9.2 Encouragement to Explore Advanced Features

Take the time to explore the advanced features of your Panasonic KX-DT543 phone to unlock its full potential and enhance your communication experience. Discover how programmable keys, customizable ring tones, and call conferencing can streamline your workflow. Experiment with voicemail setup and hands-free functionality to maximize productivity. By familiarizing yourself with these features, you can optimize your phone’s performance and enjoy a more efficient, personalized experience. Embrace the flexibility and innovation of the KX-DT543, and take your telephony to the next level with Panasonic’s cutting-edge technology.

3rd grade fluency passages pdf

Third-grade fluency passages are essential tools designed to enhance reading skills, focusing on accuracy, speed, and expression. They support students in developing smooth, natural reading abilities.

1.1. What Are Fluency Passages?

Fluency passages are short, grade-level texts designed to help students practice reading with accuracy, speed, and expression. They are often used in schools to build reading fluency through systematic practice. These passages are typically part of fluency folders or activity packets, providing structured material for oral reading exercises. They support students in developing smooth, natural reading abilities essential for comprehension.

1.2. Importance of Fluency in Reading Development

Fluency is a critical milestone in reading development, enabling students to read with accuracy, speed, and expression. It allows readers to focus on comprehension rather than decoding, fostering a deeper understanding of texts. Fluent readers build confidence and enjoy reading more, which is vital for transitioning from “learning to read” to “reading to learn.” Regular practice with passages helps achieve this key skill.

Key Features of 3rd Grade Fluency Passages

Third-grade fluency passages are designed to align with curriculum standards, offering grade-level appropriate content. They provide systematic practice to improve reading accuracy, speed, and expression.

2.1. Grade-Level Appropriateness

Third-grade fluency passages are crafted to suit the reading levels of 9-year-olds, ensuring content is engaging and challenging yet attainable. They incorporate vocabulary and sentence structures appropriate for this age group, making them ideal for building confidence and skill. The passages are designed to align with what students are learning in class, reinforcing curriculum objectives effectively. This ensures that each student can progress at their own pace.

2.2. Alignment with Curriculum Standards

Third-grade fluency passages are carefully aligned with national and state reading standards, ensuring they address key skills like comprehension and vocabulary. These passages support systematic practice of oral reading, helping students meet educational benchmarks. They integrate seamlessly with classroom instruction, reinforcing what is taught and making learning cohesive. This alignment ensures that fluency practice is both effective and relevant to students’ overall academic goals.

How to Use Fluency Passages Effectively

Fluency passages are most effective when used consistently, with opportunities for modeling, guided practice, and independent reading. This structured approach helps build confidence and skill.

3.1. Modeling Fluent Reading

Modeling fluent reading involves teachers or parents reading passages aloud with proper pacing, intonation, and expression. This demonstrates how texts should sound, helping students develop their own reading skills. By hearing fluent reading, students gain a clear understanding of rhythm and phrasing, which they can then mimic during practice. This method builds their confidence and enhances overall reading abilities effectively.

3.2. Guided and Independent Practice

Guided practice involves teachers leading students through fluency passages, offering feedback and support. Independent practice allows students to apply skills on their own, reinforcing learning. Both methods ensure consistent progress, with guided practice building confidence and independent practice promoting self-reliance. Regular use of these strategies helps students master reading fluency effectively.

Assessing Reading Fluency

Assessment involves timing readings, checking accuracy, and using passage-specific questions. These methods help gauge progress and identify areas for improvement in reading fluency.

4.1. Timing and Accuracy Checks

Timing and accuracy checks are crucial for assessing fluency. Students read passages aloud for 60 seconds, with teachers marking errors. This method tracks progress in reading speed and accuracy, helping identify areas needing improvement. Regular checks ensure consistent evaluation and provide clear benchmarks for measuring growth over time. These assessments guide targeted support for developing reading fluency effectively.

4.2. Using Passage-Specific Questions

Passage-specific questions help assess comprehension and fluency. After reading, students answer questions about key details, central messages, or themes. This ensures they understand the content and can apply their reading skills effectively. These questions also guide teachers in identifying areas where students may need additional support, making them a valuable tool for targeted instruction and improving overall reading development.

Fluency Passages and Activities

Fluency passages and activities are designed to make reading practice engaging and effective. They include sample passages and interactive workshops that help students build confidence and improve their reading skills. These resources are tailored to create a dynamic learning environment, fostering both enjoyment and progress in reading fluency.

5.1. Sample Passages for Practice

Sample passages for practice are carefully curated to align with third-grade reading levels, offering engaging stories and informative texts. These passages often feature seasonal themes, such as autumn scenes with frosty winds and dancing leaves, or relatable characters like a park ranger. They are designed to vary in content, from narratives to descriptive texts, to cater to diverse student interests and learning needs.

5.2. Interactive Reading Workshops

Interactive reading workshops create dynamic learning environments where students engage with fluency passages through collaborative activities. Techniques include paired reading, role-playing, and group discussions. These workshops encourage students to express ideas, ask questions, and explore texts deeply. They foster a sense of community while developing critical reading skills, making learning enjoyable and effective for all participants.

The Role of Technology in Fluency Practice

Digital tools and apps provide engaging platforms for reading practice, offering interactive exercises and progress tracking to support fluency development in a modern, accessible way.

6.1. Digital Tools for Reading Practice

Digital tools offer interactive and engaging ways to practice reading fluency. Many platforms provide grade-specific passages, audio models, and progress tracking. These tools allow students to practice independently, receive immediate feedback, and revisit challenging sections. Interactive features like highlighters and recording options help students develop confidence and improve their reading skills in a fun and accessible way.

6.2. Apps and Software for Fluency Development

Educational apps and software provide engaging platforms for fluency practice. Many offer interactive reading passages, audio models, and progress tracking. These tools allow students to practice at their own pace, with features like highlighting and recording to enhance learning. They often include gamification elements to make practice enjoyable and motivating, ensuring consistent improvement in reading fluency and comprehension skills.

Engaging Students with Fluency Passages

Creating a positive reading environment and incorporating interactive activities, such as games and challenges, helps students stay motivated and engaged during fluency practice sessions.

7.1. Creating a Positive Reading Environment

To foster engagement, create a welcoming space for reading. Use fluency folders filled with grade-level passages and interactive activities. Encourage students to read aloud with confidence by providing a supportive atmosphere. Incorporate games, challenges, and partner reading to make practice enjoyable. This approach helps students feel comfortable and motivated, leading to improved fluency and a lifelong love for reading.

7.2; Incorporating Games and Challenges

Incorporate games and challenges to make fluency practice engaging. Use speed reading competitions, accuracy checks, and timed passages to build confidence. Digital tools and apps can enhance practice, offering interactive exercises. Pair students for peer reading, fostering collaboration and healthy competition. These activities not only improve fluency but also make learning enjoyable and motivating for young readers.

Supporting Struggling Readers

Supporting struggling readers involves tailored strategies, such as small-group instruction and additional practice opportunities. Fluency folders and differentiated materials help build confidence and skills effectively.

8.1. Differentiated Instruction Strategies

Differentiated instruction strategies involve tailoring reading practices to meet individual needs. Teachers can use leveled readers and technology to provide scaffolded support. Fluency folders with targeted passages help students practice at their own pace, while formative assessments guide instruction. This approach ensures struggling readers receive the specific tools and encouragement needed to improve their reading fluency effectively.

8.2. Providing Additional Practice Opportunities

To support struggling readers, provide extra practice through at-home activity packets and fluency folders. These resources include targeted passages and exercises. Additionally, digital tools and interactive reading games can make practice engaging. Parents and teachers can also use grade-specific PDFs to create supplemental materials, ensuring students have ample opportunities to refine their reading skills in varied and meaningful ways.

The Role of Parents in Fluency Development

Parents play a crucial role by providing consistent home practice using fluency folders and activity packets. This support fosters improved reading skills and confidence in students.

9.1. Home Practice Activities

Parents can support fluency development by engaging their child in daily reading practice using fluency folders and activity packets. These resources include grade-level passages and comprehension questions. Encourage your child to read aloud, focusing on accuracy and expression. Timing readings and discussing the content can also enhance understanding. Regular practice, even for 10-15 minutes, helps build confidence and improves reading skills; Consistency is key to fostering fluency and a love for reading.

9.2. Communicating Progress with Teachers

Regular communication between parents and teachers is crucial for tracking a child’s fluency progress. Share observations from home practice, such as improved accuracy or expression. Discuss any challenges your child faces and ask for strategies to support their development. Teachers can provide feedback and suggest additional resources, ensuring a collaborative effort to enhance reading skills. Consistent updates help tailor instruction to meet individual needs.

Measuring Progress in Fluency

Tracking growth in reading fluency involves regular assessments, including timing readings and checking accuracy. These measurements help guide instruction and celebrate student improvements over time.

10.1. Setting Benchmarks and Goals

Establishing clear benchmarks and goals for fluency helps guide instruction and track progress. Teachers set specific targets for accuracy, speed, and expression, aligned with curriculum standards. Regular assessments and feedback allow students to see their growth and stay motivated. By breaking larger goals into smaller steps, learners can steadily improve their reading skills effectively.

10.2. Celebrating Student Improvement

Recognizing and celebrating progress boosts confidence and encourages continued effort. Teachers and parents can acknowledge achievements through verbal praise, certificates, or sharing success with peers. This positive reinforcement highlights growth and motivates students to persist in improving their reading fluency and overall academic performance, fostering a love for learning and self-improvement.

Resources for 3rd Grade Fluency Passages

Access high-quality fluency passages through PDFs, educational websites, and teacher-created materials. These resources provide engaging texts aligned with curriculum standards, ensuring effective reading practice.

11.1. Recommended Websites and PDFs

Teachers and parents can access high-quality fluency passages through reputable websites like ReadWorks and Teachers Pay Teachers. These platforms offer free and paid PDF resources specifically designed for 3rd-grade reading levels. Many passages are aligned with curriculum standards and feature engaging topics to keep students interested. Some popular PDFs include “Grade-3-Reading Passages 65-85” and “Fluency Folder Activities.” These resources provide comprehensive practice materials to support reading development.

11.2. Teacher-Created Materials and Worksheets

Teachers often design custom materials tailored to their students’ needs, incorporating engaging themes and comprehension questions. Worksheets may include fluency passages, timing exercises, and reflection sections. Many educators share their resources online, offering diverse activities that align with curriculum standards. These materials are adaptable and provide comprehensive practice, supporting students in building reading fluency and confidence effectively.

Creating Custom Fluency Passages

Customizing fluency passages allows teachers to tailor content to students’ interests and skill levels, ensuring engagement and relevance. This approach supports personalized learning and skill development.

12.1. Tailoring Passages to Student Needs

Tailoring fluency passages to student needs involves assessing individual reading levels and interests. Teachers can create or select texts that match each student’s vocabulary and comprehension skills. This personalized approach ensures that students are challenged appropriately and stay engaged, fostering a more effective learning environment. Regular assessments help adjust the content to meet growing abilities and interests over time.

12.2. Incorporating Student Interests

Incorporating student interests into fluency passages makes reading more enjoyable and relevant. Teachers can choose themes like animals, sports, or fantasy to captivate students. By aligning content with their hobbies and passions, learners become more motivated and invested in improving their reading skills. This approach not only enhances engagement but also makes practice sessions more meaningful and effective for young readers.

Fluency Passages and Comprehension

Fluency passages enhance comprehension by enabling students to focus on understanding the text’s message rather than decoding individual words, fostering a deeper connection to the material.

13.1. Linking Fluency to Understanding

Fluency and comprehension are interconnected; as students read smoothly and accurately, they can better grasp the text’s meaning. Fluency passages help bridge this gap by reducing cognitive load from decoding, allowing focus on key details and central messages. This connection fosters a deeper understanding, making reading more enjoyable and effective for young learners.

13.2. Pre- and Post-Reading Strategies

Pre-reading strategies, such as introducing vocabulary and discussing the topic, prepare students for comprehension. Post-reading activities like summarizing, asking questions, and identifying key details reinforce understanding. These strategies help students connect fluency practice with meaning, ensuring they not only read smoothly but also grasp the content effectively, making reading a more engaging and purposeful experience.

Classroom Integration of Fluency Passages

Classroom integration of fluency passages involves incorporating them into daily reading routines, utilizing group activities, and scheduling consistent practice to enhance reading development and student engagement.

14.1. Group vs. Individual Practice

Group practice fosters collaboration and peer learning, allowing students to hear fluent reading models and receive feedback. Individual practice ensures personalized attention and pacing, helping struggling readers. Both methods complement each other, providing a balanced approach to fluency development, as students benefit from varied learning environments tailored to their needs and preferences.

14.2. Scheduling Fluency Practice

Consistent scheduling of fluency practice is crucial for developing reading skills. Short, daily sessions of 10-15 minutes ensure regular reinforcement. Incorporating practice into morning routines or reading workshops helps maintain momentum. Flexible timing allows teachers to adapt to classroom needs, ensuring fluency activities align with broader curriculum goals and student progress. Regular practice fosters improvement and confidence in young readers effectively.

Overcoming Common Challenges

Teachers can address reluctant readers by incorporating engaging activities and providing positive reinforcement. Time management can be optimized by setting clear goals and using structured schedules effectively.

15.1. Addressing Reluctant Readers

Engage reluctant readers by incorporating fun activities and providing positive reinforcement. Use high-interest passages that align with their hobbies to spark curiosity. Create a supportive environment where mistakes are viewed as learning opportunities. Pair students with fluent readers for shared reading experiences. Encourage parental involvement through at-home practice activities. Celebrate small improvements to build confidence and enthusiasm for reading.

15.2. Managing Time Effectively

To manage time effectively, set clear schedules for fluency practice, ensuring consistency. Allocate specific minutes daily for reading exercises and assessments. Use digital tools to track progress and maintain engagement. Prioritize passages that align with curriculum standards to maximize efficiency. Rotate activities to keep students focused and motivated, balancing instruction with independent practice for optimal time utilization and skill development.

Third-grade fluency passages are a powerful tool for improving reading skills, fostering confidence, and laying a strong foundation for lifelong literacy. Regular practice ensures lasting progress.

16.1. The Long-Term Impact of Fluency Practice

Consistent fluency practice fosters improved reading accuracy, speed, and comprehension. Students develop a stronger foundation for advanced literacy skills, enhancing their ability to grasp complex texts. Over time, this practice builds confidence and independence in reading, preparing learners for future academic challenges and fostering a lifelong appreciation for reading.

16.2. Encouraging Lifelong Reading Habits

Fluency practice in third grade lays the groundwork for a lifelong love of reading. By making reading enjoyable and rewarding, students are more likely to continue exploring books independently. Engaging passages and positive reading experiences cultivate habits that extend beyond the classroom, fostering a deep appreciation for literature and learning that lasts a lifetime.

rubik cube 2×2 solution pdf

The 2×2 Rubik’s Cube, also known as the Pocket Cube, is a smaller version of the classic 3×3 Rubik’s Cube․ With only four stickers on each face, it has fewer pieces and is considered easier to solve, making it a great starting point for beginners․ The cube consists of eight smaller cubes, or “corner pieces,” and no fixed centers, allowing for a wide range of movements․ Its compact size and simplicity make it a popular choice for those looking to develop problem-solving skills and hand-eye coordination․

Learning to solve the 2×2 Rubik’s Cube is a rewarding challenge that can be mastered with practice and patience․ The process involves understanding the cube’s mechanics, mastering basic movements, and following a step-by-step approach․ Whether you’re solving it for fun or as a stepping stone to more complex puzzles, the 2×2 Cube offers a fun and engaging experience for all ages․

What is a 2×2 Rubik’s Cube?

The 2×2 Rubik’s Cube, often referred to as the Pocket Cube, is a smaller and simpler version of the classic 3×3 Rubik’s Cube․ It consists of eight smaller “corner” pieces and no fixed center pieces, allowing for a wide range of movements․ Unlike the 3×3 version, the 2×2 Cube does not have edge pieces, making it easier to handle and solve․ Each face of the cube has four stickers, and the goal is to align the colors on each face to match․ The 2×2 Cube is a popular choice for beginners due to its fewer components and straightforward solving process․ Its compact size and simplicity make it an excellent introduction to the world of Rubik’s Cubes, providing a fun and challenging puzzle for all skill levels․

Why Learn to Solve a 2×2 Rubik’s Cube?

Learning to solve a 2×2 Rubik’s Cube is an excellent way to develop problem-solving skills, hand-eye coordination, and patience․ It challenges the mind while being fun and rewarding․ Solving the cube teaches logical thinking and persistence, as it requires breaking down the problem into manageable steps․ The sense of accomplishment upon solving it boosts confidence and encourages tackling more complex puzzles․ Additionally, mastering the 2×2 Cube serves as a solid foundation for solving larger Rubik’s Cubes, like the 3×3․ The process also enhances spatial awareness and memory, as learners memorize algorithms and understand how pieces move․ With numerous guides and resources available, including PDFs and online tutorials, the 2×2 Cube is accessible to learners of all ages and skill levels, making it a great introduction to the world of speedcubing and puzzle-solving․

Understanding the Mechanics of the 2×2 Rubik’s Cube

The 2×2 Rubik’s Cube consists of eight corner pieces with three visible faces each․ Its internal mechanism allows smooth movement and rotation of the outer layers independently; Understanding how the pieces interact and the cube’s structure is key to solving it efficiently․ The absence of fixed center pieces means all faces can rotate freely, simplifying the solving process compared to larger cubes․ Grasping the mechanics helps in mastering algorithms and achieving faster solve times, making it a great introduction to the world of speedcubing and puzzle-solving strategies․

Structure and Components

The 2×2 Rubik’s Cube consists of eight smaller cubes, or “corner pieces,” each with three visible faces․ Unlike the 3×3 version, it has no fixed center pieces, allowing all faces to rotate freely․ The cube’s structure includes an inner mechanism that enables smooth turning of the outer layers․ Each face is composed of four stickers, and the cube has a total of 3,674,160 possible positions․ The absence of fixed centers simplifies the solving process, as there are fewer constraints on piece orientation․ Understanding the cube’s components and how they interact is essential for mastering its mechanics and solving algorithms․ The compact design and fewer pieces make it an ideal puzzle for beginners and a stepping stone to more complex cube variations․

Notation and Basic Movements

The 2×2 Rubik’s Cube uses a standard notation system to describe movements․ Each face is identified by a letter: F (Front), B (Back), R (Right), L (Left), U (Up), and D (Down)․ A single letter indicates a clockwise turn of that face, while a prime (‘) denotes a counter-clockwise turn․ For example, “F” means turning the Front face clockwise, and “F'” means turning it counter-clockwise․ Additionally, “F2” represents a 180-degree turn of the Front face․ These basic movements are essential for solving the cube and are used in algorithms to achieve specific configurations․ Understanding and practicing these fundamental turns will help you master the cube’s mechanics and improve your solving efficiency․ Consistent practice with these movements is crucial for progressing through the solving process․

Understanding the Cube’s Layers

The 2×2 Rubik’s Cube consists of two main layers: the top layer and the bottom layer․ Each layer is made up of four corner pieces that can be manipulated independently․ The top layer includes the four corners on the upper face, while the bottom layer contains the remaining four corners․ Unlike the 3×3 cube, the 2×2 does not have fixed center pieces, which simplifies its structure but also requires careful attention to orientation․ Understanding how these layers interact is crucial for solving the cube effectively․

When solving, the top layer is typically addressed first, followed by the bottom layer․ Each turn of a layer affects both the top and bottom pieces, making it important to track their positions and orientations․ This layer-based approach is fundamental to most solving methods and ensures a systematic path to completing the cube․ By mastering the movement and alignment of these layers, you can efficiently solve the 2×2 Rubik’s Cube․

Step-by-Step Solution Guide

Master the 2×2 Rubik’s Cube with a systematic approach․ Solve the first layer, orient the last layer, complete the corners, and finalize with precise algorithms for a flawless finish․

Step 1: Solving the First Layer

Step 2: Orienting the Last Layer

Once the first layer is solved, hold the cube with the white face on the bottom and focus on the top layer․ Your goal is to orient all the remaining corners so their colors match the center stickers․ Twist the top layer (U move) to align one corner, then use the front face (F move) to move it into place․ Repeat this process for each corner, ensuring they face the correct direction․ If a corner is misoriented, use the “U” and “R” moves to correct it without disturbing the solved bottom layer․ Pay attention to the cube’s orientation and use the “U2” or “U'” moves if needed․ This step requires patience, as proper orientation is crucial for the final solve․

Step 3: Completing the Last Layer Corners

With the last layer oriented, focus on aligning the corners correctly․ Hold the cube with the solved bottom layer facing down and the last layer on top․ Use the “U” and “R” moves to swap corners without disturbing the solved bottom layer․ If two corners are misaligned, perform the algorithm R U R’ U’ to swap them․ Repeat this process until all corners match their respective center colors․ Ensure no corner is misoriented before moving on․ If needed, twist the top layer (U move) to align the final corners․ This step requires careful observation and precise execution to maintain the solved bottom layer․ Once all corners are correctly aligned, proceed to the final step to complete the cube․

Step 4: Finalizing the Cube

After orienting and aligning the last layer corners, the final step is to ensure all pieces are in their correct positions․ Hold the cube so the solved bottom layer is facing down and the last layer is on top․ If any corners are still misoriented, use the algorithm R U R’ U’ to fix them without disturbing the solved bottom layer․ Once all corners are correctly oriented, check the edges to ensure they are aligned properly․ If needed, perform a U move to cycle the top layer pieces into their correct positions․ Finally, verify that all colors match up by inspecting the cube from all angles․ With patience and careful execution, the cube should now be fully solved․ This step requires attention to detail to ensure no piece is out of place․

Advanced Techniques and Algorithms

Mastering advanced algorithms like the Layer-by-Layer method enhances solving efficiency․ Learn key moves such as R U R’ U’ and L U L’ to orient and align pieces quickly․

Understanding Algorithms for the 2×2 Cube

Algorithms are essential for efficiently solving the 2×2 Rubik’s Cube․ They are predefined sequences of moves that help orient and align pieces correctly․ Common algorithms include R U R’ U’ and L U L’, which are used to orient corners without disrupting the solved portions of the cube․ These sequences are particularly useful during the final stages of solving, where precision is key․

Mastering these algorithms allows for faster and more accurate solves․ They are often memorized and applied in specific situations, such as aligning the last layer or correcting misoriented corners․ With practice, these sequences become second nature, enabling solvers to tackle even the most scrambled configurations․ PDF guides and online resources provide detailed breakdowns of these algorithms, making them accessible to learners of all skill levels․ The SpeedSolving community also offers extensive libraries of algorithms tailored for 2×2 cube mastery․

Mastering the Layer-by-Layer Method

The layer-by-layer method is a popular strategy for solving the 2×2 Rubik’s Cube․ It involves focusing on one layer at a time, starting with the bottom layer and working up to the top․ This approach helps maintain organization and reduces complexity․

R, L, U, D to align the edges and corners․ Once the first layer is solved, move to the top layer, ensuring not to disturb the solved pieces below․

PDF guides and online tutorials provide detailed step-by-step instructions for this method․ They often include visual aids and algorithms to help learners master each layer․ With consistent practice, the layer-by-layer technique becomes efficient and effective, enabling quick solves even for beginners․

Optimizing Your Solve Time

Optimizing your solve time for the 2×2 Rubik’s Cube requires practice, understanding of algorithms, and efficient movement execution․ Start by mastering the fundamental steps and layer-by-layer method․ Focus on reducing unnecessary moves by planning ahead and recognizing patterns in scrambled states․

Use algorithms sparingly and only when needed, as excessive algorithm use can slow down your solving process․ Practice regularly, aiming to solve the cube in fewer moves each time․ Re-scramble the cube frequently to build muscle memory and improve speed․

PDF guides and online tutorials offer tips for optimizing solve times, such as focusing on one layer at a time and avoiding piece misalignment․ Consistent practice and familiarity with the cube’s mechanics will help you achieve faster solves and enjoy the process of mastering this puzzle․

Practice and Mastery Tips

Consistent practice and re-scrambling are key to mastering the 2×2 Rubik’s Cube․ Focus on one layer at a time to build muscle memory and improve efficiency․

Re-Scrambling and Repeating

Re-scrambling and repeating is a crucial practice technique for mastering the 2×2 Rubik’s Cube․ After solving the cube, scramble it again and repeat the process to build consistency and speed․ This method helps you master the first layer and improves muscle memory․ By consistently re-scrambling, you’ll gain familiarity with different cube states, reducing the likelihood of mistakes․ Start with slower, deliberate movements and gradually increase your speed as you become more comfortable․ Regular repetition also enhances problem-solving skills and hand-eye coordination․ Over time, this practice will help you understand the cube’s mechanics and improve your overall solving efficiency․ Remember, patience and persistence are key to achieving mastery․ Use this method alongside guides like the 2×2 Rubik’s Cube solution PDF for a structured learning experience․

Focus on One Layer at a Time

Focusing on one layer at a time is a highly effective strategy for solving the 2×2 Rubik’s Cube․ Start by solving the first layer, ensuring all corners are correctly aligned and oriented․ Once the first layer is complete, move on to the second layer, using algorithms to orient and position the remaining pieces․ This method reduces complexity and helps avoid mistakes․ By isolating each layer, you can concentrate on mastering one step before progressing to the next․ This approach is particularly useful for beginners, as it breaks down the problem into manageable parts․ Use guides like the 2×2 Rubik’s Cube solution PDF to follow structured steps and maintain focus on one layer at a time․

Consistency and patience are key to improving your solving skills․ By dedicating practice time to one layer, you’ll build muscle memory and confidence․ Over time, this method will help you solve the cube efficiently and effectively․

Importance of Consistent Practice

Consistent practice is essential for mastering the 2×2 Rubik’s Cube․ Regular practice helps develop muscle memory, allowing your hands to perform moves instinctively․ Over time, this improves speed and efficiency, making it easier to solve the cube․ Even short daily sessions can lead to significant progress․ By repeatedly solving the cube, you’ll gain a deeper understanding of its mechanics and improve your problem-solving skills․

Use resources like the 2×2 Rubik’s Cube solution PDF to guide your practice sessions․ Set aside time each day to focus on specific steps, such as solving one layer or mastering algorithms․ Tracking your progress will keep you motivated and help you identify areas for improvement; Consistent practice is the key to unlocking your full potential and becoming a skilled solver․

Resources and Guides

Find comprehensive guides and tutorials online, including PDF downloads and video instructions․ Websites like SpeedSolving․com and Rubiks․com offer detailed step-by-step solutions and expert tips for mastering the 2×2 cube․

PDF Guides for 2×2 Rubik’s Cube

PDF guides are an excellent resource for learning to solve the 2×2 Rubik’s Cube․ These downloadable files provide step-by-step instructions, diagrams, and algorithms to help you master the cube․ Many guides are designed for beginners, breaking down the solving process into easy-to-follow stages․ Popular websites like SpeedSolving․com and Rubiks․com offer free PDF downloads that cover everything from basic movements to advanced techniques․ These guides often include visual aids and detailed explanations, making them ideal for visual learners․ Some PDFs even focus on specific methods, such as the “Layer by Layer” approach, which simplifies the solving process․ Whether you’re just starting out or looking to improve your skills, PDF guides are a valuable tool to keep handy․

Additionally, print-friendly PDFs allow you to practice without a screen, making them perfect for on-the-go learning․ Many guides also include troubleshooting tips and common mistakes to avoid, ensuring a smooth learning curve․ By downloading a PDF guide, you can access structured lessons and practice exercises anytime, helping you progress from a novice to a proficient solver․

Online Tutorials and Videos

Online tutorials and videos are invaluable resources for mastering the 2×2 Rubik’s Cube․ Platforms like YouTube and dedicated cubing websites offer a wealth of step-by-step guides and demonstrations․ These videos cater to all skill levels, from beginners learning basic movements to advanced solvers refining their techniques․ Many tutorials use a “layer-by-layer” approach, breaking down the solving process into manageable steps․ Visual learners benefit from seeing algorithms in action, making it easier to understand and replicate movements․ Additionally, online communities like SpeedSolving․com host forums where you can ask questions, share tips, and learn from experienced cubers․

Video guides often include slow-motion demonstrations and voiceover explanations, ensuring clarity for learners․ Some tutorials also cover common mistakes and how to avoid them, helping you troubleshoot as you practice․ With countless free resources available, online videos provide a flexible and accessible way to improve your 2×2 solving skills at your own pace․

SpeedSolving Community and Forums

The SpeedSolving community is a vibrant hub for cubers of all levels, offering extensive resources and forums dedicated to solving puzzles like the 2×2 Rubik’s Cube․ Members share tips, algorithms, and strategies for improving solve times and techniques․ The forums are filled with discussions on various solving methods, from beginner-friendly approaches to advanced speed-solving tactics․ Users can ask questions, share their progress, and learn from experienced cubers․ Additionally, the community hosts guides, tutorials, and competitions, fostering a supportive environment for everyone to enhance their cubing skills․ Whether you’re a novice or an expert, the SpeedSolving community provides invaluable insights and encouragement to help you master the 2×2 Rubik’s Cube․

By engaging with the SpeedSolving forums, you can gain access to a wealth of knowledge, including step-by-step guides, video tutorials, and expert advice․ This collective wisdom ensures that you’ll find the best methods to suit your learning style and improve your solving efficiency․ The community’s collaborative spirit makes it an indispensable resource for anyone serious about becoming a skilled cuber․

Troubleshooting Common Issues

Common issues while solving a 2×2 Rubik’s Cube include misoriented corners, incorrect edge alignments, and mistakes in the first layer․ These can be fixed by re-examining moves and applying corrective algorithms․ Identifying errors early prevents further complications, ensuring a smoother solving process․

Identifying Mistakes in the First Layer

Identifying mistakes in the first layer is crucial for solving the 2×2 Rubik’s Cube efficiently․ Common errors include misoriented corners, incorrect edge alignments, or forgetting to check the bottom layer․ Beginners often overlook the importance of ensuring all stickers in the first layer are properly aligned before moving to the next step․ A misplaced corner or edge can lead to complications in subsequent layers․ To avoid this, always double-check the first layer for consistency in color and alignment․ If a mistake is detected, reset the layer and repeat the process․ This step ensures a solid foundation for solving the remaining layers without unnecessary complications․ Regular practice helps develop the ability to spot and correct these errors quickly, improving overall solving speed and accuracy․

Fixing Misoriented Corners

Misoriented corners are a common issue when solving the 2×2 Rubik’s Cube, especially during the final layers․ To fix this, use specific algorithms to realign the corners without disrupting the solved parts of the cube․ For example, the “R” and “L” moves can help adjust corner orientations․ Practice these algorithms carefully to avoid scrambling the first layer․

PDF guides and online tutorials often include visual aids to help identify and correct misoriented corners․ Start by focusing on one corner at a time, ensuring it matches the color of its adjacent faces․ After correcting one corner, move to the next, double-checking your progress․ Regular practice with these techniques will improve your ability to fix misoriented corners efficiently․

Correcting Edge Alignments

Correcting edge alignments is crucial for achieving a fully solved 2×2 Rubik’s Cube․ Misaligned edges can occur during the final steps, particularly after orienting the corners․ To address this, use specific algorithms that target the edges without disturbing the already solved parts of the cube․ For instance, the “U” and “D” moves can help align edges while maintaining corner orientations․

PDF guides and online resources provide detailed step-by-step instructions for edge alignment․ Focus on one edge at a time, ensuring it matches the color of its corresponding face․ After aligning one edge, move to the next, double-checking your progress to avoid misalignments․ Consistent practice with these techniques will enhance your ability to correct edge alignments efficiently and achieve a perfectly solved cube․

Benefits of Learning to Solve a 2×2 Rubik’s Cube

Mastering the 2×2 Rubik’s Cube enhances problem-solving skills, hand-eye coordination, and patience․ It fosters critical thinking and persistence, benefiting cognitive development and mental agility in a fun, challenging way․

Improving Problem-Solving Skills

Solving a 2×2 Rubik’s Cube teaches systematic thinking and logical reasoning․ By breaking the cube into layers and focusing on one piece at a time, learners develop a methodical approach to problem-solving․ Each twist and turn requires understanding cause-and-effect relationships, enhancing spatial awareness and critical thinking․ The process of trial and error fosters resilience and adaptability, as solvers learn to correct mistakes and refine their strategies․ These skills translate to real-life challenges, helping individuals tackle complex tasks with patience and precision․ The structured nature of cube solving also encourages creative problem-solving, as solvers explore different algorithms and techniques to achieve their goals․ Ultimately, mastering the 2×2 Rubik’s Cube is a powerful way to sharpen cognitive abilities while enjoying a rewarding hobby․

Enhancing Hand-Eye Coordination

Solving a 2×2 Rubik’s Cube requires precise hand movements and visual focus, making it an excellent tool for improving hand-eye coordination․ The process involves manipulating small pieces and aligning them correctly, which demands synchronization between hand movements and visual feedback․ As solvers practice, they develop the ability to translate mental strategies into physical actions, enhancing dexterity and fine motor skills․ The repetitive nature of solving the cube also builds muscle memory, allowing for faster and more accurate twists over time․ This improvement in coordination not only benefits cube solving but also transfers to other activities requiring precision and timing․

Regular practice strengthens the connection between the brain and hands, leading to better reflexes and spatial awareness․ Mastering the cube’s algorithms becomes second nature, showcasing the powerful link between physical skill and mental focus․

Building Patience and Perseverance

Solving a 2×2 Rubik’s Cube is a process that naturally cultivates patience and perseverance․ The journey from a scrambled cube to a solved one often involves setbacks and requires persistence․ Each twist and turn demands attention, and the repetition of attempts builds resilience․ Learners quickly realize that frustration is part of the learning curve, but overcoming it leads to a sense of accomplishment․ The incremental progress, even in small steps, reinforces the value of persistence․ As solvers master algorithms and improve their speed, they develop a mindset that embraces challenges and views failures as opportunities to grow․ This perseverance extends beyond cube solving, benefiting other areas of life that require dedication and determination․

The rewarding experience of solving the cube teaches individuals to remain patient and persistent, even when faced with complex problems․

honeywell 8000 user manual

The Honeywell VisionPRO 8000 is a touchscreen programmable thermostat offering advanced features like remote access‚ humidity control‚ and compatibility with various HVAC systems for optimal comfort and energy efficiency.

Overview of the Honeywell VisionPRO 8000 Series

The Honeywell VisionPRO 8000 Series represents a line of advanced‚ touchscreen programmable thermostats designed for intuitive climate control. These thermostats are known for their large‚ clear displays and user-friendly interfaces‚ making it easy to manage temperature‚ humidity‚ and schedules. The series offers compatibility with a wide range of HVAC systems‚ including multi-stage systems‚ heat pumps‚ and gas or electric furnaces. With features like remote access via Wi-Fi‚ humidity sensors‚ and energy-saving modes‚ the VisionPRO 8000 Series provides both comfort and efficiency. The thermostats are programmable‚ allowing users to set schedules for up to 7 days‚ and they support both manual and automatic operating modes. The series is also backed by comprehensive user manuals and robust customer support‚ ensuring seamless installation and operation.

Key Features of the Honeywell VisionPRO 8000

The Honeywell VisionPRO 8000 stands out with its high-resolution touchscreen display‚ providing a clear and intuitive interface for temperature control. It offers advanced scheduling options‚ including 7-day programmability and a 5-2 day mode‚ allowing users to customize their comfort settings. The thermostat supports multi-stage HVAC systems and is compatible with heat pumps and dual fuel systems. It also features humidity control‚ enabling precise management of indoor air quality. Wi-Fi connectivity allows remote access and control via smartphones or tablets‚ while energy-saving modes help reduce utility bills. Additional features include filter change reminders and automatic software updates‚ ensuring optimal performance and efficiency. These features make the VisionPRO 8000 a versatile and user-friendly solution for home climate management.

Compatibility with HVAC Systems

The Honeywell VisionPRO 8000 thermostat is universally compatible with a wide range of HVAC systems‚ including multi-stage heating and cooling systems‚ heat pumps‚ and gas or electric furnaces. It supports dual fuel systems‚ ensuring optimal performance by switching between heating sources. The thermostat is designed to work with 2Heat/2Cool‚ 3Heat/2Cool‚ and heat pump systems with auxiliary heat. Its flexibility allows it to integrate seamlessly with most home HVAC configurations‚ providing precise temperature control and energy efficiency. Whether installed in a single-stage or multi-stage system‚ the VisionPRO 8000 adapts to meet the specific needs of your home‚ ensuring comfort and reliability year-round. Its compatibility with various systems makes it a versatile choice for homeowners seeking advanced climate control solutions.

Safety Precautions and Warnings

When installing and using the Honeywell VisionPRO 8000 thermostat‚ it is essential to follow safety guidelines to avoid potential hazards. Always turn off power to the HVAC system at the circuit breaker before starting installation to prevent electrical shocks. Ensure proper grounding of the system to maintain safety and functionality. Avoid exposing the thermostat to extreme temperatures or moisture‚ as this may damage the device or compromise its performance. Never attempt to repair the thermostat yourself‚ as this could lead to electrical hazards or void the warranty. Follow all instructions provided in the user manual carefully‚ and if unsure about any step‚ consult a licensed professional. Failure to adhere to these precautions may result in injury‚ system damage‚ or reduced product lifespan.

Installation and Setup

Turn off power to the HVAC system at the circuit breaker. Remove the old thermostat and connect wires to the new Honeywell VisionPRO 8000. Mount securely and follow on-screen setup instructions to configure settings and Wi-Fi connectivity for optimal performance.

Step-by-Step Installation Instructions

To install the Honeywell VisionPRO 8000 thermostat‚ start by turning off power to your HVAC system at the circuit breaker. Remove the old thermostat and label the wires for identification. Mount the new base plate to the wall‚ ensuring it is level and securely fastened. Connect the labeled wires to the corresponding terminals on the new thermostat‚ following the wiring diagram provided in the manual. Gently pull the thermostat onto the base plate until it clicks into place. Turn the power back on and follow the on-screen setup instructions to configure your settings‚ including the time‚ date‚ and Wi-Fi connectivity. Refer to the user manual for detailed wiring diagrams and specific installation requirements. If unsure‚ consult a licensed HVAC technician to ensure proper installation.

Required Tools and Materials

For installing the Honeywell VisionPRO 8000 thermostat‚ you’ll need basic tools like a screwdriver‚ wire strippers‚ and a drill with bits for wall mounting. Ensure you have a level to ensure proper alignment. Additionally‚ gather wire connectors‚ mounting screws‚ and wall anchors‚ which may be included in the packaging. A voltage tester is recommended to verify power is off before starting. Label the existing wires with the provided wire labels or use markers to avoid confusion during reconnection. If necessary‚ have spacers or a wall plate to cover any gaps from the old thermostat. Always refer to the user manual for specific material requirements tailored to your HVAC system.

Wiring Diagram and Connections

Refer to the wiring diagram in the Honeywell VisionPRO 8000 manual to ensure proper connections. Identify the terminal labels (R‚ W‚ Y‚ G‚ C‚ etc.) and match them to your HVAC system. Connect the wires carefully‚ following the color codes or labels provided. Double-check the system type (heat pump‚ gas furnace‚ etc.) to configure the wiring correctly. Use the included wire connectors for secure links. If your system requires a common wire (C)‚ ensure it is connected to maintain Wi-Fi functionality. Label each wire before disconnecting the old thermostat to avoid confusion. Turn off the power at the circuit breaker before starting. Use a voltage tester to confirm no power is present. For advanced setups‚ consult the manual or a professional for assistance. Proper wiring ensures safe and efficient thermostat operation. Always follow safety guidelines to prevent electrical hazards.

Mounting the Thermostat

Mount the Honeywell VisionPRO 8000 thermostat on a flat wall surface‚ ensuring it is level for accurate temperature readings. Begin by turning off the power to your HVAC system at the circuit breaker. Remove the old thermostat and take note of the wire connections. Use the included wall anchors and screws to secure the mounting plate to the wall. Ensure the plate is straight by using a level. If necessary‚ drill pilot holes for the screws. Attach the thermostat to the mounting plate by aligning the tabs and gently snapping it into place. Connect the wires to the appropriate terminals‚ following the wiring diagram. Tighten the screws to secure the thermostat firmly. Test the thermostat by turning the power back on and verifying proper operation. For uneven walls‚ adjust the mounting plate as needed.

Programming the Thermostat

The Honeywell VisionPRO 8000 allows easy programming via its touchscreen interface‚ enabling users to set temperature and humidity levels‚ create schedules‚ and optimize energy efficiency with a 7-day programmable mode.

Understanding the Touchscreen Interface

The Honeywell VisionPRO 8000 features a large‚ clear touchscreen display with a backlight‚ ensuring easy readability even in low-light conditions. The interface is menu-driven‚ making it intuitive to navigate and set preferences. The home screen displays current temperature‚ setpoint‚ and system status. Users can adjust settings like temperature‚ humidity‚ and schedules by selecting icons or using slide bars. The thermostat also provides on-screen prompts to guide users through complex settings. The display automatically dims when not in use to conserve energy. With its responsive design‚ the touchscreen allows for seamless interaction‚ enabling users to customize their comfort settings efficiently. This user-friendly design ensures that even those less familiar with smart technology can operate the thermostat with ease. The interface is designed to simplify thermostat operation while providing advanced functionality.

Setting Temperature and Humidity Levels

Setting temperature and humidity levels on the Honeywell VisionPRO 8000 is straightforward. Users can manually adjust the temperature by tapping the touchscreen and using the on-screen controls. The thermostat allows for precise temperature adjustments‚ with options to switch between heating and cooling modes. For humidity control‚ the VisionPRO 8000 integrates seamlessly with compatible humidity sensors‚ enabling users to set ideal humidity levels for comfort and energy efficiency. The interface provides real-time feedback‚ displaying the current temperature and humidity levels; Users can also enable automatic mode‚ letting the thermostat manage temperature and humidity based on programmed settings. The thermostat’s intuitive design ensures that adjusting comfort levels is quick and effortless‚ making it easy to maintain a perfect indoor environment year-round. This feature is essential for optimizing both comfort and energy savings.

Creating and Managing Schedules

Creating and managing schedules on the Honeywell VisionPRO 8000 is designed to be user-friendly and flexible. The thermostat offers 7-day programmable modes‚ allowing users to customize temperature settings for each day of the week. Additionally‚ a 5-2 day mode is available for those with consistent weekday and weekend routines. Users can set up to four temperature points per day‚ ensuring optimal comfort and energy efficiency. The thermostat also features “armchair programming‚” enabling users to remove the device from the wall and comfortably program schedules from anywhere. These schedules can be easily adjusted or overridden as needed. With the ability to save up to 99 programs and 99 segments‚ the VisionPRO 8000 provides unparalleled flexibility. This feature ensures that users can tailor their comfort settings to their lifestyle while maximizing energy savings. The intuitive interface makes it easy to manage and adjust schedules at any time.

Using the Hold Feature

The Hold feature on the Honeywell VisionPRO 8000 allows users to temporarily override the current schedule and maintain a specific temperature setting until manual changes are made or a new scheduled event begins. This feature is ideal for occasions when the usual schedule needs adjustment‚ such as during vacations or unexpected events. To use the Hold feature‚ navigate to the temperature settings menu‚ select the desired temperature‚ and choose the “Hold” option. The thermostat will then hold the selected temperature indefinitely until you deactivate the hold or a new program schedule takes over. This flexibility ensures comfort and energy savings by avoiding unnecessary heating or cooling when the schedule isn’t aligned with current needs. The Hold feature can be easily activated or canceled through the touchscreen interface‚ providing quick and convenient control over your home’s climate.

Advanced Features

The Honeywell VisionPRO 8000 offers advanced features like remote access via Wi-Fi‚ humidity sensors‚ and energy-saving modes‚ enhancing convenience and efficiency for smart home integration.

Remote Access via Wi-Fi

The Honeywell VisionPRO 8000 thermostat offers seamless remote access through its Wi-Fi connectivity. By connecting to the Honeywell Home app‚ users can monitor and control their HVAC system from anywhere using a smartphone‚ tablet‚ or computer. This feature allows for real-time temperature adjustments‚ schedule changes‚ and system mode switches. Remote access also enables users to receive email alerts for system notifications‚ such as temperature deviations or filter change reminders. Additionally‚ the thermostat supports automatic software updates‚ ensuring users have the latest features and security enhancements. This advanced capability enhances convenience‚ energy efficiency‚ and overall home comfort‚ making it ideal for modern smart home integration and remote management.

Humidity Control and Sensors

The Honeywell VisionPRO 8000 thermostat features advanced humidity control‚ allowing users to maintain optimal indoor humidity levels for enhanced comfort. It works seamlessly with compatible humidity sensors to monitor and adjust moisture levels‚ preventing excessive humidity or dryness. The thermostat can automatically activate dehumidification or humidification systems based on sensor readings. This ensures a balanced indoor environment‚ reducing the risk of mold growth and improving air quality. Additionally‚ the humidity control system integrates with the thermostat’s programming and scheduling features‚ enabling users to customize settings for different times of the day or week. This feature is particularly beneficial for regions with extreme humidity fluctuations‚ providing consistent comfort and energy efficiency year-round.

Energy-Saving Modes and Settings

The Honeywell VisionPRO 8000 thermostat offers multiple energy-saving modes and settings to optimize your home’s energy efficiency. The Energy Saving Mode adjusts temperature settings slightly to reduce energy consumption while maintaining comfort. Smart Recovery learns your system’s performance to pre-cool or pre-heat‚ ensuring your home reaches the desired temperature at your scheduled time. Additionally‚ the thermostat supports geofencing and smart sensors‚ which can automatically adjust settings based on your location or indoor conditions. Users can also enable energy-saving features like auto-changeover and fan circulation modes to minimize energy waste. These settings can be easily customized via the touchscreen interface or through the remote access app‚ helping you save energy and lower your utility bills without compromising comfort.

Maintenance and Troubleshooting

Regularly clean the thermostat screen and check wiring connections. Replace batteries as needed. Ensure proper humidity levels and address sensor issues promptly to maintain optimal performance and resolve common problems efficiently.

Cleaning and Upkeeping the Thermostat

Regular maintenance ensures the Honeywell VisionPRO 8000 thermostat operates efficiently. Clean the touchscreen with a soft‚ dry cloth to remove fingerprints and dust. Avoid harsh chemicals or abrasive materials that could damage the display. Check and replace batteries as needed‚ typically every 12-24 months‚ depending on usage. Inspect wiring connections to ensure they are secure and free from corrosion. For models with humidity sensors‚ ensure proper calibration and clean the sensor periodically to maintain accuracy. Update the thermostat’s software when prompted to access the latest features and improvements. Schedule annual professional HVAC system maintenance to complement thermostat upkeep. Proper care extends the lifespan and reliability of the device‚ ensuring consistent heating and cooling performance.

Understanding Filter Reminders

The Honeywell VisionPRO 8000 thermostat includes a filter reminder feature to ensure optimal HVAC system performance. This feature alerts you when it’s time to replace or clean your air filter‚ improving energy efficiency and indoor air quality; The reminder can be programmed based on time or filter usage‚ with settings adjustable via the touchscreen interface. Typically‚ filters should be replaced every 1-3 months‚ depending on usage and environmental conditions. When the reminder appears‚ replace the filter promptly and reset the feature through the thermostat’s menu. Proper filter maintenance helps prevent system strain‚ reduces dust buildup‚ and ensures consistent heating and cooling performance. Regular checks and replacements are crucial for maintaining your HVAC system’s health and efficiency. Always refer to your system’s specifications for the correct filter type and sizing.

Common Issues and Solutions

The Honeywell VisionPRO 8000 thermostat may occasionally encounter issues‚ but most can be resolved with simple troubleshooting. One common problem is the thermostat becoming unresponsive‚ which can often be fixed by restarting it or ensuring proper wiring connections. Another issue is inaccurate temperature readings‚ which may require recalibrating the thermostat or checking sensor accuracy. Connectivity problems with Wi-Fi can be resolved by resetting the network connection or verifying internet stability. If the thermostat fails to follow schedules‚ ensure the time and date are correct and that schedules are properly programmed. For recurring issues‚ refer to the user manual or contact Honeywell support for assistance. Regular maintenance and software updates can also prevent many common problems.

The Honeywell VisionPRO 8000 offers advanced features for optimal comfort and energy efficiency. For further assistance‚ refer to the user manual or contact Honeywell’s customer support.

The Honeywell VisionPRO 8000 thermostat offers a touchscreen interface‚ 7-day programmable scheduling‚ and compatibility with various HVAC systems‚ including multi-stage and heat pump systems. It provides humidity control‚ energy-saving modes‚ and remote access via Wi-Fi. The thermostat is designed for ease of use‚ with features like armchair programming and a large backlit display. It supports up to 99 programs and segments‚ ensuring flexibility for different comfort needs. Additionally‚ the thermostat is dual-powered‚ offering system flexibility and automatic or manual changeover options. These features make it an efficient and customizable solution for home climate control‚ enhancing both comfort and energy savings.

Where to Find Additional Support

For additional support with the Honeywell VisionPRO 8000 thermostat‚ visit the official Honeywell Home website or contact their customer support at 1-800-468-1502. The website offers PDF manuals‚ installation guides‚ and troubleshooting tips. You can also access the Honeywell Home app for remote thermostat control and updates. For further assistance‚ explore community forums and authorized Honeywell dealers. Ensure to register your product for warranty and software updates. The thermostat’s built-in help menu and online resources provide comprehensive guidance for optimal performance and customization.

edison party system 6000 manual pdf

Welcome to the Edison Party System 6000 Manual, your guide to unlocking the full potential of this powerful entertainment system. Designed for vibrant parties and events, this 6000-watt system delivers high-quality sound with dual 15-inch woofers and wireless connectivity, making it perfect for creating unforgettable experiences. Explore its features, setup, and troubleshooting tips to maximize your enjoyment.

Overview of the Edison Party System 6000

The Edison Party System 6000 is a high-performance entertainment system designed to elevate your party experience. With a powerful 6000-watt peak output, it features dual 15-inch woofers and dual 1.5-inch tweeters for rich, clear sound. The system includes Bluetooth connectivity, a built-in equalizer, and stunning 360-degree LED lights that synchronize with your music. Perfect for large gatherings, it offers versatility with multiple input options, including USB, SD, and FM radio. Its robust design and advanced features make it ideal for creating an immersive audio-visual experience at any event.

Importance of the Manual

The Edison Party System 6000 manual is essential for optimal use and troubleshooting. It provides detailed instructions for setup, connectivity, and customization, ensuring you maximize the system’s features. The manual also offers safety precautions, maintenance tips, and solutions for common issues like Bluetooth connectivity problems. By following the guidelines, users can prevent damage and extend the system’s lifespan. Referencing the manual ensures a seamless and enjoyable experience, making it a crucial resource for both beginners and advanced users.

Features of the Edison Party System 6000

The Edison Party System 6000 offers 6000 watts of peak power, dual 15-inch woofers, and dual 1.5-inch tweeters for exceptional sound quality. It features Bluetooth connectivity, a built-in equalizer, and stunning 360-degree LED lighting for an immersive experience. The system also includes dual microphones, USB, SD, and FM radio support, making it versatile for parties and events.

Power Output and Sound Quality

The Edison Party System 6000 delivers an impressive 6,000 watts of peak power, ensuring powerful and clear sound for large gatherings or outdoor events. Its dual 15-inch woofers and dual 1.5-inch tweeters provide deep bass and crisp highs, creating an immersive audio experience. The system also features a built-in equalizer, allowing users to customize bass and treble levels for optimal sound quality. With its high-power output and advanced speaker configuration, the system excels at producing dynamic and balanced sound, making it ideal for parties, karaoke, and professional events.

Speaker Configuration

The Edison Party System 6000 features a robust speaker configuration, including dual 15-inch woofers and dual 1.5-inch tweeters, delivering deep bass and crisp highs for a balanced sound experience. The system’s speaker setup is designed to handle high-power output, ensuring clarity and volume for large spaces or outdoor events. The dual woofers provide powerful low-frequency response, while the tweeters ensure detailed high-frequency reproduction, creating an immersive audio environment for parties and performances. The configuration is optimized for both music and karaoke, offering versatility and quality sound.

Bluetooth and Wireless Connectivity

The Edison Party System 6000 offers seamless Bluetooth connectivity, enabling wireless streaming from compatible devices. With dual Bluetooth inputs, you can connect two devices simultaneously, ensuring uninterrupted music playback. The system also supports advanced wireless features, allowing for easy pairing and stable connections. This wireless capability enhances convenience, letting you control the music from anywhere in the room, making it ideal for parties and social gatherings where flexibility and ease of use are essential for an engaging experience.

Lighting and Visual Effects

The Edison Party System 6000 features a stunning 360-degree flashing light ball that synchronizes with your music, creating an immersive atmosphere. LED-illuminated speakers further enhance the visual experience, pulsating in rhythm with the sound. The system also includes a built-in disco light mode, transforming any space into a vibrant party environment. These lighting effects are designed to elevate your gatherings, ensuring a dynamic and engaging visual display that complements the powerful audio output, making it a standout choice for entertaining guests.

Equalizer and Sound Customization

The Edison Party System 6000 offers a built-in equalizer, allowing users to fine-tune audio settings for optimal sound quality. Adjust bass and treble levels to suit your music genre or personal preference. The system also supports customizable audio profiles, enabling you to create unique soundscapes for different occasions. With intuitive controls and real-time adjustments, this feature ensures your music always sounds its best, whether you’re hosting a party or enjoying a quiet evening with friends.

Technical Specifications

The Edison Party System 6000 features a powerful 6000-watt peak output, dual 15-inch woofers, and dual 1.5-inch tweeters for clear, high-quality sound. It supports Bluetooth connectivity, LED lighting, and customizable equalizer settings for enhanced audio control.

Power Ratings and Output

The Edison Party System 6000 delivers an impressive 6000-watt peak power output, ensuring robust sound for large gatherings or outdoor events. With a 10000-watt PMPO, it offers clear and powerful audio reproduction. The system’s dual 15-inch woofers and dual 1.5-inch tweeters are optimized to handle high power levels, providing deep bass and crisp highs. This high-capacity output makes it ideal for parties, events, and immersive entertainment experiences, guaranteeing consistent performance at maximum volume.

Speaker Components

The Edison Party System 6000 features dual 15-inch woofers and dual 1.5-inch tweeters, delivering deep bass and crisp high-frequency sounds. The woofers are designed to handle the system’s high power output, ensuring robust low-end performance. The tweeters provide clear and detailed highs, enhancing overall audio clarity. With a 4-ohm impedance rating, these components are optimized for efficient power handling, ensuring distortion-free sound even at maximum volume. This configuration makes the system ideal for large-scale parties and outdoor events, offering balanced and immersive audio reproduction.

Connectivity Options

The Edison Party System 6000 offers versatile connectivity options, including dual Bluetooth inputs for seamless wireless streaming from devices. It also features USB, SD card, and AUX ports for wired connections, ensuring compatibility with a wide range of audio sources. Additionally, the system supports FM radio for tuning into live broadcasts. A remote control is included, allowing users to adjust settings conveniently. These connectivity options make it easy to integrate the system with various devices, enhancing its versatility for different entertainment needs.

Compatibility and Formats

The Edison Party System 6000 supports a wide range of formats, including CD, DVD, MP3, and USB/SD card playback, ensuring compatibility with various media sources. It is designed to work seamlessly with Bluetooth-enabled devices, allowing wireless streaming from smartphones, tablets, and laptops. The system also supports FM radio, offering access to live broadcasts. This versatility ensures that users can enjoy their favorite music across different formats and devices, making it a flexible choice for diverse entertainment needs.

Where to Find the Edison Party System 6000 Manual

Access the Edison Party System 6000 Manual via the official manufacturer’s website or trusted third-party repositories like ManualsLib. Ensure to verify the source for authenticity and safety.

Official Manufacturer Sources

The Edison Party System 6000 Manual can be directly downloaded from the official Edison Professional website. This ensures you receive a genuine, up-to-date, and safe version of the manual. Additionally, trusted platforms like ManualsLib and FCCID.io host verified PDF versions of the manual. These sources are reliable and provide easy access to the document, ensuring you can navigate and understand your system’s features and setup without risks associated with unofficial sites.

Third-Party Repositories

Third-party websites like ManualsLib and All-Guides Database offer downloadable PDF versions of the Edison Party System 6000 Manual. These platforms aggregate user manuals from various sources, providing easy access. While convenient, ensure the files are verified to avoid malware or incorrect information. Always cross-check with official sources for accuracy and safety. These repositories are useful alternatives if the manual isn’t available directly from the manufacturer.

Caution with Unofficial Sites

When downloading the Edison Party System 6000 Manual from unofficial sites, exercise extreme caution. Third-party repositories may host malicious files or outdated versions, posing security risks. Always verify the file’s authenticity and source to avoid malware or incorrect instructions. Stick to reputable platforms like ManualsLib or the manufacturer’s official website for safe and reliable downloads. Be wary of sites offering free access without proper verification, as they may compromise your device’s security.

Setup and Installation Guide

Unbox and inventory all components, then connect speakers and cables. Pair Bluetooth devices and configure settings for optimal performance. Follow manual instructions carefully for seamless setup.

Unboxing and Inventory

Start by carefully unpacking the Edison Party System 6000 from its box. Ensure all components, including the main unit, dual 15-inch woofers, tweeters, remote control, cables, and manual, are present. Inspect each item for damage or defects. Verify the inclusion of Bluetooth adapters, power cords, and auxiliary inputs. Organize the components to prepare for a smooth setup process. This step ensures everything is accounted for before proceeding with installation, minimizing potential issues later.

Connecting Components

Begin by powering off all components before connecting. Attach the dual 15-inch woofers and tweeters to the main unit using the provided cables. Plug in the power cords, ensuring they are securely connected to both the system and a power source. Connect auxiliary inputs, such as microphones or external devices, to the designated ports. For wireless connectivity, pair your device via Bluetooth following the manual’s instructions. Double-check all connections to ensure proper functionality before turning on the system.

Initial Setup and Pairing

Turn on the Edison Party System 6000 and ensure all components are powered up. Use the control panel or remote to navigate to the system menu. Select the Bluetooth option to enable wireless pairing. On your device, search for available Bluetooth connections and select the system’s designated name. Follow the manual’s instructions for entering any required passcodes. Once connected, test the audio output to ensure proper pairing. If issues arise, restart both devices or reset the system to retry the pairing process.

Troubleshooting Common Issues

Address common issues like Bluetooth connectivity problems by restarting devices and ensuring proper pairing. Check speaker connections for malfunctions and refer to the manual for detailed solutions.

Bluetooth Connectivity Problems

Experiencing issues with Bluetooth connectivity? Ensure your device is properly paired with the Edison Party System 6000. Restart both devices and check Bluetooth settings. Verify that devices are within range and compatible. If problems persist, reset the system by turning it off, waiting 30 seconds, and turning it back on. Consult the manual for detailed pairing instructions and troubleshooting steps to resolve connectivity issues effectively and enjoy uninterrupted music playback.

Speaker Malfunction

If your Edison Party System 6000 speakers are not functioning properly, first check all connections to ensure they are secure. Verify that the power supply is stable and that no cables are damaged. If issues persist, restart the system or perform a factory reset as outlined in the manual. Check for firmware updates, as outdated software may cause malfunctions. For severe problems, consult the troubleshooting section or contact customer support for professional assistance to restore optimal performance.

System Freeze or Restart Issues

If the Edison Party System 6000 freezes or restarts unexpectedly, ensure it is operating in a well-ventilated area to prevent overheating. Check for firmware updates, as outdated software may cause instability. Disconnect and reconnect all components, then power cycle the system. If issues persist, perform a factory reset via the settings menu. Avoid overloading the system with too many connected devices, and ensure all cables are securely plugged in. Consulting the manual for advanced troubleshooting steps can help resolve persistent problems.

Maintenance and Care

Regularly clean the system with a soft cloth to prevent dust buildup. Check for software updates to ensure optimal performance. Store components in a dry, cool environment to maintain functionality and longevity.

Cleaning the System

Regular cleaning is essential to maintain the Edison Party System 6000’s performance and appearance. Use a soft, dry cloth to gently wipe down the speakers and control panels, removing dust and debris. Avoid harsh chemicals or abrasive materials that could damage the finish. For stubborn stains, dampen the cloth with distilled water, but ensure the system is powered off and unplugged. Never spray liquids directly onto components. Proper cleaning ensures optimal sound quality and longevity of your system.

Software Updates

Keeping your Edison Party System 6000 up to date ensures optimal performance and access to new features. Regularly check for firmware updates via the official Edison website or through the system’s dedicated app; Download the update file to a USB drive, then connect it to the system. Follow the on-screen instructions to complete the update process; Ensure the system is powered on and connected to a stable power source during the update to avoid interruptions. Refer to the manual for detailed steps and troubleshooting tips.

Storage and Transportation

Store the Edison Party System 6000 in a cool, dry place to protect it from humidity and extreme temperatures. Avoid stacking heavy objects on the system to prevent damage. When transporting, use the original packaging or a sturdy case to safeguard components. Handle the system with care, as its speakers and electronics are sensitive. Ensure all cables and accessories are securely packed to avoid tangling or breakage. Avoid exposing the system to direct sunlight or moisture during transit. Always maintain a stable position during transport to prevent internal damage.

Safety Precautions

Ensure electrical safety by disconnecting power before maintenance. Avoid exposure to moisture and extreme temperatures. Handle the system carefully to prevent physical damage and ensure optimal performance.

Electrical Safety

Always prioritize electrical safety when using the Edison Party System 6000. Ensure the system is unplugged before performing any maintenance or repairs. Avoid exposing the device to moisture or extreme temperatures, as this can cause electrical hazards. Never attempt to modify the system or use unauthorized components, as this may void the warranty and pose safety risks. Keep the system away from flammable materials and ensure proper ventilation to prevent overheating. Follow the manufacturer’s guidelines and consult the manual for specific electrical safety precautions.

Handling and Installation

Handle the Edison Party System 6000 with care to avoid damage. Place the system on a stable, flat surface away from direct sunlight and moisture. During installation, ensure all components are securely connected to prevent loose wires or unstable setups. Use the provided mounting hardware if wall-mounting. Avoid touching electrical components with wet hands. For optimal performance, position speakers at ear level and maintain proper spacing. Refer to the manual for specific installation guidelines to ensure safe and effective setup.

Operating Environment

Ensure the Edison Party System 6000 operates in a stable environment. Maintain a room temperature between 32°F and 104°F (0°C to 40°C) and humidity levels below 80%. Avoid direct sunlight, moisture, or extreme temperatures. Keep the system away from flammable materials and ensure proper ventilation to prevent overheating. For outdoor use, protect it from rain and dust. Follow these guidelines to maintain optimal performance and longevity of your system.

Reading the Manual Effectively

Start by reviewing the table of contents to locate specific sections quickly. Pay attention to symbols, safety precautions, and troubleshooting guides to ensure proper system operation and maintenance.

Navigating the Manual

The manual is organized into clear sections, starting with an overview of the system and progressing through setup, features, and troubleshooting. Use the table of contents to quickly locate specific topics. Symbols and icons are explained to ensure clarity, while numbered lists guide you through complex procedures. Refer to the troubleshooting section for common issues and solutions. The manual also includes a glossary of terms and a detailed index for easy navigation. By following these guidelines, you can efficiently explore and understand the Edison Party System 6000.

Understanding Symbols and Terminology

The manual uses specific symbols and terms to guide you effectively. Symbols like ⚠️ indicate warnings, while ✓ highlights important steps. Terms such as “PMPO” (Peak Music Power Output) and “Bluetooth Pairing” are explained to ensure clarity. Familiarize yourself with these symbols and definitions to better understand the system’s operation. Refer to the glossary or symbol guide section for detailed explanations, ensuring safe and efficient use of the Edison Party System 6000.

Tips for Optimal Use

Adjust the equalizer settings to enhance sound quality. Use Bluetooth connectivity for seamless wireless streaming. Customize lighting effects to match your music’s rhythm for an immersive experience. Regularly update software and clean speakers to maintain performance. Experiment with settings to find your perfect sound balance.

Maximizing Sound Quality

To enhance your audio experience with the Edison Party System 6000, adjust the built-in equalizer to balance bass and treble levels according to your music preferences. Ensure proper placement of the dual 15-inch woofers and 1.5-inch tweeters to avoid sound interference. Use high-quality audio sources and maintain stable Bluetooth connectivity for uninterrupted streaming. Experiment with settings to optimize sound for different genres and environments. Regularly clean the speakers and update software to maintain peak performance and clarity.

Customizing Settings

Personalize your experience by adjusting the Edison Party System 6000’s equalizer to refine bass and treble levels. Experiment with lighting effects to synchronize visuals with your music. Utilize Bluetooth settings to customize device pairing preferences. The system also allows you to tailor audio inputs, such as microphone levels, for karaoke sessions. Explore these features to create a unique and immersive entertainment experience. Refer to the manual for detailed guidance on accessing and modifying these settings effectively.

Utilizing All Features

Maximize your Edison Party System 6000’s potential by exploring its versatile features. Sync the 360-degree light ball with your music for a dynamic visual experience. Leverage Bluetooth connectivity for seamless wireless streaming and dual microphone inputs for karaoke sessions. Adjust the built-in equalizer to tailor sound to your preference. Take advantage of the system’s compatibility with various formats, including USB, SD, and FM radio. Experiment with these features to create a unique and engaging atmosphere for any gathering, ensuring every function enhances your entertainment experience.

Customer Reviews and Feedback

Users praise the Edison Party System 6000’s powerful sound and vibrant lighting, calling it ideal for large gatherings. Some note occasional Bluetooth connectivity issues, but overall, it’s a favorite for party enthusiasts seeking a high-energy experience with customizable settings and reliable performance.

Positive Aspects

The Edison Party System 6000 is praised for its 6,000-watt peak power output, delivering powerful and clear sound through its dual 15-inch woofers and dual 1.5-inch tweeters. Users appreciate the built-in equalizer for customizable bass and treble settings, enhancing their audio experience. The 360-degree flashing light ball adds a vibrant visual element, synchronizing with the music to create an immersive atmosphere. Bluetooth connectivity ensures seamless wireless pairing, while support for multiple formats (DVD, CD, USB, SD, FM radio) offers versatility. The remote control adds convenience, making it a standout choice for indoor and outdoor events.

Areas for Improvement

While the Edison Party System 6000 impresses with its power and features, some users note room for enhancement. Bluetooth connectivity can be unstable at times, with limited range. The system’s bulkiness makes it less portable. Additionally, the lack of Wi-Fi connectivity may disappoint tech-savvy users. The user interface could be more modern and intuitive. Finally, the absence of water resistance may limit outdoor use. Addressing these areas could elevate the system’s overall performance and user satisfaction.

Frequently Asked Questions

  • How do I connect my device via Bluetooth to the Edison Party System 6000?
  • Where can I download the official Edison Party System 6000 manual?
  • Why is my system experiencing connectivity issues?
  • Can I update the system’s software?

Common Queries

Users often ask about Bluetooth connectivity issues, such as pairing problems or dropped connections. Another common query is how to download the manual PDF and where to find it on official sites. Many seek troubleshooting tips for system malfunctions, like speaker issues or software updates. Additionally, questions about compatibility with various devices and formats are frequent. These queries highlight the need for clear guidance to ensure optimal performance and user satisfaction with the Edison Party System 6000.

Clarifying Misconceptions

Some users believe the Edison Party System 6000 has a 10,000-watt output, but it actually delivers 6,000 watts of peak power. Others think it’s solely for professional use, yet it’s designed for both home and outdoor events. Additionally, there’s confusion about the manual’s availability; while it’s easily accessible via official sources, third-party sites may offer unreliable versions. Understanding these points ensures proper expectations and usage of the system.

The Edison Party System 6000 is a powerful 6000-watt system designed for vibrant gatherings, offering Bluetooth connectivity, dual 15-inch woofers, and synchronized lighting effects. This manual is essential for optimal use and troubleshooting, ensuring you maximize its features for unforgettable experiences.

Final Thoughts

The Edison Party System 6000 is a high-powered, feature-rich entertainment solution perfect for parties and events. With 6000 watts of peak power, dual 15-inch woofers, and Bluetooth connectivity, it delivers vibrant sound and synchronized lighting effects. The manual is essential for troubleshooting and optimizing its performance. Whether hosting indoor or outdoor gatherings, this system ensures unforgettable experiences. Its robust design and user-friendly interface make it a top choice for entertainment enthusiasts. Refer to the manual for tips on maximizing its potential and resolving common issues efficiently.

Encouragement for Further Exploration

Now that you’ve explored the Edison Party System 6000, dive deeper into its features to unlock its full potential. Experiment with the equalizer settings to customize your sound experience, and explore the lighting effects to create a vibrant ambiance for your gatherings. Refer to the manual for troubleshooting tips and optimization guides. By fully understanding and utilizing the system’s capabilities, you’ll elevate your events and create unforgettable memories. Keep exploring and enjoy the immersive audio experience this powerful system has to offer!

aqualink long beach schedule 2024 pdf

The Aqualink Long Beach Schedule 2024 PDF provides essential details about the water taxi service, including routes, fares, and holiday adjustments․ Download it for convenient trip planning․

Overview of Aqualink Water Taxi Service

The Aqualink Water Taxi Service is a convenient and scenic way to travel along Long Beach’s coastline․ Operated by Long Beach Transit, it connects key locations such as Alamitos Bay, Downtown Long Beach, Queen Mary, Aquarium of the Pacific, and Shoreline Village Dock 9․ The service provides an affordable and enjoyable alternative to traditional transportation, with one-way fares priced at $5․ Each trip takes approximately 40 minutes, offering stunning views of the city’s waterfront․ Aqualink operates seasonally, with extended service during summer months from Memorial Day to Labor Day․ It is a popular choice for both tourists and locals, making it an essential part of Long Beach’s transit network․

Importance of the 2024 Schedule PDF

The 2024 Aqualink Schedule PDF is a vital resource for planning trips efficiently․ It outlines service dates, operating hours, and route details, ensuring passengers can navigate Long Beach’s waterways smoothly․ The PDF highlights summer service from Memorial Day to Labor Day, including weekend and holiday schedules․ It also provides fare information and special service adjustments, such as modified schedules on Memorial Day and Labor Day․ By downloading the PDF, users can access all necessary details in one place, making it easier to plan their travel in advance․ This resource is particularly useful for tourists and regular commuters alike, helping them make the most of Aqualink’s convenient water taxi service․

Key Information About the 2024 Schedule

The 2024 schedule outlines summer service from Memorial Day to Labor Day, weekend and holiday options, and $5 fares for Alamitos Bay to Downtown routes, 40-minute trips․

Summer Service Dates and Operating Hours

The 2024 Aqualink summer service begins on Memorial Day, May 27, 2024, and runs through Labor Day, September 2, 2024․ Operating hours are from 9:00 AM to 9:00 PM daily․ The water taxi service connects key stops such as Alamitos Bay, Downtown Long Beach, Queen Mary, Aquarium of the Pacific, and Shoreline Village Dock 9․ During summer, the AquaLink operates every 30 minutes, ensuring convenient travel across Long Beach’s coastline․ The approximate 40-minute trip offers scenic views and an efficient way to explore the city․ Check the schedule for exact departure times to plan your summer outings effectively․

Weekend and Holiday Service Details

The Aqualink water taxi operates on weekends and holidays throughout the summer season, with service available from Memorial Day to Labor Day․ On Memorial Day, Monday, May 27, 2024, Aqualink will run on a modified schedule with reduced service hours․ Holiday service typically follows the same frequency as weekend operations, ensuring convenient travel for passengers․ Weekend service operates every 30 minutes, aligning with summer hours from 9:00 AM to 9:00 PM․ For exact departure times and any holiday-specific adjustments, passengers are advised to check the Long Beach Transit website or consult the 2024 schedule PDF․ This ensures seamless planning for trips during peak seasonal periods․

Memorial Day to Labor Day Service

Aqualink offers extended service during the Memorial Day to Labor Day period, providing daily operations from 9:00 AM to 9:00 PM․ This seasonal schedule starts on Memorial Day weekend, May 25, 2024, and continues through Labor Day, September 2, 2024․ The water taxi runs frequently between Alamitos Bay, Queen Mary, Aquarium of the Pacific, and Shoreline Village Dock 9, ensuring easy access to popular attractions․ Fares remain $5 one-way, with tickets available at each dock or through the Long Beach Transit website․ Passengers can enjoy a 40-minute scenic ride across the bay, making it a convenient and enjoyable option for both residents and visitors during the summer months․

Service Routes and Stops

Aqualink connects Alamitos Bay, Downtown Long Beach, Queen Mary, Aquarium of the Pacific, Shoreline Village Dock 9, and Rainbow Harbor at Aquarium Dock 4․

Alamitos Bay to Downtown Long Beach Route

The Alamitos Bay to Downtown Long Beach route offers a scenic 40-minute ride across the bay․ This route is popular for both residents and tourists, providing stunning views of the Long Beach coastline․ The AquaLink water taxi operates on this route, connecting key landmarks and offering a convenient transportation option․ With a fare of $5 one-way, it’s an affordable way to travel while enjoying the sights․ The service runs frequently during summer months, from Memorial Day to Labor Day, making it an ideal choice for those exploring Long Beach’s attractions․ Check the schedule for exact departure and arrival times to plan your trip efficiently․

Queen Mary, Aquarium of the Pacific, and Shoreline Village Dock 9 Stops

The Aqualink water taxi service connects iconic destinations such as the Queen Mary, Aquarium of the Pacific, and Shoreline Village Dock 9․ These stops provide easy access to popular attractions, making it convenient for tourists and locals alike․ The Queen Mary stop offers a historic experience, while the Aquarium of the Pacific stop is perfect for families․ Shoreline Village Dock 9 serves as a vibrant hub for dining and shopping․ With a single fare of $5, passengers can enjoy a 40-minute ride between these key locations․ Service operates daily during summer months, with adjustments on holidays․ Check the schedule for exact departure times to plan your visit seamlessly․

Fares and Payment Options

Aqualink offers a convenient fare of $5 for one-way trips․ Payment options include cash, credit cards, or mobile payments․ Tickets are available at the dock or online;

One-Way Fare Details

The Aqualink water taxi service offers an affordable one-way fare of $5 per person․ This cost-effective option is ideal for both residents and visitors, providing a convenient way to travel across Long Beach’s coastline․ The fare applies to all one-way trips between stops, including Alamitos Bay, Downtown Long Beach, and other key destinations․ Payment can be made using cash, credit cards, or mobile payments, ensuring flexibility for all passengers․ With a journey time of approximately 30-40 minutes, the Aqualink service is not only budget-friendly but also offers scenic views of the city․ This fare structure makes it an attractive option for those seeking a hassle-free and enjoyable water-based commute․

Payment Methods and Ticket Availability

Aqualink accepts various payment methods for ticket purchases, including cash, credit cards, and mobile payments, ensuring convenience for all passengers․ Tickets can be bought at physical locations such as the Long Beach Transit Visitor Center, Alamitos Bay Landing, and Shoreline Village Dock 9․ Additionally, tickets are available for purchase directly from the crew onboard the water taxi․ It is recommended to have exact change if paying with cash․ Tickets are valid for one-way trips and can be used immediately after purchase․ For ease of access, passengers can also plan their payments in advance by visiting the Long Beach Transit website for detailed fare information․

Holiday Adjustments and Exceptions

The Aqualink Long Beach Schedule 2024 PDF outlines holiday service changes, including Memorial Day and Labor Day adjustments․ Check the PDF for specific modified schedules and exceptions․

Modified Schedule for Memorial Day 2024

On Memorial Day, May 27, 2024, Aqualink will operate on a modified schedule with reduced service hours․ The water taxi will run between Downtown Long Beach and Alamitos Bay, with limited trips․ Fares remain $5 one-way, and the journey takes approximately 40 minutes․ Passengers are advised to check the official 2024 PDF for exact departure and arrival times, as the schedule will differ from regular operations․ This adjustment ensures service availability during the holiday while accommodating reduced demand․ Plan your trip by referring to the PDF for detailed information and to avoid any inconvenience․

Labor Day Service End Date

Aqualink’s 2024 summer service concludes on Labor Day, September 2, 2024․ The final trips of the season will operate on this day, with evening departures marking the end of the summer schedule․ After Labor Day, weekend and holiday service will cease until the following summer season․ Passengers are encouraged to plan their trips accordingly, as no additional weekend service will be available post-Labor Day․ The Labor Day service end date ensures the water taxi aligns with seasonal demand, providing reliable transportation throughout the summer months․ For exact departure times on the final day, refer to the official Aqualink Long Beach Schedule 2024 PDF․

Accessing the 2024 Schedule PDF

Download the Aqualink Long Beach Schedule 2024 PDF from the official Long Beach Transit website or obtain a physical copy at designated information centers for easy access․

Downloading from the Long Beach Transit Website

To access the Aqualink Long Beach Schedule 2024 PDF, visit the official Long Beach Transit website․ Navigate to the “Schedules” section and search for “Aqualink․” Click on the provided link to download the PDF directly․ This convenient option allows you to view departure times, routes, and fares from the comfort of your device․ The PDF is free and easily accessible, ensuring you can plan your trip efficiently․ For the most accurate and up-to-date information, always download the latest version from the official source․

Physical Copies and Information Centers

Physical copies of the Aqualink Long Beach Schedule 2024 PDF are available at key locations throughout the city․ Visit Alamitos Bay Landing, Queen Mary, Shoreline Village Dock 9, or Rainbow Harbor at Aquarium Dock 4 to pick up a printed schedule․ Additionally, Long Beach Transit Information Centers provide complimentary copies and can assist with trip planning․ These centers are staffed by knowledgeable representatives who can answer questions and offer detailed route information․ For added convenience, many local businesses and transit hubs also display or distribute the schedules․ Ensure you have a physical copy for easy reference while exploring Long Beach’s waterfront destinations․

Planning Your Trip with Aqualink

Use the Aqualink Long Beach Schedule 2024 PDF to plan your water taxi journey efficiently․ Check departure times, avoid peak hours, and connect seamlessly with other transit services․

Using the Schedule for Efficient Travel

Utilizing the Aqualink Long Beach Schedule 2024 PDF ensures a smooth journey․ Plan your route by checking real-time departure and arrival times, service frequency, and stop locations․ Identify peak hours to avoid delays and choose the most convenient travel times․ The schedule helps you coordinate with connecting transit services, such as buses or other water taxis, for a seamless trip․ Additionally, noting holiday adjustments and special events allows you to anticipate any service changes․ By referencing the PDF, you can maximize your travel efficiency and enjoy a hassle-free experience exploring Long Beach’s scenic coastline and popular attractions․

Connecting to Other Transit Services

The Aqualink Long Beach Schedule 2024 PDF simplifies connecting to other transit services․ Use the PDF to identify transfer points and synchronize your water taxi trips with buses or other water taxis․ Plan seamless transitions at key stops like Alamitos Bay or Downtown Long Beach․ The schedule includes maps and timetables to help you navigate between services․ By coordinating your travel, you can effortlessly explore Long Beach’s attractions without missing a beat․ This integration ensures a convenient and efficient travel experience, making it easy to connect to your next destination․

Additional Resources and Contacts

Visit the Long Beach Transit website for the Aqualink Long Beach Schedule 2024 PDF and contact customer service at (562) 591-2301 for assistance․

Long Beach Transit Customer Service Information

For inquiries about the Aqualink Long Beach Schedule 2024 PDF, contact Long Beach Transit customer service at (562) 591-2301․ Representatives are available to assist with schedule details, fare information, and route planning․ Visit the Long Beach Transit website for downloadable resources and real-time updates․ Customer service is also available at major transit centers, including Alamitos Bay Landing and Downtown Long Beach․ For the latest information, follow Long Beach Transit on social media or sign up for their newsletter․ Physical copies of the schedule are available at key stops and transit hubs for added convenience․

Official Website and Social Media Links

Visit the official Long Beach Transit website for the latest updates on the Aqualink Long Beach Schedule 2024 PDF․ The website offers downloadable schedules, fare details, and route maps․ Follow Long Beach Transit on Facebook, Instagram, and Twitter for real-time service alerts, special promotions, and community updates․ Stay connected to plan your trips efficiently and enjoy seamless water taxi experiences in Long Beach․ Social media platforms also provide a space to ask questions and engage with the transit community․

manual transmission oil change how often

Regular manual transmission oil changes are essential for maintaining optimal performance and longevity. Typically, fluid changes are recommended every 30,000 to 60,000 miles, depending on driving conditions and manufacturer guidelines. While some modern transmissions may last longer, adhering to these intervals ensures smooth operation and prevents premature wear. Always consult your vehicle’s manual for specific recommendations, as neglecting fluid changes can lead to costly repairs. Proper maintenance habits, including timely oil changes, are crucial for extending the lifespan of your manual transmission.

1.1 Importance of Transmission Fluid in Manual Transmissions

Transmission fluid is crucial for manual transmissions as it lubricates gears, synchronizers, and bearings, preventing wear and tear. It also protects against corrosion and overheating, ensuring smooth shifting and optimal performance. Without proper lubrication, components can degrade prematurely, leading to costly repairs.

Regular fluid changes help maintain viscosity and cleanliness, ensuring the transmission operates efficiently. Neglecting this can result in damage to critical parts, emphasizing the need for routine maintenance to extend the transmission’s lifespan and reliability.

1.2 Overview of Gear Oil vs. Transmission Fluid

Manual transmissions typically use gear oil rather than transmission fluid. Gear oil is designed to lubricate gears and synchronizers, reducing friction and wear. Transmission fluid, used in automatics, contains additives for torque converter and clutch pack operation, which manuals don’t need. Gear oil has higher viscosity for manual components, ensuring smooth shifting and protection against corrosion and heat. Using the correct fluid is vital for optimal performance and longevity, as specified by manufacturers for each transmission type.

How Often to Change Manual Transmission Fluid

Manual transmission fluid should typically be changed every 30,000 to 60,000 miles, depending on driving conditions and manufacturer recommendations. Harsh driving conditions may necessitate more frequent changes to prevent fluid degradation and maintain optimal performance. While some manufacturers don’t specify a service interval, regular fluid changes are crucial for prolonging transmission lifespan and preventing costly repairs. Adhering to this routine ensures smooth operation and protects critical components like gears and synchronizers.

2.1 General Recommendations for Manual Transmissions

Most manufacturers recommend changing manual transmission fluid every 30,000 to 60,000 miles under normal driving conditions. For vehicles subjected to frequent stop-and-go traffic, towing, or extreme temperatures, the interval may be shorter, typically around 30,000 miles. Some older models might extend this range up to 80,000 miles, but modern vehicles usually fall within the 30,000 to 60,000-mile guideline. Always consult your vehicle’s owner’s manual for specific recommendations, as some manufacturers may have unique requirements for their transmissions. Regular fluid changes help maintain smooth shifting and prevent premature wear on internal components.

2.2 Manufacturer-Specific Guidelines

Manufacturer-specific guidelines for manual transmission fluid changes vary slightly. For example, Honda recommends fluid changes every 30,000 to 60,000 miles, while Toyota suggests intervals of 30,000 to 50,000 miles. BMW and other European manufacturers often extend this range to 60,000 to 80,000 miles. Some manufacturers, like Ford, may not specify a fixed interval but advise changing the fluid every 30,000 to 60,000 miles under normal conditions. Always refer to your vehicle’s owner’s manual for precise recommendations, as these guidelines are tailored to the specific transmission and driving conditions. Manufacturer advice ensures optimal performance and longevity. Regular checks are essential.

2.3 Factors Influencing Fluid Change Intervals

Several factors influence how often manual transmission fluid should be changed. Driving conditions, such as frequent stop-and-go traffic or extreme temperatures, can reduce fluid lifespan. Aggressive driving or towing heavy loads also accelerates wear. Additionally, older transmissions may require more frequent changes due to increased wear on internal components. The type of gear oil used and its viscosity play a role in determining change intervals. While some transmissions can go longer between changes, adhering to these factors ensures optimal performance and prevents premature damage. Regular checks are essential to maintain transmission health.

Differences Between Automatic and Manual Transmission Fluid Changes

Manual and automatic transmissions differ in fluid change needs. Manuals typically require gear oil changes every 30,000 to 60,000 miles, while automatics need ATF changes at 60,000 to 100,000 miles. Automatics have more complex systems, requiring specialized fluids with additives for friction control and heat resistance. Manuals use simpler gear oils focused on lubrication. Service intervals and fluid types vary, impacting maintenance costs and procedures. Understanding these differences helps in scheduling appropriate care for each transmission type, ensuring longevity and performance.

3.1 Fluid Types and Purposes

Manual transmissions use gear oil, while automatics require automatic transmission fluid (ATF). Gear oil is designed for lubrication and protecting gears, with a focus on viscosity and wear resistance. ATF, however, includes additives for friction control, heat resistance, and smooth torque transfer. These differences reflect the distinct operational demands of each transmission type. Manual fluids prioritize durability and shear strength, whereas ATF ensures hydraulic performance and clutch pack engagement in automatic systems. Understanding these fluid types is crucial for proper maintenance and performance.

3.2 Service Intervals Comparison

Manual transmissions typically require fluid changes every 30,000 to 60,000 miles, while automatics often go 60,000 to 100,000 miles between services. Manuals need more frequent attention due to simpler designs and higher gear stress, whereas automatics rely on advanced fluid properties for longer intervals. Driving conditions, such as heavy use or towing, may reduce these intervals for both types. Always consult the manufacturer’s guidelines for specific recommendations tailored to your vehicle. Proper timing ensures optimal performance and prevents premature wear.

Signs Your Manual Transmission Needs a Fluid Change

Difficulty shifting gears, grinding noises, or a dark, dirty fluid color are key indicators your manual transmission needs a fluid change. Addressing these signs early prevents damage.

4.1 Common Indicators of Worn-Out Fluid

Several signs indicate your manual transmission fluid is worn out. Difficulty shifting gears, grinding or clunking noises during gear changes, and a dark or black fluid color are key indicators. Slipping gears, hesitation, or a lack of smooth engagement during acceleration may also occur. Additionally, a burning smell from the transmission area can signal degraded fluid. These symptoms often appear gradually, so monitoring your transmission’s behavior is crucial for early detection and maintenance.

4.2 Performance Issues to Watch For

If the fluid is worn out, your manual transmission may exhibit erratic shifting, such as slipping or refusing to engage gears smoothly. You might experience a delay in acceleration or a lack of responsiveness when shifting. Grinding noises during gear changes can intensify, and the transmission may feel sluggish or uncooperative. Over time, this can lead to increased wear on internal components, potentially causing costly damage. Monitoring these performance issues is crucial, as they often signal the need for a fluid change to restore smooth operation and prevent further deterioration.

Benefits of Regular Manual Transmission Fluid Changes

Regular fluid changes extend the transmission’s lifespan, improve shifting efficiency, and reduce wear on internal components; Fresh fluid ensures smoother gear operation and prevents costly repairs.

5.1 Extended Transmission Lifespan

Regular manual transmission fluid changes significantly extend the lifespan by lubricating gears and bearings, preventing metal-on-metal wear. Fresh fluid removes contaminants and reduces heat buildup, minimizing component damage. This maintenance ensures smooth operation and delays the need for costly rebuilds. With proper care, manual transmissions can last up to 300,000 miles or more, depending on driving conditions. Consistent fluid changes are a simple yet effective way to protect your investment and maintain reliability over time.

5.2 Improved Performance and Efficiency

Regular manual transmission fluid changes enhance performance by ensuring smooth gear engagement and reducing friction between components. Clean fluid maintains optimal lubrication, preventing overheating and wear on synchronizers and gears. This results in crisper shifts, better fuel efficiency, and consistent power delivery. Fresh fluid also reduces the risk of transmission hesitation or sluggishness, especially during acceleration. By keeping the transmission cool and well-lubricated, regular fluid changes contribute to a more responsive and efficient driving experience, making maintenance a key factor in preserving peak performance.

DIY vs. Professional Transmission Fluid Change

A DIY manual transmission fluid change can be cost-effective for those with mechanical skills, while professional service offers expertise and convenience at a higher cost.

6.1 Pros and Cons of DIY Service

DIY transmission fluid changes offer cost savings and a hands-on learning experience; However, they require mechanical skills and tools, risking errors if done improperly. While cheaper, improper draining or refilling can lead to damage. Professionals ensure accuracy and use specialized tools, but at a higher cost. DIY suits confident individuals, while others prefer expert reliability.

6.2 When to Seek Professional Help

Seek professional help if you lack mechanical skills or tools for a manual transmission fluid change. Experts ensure proper draining, refilling, and filter replacement, minimizing risks of damage. Additionally, if your vehicle has unique requirements or complex systems, professionals can handle specialized needs. Their experience guarantees a flawless service, preventing potential issues from improper techniques. For peace of mind and reliability, especially with high-value or performance vehicles, professional service is advisable.

Step-by-Step Process of Changing Manual Transmission Fluid

Prepare tools and materials, drain old fluid, refill with new gear oil, and replace the filter if needed. Follow manufacturer guidelines for a smooth process.

7;1 Tools and Materials Required

To perform a manual transmission fluid change, you’ll need a socket set, drain pan, new transmission filter, gasket, and gear oil. A car jack or lift may also be necessary for better access. Ensure you have gloves and safety goggles for protection. Check your vehicle’s manual for specific tools and fluid type recommendations. Having all materials ready beforehand ensures a smooth and efficient process. Proper preparation helps avoid delays and potential mistakes during the fluid change procedure.

7.2 Draining and Refilling the Fluid

Draining the old fluid typically involves locating and removing the drain plug at the bottom of the manual transmission. Place a drain pan underneath to catch the fluid. Once drained, replace the plug securely. Refilling requires a funnel and the specified gear oil type. Pour the new fluid slowly to avoid spills. Check the manual for the correct fluid capacity and type. After refilling, start the engine and shift through all gears to circulate the new fluid. Ensure no leaks are present before finalizing the process.

Cost of Manual Transmission Fluid Change

A DIY manual transmission fluid change typically costs $20 to $50 for materials. Professional service ranges from $100 to $250, depending on labor and fluid type.

8.1 Average Cost for DIY and Professional Service

The cost of a manual transmission fluid change varies depending on whether you opt for DIY or professional service. For a DIY change, you can expect to spend between $20 and $50, covering the cost of gear oil, a filter (if applicable), and a drain pan. Professional services typically range from $100 to $250, including labor costs, fluid replacement, and potential additional parts. Factors such as the type of fluid required, vehicle make, and service location (e.g., dealership vs. independent shop) influence the final cost. Always compare prices and services to find the best value for your vehicle.

8.2 Factors Influencing the Cost

Several factors influence the cost of a manual transmission fluid change. The type of gear oil required, as specified by the manufacturer, can vary in price based on quality and brand. Labor costs differ between independent shops and dealerships, with dealers often charging higher rates; Additionally, the volume of fluid needed, which depends on the transmission size, affects the total cost. In some cases, extra components like gaskets or filters may be necessary, further increasing expenses. These variables ensure that the cost can vary significantly from one vehicle to another.

Tips for Maintaining Manual Transmission Health

Regular fluid checks, smooth driving habits, and timely inspections are key to maintaining manual transmission health. Use the correct gear oil and avoid aggressive shifting to prolong lifespan.

9.1 Driving Habits to Prolong Fluid Life

Smooth and consistent driving habits significantly prolong manual transmission fluid life. Avoid aggressive acceleration, rapid shifting, and riding the clutch, as these actions generate excessive heat and stress. Extreme temperatures, towing, or off-road driving can also degrade fluid faster. Regularly check fluid levels and condition, especially after prolonged exposure to harsh conditions. Maintaining a steady driving style and avoiding unnecessary strain on the transmission helps preserve fluid integrity and overall system health. Consistent care ensures optimal performance and extends the lifespan of your manual transmission.

9.2 Regular Inspection and Maintenance

Regular inspections and maintenance are vital for ensuring the health of your manual transmission. Check fluid levels periodically and monitor for signs of degradation, such as dark color or particles. Inspect for leaks around seals and gaskets, addressing them promptly to prevent fluid loss. Follow the manufacturer’s recommended service schedule for fluid changes, typically every 30,000 to 60,000 miles. Consistent maintenance helps prevent premature wear and ensures smooth operation. By staying proactive, you can extend the lifespan of your transmission and avoid costly repairs down the line.

Regular manual transmission oil changes, typically every 30,000 to 60,000 miles, are crucial for maintaining performance and longevity. Consistent maintenance prevents issues and extends lifespan.

10.1 Summary of Key Takeaways

Manual transmission oil changes are vital for optimal performance and longevity. Most manufacturers recommend changing the fluid every 30,000 to 60,000 miles, depending on driving conditions. Regular maintenance helps prevent wear and tear, ensuring smooth operation. Neglecting fluid changes can lead to costly repairs. Always consult your vehicle’s manual for specific guidelines, as intervals may vary. Consistent care extends the transmission’s lifespan and maintains efficiency. Prioritizing timely oil changes is a simple yet effective way to keep your manual transmission running smoothly for years.

10.2 Final Recommendations for Manual Transmission Care

Always adhere to your vehicle manufacturer’s recommendations for fluid changes, typically every 30,000 to 60,000 miles. Check your owner’s manual for specific guidelines. Driving habits, such as frequent stop-and-go traffic or off-road use, may require more frequent service. Monitor fluid condition and top it off as needed. Regular maintenance prevents wear and tear, ensuring smooth operation and prolonging transmission life. Consistent care is key to maintaining your manual transmission’s performance and longevity, avoiding costly repairs down the road.