pedal tractor value guide

Pedal tractors are miniature, kid-friendly versions of farm tractors, often sought after by collectors for their nostalgic charm and historical significance․ Their value is influenced by rarity, condition, and brand․

What Are Pedal Tractors?

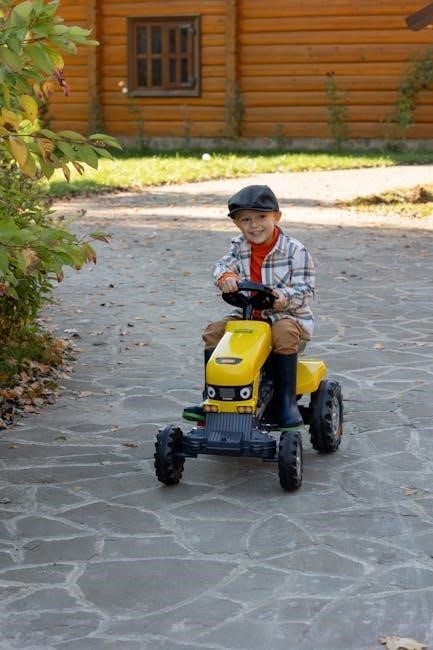
Pedal tractors are miniature, kid-friendly versions of farm tractors, designed for play and recreation․ Typically made of durable materials like steel or cast iron, these tractors feature pedals, a steering wheel, and a seat, allowing children to mimic farming activities․ Many models are scale replicas of real tractors, preserving their original design and functionality․ Over time, pedal tractors have evolved from simple toys to highly detailed collectibles, often sought after by enthusiasts for their nostalgic charm and historical significance․ Their popularity spans across generations, as they serve both as toys for kids and as cherished items for collectors․ With their enduring appeal, pedal tractors have become a unique blend of childhood joy and investable memorabilia․

The Evolution of Pedal Tractors

The evolution of pedal tractors reflects advancements in design, materials, and cultural trends․ Early models, emerging in the mid-20th century, were simple, durable toys made from steel and cast iron, often resembling real tractors․ As farming machinery evolved, so did pedal tractors, with manufacturers incorporating intricate details and authentic features․ The 1960s and 1970s saw the rise of licensed models, mirroring popular tractor brands like John Deere and International Harvester․ Modern pedal tractors now feature adjustable seats, gear systems, and even electric-powered versions, catering to both children and collectors․ This transformation from basic toys to sophisticated collectibles highlights their enduring appeal and adaptability, making them a beloved part of agricultural heritage and playtime traditions across generations․

Why Pedal Tractors Are Popular Among Collectors

Pedal tractors have become highly sought after by collectors due to their nostalgic appeal, intricate details, and historical significance․ Many collectors cherish these tractors as reminders of their childhood or rural heritage․ The craftsmanship and accuracy in replicating real tractor models, such as vintage International Harvester designs, add to their allure․ Additionally, limited production runs and the rarity of certain models make them valuable additions to collections․ Collectors also appreciate how these tractors combine functionality with collectibility, as they can still be enjoyed by children while potentially increasing in value over time․ The joy of the hunt for rare models and the satisfaction of preserving agricultural history further fuel their popularity among enthusiasts․

Understanding Pedal Tractor Value

Pedal tractor value is determined by factors like rarity, condition, and brand․ Vintage models, especially International Harvester, often hold higher worth due to collector demand and historical significance․

What Determines the Value of a Pedal Tractor?

The value of a pedal tractor is influenced by several key factors, including its rarity, condition, and brand․ Rare and vintage models, such as those from International Harvester, tend to command higher prices due to their historical significance and collector demand․ The condition of the tractor plays a crucial role, with well-preserved or restored models retaining or increasing in value over time․ Additionally, the originality of parts and the presence of unique features can significantly impact valuation․ Market trends and auction results also provide insights into current value, as collector preferences and demand often drive pricing․ While price guides like the Dicks Farm Toy Price Guide offer a baseline, they may not always reflect real-time market fluctuations․ Ultimately, the combination of these factors determines whether a pedal tractor is a valuable collectible or a cherished toy․

The Importance of Condition in Valuation

The condition of a pedal tractor is a critical factor in determining its value․ Well-maintained models with minimal wear and tear typically command higher prices, as collectors prioritize authenticity and originality․ Rust, dents, and missing parts can significantly lower a tractor’s worth, while a pristine or restored condition can enhance its appeal․ Even minor details, such as the integrity of paint and decals, play a role in valuation․ Auctions often highlight the importance of condition, as buyers are willing to pay a premium for tractors that are in excellent shape․ Regular maintenance and proper storage can help preserve a pedal tractor’s condition, ensuring it retains or increases in value over time․ Thus, condition serves as a cornerstone in assessing the worth of these collectibles․

Rare and Vintage Models: Key to Higher Value

Rare and vintage pedal tractors are highly sought after by collectors, often commanding premium prices due to their scarcity and historical significance․ Models from iconic brands like International Harvester or antique designs with unique features are particularly valuable․ The age and rarity of a pedal tractor can significantly influence its worth, with older models in original condition fetching higher prices․ For instance, early 20th-century pedal tractors with intact paint and mechanisms are considered gems․ Additionally, limited-edition or discontinued models often see their value appreciate over time․ Collectors are willing to pay more for tractors that showcase craftsmanship and nostalgic appeal, making rare and vintage models a key focus in the pedal tractor market․

Price Guides for Pedal Tractors

Price guides, like the Dicks Farm Toy Price Guide, provide valuable insights into pedal tractor values, listing over 8,000 items with computer-averaged prices from dealers and auctions, offering a market baseline;

Overview of the Dicks Farm Toy Price Guide

The Dicks Farm Toy Price Guide is a comprehensive resource for collectors, listing over 8,000 pedal tractors, implements, and scale models from 1886 to 2024․ It provides computer-averaged values from multiple dealers and auctions, offering a reliable baseline for market trends․ This guide is widely trusted for its accuracy and detail, making it a go-to reference for both seasoned collectors and new enthusiasts․ Regular updates ensure it reflects current market fluctuations, helping users understand the evolving value of vintage and rare models․ While it serves as an essential tool for pricing, it also educates collectors on historical trends and the significance of specific brands like International Harvester․ The guide’s focus on 1/16 and 1/32 scale models highlights their popularity in the collector community, making it indispensable for those seeking to buy, sell, or appraise pedal tractors․

How Price Guides Reflect Market Trends

Price guides, such as the Dicks Farm Toy Price Guide, play a crucial role in reflecting current market trends for pedal tractors․ By compiling data from auctions and dealer sales, they provide a snapshot of collector demand and preferences․ For instance, the rise in popularity of vintage International Harvester models has been mirrored in price guides, showcasing increased valuations․ These guides also highlight shifts in regional demand and the influence of global collectors․ While they offer valuable insights, it’s important to note that market trends can fluctuate rapidly due to factors like rare finds or changes in collector preferences․ As a result, price guides are most effective when used in conjunction with real-time market data, ensuring collectors stay informed about the dynamic nature of pedal tractor values․

Limitations of Price Guides in Determining Value

While price guides like the Dicks Farm Toy Price Guide offer valuable insights, they have limitations in determining the exact value of pedal tractors․ Prices listed are often averages and may not reflect real-time market fluctuations or unique auction dynamics․ Additionally, rare or exceptional models might not be accurately represented, as their value can be highly subjective․ Condition plays a significant role, and guides may not account for specific defects or restorations․ Emotional appeal and brand loyalty can also drive prices beyond guide values․ Furthermore, guides may not capture regional disparities or emerging trends․ Therefore, while they provide a baseline, buyers and sellers should supplement guide data with current auction results, expert opinions, and thorough inspections to ensure accurate valuations․

Factors Influencing Market Value

Market value is shaped by auctions, collector demand, and brand reputation, with rare models and vintage International Harvester tractors commanding higher prices due to nostalgia and scarcity․

The Role of Auctions in Setting Pedal Tractor Values

Auctions play a pivotal role in determining pedal tractor values by creating competitive marketplaces where collectors bid on rare and vintage models․ These events often set benchmarks for pricing, as the demand for specific tractors becomes evident through bidding wars․ Platforms like Mecum Auctions have become prominent, showcasing high-value sales that influence the broader market․ The transparency of auction outcomes allows collectors and sellers to gauge current trends and adjust their expectations accordingly․ Additionally, auctions highlight the desirability of certain brands, such as International Harvester, which frequently fetch premium prices․ Thus, auctions not only facilitate the sale of pedal tractors but also serve as key indicators of their market value and trends․

Collector Demand and Its Impact on Prices

Collector demand significantly influences the pricing of pedal tractors, driving the market trends and value fluctuations․ Enthusiasts often seek rare and vintage models, such as early 20th-century International Harvester pedal tractors, which have seen a surge in popularity․ This increased demand leads to higher prices, especially for tractors in excellent condition or with unique features․ Additionally, nostalgia plays a role, as collectors aim to own pieces of agricultural history․ The limited supply of certain models exacerbates competition among buyers, further driving up prices․ As a result, the pedal tractor market remains dynamic, with values often rising in response to collector interest․ This demand-driven environment highlights the importance of understanding collector preferences when assessing or pricing pedal tractors․

The Influence of Brand and Model on Value

The brand and model of a pedal tractor play a crucial role in determining its value․ Well-known brands like International Harvester, John Deere, and Case are highly sought after by collectors, often commanding higher prices due to their reputation and historical significance․ Specific models, such as the International Harvester Cub Cadet or the John Deere 520, are particularly prized for their rarity and nostalgic appeal․ Limited edition or unique designs further enhance value, as they are harder to find and more desirable to enthusiasts․ Additionally, tractors with original parts or those that closely resemble their full-scale counterparts are more valuable․ The combination of brand prestige and model scarcity creates a tiered market, where certain tractors stand out as premium collectibles, influencing both their demand and final sale price․

Current Market Trends

The market for pedal tractors is thriving, driven by nostalgia and collectibility․ Vintage International Harvester models are particularly sought after, while emerging global markets expand the collector base․

Recent Trends in Pedal Tractor Collecting

Recent trends in pedal tractor collecting highlight a growing interest in vintage and rare models, particularly those from iconic brands like International Harvester․ Collectors are drawn to these tractors for their nostalgic appeal and historical significance․ The rise of online marketplaces and auction platforms has made it easier for enthusiasts to discover and purchase these items, contributing to increased demand․ Additionally, the popularity of farm toys and pedal tractors has expanded globally, with emerging markets showing a keen interest in these collectibles․ Many collectors now view pedal tractors not only as playful toys but also as valuable investments, with some models appreciating significantly over time․ This shift has led to a more competitive market, where condition, rarity, and authenticity play crucial roles in determining value․

The Rise of Vintage International Harvester Models

Vintage International Harvester (IH) pedal tractors have experienced a significant surge in popularity among collectors․ These models, known for their durability and nostalgic appeal, are highly sought after due to their historical connection to the agricultural industry․ Many collectors appreciate the intricate details and craftsmanship of IH pedal tractors, which often mirror their full-sized counterparts․ Auctions have seen a steady increase in demand for these models, with rare examples fetching premium prices․ The brand’s legacy and the emotional connection to farming heritage contribute to their desirability; As a result, vintage IH pedal tractors have become a cornerstone of many collections, both for their aesthetic value and as a sound investment opportunity․ This trend reflects a broader appreciation for vintage farm toys and their enduring charm in the collector community․

Emerging Markets for Pedal Tractors

Emerging markets for pedal tractors are expanding globally, driven by increasing interest in vintage collectibles and nostalgia for agricultural heritage․ Countries in Asia, South America, and Eastern Europe are witnessing growing demand, particularly among younger collectors and enthusiasts․ Online marketplaces have played a crucial role in connecting buyers and sellers worldwide, facilitating the growth of these markets․ The accessibility of international shipping and digital platforms has made it easier for collectors to acquire rare and unique pedal tractors․ Additionally, the rise of social media and specialized forums has fostered communities that celebrate and trade these miniature tractors․ As a result, the global appeal of pedal tractors continues to grow, attracting new generations of collectors and investors․ This expansion not only broadens the market but also contributes to the appreciation of pedal tractor values in these regions․

Buying and Selling Strategies

Researching market trends and using price guides like Dicks Farm Toy Price Guide helps buyers and sellers make informed decisions․ Authenticity, condition, and rarity significantly impact value, guiding negotiation strategies․

Tips for Buying a Pedal Tractor at Auction

When buying a pedal tractor at auction, research the market value using guides like the Dicks Farm Toy Price Guide to set realistic expectations․ Inspect the tractor’s condition, focusing on original parts and signs of wear․ Set a budget and stick to it to avoid overspending․ Consider attending preview events to closely examine the tractor before bidding․ Start with lower bids and gradually increase to avoid overpaying․ Be aware of additional fees, such as buyer’s premiums․ Don’t hesitate to ask questions about the tractor’s history or authenticity․ Finally, stay patient and disciplined during the bidding process to secure the best value for your purchase․ These strategies ensure a successful and satisfying auction experience for collectors and enthusiasts alike․

How to Sell Your Pedal Tractor for Maximum Value

To sell your pedal tractor for maximum value, start by researching its market demand and current pricing trends using guides like the Dicks Farm Toy Price Guide․ Highlight the tractor’s condition, rarity, and original features in your listing․ Use high-quality photos to showcase details such as paint quality, decals, and functionality․ Emphasize any unique aspects, like a vintage International Harvester model or rare brand-specific parts․ Consider listing on reputable platforms or auction sites where collectors frequent․ Set a competitive but realistic price based on similar sales․ Be open to reasonable offers and negotiate fairly․ Finally, ensure clear communication about the tractor’s history and condition to build trust with potential buyers․ These strategies will help you achieve the best possible price for your pedal tractor․

Online Marketplaces for Pedal Tractors

Online marketplaces have become essential platforms for buying and selling pedal tractors, offering a wide audience and competitive pricing․ Popular options include eBay, Etsy, and specialized farm toy forums․ These platforms allow sellers to showcase their pedal tractors with detailed descriptions, high-quality photos, and videos, attracting both casual buyers and serious collectors; Additionally, auction sites like Mecum Auctions and Proxibid frequently feature pedal tractors, particularly rare and vintage models․ Social media platforms such as Facebook Marketplace and Instagram also provide opportunities to connect with enthusiasts․ When listing, ensure accurate descriptions and highlight the tractor’s condition, rarity, and authenticity to maximize appeal․ Online marketplaces not only simplify the selling process but also enable global reach, making them a vital tool for pedal tractor enthusiasts and collectors alike․

Maintenance and Restoration

Regular maintenance and careful restoration preserve the value of pedal tractors․ Cleaning, lubricating moving parts, and replacing worn components are essential for maintaining functionality and appearance over time․

Preserving the Value of Your Pedal Tractor

Preserving the value of a pedal tractor requires careful maintenance and storage․ Regular cleaning with mild detergents prevents rust and corrosion, while proper lubrication of moving parts ensures functionality․ Avoid exposing the tractor to harsh weather or excessive wear, as this can diminish its condition and, consequently, its value․ Storing it in a dry, climate-controlled environment is ideal․ Refurbishments should be minimal and done with original or authentic parts to retain its historical integrity․ Over-restoration or the use of non-original components can lower its appeal to collectors․ Keeping the tractor in its original state, with minimal alterations, is key to maintaining its value․ By taking these steps, you not only protect your pedal tractor but also ensure it remains a valuable and cherished collectible for years to come․

Restoration Tips to Maintain or Increase Value

When restoring a pedal tractor, prioritize authenticity to maintain or enhance its value․ Use original or vintage parts whenever possible, as reproductions can lower the tractor’s appeal․ Gentle cleaning and minimal sanding preserve original finishes, while repainting should match the factory colors․ Lubricate moving parts to ensure functionality without altering their historical state․ Avoid over-restoration, as it can detract from the tractor’s charm․ Document the restoration process, including before-and-after photos, to provide transparency for potential buyers․ Consulting with experienced collectors or restorers can also guide decisions that align with market expectations․ By focusing on preserving the tractor’s original character, you can maintain or even increase its value in the collector’s market․

Common Mistakes to Avoid in Restoration

When restoring a pedal tractor, several common mistakes can harm its value․ Over-sanding or stripping original paint can erase historical significance․ Using incorrect paint colors or modern finishes can also detract from authenticity․ Avoid replacing original parts with reproduction pieces unless necessary, as collectors prefer untouched components․ Over-lubrication can lead to a “too new” appearance, reducing charm․ Neglecting to document the restoration process can make it harder to prove authenticity․ Additionally, ignoring minor flaws in favor of perfection can lower the tractor’s appeal, as collectors often appreciate original wear․ Lastly, rushing the restoration can lead to overlooked details․ By avoiding these pitfalls, restorers can preserve the tractor’s value and historical integrity․

Investment Potential

Pedal tractors offer intriguing investment opportunities due to their rarity and nostalgic appeal, with certain vintage models showing consistent appreciation in value over the years․

Are Pedal Tractors a Good Investment?

Pedal tractors can be a viable investment option due to their historical significance and nostalgic appeal․ Rare and vintage models, especially those from brands like International Harvester, often appreciate in value over time․ Collectors seek these tractors for their condition, rarity, and brand heritage, making them a stable investment․ However, market trends and demand fluctuations can impact their worth․ While they may not offer the same liquidity as traditional investments, their tangible nature and potential for long-term appreciation make them attractive to enthusiasts and collectors․ Proper research and understanding of market dynamics are crucial for maximizing returns․ Thus, pedal tractors can be a rewarding investment for those passionate about vintage collectibles and farming history․

Historical Appreciation of Pedal Tractors

Pedal tractors have shown consistent historical appreciation, with rare and vintage models increasing significantly in value․ Auctions often highlight high-demand models, such as vintage International Harvester tractors, which draw substantial interest․ Price guides like the Dicks Farm Toy Price Guide document these trends, reflecting how values rise over time․ factors like condition, rarity, and brand heritage play key roles․ Early models from the mid-20th century, particularly those with original parts, have seen notable appreciation․ Collectors’ growing interest in nostalgic and agricultural memorabilia further drives this upward trend․ As a result, pedal tractors are not only cherished collectibles but also assets with potential long-term growth, appealing to both enthusiasts and investors․ Their historical significance and enduring popularity ensure continued appreciation in the market․

Case Studies of High-Value Pedal Tractor Sales

Several high-value pedal tractor sales highlight their growing appeal․ A rare 1950s-era International Harvester pedal tractor sold at Mecum Auctions for $12,000, showcasing its historical allure․ Another notable sale involved a vintage Eska model, fetching $8,500 due to its pristine condition and rarity․ Limited editions, such as the 1960s AMF 502, have also commanded premium prices, with one selling for $10,000 at a specialized auction․ These cases emphasize how factors like condition, rarity, and brand heritage significantly impact value․ Additionally, models with unique historical provenance, such as those once owned by prominent collectors, often achieve higher prices․ These sales underscore the potential for pedal tractors to serve as valuable investments, attracting both enthusiasts and serious collectors․

proof of miscarriage letter pdf

A proof of miscarriage letter PDF is a document confirming a miscarriage, providing essential details like the date, type, and medical confirmation for legal or emotional purposes․

1․1 Overview of the Document

A proof of miscarriage letter PDF is an official document issued by a healthcare provider to confirm a miscarriage․ It typically includes details such as the date and type of miscarriage, any treatments provided, and the physician’s certification․ This document serves as legal and medical proof, offering evidence for employers, insurance purposes, or emotional closure․ It is often required for leave requests, maternity benefits, or medical records․ The letter is standardized and legally binding, ensuring accuracy and confidentiality․ It plays a crucial role in both personal and administrative processes following a miscarriage, providing clarity and validation for various needs․

1․2 Importance of the Letter

The proof of miscarriage letter is crucial for providing formal evidence of a miscarriage․ It serves as documentation for employers, insurance companies, or legal entities, confirming the medical event․ This letter is essential for obtaining maternity leave, benefits, or emotional closure․ It also satisfies legal and medical requirements, ensuring confidentiality and accuracy․ Additionally, it supports workplace considerations, such as leave requests and eligibility for maternity pay․ The document is protected under HIPAA rights, guaranteeing access to medical records while maintaining privacy․ Its importance extends to personal and administrative processes, offering validation and support during a sensitive time․ It is a vital tool for both practical and emotional needs following a miscarriage․

Understanding Miscarriage Confirmation

Miscarriage confirmation involves blood tests for hormone levels and ultrasound results to determine pregnancy status․ Follow-up tests may be needed if initial results are inconclusive․

2․1 Blood Tests for Hormone Levels

Blood tests measuring hCG levels are crucial for confirming a miscarriage․ Typically, two tests 48 hours apart are conducted to assess whether hormone levels are rising or falling․ If hCG levels drop significantly, it indicates a miscarriage․ These tests are often used alongside ultrasound results to confirm the absence of a viable pregnancy․ In some cases, additional blood tests may be required if initial results are inconclusive․ Accurate documentation of these hormone levels is essential for generating a proof of miscarriage letter, providing medical evidence for further proceedings․

2;2 Ultrasound Results

Ultrasound results play a critical role in confirming a miscarriage by providing visual evidence of the pregnancy’s status․ A transvaginal or abdominal ultrasound can reveal an empty uterus, a non-viable embryo, or fetal demise․ If the ultrasound shows no heartbeat or an empty gestational sac, it supports the diagnosis of miscarriage․ In some cases, especially early in pregnancy, ultrasound results may be inconclusive, requiring follow-up scans․ These results, combined with blood test findings, are essential for documenting the miscarriage in the proof of miscarriage letter․ They offer a clear, medically verified confirmation needed for legal, emotional, or administrative purposes․

2․3 Follow-Up Tests and Timing

Follow-up tests are crucial after an initial miscarriage diagnosis to confirm the completion of the process and ensure no tissue remains․ Typically, blood tests measuring hormone levels, such as hCG, are repeated 48 hours apart to monitor any changes․ If levels are not declining as expected, further testing or intervention may be required․ Ultrasound scans may also be repeated to check for any remaining pregnancy tissue․ Timing is important, as some cases may require waiting 1-2 weeks before final confirmation․ These follow-up tests provide the necessary documentation for the proof of miscarriage letter, ensuring accuracy and completeness for medical and legal purposes․

Purpose of a Proof of Miscarriage Letter

The purpose of a proof of miscarriage letter is to provide official documentation for employers, emotional closure, and to meet medical or legal requirements following a miscarriage․

3․1 Providing Evidence for Employers

A proof of miscarriage letter serves as official documentation for employers, enabling women to request leave or workplace accommodations․ It confirms the miscarriage, supporting maternity pay claims and ensuring employers understand the situation․ This document is crucial for verifying eligibility for workplace policies related to pregnancy loss․ Employers often require this letter to process leave requests or provide necessary support․ The letter typically includes the date of miscarriage and medical confirmation, ensuring its validity․ It protects the employee’s rights and facilitates a smooth return to work when ready․ This formal evidence helps employers adhere to legal and compassionate workplace practices following a miscarriage․

3․2 Emotional Closure and Documentation

A proof of miscarriage letter provides emotional closure by formally acknowledging the loss, helping individuals process grief․ It serves as documentation, allowing reflection and preserving memories․ This document can be a therapeutic tool, offering validation of the experience․ Many find comfort in having a formal record, which can also be shared with loved ones or used to seek support․ It acts as a keepsake, honoring the pregnancy and loss․ The letter’s existence helps in navigating emotional recovery, providing a tangible acknowledgment of a significant life event․ This documentation supports personal healing and serves as a reminder of resilience during a challenging time․

3․3 Medical and Legal Requirements

A proof of miscarriage letter satisfies medical and legal needs by verifying the occurrence and details of the miscarriage․ It includes the date, type, and treatments performed, ensuring accuracy․ Legally, this document protects patient rights, such as accessing benefits or leave․ Medically, it aids in future care, providing a history that guides healthcare providers․ HIPAA ensures patients can obtain this record, maintaining privacy and accessibility․ The letter is essential for both personal and official use, serving as a verified source of information․ Its structured format guarantees clarity and legitimacy, making it a crucial document for various purposes․ It adheres to medical and legal standards, ensuring reliability and compliance․

Legal and Medical Information in the Letter

The letter includes the date and type of miscarriage, treatments performed, and physician certification, providing a legally binding and medically accurate record of the event․

4․1 Date and Type of Miscarriage

The letter specifies the exact date of the miscarriage and classifies it as spontaneous or induced․ This information is crucial for medical records and legal purposes, ensuring clarity․

4․2 Treatments or Procedures Performed

The letter outlines any medical interventions, such as dilation and curettage (D&C) or medication, used to manage the miscarriage․ It also notes follow-up care to ensure proper healing and prevent complications․

4․3 Physician’s Certification

The proof of miscarriage letter includes a physician’s certification, confirming the miscarriage details․ This section is legally binding, as it is signed by a licensed healthcare provider․ It typically includes the date of the miscarriage, the type, and any relevant medical observations․ The physician’s signature and contact information are also provided to validate the document․ This certification serves as official evidence for employers, insurance, or legal purposes․ It ensures the authenticity of the miscarriage claim and supports any necessary paperwork or benefits․ The physician’s certification is a critical component, making the document admissible for various official uses․

How to Obtain a Proof of Miscarriage Letter

To obtain a proof of miscarriage letter, consult your healthcare provider, who will document the medical details and provide the necessary certification for official purposes․

5․1 Consulting Your Healthcare Provider

Consulting your healthcare provider is the first step in obtaining a proof of miscarriage letter․ They will assess your medical history, confirm the miscarriage through blood tests or ultrasound, and provide the necessary documentation․ Be prepared to discuss your symptoms and any treatments you received․ Your provider will then issue a formal letter detailing the miscarriage, which may include the date, type, and any procedures performed․ This document serves as official proof and is essential for legal, employment, or emotional closure purposes․ Ensure all details are accurately recorded to avoid delays or complications in future processes․

5․2 Requirements for the Letter

The proof of miscarriage letter must include specific details to be considered valid․ It should state the date and type of miscarriage, along with any treatments or procedures performed․ The letter must be signed and dated by the attending physician, confirming the miscarriage and its medical confirmation․ Additionally, it should include the patient’s name, medical record number, and the healthcare provider’s contact information․ The document must be printed on official letterhead to ensure authenticity․ These requirements ensure the letter meets legal and medical standards, making it suitable for submission to employers, insurance providers, or legal entities․ Accuracy and completeness are crucial for its acceptance․

5․3 HIPAA Rights and Access to Medical Records

Under HIPAA, patients have the right to access their medical records, including a proof of miscarriage letter․ This ensures confidentiality and allows individuals to obtain necessary documentation․ Patients can request a copy of their miscarriage confirmation from their healthcare provider, who must comply within 30 days․ The letter must be provided in the requested format, such as a PDF, ensuring accessibility․ This process protects patient privacy while granting access to essential medical information․ Understanding these rights helps individuals navigate the process smoothly and ensures they receive the documentation they need for legal, emotional, or administrative purposes․ HIPAA safeguards both privacy and access, making it a crucial aspect of obtaining such letters․

Filling Out the Miscarriage Paperwork Online

Filling out miscarriage paperwork online is a convenient and secure process․ Use platforms like SignNow or DocHub to access templates, fill in personal and medical details, and e-sign․ Ensure the document is legally binding by following platform guidelines․ Many tools offer HIPAA-compliant security to protect sensitive information․ Gather required details beforehand to streamline the process․ Online completion saves time and reduces paperwork hassle, while maintaining confidentiality and legal validity․ This method is efficient and accessible, making it easier to obtain the necessary documentation․

6․1 Gathering Personal and Medical Information

Gathering personal and medical information is the first step in filling out miscarriage paperwork online․ You will need to provide your full name, address, contact details, and date of birth․ Medical information includes the date of the miscarriage, type of miscarriage, and any treatments or procedures performed․ Additionally, details like test results, such as blood tests or ultrasound findings, may be required․ Ensure all information is accurate and up-to-date to avoid delays․ It’s important to have all necessary documents and details readily available before starting the process․ If unsure about any information, consult your healthcare provider for clarification․ This step ensures the document is complete and valid․

6․2 Using Online Platforms for Completion

Online platforms simplify the process of completing miscarriage paperwork by offering fillable templates and digital tools․ Platforms like airSlate SignNow and DocHub provide easy-to-use interfaces where you can input personal and medical information directly into the document․ These platforms often include features like electronic signatures, allowing you to sign the document digitally․ Once completed, you can download the PDF or share it securely with relevant parties․ Many platforms ensure legal compliance and security, making the process efficient and stress-free․ Using online services saves time and reduces the hassle of manual paperwork, ensuring your proof of miscarriage letter is professional and legally binding․

6․3 Ensuring Legal Binding and Security

Ensuring the legal binding and security of your proof of miscarriage letter is crucial․ Online platforms often use encryption to protect your data, ensuring confidentiality․ Electronic signatures are legally recognized in many jurisdictions, making your document binding․ Platforms like airSlate SignNow and DocHub comply with regulations such as HIPAA, safeguarding medical information․ When completing the paperwork online, verify the platform’s security features and ensure it adheres to legal standards․ Secure storage and access controls further protect your document from unauthorized use․ Always choose reputable services to maintain the integrity and legality of your proof of miscarriage letter․

Emotional and Medical Follow-Up After Miscarriage

Emotional and medical follow-up after miscarriage is vital for healing․ Counseling, support groups, and regular check-ups help address grief and ensure physical recovery, promoting overall well-being․

7․1 Importance of Follow-Up Care

Follow-up care after a miscarriage is crucial for both physical and emotional recovery․ Regular check-ups ensure proper healing and prevent complications․ It also provides an opportunity to address emotional trauma and receive support․ Healthcare providers can monitor recovery, offer counseling, and provide guidance for future pregnancies․ Proper documentation, such as a proof of miscarriage letter, is often required for medical and legal purposes․ This documentation ensures that all necessary information is recorded and accessible, aiding in the healing process and any future medical needs, while also supporting legal requirements․

7․2 Coping with Emotional Loss

Coping with the emotional loss after a miscarriage can be challenging; It is important to acknowledge the grief and allow yourself time to heal․ Many find comfort in sharing their feelings with loved ones or support groups․ Professional counseling can also provide guidance and reassurance during this difficult period․ Remember, there is no set timeline for healing, and everyone experiences loss differently․ Seeking support, whether through therapy or community resources, can help navigate the emotional journey․ Taking care of your mental well-being is a crucial step toward recovery and finding peace after a miscarriage․

7․3 Support Resources and Counseling

Accessing support resources and counseling is vital for emotional recovery after a miscarriage․ Organizations like the NHS and online platforms offer counseling services tailored to pregnancy loss․ Many hospitals provide bereavement support teams to help navigate grief․ Online communities and forums connect individuals with shared experiences, fostering a sense of understanding and comfort․ Professional counselors specialize in miscarriage-related trauma, offering personalized guidance․ Additionally, local support groups provide a safe space to share feelings and receive empathy․ These resources emphasize that no one needs to face their loss alone, ensuring access to compassionate care and understanding during this challenging time․

Workplace Considerations and Leave

Informing employers about a miscarriage is crucial for requesting leave and understanding eligibility for maternity pay or benefits․ Legal protections ensure employees receive fair treatment during recovery;

8․1 Informing Employers and Requesting Leave

Informing your employer about a miscarriage is a sensitive yet necessary step to request leave and ensure workplace support․ Providing a proof of miscarriage letter serves as formal documentation, enabling employers to understand your situation and offer appropriate accommodations․ This letter is crucial for accessing legal protections, such as maternity leave or sick leave, depending on your workplace policies․ Employers are obligated to provide fair treatment and necessary time off for recovery, as mandated by employment laws․ It’s important to review your company’s leave policies and communicate clearly with your HR department to ensure a smooth process during this challenging time․

8․2 Maternity Pay and Benefits Eligibility

A proof of miscarriage letter is often required to determine eligibility for maternity pay and benefits․ Even if the pregnancy ended in miscarriage, some employers offer paid leave or financial support to aid recovery․ The letter serves as official documentation, verifying the circumstances and allowing employers to process claims fairly․ Eligibility varies by company policies and local laws, but providing this document ensures you can access entitled benefits․ It’s important to submit the letter to your HR department promptly to avoid delays in receiving compensation․ Legal protections often extend to miscarriage cases, ensuring fair treatment and financial support during this challenging time․

8․3 Legal Protections for Employees

Employees experiencing a miscarriage are protected under various laws, ensuring fair treatment and leave entitlements․ In many regions, laws like the Pregnancy Discrimination Act (PDA) and the Family and Medical Leave Act (FMLA) provide protections․ These laws allow eligible employees to take unpaid, job-protected leave for health-related issues, including recovery from miscarriage․ A proof of miscarriage letter serves as essential documentation to support leave requests; Employers are legally obligated to accommodate such requests without discrimination․ These protections ensure employees can heal physically and emotionally without jeopardizing their job security․ Submitting the letter helps enforce these rights and guarantees fair workplace treatment during a sensitive time․

A proof of miscarriage letter is crucial for documentation, providing evidence, and emotional closure․ It ensures medical and legal requirements are met, aiding in the healing process․

9․1 Summary of Key Points

The proof of miscarriage letter PDF is a critical document that confirms a miscarriage, providing essential details such as the date, type, and medical confirmation․ It serves multiple purposes, including offering evidence for employers, aiding emotional closure, and fulfilling legal and medical requirements․ The letter typically includes the date and type of miscarriage, treatments performed, and a physician’s certification․ Obtaining this document involves consulting healthcare providers, understanding specific requirements, and ensuring compliance with HIPAA rights․ Online platforms simplify the process of filling out and signing the paperwork securely․ Follow-up care is crucial for both physical and emotional recovery, emphasizing the importance of proper documentation and support resources․ This document plays a vital role in facilitating the necessary steps after a miscarriage, ensuring clarity and validation for all parties involved․

9․2 Importance of Proper Documentation

Proper documentation in a proof of miscarriage letter is essential for legal, medical, and emotional reasons․ It ensures clarity and validation, providing a formal record of the event․ Accurate details, such as the date, type of miscarriage, and medical confirmation, are vital for employers, insurance claims, and personal records․ This documentation also supports emotional closure, serving as recognition of the loss․ Additionally, it protects privacy and rights under HIPAA, ensuring secure access to medical information․ Properly executed paperwork prevents disputes and facilitates necessary processes, making it a cornerstone of post-miscarriage procedures․ Its accuracy and completeness are crucial for all stakeholders involved․

9․3 Moving Forward After Miscarriage

Moving forward after a miscarriage involves emotional healing, medical care, and support․ It’s important to seek counseling or join support groups to process grief․ Consulting healthcare providers ensures proper recovery and addresses concerns about future pregnancies․ Emotional well-being is crucial, and leaning on loved ones can provide comfort․ Documentation, like a proof of miscarriage letter, helps with closure and practical matters․ Taking time to heal physically and emotionally is essential․ Many women find strength in sharing their experiences or engaging in memorial activities․ Moving forward doesn’t erase the loss but helps in rebuilding life with resilience and hope for the future․

spectrum tv guide cincinnati ohio

Spectrum TV Guide Cincinnati Ohio Overview

The Spectrum TV Guide for Cincinnati‚ Ohio‚ offers detailed channel listings‚ live TV schedules‚ and on-demand content․ TitanTV enhances this with detailed programming information‚ aiding users in discovering favorite shows effortlessly․

1․1 Features of the Spectrum TV Guide

The Spectrum TV Guide offers a variety of features tailored for Cincinnati‚ Ohio viewers․ It provides detailed live TV listings‚ allowing users to browse channels and programs in real-time․ The guide also includes on-demand content availability‚ enabling viewers to access shows and movies at their convenience․ A robust search functionality helps users quickly find specific programs or channels․ Additionally‚ the guide supports DVR and recording options‚ letting viewers schedule and store their favorite shows․ Customization options allow users to personalize their channel lineup‚ ensuring a seamless and user-friendly experience․ These features make it an essential tool for managing TV viewing preferences efficiently․

1․2 How to Access the Spectrum TV Guide in Cincinnati

To access the Spectrum TV Guide in Cincinnati‚ viewers can use the Spectrum TV app on devices like Roku or smart TVs․ The guide is also available through the Spectrum website or mobile app․ Users can browse live TV listings‚ on-demand content‚ and search for specific programs․ TitanTV is another resource that provides detailed programming information for Cincinnati channels․ For traditional cable users‚ the guide can be accessed via the cable box using the remote control․ Ensuring the app or guide is updated and restarting devices can resolve access issues‚ providing a smooth viewing experience․

Program Listings and Schedules

Spectrum TV Guide offers detailed program listings and schedules for Cincinnati‚ Ohio․ TitanTV provides enhanced programming info‚ while the guide itself includes live TV and on-demand content․

2․1 Live TV Listings for Cincinnati

The Spectrum TV Guide provides real-time live TV listings for Cincinnati‚ allowing users to explore current and upcoming programs․ TitanTV enhances this by offering detailed programming information‚ ensuring accurate schedules․ The guide simplifies browsing with a user-friendly interface‚ enabling quick access to favorite channels․ Users can seamlessly navigate through live listings‚ filter by genres‚ or search for specific shows․ Compatible with various devices‚ the Spectrum TV Guide ensures Cincinnati viewers stay updated on live broadcasts․ Regular updates guarantee the most current programming details‚ making it an essential tool for planning TV viewing experiences․

2․2 On-Demand Content Availability

The Spectrum TV Guide for Cincinnati offers extensive on-demand content‚ allowing viewers to access a wide range of shows‚ movies‚ and original programming․ Users can browse through a vast library of on-demand titles‚ searchable by genre‚ title‚ or actor․ The guide integrates seamlessly with Spectrum’s on-demand service‚ enabling quick access to content․ This feature complements live TV listings‚ providing flexibility for viewers to watch their favorite programs at any time․ The on-demand availability is accessible via the Spectrum TV app on various devices‚ including Roku‚ ensuring convenience and enhanced viewing experiences for Cincinnati subscribers․

2․3 Search Functionality in the TV Guide

The Spectrum TV Guide features an advanced search tool‚ enabling users to quickly find specific programs‚ movies‚ or channels․ By entering text using the arrow keys‚ viewers can search through live TV listings‚ on-demand content‚ and recorded shows․ This functionality streamlines the process of discovering new programs or locating favorite series․ The search tool is intuitive and accessible across all devices‚ including Roku‚ making it easy for Cincinnati users to navigate and enjoy their viewing experience efficiently․ This feature enhances the overall usability of the Spectrum TV Guide‚ catering to diverse viewer preferences and needs․

Troubleshooting Common Issues

Common issues with the Spectrum TV Guide include loading problems‚ “No Data” messages‚ and channel unavailability․ These are often resolved by checking internet connections or restarting devices․

3․1 Why the Spectrum TV Guide Might Not Load

The Spectrum TV Guide may fail to load due to temporary issues with data retrieval or display․ Common causes include poor internet connectivity‚ outdated software‚ or server-side problems․ Users should first check their internet connection and ensure all devices are properly connected․ Restarting the device or updating the Spectrum TV app can often resolve the issue․ Additionally‚ clearing cached data or reinstalling the app may help restore functionality․ If problems persist‚ contacting Spectrum support is recommended to address potential server-related issues or regional outages affecting the guide’s performance in Cincinnati‚ Ohio․

3․2 “No Data” Message on the Spectrum TV Guide

The “No Data” message on the Spectrum TV Guide indicates a temporary inability to retrieve or display programming information․ This issue often arises from connectivity problems‚ such as unstable internet or outdated app versions․ To resolve this‚ users should disconnect and reconnect their device’s power cord‚ ensuring a proper reboot․ Additionally‚ checking for software updates and clearing the app’s cache can help restore functionality․ If the problem persists‚ reaching out to Spectrum’s customer support is advised to investigate potential server-side issues or regional outages affecting the guide’s data availability in Cincinnati‚ Ohio․

3․3 Channel Unavailability on the Spectrum TV Guide

Channel unavailability on the Spectrum TV Guide can occur due to temporary server issues‚ connectivity problems‚ or specific channel outages․ Users may encounter this when certain channels fail to appear or load properly․ To resolve this‚ restarting the device or checking internet connectivity often helps․ Additionally‚ ensuring the app is updated and clearing cached data can restore access․ If the issue persists‚ contacting Spectrum support is recommended to investigate potential regional outages or technical difficulties affecting specific channels in Cincinnati‚ Ohio․

How to Use the Spectrum TV Guide

Navigate the Spectrum TV Guide to explore channels‚ shows‚ and on-demand content․ Use the search feature to quickly find programs and set up recordings for convenience․

4․1 Navigating the Spectrum TV Guide Interface

The Spectrum TV Guide interface is user-friendly‚ featuring a grid layout that displays channels‚ program titles‚ and schedules․ Users can scroll through time slots and channels using arrow keys or touch controls․ The guide includes a search bar for quick access to specific shows or networks․ Filters allow viewers to sort content by genre‚ popularity‚ or favorites․ Detailed program descriptions are available by selecting a listing‚ and users can set reminders or recordings directly from the guide․ This intuitive design ensures seamless navigation and enhances the overall viewing experience for Spectrum subscribers in Cincinnati․

4․2 Setting Up and Updating the TV Guide

Setting up the Spectrum TV Guide in Cincinnati involves accessing it through the Spectrum TV app or website․ Upon launching‚ the guide automatically populates with your local channel lineup and schedule․ Regular updates ensure the most accurate program listings․ If the guide fails to load‚ disconnecting the power cord and reconnecting often resolves the issue․ Manual refresh options are also available to update the guide instantly․ TitanTV integration further enhances the guide’s functionality‚ providing detailed program descriptions and schedules․ This seamless setup and update process ensures viewers always have access to current and accurate TV listings in Cincinnati․

Viewing Options and Customization

Spectrum TV Guide Cincinnati offers live TV‚ on-demand content‚ and DVR options․ Customize your viewing experience by selecting preferred channels and scheduling recordings for favorite shows․

5․1 Live TV vs․ Recorded Content

Spectrum TV Guide Cincinnati allows users to switch seamlessly between live TV and recorded content․ Live TV offers real-time broadcasts‚ while recorded content provides flexibility to watch shows later․ The guide integrates both options‚ enabling easy navigation; Users can access live broadcasts for current events and sports or choose recorded content for convenience․ TitanTV enhances this by providing detailed program listings‚ making it easier to discover and manage favorite shows․ This dual functionality ensures a personalized viewing experience‚ catering to both immediate and delayed watching preferences․

5․2 Customizing Your Channel Lineup

Spectrum TV Guide Cincinnati lets users customize their channel lineup for a tailored viewing experience․ By signing in‚ viewers can access and manage their subscribed channels‚ filtering options to prioritize favorites․ The guide allows easy organization‚ enabling quick access to preferred networks․ This feature enhances navigation‚ ensuring users spend less time searching and more time watching․ Customization options are particularly useful for managing family-friendly content or focusing on specific genres․ TitanTV further supports this by providing detailed channel descriptions‚ helping users make informed decisions about their lineup preferences․

5․3 DVR and Recording Options

The Spectrum TV Guide in Cincinnati offers robust DVR and recording options‚ allowing users to schedule and manage their favorite shows effortlessly․ Viewers can record live TV‚ set up series recordings‚ and access stored content from any compatible device․ The guide integrates seamlessly with DVR functionality‚ enabling easy organization and playback of recorded programs․ Additionally‚ users can manage storage space and prioritize recordings‚ ensuring they never miss their favorite content․ This feature enhances the overall viewing experience‚ providing flexibility and convenience for users in Cincinnati․

Technical Requirements and Compatibility

Ensure your device meets Spectrum TV Guide’s minimum system requirements for smooth operation․ Compatibility extends to Roku‚ smartphones‚ tablets‚ and web browsers‚ offering flexible viewing options․

6․1 Minimum Requirements for Spectrum TV Guide

The Spectrum TV Guide requires a stable internet connection and compatible devices․ For optimal performance‚ ensure your Roku‚ smartphone‚ or tablet runs the latest software․ The app supports various browsers like Chrome and Firefox․ A minimum internet speed of 10 Mbps is recommended for smooth streaming and guide updates․ Additionally‚ verify that your device meets the operating system requirements‚ such as Android 5․0 or iOS 11 and above․ Regular updates are essential to access new features and maintain functionality․ Always check for updates before using the guide to ensure compatibility and performance․

6․2 Compatible Devices for Spectrum TV Guide

The Spectrum TV Guide is accessible on various devices‚ including Roku players‚ Samsung smart TVs‚ and iOS/Android smartphones or tablets․ It also supports streaming devices like Chromecast and Apple TV․ For browser access‚ Chrome‚ Firefox‚ and Safari are compatible․ Ensure your device runs the latest software for optimal performance․ Spectrum regularly updates its compatibility list‚ so check their official website for the most current information․ This ensures uninterrupted access to live TV listings‚ on-demand content‚ and guide features․ Compatibility varies by device type and operating system‚ so verify requirements before use․

Local Cincinnati Channels and Lineup

Cincinnati residents can access a wide range of broadcast and cable channels through Spectrum‚ including sports‚ news‚ and entertainment․ Antenna TV listings are also available locally․

7․1 Broadcast TV Channels in Cincinnati

Cincinnati offers a diverse range of broadcast TV channels‚ including major networks like ABC‚ CBS‚ NBC‚ and FOX․ These channels provide local news‚ sports‚ and entertainment․ Public access channels are also available‚ offering community-focused content․ TitanTV is a reliable source for detailed programming information․ Users can easily navigate through listings to find their favorite shows․ The Spectrum TV Guide helps viewers manage channel lineups and troubleshoot issues like “No Data” messages․ This ensures seamless access to Cincinnati’s broadcast TV offerings‚ catering to various viewer preferences and needs․

7․2 Cable and Satellite Channel Lineup

The Spectrum TV Guide for Cincinnati offers an extensive cable and satellite channel lineup‚ featuring popular networks like ESPN‚ HBO‚ and CNN․ Users can access a variety of genres‚ including sports‚ movies‚ and news․ The guide allows viewers to customize their channel lineup‚ marking favorites for easy access․ TitanTV provides detailed programming information‚ making it simple to navigate through available channels․ Additionally‚ Spectrum’s HD and On Demand content ensures a rich viewing experience․ The interactive guide helps users efficiently explore and manage their cable and satellite options in Cincinnati․

7․3 Antenna TV Listings for Cincinnati

The Spectrum TV Guide for Cincinnati includes antenna TV listings‚ offering access to local broadcast channels like ABC‚ CBS‚ FOX‚ and NBC․ Users can view live TV schedules and program details directly through the guide․ TitanTV enhances this feature by providing detailed programming information for over-the-air channels․ The guide supports HD quality for antenna channels‚ ensuring a clear viewing experience․ Additionally‚ viewers can search for specific shows or channels‚ making it easier to find favorite programs․ This feature complements Spectrum’s cable and satellite offerings‚ providing a comprehensive TV viewing experience in Cincinnati․

User Experience and Tips

Spectrum TV Guide enhances viewing by integrating TitanTV for detailed listings․ Tips include regular updates‚ effective search‚ and customizing channels for a personalized experience․

8․1 Tips for Maximizing Your Spectrum TV Guide Experience

Regularly update your Spectrum TV Guide to ensure access to the latest channel listings and features․ Use the search tool to quickly find specific shows or genres․ Customize your channel lineup to prioritize favorite networks‚ and take advantage of DVR options to record content․ For troubleshooting‚ restart your device or check for system updates․ Explore TitanTV for detailed programming information to enhance your viewing experience․ Organize your viewing schedule by setting reminders and filtering live vs․ recorded content for convenience․

8․2 How to Quickly Find Your Favorite Shows

To quickly find your favorite shows on the Spectrum TV Guide in Cincinnati‚ use the search feature by typing the show name‚ channel‚ or genre․ This tool searches across live TV‚ recordings‚ and on-demand content․ Organize your favorites by customizing your channel lineup and setting reminders for upcoming episodes․ Filter options allow you to view only live or recorded content․ For enhanced accuracy‚ ensure your guide is updated․ Utilize TitanTV for detailed programming information to streamline your search and enjoy seamless access to your preferred shows․

Comparing Spectrum TV Guide with Other Providers

Spectrum TV Guide stands out with its user-friendly interface and robust search functionality‚ making it a top choice compared to other cable and satellite providers․

9․1 Spectrum vs․ Other Cable Providers in Cincinnati

Spectrum TV Guide excels in Cincinnati with its intuitive interface and extensive channel lineup․ Compared to other providers‚ Spectrum offers superior on-demand content integration and a robust search feature․ TitanTV complements Spectrum’s guide with detailed programming information‚ enhancing user experience․ While other providers may lack seamless integration across platforms‚ Spectrum ensures compatibility with various devices‚ including Roku․ This makes Spectrum a top choice for viewers seeking convenience and variety in Cincinnati’s cable services․

9․2 Unique Features of Spectrum TV Guide

The Spectrum TV Guide stands out with its user-friendly interface‚ offering seamless navigation and personalized viewing experiences․ Its advanced search functionality allows quick access to programs across live TV‚ recordings‚ and on-demand content․ Additionally‚ Spectrum’s DVR capabilities enable users to record and watch shows at their convenience․ The guide also provides detailed program descriptions and customizable channel lineups‚ enhancing viewer satisfaction․ Its compatibility with multiple devices‚ including Roku‚ further sets it apart‚ ensuring uninterrupted entertainment across platforms․

Future of the Spectrum TV Guide

The Spectrum TV Guide is expected to integrate advanced features like TitanTV listings‚ voice search‚ and AI recommendations‚ enhancing user experience with personalized and multi-device compatibility․

10․1 Upcoming Updates and Features

Future updates to the Spectrum TV Guide will likely include enhanced search functionality‚ personalized recommendations‚ and improved multi-device synchronization․ TitanTV’s integration will provide more detailed programming information‚ making it easier for users to discover new shows․ Additionally‚ voice search and AI-powered suggestions are expected to be added‚ offering a more intuitive experience․ Cloud-based DVR enhancements and better compatibility with smart home devices are also anticipated‚ ensuring seamless access to content․ These updates aim to streamline navigation and cater to evolving viewer preferences‚ keeping the Spectrum TV Guide at the forefront of TV guide technology․

10․2 Trends in TV Guide Technology

TV guide technology is evolving rapidly‚ with TitanTV leading the way by providing detailed programming information and enhancing user experience․ The integration of AI and machine learning allows for personalized recommendations‚ while voice search and multi-device synchronization are becoming standard features․ Cloud-based DVR and seamless smart home integration are also on the rise‚ offering users greater flexibility․ These advancements aim to create a more intuitive and accessible platform‚ ensuring viewers can easily navigate and discover content․ The future of TV guides lies in smarter‚ more connected‚ and user-centric technologies․

ductwork installation guide pdf

Welcome to our comprehensive guide on ductwork installation! This section introduces the fundamentals of ductwork systems, their importance in HVAC efficiency, and the essential considerations for proper installation to ensure optimal airflow and performance. Learn how to plan, execute, and maintain ductwork systems effectively.

1.1 Overview of Ductwork Systems

Ductwork systems are networks of channels that distribute air throughout buildings, ensuring efficient heating, cooling, and ventilation. They consist of rigid or flexible ducts, fittings, and vents, designed to maintain consistent airflow and pressure. Properly installed ductwork enhances HVAC performance, reduces energy consumption, and improves indoor air quality. The layout and assembly of these systems are critical, as they directly impact system efficiency and long-term functionality. Understanding the components and their roles is essential for installers to ensure optimal performance and meet safety standards. This section provides a foundational understanding of ductwork systems, setting the stage for detailed installation guidance.

1.2 Importance of Proper Installation

Proper ductwork installation is crucial for ensuring efficient HVAC system performance, energy savings, and indoor air quality. Incorrectly installed ducts can lead to leakage, poor airflow, and increased energy bills. A well-executed installation minimizes risks of moisture damage, mold growth, and safety hazards. Additionally, it ensures compliance with local building codes and manufacturer warranties. Proper installation also extends the lifespan of the HVAC system by reducing strain on components. By following guidelines and best practices, installers can achieve a reliable, durable, and high-performing ductwork system that meets the needs of the building and its occupants. This section emphasizes the significance of meticulous installation techniques for optimal results.

1.3 Safety Precautions and Guidelines

Ensuring safety during ductwork installation is paramount to prevent injuries and system damage. Always wear personal protective equipment (PPE), such as gloves and safety glasses, when handling sharp materials. Properly support ducts during installation to avoid accidents and structural damage. Follow manufacturer guidelines for handling and storing materials to prevent wear and tear. Ensure all power tools are used correctly, and keep loose clothing tied back. Never bypass safety protocols, as improper installation can lead to system malfunctions or safety hazards. Additionally, ensure the system is installed by a qualified professional to maintain warranty validity and compliance with local codes. Adhering to these guidelines ensures a safe and efficient installation process.

Materials and Components

Ductwork systems rely on high-quality materials, including rigid and flexible ducts, insulation, and specialized fittings. Accessories like vents and registers ensure efficient airflow and system performance.

2.1 Types of Ducts: Rigid vs. Flexible

Rigid ducts, typically made of metal or fiberglass, are durable and ideal for straight runs, offering superior airflow and minimal leakage. Flexible ducts, constructed with insulated, flexible materials, are perfect for navigating tight spaces and reducing noise. Proper selection between rigid and flexible ducts depends on the specific HVAC system requirements, space constraints, and desired performance efficiency. Each type has unique installation considerations, with rigid ducts requiring precise fitting and flexible ducts needing careful handling to avoid kinking and damage. Balancing these factors ensures an optimal ductwork system for any application.

2.2 Insulation and Soundproofing Materials

Proper insulation and soundproofing are critical for maximizing energy efficiency and reducing noise in ductwork systems. Common materials include fiberglass, foam insulation, and acoustic liners, which help minimize heat loss and prevent sound transmission. Insulation thickness and type should be selected based on the system’s operating conditions and environmental requirements. For instance, wrapped insulation is ideal for exterior ducts, while internal coatings are used for sound dampening. Ensuring airtight seals and proper installation of these materials is essential to maintain system performance and prevent energy loss. Additionally, soundproofing materials like mass-loaded vinyl can be applied to ducts to further reduce operational noise.

2.3 Accessories: Fittings, Vents, and Registers

Accessories such as fittings, vents, and registers are essential for a functional ductwork system. Fittings, including elbows, tees, and couplers, enable proper airflow direction and connection between duct segments. Vents and registers regulate air distribution, ensuring even circulation throughout the space; These components are typically made from materials like galvanized steel, aluminum, or plastic, chosen for durability and compatibility with the duct system. Proper installation of these accessories is critical to maintain system efficiency and prevent leaks. They also allow for customization, such as adjusting airflow in specific areas. Regular inspection and maintenance of these parts ensure optimal performance and longevity of the ductwork system.

Tools and Equipment

Essential tools for ductwork installation include hand tools like snips, screwdrivers, and wrenches, as well as power tools such as drills and saws. Measuring devices like tape measures and duct calculators ensure accuracy. Safety equipment, including gloves and goggles, is crucial for protection. Specialized machinery, like ductforming equipment, may also be required for precise installations.

3.1 Essential Hand Tools for Ductwork

For ductwork installation, essential hand tools include metal snips for cutting ducts, screwdrivers for securing fittings, and wrenches for tightening connections. Pliers and hammers are useful for shaping and fitting duct sections. Utility knives and saws assist in trimming insulation and cutting materials. Tape measures and levels ensure accurate installations. Safety tools like gloves and goggles protect against sharp edges and debris. Maintaining these tools in good condition and organizing them efficiently can significantly speed up the installation process. Always refer to the installation guide for specific tool recommendations tailored to your ductwork project.

3.2 Power Tools and Machinery

Power tools and machinery are indispensable for efficient ductwork installation. Drills and impact wrenches are used for securing screws and bolts, while reciprocating saws and circular saws excel at cutting duct materials. Sheet metal shears and nibblers are essential for precise cuts without damaging the metal. Additionally, a duct crimper is crucial for forming tight connections between duct sections. For larger projects, consider using automatic duct-forming machines to streamline production. Vacuum pumps and pressure testers ensure system integrity by detecting leaks. Always follow safety guidelines and maintenance recommendations for these tools to optimize performance and longevity. Proper use of power tools ensures professional-grade results in ductwork projects.

3.3 Measuring and Testing Equipment

Accurate measurement and testing are critical for ensuring ductwork installation quality. Essential tools include pressure gauges to measure static pressure and airflow meters to verify air velocity. Temperature and humidity sensors help assess environmental conditions. Leak detection kits, such as smoke generators or pressure testing tools, identify gaps or seal failures. Digital multimeters are used to test electrical connections in HVAC systems. Manometers measure pressure drops across duct sections, while duct calipers ensure proper sizing. Regularly calibrate these tools to maintain accuracy. Proper testing ensures system efficiency, safety, and compliance with design specifications, preventing costly rework and ensuring optimal performance. These tools are vital for diagnosing and resolving installation issues effectively.

Design and Planning

Proper design and planning are crucial for efficient ductwork installation. This involves load calculations, duct sizing, and creating detailed blueprints to ensure optimal airflow and system performance.

4.1 Load Calculation and Duct Sizing

Accurate load calculation and duct sizing are critical for ensuring efficient HVAC system performance. Start by determining the space’s heating and cooling requirements, considering factors like room size, insulation, and occupancy. Use tools like duct calculators or Manual J load calculations to assess airflow needs. Proper sizing ensures optimal airflow velocity, minimizing friction loss and static pressure issues. Oversized ducts can lead to inefficiency, while undersized systems may struggle to meet demand. Always refer to manufacturer guidelines and consult professionals for complex systems to avoid common pitfalls. Correct sizing ensures energy efficiency, reduced noise, and improved system longevity. Plan meticulously for a seamless installation process.

4.2 System Layout and Blueprinting

A well-planned ductwork layout is essential for efficient HVAC performance. Begin by assessing the space to determine the optimal duct routing, ensuring minimal obstructions and even airflow distribution. Create a detailed blueprint that outlines the ductwork path, including connections to vents and registers. Use specialized tools like duct calculators to verify system design. Properly label and organize the blueprint for clarity, ensuring ease of installation. Consider factors like ceiling height, insulation, and equipment placement to maximize system efficiency. A well-designed layout minimizes leaks and ensures consistent air pressure, while a clear blueprint serves as a guide for installers, helping them achieve precise and error-free results during the installation process.

4.3 Considering Airflow and Pressure Drops

Ensuring proper airflow and minimizing pressure drops are critical for efficient ductwork performance. Airflow velocity and duct sizing must be carefully calculated to avoid restrictions, which can lead to reduced system efficiency. Pressure drops occur due to friction, fittings, and bends, and they must be accounted for during design. Use duct calculators or software to determine optimal duct sizes and layouts. Properly seal all connections to prevent leaks, which can exacerbate pressure drops. Additionally, ensure that the ductwork is balanced to maintain consistent airflow across all branches. Regular inspections and maintenance can help identify and address airflow issues before they impact system performance.

Installation Steps

Prepare the site, assemble and connect ducts securely, ensuring proper alignment and stability. Follow guidelines for fitting and sealing to maintain optimal airflow and system performance.

5.1 Preparing the Site and Materials

Before starting the installation, ensure the site is clear of debris and obstructions. Inspect all access panels and clean-out ports to guarantee easy access for future maintenance. Verify that all materials, including duct sections, fittings, and insulation, are on-site and undamaged. Organize tools and equipment, such as HVAC support channels, brackets, and hangers, to streamline the process. Check the ductwork layout and blueprint to confirm compatibility with the building structure. Ensure all materials meet specifications and are suitable for the intended application. Proper preparation prevents delays and ensures a smooth installation process, minimizing the risk of errors or safety hazards.

5.2 Assembling and Connecting Ducts

Begin by carefully planning the duct layout to ensure proper alignment and connection. Use tools like sheet metal screws or clamps to secure duct sections together, ensuring tight seals to prevent leaks. For rigid ducts, use fittings such as elbows and tees to direct airflow accurately. Flexible ducts can be bent to fit tight spaces but should be supported to avoid kinking. Apply insulation where required to maintain energy efficiency and reduce noise. Verify that all connections are secure and properly fastened to the building structure using HVAC support channels or hangers. Double-check the ductwork for any obstructions or misalignments before moving to the next step. Proper assembly ensures efficient airflow and system performance.

5.3 Securing Ducts and Ensuring Stability

Securing ducts is crucial for maintaining system stability and performance. Use HVAC support channels, brackets, and hangers to fasten ducts to the building structure, ensuring they remain stable and level. Proper support prevents sagging, misalignment, and vibration, which can lead to leaks or damage. For rigid ducts, install hangers at regular intervals, while flexible ducts may require additional straps to prevent movement. Inspect all supports periodically to ensure they remain intact and adjust as needed. Improperly secured ducts can compromise airflow and system efficiency, leading to increased energy costs and potential safety hazards. Always follow manufacturer guidelines for securing ductwork to guarantee long-term stability and reliability.

Safety Measures and Best Practices

Adhering to safety guidelines is essential for ductwork installation. Always use PPE, handle tools and materials safely, and follow proper installation techniques to minimize risks and ensure a secure system.

6.1 Personal Protective Equipment (PPE)

Personal Protective Equipment (PPE) is essential for ensuring safety during ductwork installation. Always wear gloves to prevent cuts and abrasions, safety glasses to protect eyes from debris, and a dust mask to reduce inhalation of airborne particles. Steel-toe boots are recommended to safeguard against heavy tools or falling objects. Proper PPE prevents injuries and ensures compliance with workplace safety standards. Failure to use PPE can lead to serious harm, such as lacerations from sharp metal edges or eye damage from flying debris. Additionally, ensure all PPE fits correctly and remains in good condition for optimal protection. Prioritize safety by making PPE a non-negotiable part of your installation process.

6.2 Handling and Storing Materials Safely

Proper handling and storage of ductwork materials are crucial to prevent damage and ensure a safe working environment. Always use mechanical aids like dollies or lifts for heavy or bulky items to avoid physical strain. Store ducts and components in a dry, clean area away from direct sunlight and moisture to prevent rust or degradation. Use racks or stands to keep materials organized and secure, reducing the risk of accidental damage. Label stored items clearly for easy identification. Regularly inspect stored materials for signs of wear or damage before use. Proper storage also helps maintain material quality, ensuring optimal performance during installation and system operation.

6.3 Emergency Procedures and First Aid

In case of emergencies during ductwork installation, prioritize immediate action to minimize harm. For injuries involving sharp metal edges, apply direct pressure to control bleeding and seek medical attention. If a worker falls, check for fractures or head injuries and immobilize if necessary. For electrical accidents, disconnect power immediately and provide CPR if needed. Keep a first aid kit on site and ensure all personnel are trained in its use. Store emergency contact numbers prominently and have a plan for evacuating the area if required. Regular safety drills can help prepare for such situations, ensuring a swift and effective response to emergencies.

Testing and Inspection

Testing and inspection ensure ductwork efficiency and safety. Conduct pressure tests to detect leaks, inspect connections for tightness, and verify airflow performance for optimal system operation.

7.1 Pressure Testing and Leak Detection

Pressure testing is a critical step to ensure ductwork integrity. Use a pressure gauge to measure system resistance, identifying leaks or weak points. Proper sealing is essential for energy efficiency and airflow performance. Inspect all connections, joints, and seams for any gaps or damage. Addressing leaks promptly prevents system inefficiencies and potential safety hazards. Refer to the ductwork installation guide for specific pressure testing procedures and recommended tools. Ensure compliance with safety guidelines to avoid over-pressurization, which could lead to system damage or personal injury. A well-sealed duct system ensures optimal HVAC performance, reduces energy costs, and prolongs equipment lifespan. Regular testing maintains system reliability and efficiency over time.

7.2 Visual Inspection of Connections

A thorough visual inspection of ductwork connections is essential to ensure system integrity. Examine all joints, seams, and fittings for gaps, damage, or loose fasteners. Verify that connectors are securely fastened and aligned properly. Use a flashlight to inspect hard-to-reach areas, such as inside ducts or behind fittings. Look for signs of wear, rust, or corrosion that could compromise the connection. Ensure all seals are tight and free from defects. Document any issues and address them promptly to maintain optimal airflow and prevent energy losses. Regular visual inspections help identify potential problems early, reducing the need for costly repairs and ensuring long-term system performance. Always follow safety guidelines during inspections to avoid accidents.

7.3 Final System Performance Check

The final system performance check ensures the ductwork operates efficiently and meets design specifications. Test airflow rates at registers and vents using anemometers or flow hoods to confirm balanced distribution. Check for any remaining leaks or connection issues, ensuring all repairs are made. Verify that the system maintains proper static pressure and airflow velocities. Review the installation documentation to ensure all components are correctly installed and functional. Conduct a runtime test of the HVAC system to observe performance under normal operating conditions. A well-performing ductwork system is crucial for energy efficiency, comfort, and long-term reliability. This final check ensures everything works harmoniously, providing optimal results for the building’s heating and cooling needs.

Maintenance and Upkeep

Regular ductwork maintenance ensures optimal performance and longevity. Schedule professional inspections, clean ducts annually, and replace worn parts promptly. Proper upkeep prevents issues and extends system life effectively.

8.1 Cleaning and Servicing Ducts

Regular cleaning and servicing of ducts are essential for maintaining efficient HVAC performance. Start with a thorough inspection to identify dust buildup, debris, or mold growth. Use specialized tools like high-powered vacuums and brushes to remove contaminants, ensuring clean airflow. Check for blockages in vents and registers, as these can reduce system efficiency. For best results, clean ducts annually or as needed, especially in high-traffic areas. Additionally, inspect duct linings and seals for damage. If mold or pests are present, address these issues promptly to prevent health risks. Always follow safety guidelines and consider professional cleaning for complex systems or older ductwork.

8.2 Replacing Damaged or Worn-Out Parts

Replacing damaged or worn-out ductwork components is crucial for maintaining system efficiency and preventing further damage. Inspect ducts regularly for leaks, dents, or corroded sections. When replacing parts, ensure compatibility with the existing system to maintain airflow and structural integrity. Use high-quality materials, such as durable sheet metal or flexible ducting, and secure connections with proper seals and fasteners. Disconnect power to the HVAC system before starting repairs to ensure safety. For complex replacements, consider consulting a professional to avoid installation errors. Regularly updating worn-out parts prevents energy loss, reduces noise, and extends the lifespan of the ductwork system, ensuring optimal performance and reliability.

8.3 Scheduling Regular Maintenance

Scheduling regular maintenance is essential to ensure the ductwork system operates efficiently and effectively. Plan inspections and cleanings annually, or more frequently in high-usage environments. Clean ducts and vents to remove dust, debris, and contaminants that impede airflow. Inspect connections, seals, and insulation for damage or wear. Address minor issues promptly to prevent larger problems. Consider hiring a professional for thorough inspections and deep cleaning. Regular maintenance improves indoor air quality, reduces energy consumption, and extends the system’s lifespan. Create a maintenance calendar to stay organized and ensure consistency. This proactive approach safeguards your investment and ensures optimal performance of your ductwork system throughout the year.

Troubleshooting Common Issues

Identify and resolve leaks, airflow problems, and noise promptly. Use sealants for leaks, inspect ducts for blockages, and ensure proper installation to minimize vibrations and ensure smooth operation.

9.1 Identifying Leaks and Sealing Them

Leak detection is critical for maintaining efficient ductwork performance. Start with a visual inspection of seams, joints, and connections. Use a smoke test to identify hidden leaks. Seal gaps with duct sealant or mastic, ensuring proper adhesion. For larger holes, apply a patch and secure it with metal tape. Regularly inspect access panels and clean-out ports to catch issues early. Addressing leaks promptly prevents energy loss and improves system efficiency. Always follow safety guidelines during inspections and repairs to avoid accidents. Proper sealing ensures optimal airflow and reduces the risk of future leaks, maintaining the overall integrity of the ductwork system. Regular maintenance is key to long-term performance.

9.2 Resolving Airflow Problems

Airflow issues in ductwork systems often stem from improper sizing, blockages, or poor design. Begin by inspecting the ducts for kinks, crushed sections, or excessive bends that restrict airflow. Ensure all vents and registers are open and unobstructed. Conduct a load calculation to verify the system is appropriately sized for the space. Balance the airflow by adjusting dampers at branch lines to maintain even distribution. Use pressure gauges or airflow measurement tools to identify imbalances. Insulate ducts in unconditioned spaces to minimize heat loss and gain. If issues persist, consult a professional to assess and optimize the system. Proper airflow resolution enhances efficiency, reduces energy costs, and improves overall system performance. Regular checks and adjustments are essential for maintaining optimal airflow.

9.3 Addressing Noise and Vibration

Noise and vibration in ductwork systems can result from loose connections, improper support, or high airflow velocities. To mitigate these issues, ensure all ducts are securely fastened using brackets, hangers, or isolation mounts. Insulate ducts in high-traffic areas to reduce noise transmission. Use flexible ducts in tight spaces to absorb vibrations and minimize rattling. Check for unbalanced airflow, as excessive velocity can cause turbulence and noise. Seal any gaps or leaks, as these can amplify sound. Consider acoustic lining in ducts for additional noise reduction. Regularly inspect and tighten connections to prevent vibration-related issues. Proper installation and maintenance are key to minimizing noise and ensuring a smooth, quiet operation. Addressing these problems early prevents long-term discomfort and system inefficiency.

Additional Resources and References

Explore recommended manuals, online calculators, and professional forums for detailed guidance. Retain installation records and seek expert advice for complex ductwork challenges and system optimizations.

10.1 Recommended Manuals and Guides

For successful ductwork installation, refer to the Ductwork Installation Guide PDF, which provides a comprehensive overview of the process. This manual includes detailed steps for examining access panels, ensuring proper connections to HVAC equipment, and completing installation records. It also covers safety precautions and warranty information, emphasizing the importance of qualified installation. Additional resources like the Oneida Air Systems Ductwork Design and Installation Guide offer insights into system layout and material selection. These guides are essential for Understanding airflow dynamics, selecting the right materials, and troubleshooting common issues. They serve as invaluable tools for both professionals and DIY enthusiasts, ensuring efficient and safe ductwork setup.

10.2 Online Tools and Calculators

Utilize online tools and calculators to streamline your ductwork installation process. Duct size calculators, such as those found in the Ductwork Installation Guide PDF, help determine optimal duct dimensions based on airflow, pressure, and system requirements. Load calculation tools, like Manual J, assist in assessing heating and cooling needs for precise duct sizing. Interactive design platforms allow you to model and simulate duct layouts, ensuring efficiency and accuracy. Additionally, online product finders and energy efficiency calculators aid in selecting the right materials and optimizing system performance. These resources, often provided by HVAC manufacturers and professional associations, empower installers to achieve compliant, high-performance ductwork systems tailored to specific projects.

10.3 Professional Associations and Forums

Engage with professional associations and forums to enhance your expertise in ductwork installation. Organizations like ASHRAE and SMACNA provide invaluable resources, including updated standards, training materials, and best practices. Online forums and communities, such as HVAC-focused groups, allow professionals to share experiences, solve challenges, and stay informed about industry advancements. Participating in webinars, workshops, and conferences hosted by these associations can deepen your knowledge and skills. Additionally, these platforms often offer access to certified experts, enabling you to address complex installation scenarios effectively. By leveraging these networks, you can stay updated on the latest technologies and ensure compliance with industry standards, ultimately delivering high-quality ductwork installations.

nursing report sheet pdf

A nursing report sheet PDF is a structured template used by nurses to document patient information, ensuring clear communication during shift changes. It provides essential details about patient status, treatments, and care plans, fostering continuity of care and reducing errors. These PDF templates are customizable, printable, and widely used in various healthcare settings, making them a valuable tool for efficient and organized reporting.

Overview of Nursing Report Sheets

Nursing report sheets are practical tools used by nurses to document patient information efficiently. They are initiated at the start of a shift to capture vital details about patient status, treatments, and care plans. These sheets serve as a communication bridge between outgoing and incoming nurses, ensuring continuity of care. Available as free PDF templates, they can be customized to suit various healthcare settings, including med-surg, ICU, and ER units. Their structured format helps nurses organize patient data clearly and effectively, making them indispensable for seamless shift transitions and accurate reporting.

Importance of Using PDF Formats for Nursing Reports

PDF formats are widely preferred for nursing reports due to their portability and consistency. They ensure that patient information remains intact and visually consistent across different devices. PDFs are easily shareable and printable, making them ideal for maintaining accurate records. Additionally, PDFs are secure, reducing the risk of unauthorized edits. This format is particularly useful for creating standardized templates, such as SBAR and Brain formats, which are essential for clear communication between shifts. Using PDFs enhances professionalism and reliability in nursing documentation, contributing to better patient care outcomes.

Types of Nursing Report Sheet Templates

Nursing report sheet templates vary, catering to different units like Med-Surg, Tele, ICU, ER, and Home Health Care, ensuring organized and efficient patient documentation.

SBAR Format Templates

SBAR (Situation, Background, Assessment, Recommendation) format templates are widely used for structured communication in nursing reports. These templates organize patient information into clear sections, enhancing clarity and efficiency. Ideal for med-surg and tele units, SBAR templates ensure critical data is conveyed effectively during shift changes. They are available in PDF and editable formats, allowing customization to meet specific unit needs. This format is particularly valued for its ability to reduce errors and improve continuity of care, making it a popular choice among healthcare professionals for accurate and concise reporting.

Brain Format Templates

Brain format templates are popular tools for organizing patient information in nursing report sheets. These templates use a structured approach, often resembling a mental framework, to capture essential details such as patient history, current status, and care priorities. They are particularly useful for med-surg, ICU, and tele units, offering a clear and concise format for shift reports. Available in PDF and editable formats, brain templates are customizable to meet specific needs, ensuring effective communication and continuity of care during handoffs. Their simplicity and focus on critical data make them a favorite among nurses for efficient reporting.

Med-Surg and Tele Unit Templates

Med-Surg and Tele unit templates are designed for nurses working in medical-surgical and telemetry units, where patient conditions can change rapidly. These templates provide detailed sections for monitoring vital signs, tracking medications, and documenting patient progress. They often include space for noting specific concerns, such as arrhythmias in telemetry patients. The templates are available in PDF and editable formats, allowing nurses to customize them according to unit-specific needs. Their structured layout ensures that critical information is easily accessible, promoting efficient communication during shift handoffs and improving overall patient care.

Key Components of a Nursing Report Sheet

A nursing report sheet includes patient identification, shift overview, vital signs, medication administration, and care plans, ensuring comprehensive documentation and seamless communication between shifts.

Patient Identification and Demographics

Patient identification and demographics are critical components of a nursing report sheet, ensuring accurate and personalized care. This section includes the patient’s name, medical record number (MRN), date of birth (DOB), room number, and admission date. It also covers demographic details such as age, gender, insurance information, and emergency contact. Accurate identification ensures patient safety and continuity of care, while demographics provide context for individualized treatment plans. This information is essential for nurses to deliver tailored care and maintain clear communication across shifts.

Shift Overview and Summary

The shift overview and summary section of a nursing report sheet provides a concise recap of the patient’s status during the shift. It includes key details such as condition changes, completed treatments, and notable events. This section ensures continuity of care by highlighting current concerns, goals for the next shift, and any unresolved issues. Nurses use this summary to quickly communicate patient progress, enabling the oncoming team to prioritize tasks effectively. It serves as a bridge between shifts, promoting seamless care and clear communication.

Vital Signs and Monitoring Data

Vital signs and monitoring data are critical components of a nursing report sheet, providing insights into a patient’s physiological status. This section typically includes blood pressure, heart rate, respiratory rate, oxygen saturation, and temperature. Nurses document trends or abnormalities to identify potential issues early. Monitoring data, such as fluid intake/output and lab results, are also recorded to support clinical decision-making. Accurate and timely documentation of these metrics ensures continuity of care and helps guide interventions, making it essential for patient safety and effective care planning.

Medication Administration Record

The medication administration record (MAR) is a vital section of the nursing report sheet, detailing all medications given to patients. It includes the drug name, dose, route, time administered, and any side effects observed. This ensures accountability and patient safety. Nurses use this section to verify adherence to prescribed regimens and communicate changes to oncoming shifts. Accurate documentation in the MAR helps prevent errors and promotes seamless care coordination, making it an indispensable tool for effective medication management and patient monitoring.

Benefits of Using Nursing Report Sheet PDFs

Nursing report sheet PDFs enhance continuity of care, improve communication, and reduce documentation errors. They provide a professional, organized format for tracking patient information, ensuring accuracy and efficiency.

Enhanced Continuity of Care

Nursing report sheet PDFs ensure seamless patient care transitions by providing a structured format for sharing critical information between shifts. They maintain consistency in documenting patient status, treatments, and care plans, reducing errors and improving outcomes. These tools help nurses deliver uninterrupted care, as all relevant details are readily available. By standardizing communication, PDFs enhance collaboration, ensuring that patient needs are met without gaps. This continuity is vital for maintaining high-quality care and patient safety across healthcare settings.

Improved Communication Between Shifts

Nursing report sheet PDFs facilitate clear and concise communication between shifts, ensuring that critical patient information is accurately transferred. These structured templates minimize misunderstandings by organizing details such as patient status, treatments, and care plans. By providing a standardized format, they enable nurses to quickly review and understand key information, promoting effective collaboration. This clear communication enhances teamwork and ensures that patient care remains consistent and coordinated during shift transitions, ultimately improving overall patient outcomes and safety.

Reduced Errors in Documentation

Nursing report sheet PDFs minimize documentation errors by providing structured, standardized formats for recording patient information. These templates ensure consistency, reducing omissions and inaccuracies. By guiding nurses through essential sections, they help capture critical details accurately. The clear layout and predefined fields prevent mistakes, fostering precise documentation. This structured approach reduces errors, ensuring that patient data is reliable and easily understandable. As a result, nursing report sheet PDFs enhance the accuracy of patient records, which is vital for delivering safe and effective care.

How to Create a Nursing Report Sheet

Creating a nursing report sheet involves starting with a customizable template, incorporating essential sections like patient ID, vital signs, and care plans, and ensuring a clear, organized layout for effective documentation.

Designing a Custom Template

Designing a custom nursing report sheet template involves selecting a format that suits your needs, such as SBAR or Brain, and incorporating essential sections like patient ID, vital signs, and medications. Use tables or charts for clarity and ensure the layout is easy to read. Customize fonts and colors for professionalism. Tailor the template to specific units, such as ICU or med-surg, by adding unit-specific fields. This allows nurses to document efficiently and effectively, saving time during busy shifts while maintaining organized records.

Including Essential Sections

A nursing report sheet should include essential sections like patient identification, vital signs, medication administration, and care plans. Add a shift overview for summaries of patient status and significant events. Include sections for labs, diagnostics, and treatment plans to ensure comprehensive documentation. Incorporate notes or comments for additional details. These sections ensure all critical information is captured, promoting accuracy and continuity of care. Customize the sections based on unit-specific needs, such as ICU or med-surg, to tailor the report to the patient’s care requirements.

Formatting for Clarity and Readability

Ensure your nursing report sheet is formatted for clarity and readability. Use clear fonts like Arial or Times New Roman in size 10-12. Organize information into logical sections with headers; Utilize bullet points or checkboxes for lists and tasks. Leave adequate spacing between sections to avoid clutter. Highlight critical areas, such as medications or vital signs, for quick reference. Proper formatting reduces errors and saves time, ensuring that healthcare providers can easily understand and act on the information provided. A well-designed layout enhances professionalism and efficiency in patient care documentation.

Downloading and Printing Nursing Report Sheets

Nursing report sheet PDFs are easily downloadable and printable. Available in PDF and editable DOCX formats, they offer portrait and landscape options, suitable for med-surg, ICU, and ER units.

Free PDF Templates Available Online

Free nursing report sheet PDF templates are widely available online. These templates are designed for various healthcare settings, including med-surg, ICU, and ER units. They often include essential sections such as patient identification, vital signs, medication administration, and shift summaries. Many templates are customizable, allowing nurses to tailor them to specific needs. Websites offer downloadable PDFs in portrait and landscape formats, with options for 1-4 patients per sheet. These resources are practical tools for maintaining organized and efficient patient care documentation.

Editable Formats for Customization

Editable nursing report sheet templates are available in formats like Google Docs, Microsoft Word, and Excel. These allow nurses to customize content, such as adding or removing sections, to suit their specific needs. Users can adjust fonts, colors, and text to personalize the templates further. Many templates are downloadable in PDF, PNG, or JPG formats, offering flexibility for printing or digital use. This adaptability ensures that nurses can tailor their report sheets to meet the unique demands of their healthcare setting, improving efficiency and patient care documentation.

Printing Tips for Professional Appearance

For a professional look, print nursing report sheets on high-quality paper using a reliable printer. Choose A4 or US Letter sizes based on your needs. Ensure the template is fully visible and not overcrowded. Use black ink for clarity and avoid smudging. Print a test page to check formatting and alignment. Consider using cardstock for durability, especially for frequently used templates. Ensure all sections are legible and properly spaced. Review the document before printing to catch any errors or omissions, ensuring a polished final product for patient care documentation.

Best Practices for Using Nursing Report Sheets

Use clear, concise language and ensure all sections are completed accurately. Regularly update patient information and maintain confidentiality. Review reports before passing to the next shift, ensuring accessibility for oncoming staff and promoting seamless care transitions.

Ensuring Accuracy and Completeness

Accurate and complete documentation is critical in nursing report sheets. Verify patient data, medical history, and treatment plans before recording. Double-check medication lists, vital signs, and lab results for errors. Use standardized formats like SBAR or Brain to organize information clearly. Ensure all sections, such as patient identification and shift summaries, are filled out thoroughly. Review the report for completeness before passing it on, and update it regularly to reflect any changes in patient condition. This ensures seamless communication and high-quality care delivery.

Updating Information Regularly

Regular updates are essential to maintain the relevance and reliability of nursing report sheets. Nurses should update patient information at the start, midpoint, and end of shifts to reflect current statuses and any changes in condition. This includes revising medication lists, vital signs, and care plans as needed. Real-time updates ensure that incoming nurses receive the most accurate and up-to-date details, promoting seamless care transitions and improving patient outcomes. Consistent updates also help identify trends and patterns in patient health, enabling proactive interventions and enhancing overall care quality.

Maintaining Patient Confidentiality

Maintaining patient confidentiality is a critical aspect of using nursing report sheets. All patient information must be handled securely to comply with HIPAA and other privacy regulations. Nurses should ensure that report sheets are stored in safe, accessible locations and shared only with authorized personnel. Digital PDFs should be encrypted and password-protected to prevent unauthorized access. Verbal or written reports must avoid sharing sensitive details in public areas. Breaching confidentiality can lead to legal consequences and erosion of patient trust, emphasizing the need for strict adherence to privacy protocols in all reporting practices.

Nursing Report Sheets for Specialized Units

Nursing report sheets are tailored for specialized units like ICU, ER, and step-down care. These templates accommodate 1-4 patients per sheet, ensuring detailed and unit-specific documentation, enhancing care efficiency and accuracy.

ICU and ER Unit Templates

ICU and ER unit templates are designed for high-acuity care, offering detailed sections for critical patient data. These templates often include fields for vital signs, medication administration, and key interventions. They are structured to accommodate 1-4 patients per sheet, with options for portrait or landscape layouts. ER templates may emphasize rapid assessment and treatment notes, while ICU templates focus on complex care plans and continuous monitoring. Both formats prioritize clarity and efficiency, ensuring healthcare providers can quickly access and update patient information during fast-paced shifts.

Step-Down and Telemetry Unit Templates

Step-down and telemetry unit templates are tailored for patients transitioning from ICU to less acute care. These templates include sections for continuous cardiac monitoring, vital signs, and medication schedules. They often support 1-4 patients per sheet, with portrait or landscape options. Designed for clarity, they help nurses track progress and prepare for discharge. SBAR and Brain formats are commonly used, ensuring concise and organized reporting. These templates are adaptable to unit-specific needs, making them essential for efficient and effective patient care in intermediate settings.

Home Health Care Templates

Home health care templates are designed for nurses providing care in patient homes, focusing on individualized patient needs and long-term care plans. These templates often include sections for vital signs, medication schedules, and visit summaries. They are available in PDF and editable formats, allowing for customization to suit specific patient requirements. Printable and easy to use, these templates help nurses maintain detailed records and ensure continuity of care during home visits, supporting effective communication between healthcare providers.

Electronic vs. Paper-Based Nursing Report Sheets

Electronic nursing report sheets offer real-time data entry and integration with EHRs, enhancing efficiency and reducing errors. Paper-based systems are straightforward but may lack these advanced features.

Advantages of Digital Reporting

Digital reporting offers enhanced efficiency, with real-time data entry and instant accessibility. It reduces errors through automated checks and improves communication across shifts. Digital tools enable easy customization and integration with EHRs, streamlining workflows. Nurses can quickly access patient histories and update records, ensuring continuity of care. Additionally, digital reports are environmentally friendly and reduce storage needs. They also support advanced features like AI-driven insights, making them a modern solution for nursing practice. This approach fosters accuracy and saves time, benefiting both nurses and patients;

Challenges with Paper-Based Systems

Paper-based systems face challenges like illegibility, lost documents, and time-consuming data entry. They are prone to errors, as handwritten notes can be unclear, leading to miscommunication. Storage and organization of physical records are also problematic, requiring significant space and effort. Paper reports are less accessible in real-time, delaying decision-making. Additionally, they lack the scalability and efficiency of digital tools, making them less suitable for modern healthcare. These limitations highlight the need for transitioning to digital solutions for improved accuracy and efficiency in patient care. Paper-based systems are gradually being phased out in favor of more reliable digital alternatives.

Hybrid Solutions for Modern Nursing

Hybrid solutions combine electronic and paper-based systems, offering flexibility for modern nursing. These systems allow nurses to use digital tools for real-time data entry while maintaining paper-based options for specific situations. They are ideal for healthcare settings transitioning to fully digital platforms. Hybrid solutions provide backup options during tech failures and cater to units with varying needs. They enable seamless integration of patient data, enhancing accuracy and efficiency. By bridging the gap between traditional and digital methods, hybrid solutions support nurses in delivering high-quality care while embracing technological advancements. They are scalable, future-proof, and improve patient care outcomes significantly.

Future Trends in Nursing Report Sheets

Future trends include AI and machine learning for data analysis, predictive patient care, and streamlined reporting. Integration with EHRs will enhance real-time data accessibility and accuracy, improving patient outcomes.

Integration with Electronic Health Records

Integrating nursing report sheets with Electronic Health Records (EHRs) enhances real-time data accessibility and accuracy. This seamless connection allows nurses to update patient information directly within the EHR system, reducing duplication of efforts and ensuring consistency across care teams. Automated data transfer minimizes manual entry errors, while instant access to historical patient data improves decision-making. This integration also supports care coordination by providing a comprehensive view of patient progress, making it easier to track treatments and outcomes. As a result, patient care becomes more efficient and well-documented.

AI and Machine Learning Applications

AI and machine learning are transforming nursing report sheets by enhancing data analysis and pattern recognition. These technologies can analyze large datasets to identify trends, predict patient outcomes, and flag potential risks. AI-powered tools can automate routine tasks, such as filling out report templates or generating summaries, saving time for nurses. Additionally, natural language processing (NLP) can assist in converting verbal reports into structured data, improving accuracy and efficiency. These advancements enable nurses to focus more on patient care while leveraging intelligent systems to support decision-making and documentation.

Mobile and Cloud-Based Reporting Tools

Mobile and cloud-based reporting tools are revolutionizing nursing documentation by enabling real-time access to patient data from anywhere. These tools allow nurses to update and share reports instantly, improving collaboration and care coordination. Cloud storage ensures that report sheets are securely backed up and accessible across devices, reducing the risk of data loss. Mobile apps also offer features like voice-to-text and barcode scanning, streamlining the reporting process. This technology enhances flexibility, allowing nurses to complete tasks more efficiently while maintaining patient care quality.

Additionally, cloud-based platforms support seamless integration with electronic health records (EHRs), ensuring all patient information is up-to-date and accessible to the entire healthcare team. Mobile tools also enable nurses to generate reports during patient bedside visits, reducing errors and improving accuracy. With automatic syncing, all updates are immediately available to oncoming shifts, fostering continuity of care. These solutions are particularly beneficial in fast-paced environments like hospitals and clinics, where timely and accurate documentation is critical.

Nursing report sheet PDFs are essential tools for efficient, accurate, and organized patient care documentation. Their versatility and customization options make them indispensable for modern nursing practices.

Final Thoughts on Nursing Report Sheets

Nursing report sheets are indispensable tools for ensuring seamless communication and continuity of care. They provide a structured format for documenting patient information, making it easier for nurses to track progress and share critical details during shift changes. With customizable templates available in PDF and editable formats, nurses can tailor these sheets to meet specific needs, enhancing efficiency and accuracy. By adopting these practical tools, healthcare professionals can improve patient outcomes and maintain high standards of care delivery across all settings.

Encouragement to Adopt Best Practices

Adopting best practices with nursing report sheets PDF enhances patient care and streamlines workflows. Nurses are encouraged to utilize these templates consistently, ensuring accuracy and completeness in documentation. Regular updates and adherence to confidentiality protocols are crucial. Embracing digital tools and customizable formats fosters collaboration and reduces errors. By prioritizing these practices, nurses contribute to better patient outcomes and improved communication across healthcare teams, ultimately elevating the standard of care delivery in various clinical settings.

book of mormon study guide pdf

The Book of Mormon Study Guide enhances comprehension of the scripture’s teachings‚ offering insights and resources for deeper spiritual study‚ available in convenient PDF formats.

1.1 Purpose of the Study Guide

The purpose of the Book of Mormon Study Guide is to enhance understanding and deepen spiritual insights through structured lessons‚ commentary‚ and resources. It serves as a companion for individuals‚ families‚ or groups‚ facilitating meaningful study and application of the scripture’s teachings. Designed to complement the Book of Mormon‚ it aids in personal reflection‚ doctrine mastery‚ and practical application of its principles in daily life.

1.2 Structure of the Study Guide

The Book of Mormon Study Guide is organized into numbered sections‚ each corresponding to specific lessons and reading assignments. It includes discussion questions‚ application exercises‚ and insightful commentary to deepen understanding. The guide also incorporates historical context‚ doctrine‚ and visual aids like maps and charts‚ making it a versatile tool for individual‚ family‚ or group study‚ enhancing comprehension and application of the scripture.

1.3 Importance of the Book of Mormon in Religious Study

The Book of Mormon is a vital scripture in religious study‚ testifying of Jesus Christ and His mission. It provides profound teachings on discipleship‚ morality‚ and the Plan of Salvation. Its unique narrative and doctrinal depth enrich personal and collective spirituality‚ offering insights that complement other scriptures. Available in PDF formats‚ it remains a central resource for spiritual growth and doctrinal understanding‚ accessible for all seeking truth.

Official Book of Mormon Study Guides

Authorized by The Church of Jesus Christ of Latter-day Saints‚ these guides provide trusted‚ in-depth analysis and resources for studying the Book of Mormon effectively.

2.1 Church of Jesus Christ of Latter-day Saints Resources

The Church of Jesus Christ of Latter-day Saints offers official Book of Mormon study guides designed to deepen understanding and testimony. These resources include manuals for seminary‚ Sunday School‚ and institute classes‚ as well as digital tools like PDF versions of student manuals and scripture study aids. They are specifically created to help individuals and families engage with the scripture effectively‚ fostering spiritual growth and doctrinal insight.

2.2 BYU-Developed Study Aids

BYU has developed comprehensive Book of Mormon study aids to enhance personal and classroom learning. These resources include verse-by-verse commentaries‚ historical insights‚ and interactive tools. Available in PDF formats‚ they provide structured lessons and application exercises‚ making them invaluable for both individual study and academic settings. BYU’s materials are designed to enrich understanding and application of the scripture’s teachings.

2.3 CES (Church Educational System) Manuals

CES manuals are designed to support structured Book of Mormon study within the Church Educational System. These resources include lesson plans‚ discussion questions‚ and doctrinal insights. Available in PDF formats‚ they are tailored for seminary and institute classes‚ helping students deepen their understanding of the scripture and its relevance in their lives. CES materials emphasize practical application and spiritual growth.

Types of Study Guides Available

Various study guides cater to different learning needs‚ including home-study seminary manuals‚ Sunday School resources‚ and institute student guides‚ all available in PDF formats for convenience.

3.1 Home-Study Seminary Manuals

Home-study seminary manuals provide structured lessons and assignments for individual study‚ aligning with the Book of Mormon’s content. These guides include insights‚ doctrines‚ and practical applications‚ making them ideal for personal or family study. Available in PDF formats‚ they offer flexibility and accessibility for learners of all ages‚ enhancing spiritual growth and understanding of the scripture.

3.2 Sunday School Study Guides

Sunday School study guides are tailored for group learning‚ offering weekly reading assignments and discussion questions. These resources deepen understanding of the Book of Mormon‚ focusing on doctrine and practical application. Available in PDF formats‚ they are accessible for digital use‚ promoting engagement and spiritual growth among participants of all ages and learning styles.

3.3 Institute Student Manuals

Institute student manuals provide in-depth analysis and application materials for advanced study of the Book of Mormon. These resources include interpretive commentary‚ doctrine‚ and principles‚ supplemented with maps and charts. Designed for Religion 121 and 122 courses‚ they enhance individual and family study‚ offering structured learning experiences that foster a deeper understanding of the scripture’s teachings and historical context.

Key Features of the Study Guide

Verse-by-verse commentary‚ historical context‚ doctrine‚ and visual aids like maps and charts enhance understanding‚ while application exercises and discussion questions deepen spiritual insights and practical application.

4.1 Verse-by-Verse Commentary

The verse-by-verse commentary provides detailed insights into each passage of the Book of Mormon‚ helping readers understand complex doctrines‚ historical contexts‚ and spiritual significance. This feature aids in breaking down challenging verses‚ offering clarity and depth to enhance personal study and application of the teachings.

4.2 Historical and Cultural Context

The study guide provides rich historical and cultural context‚ illuminating the settings and traditions of the Book of Mormon; Maps‚ timelines‚ and explanations of ancient customs help readers better understand the narrative. This section enhances comprehension of the text by bridging the gap between modern readers and the ancient world in which the events unfolded.

4.3 Doctrine and Principles

The study guide delves into key doctrines and principles found in the Book of Mormon‚ such as the Plan of Salvation‚ the Atonement‚ and covenant-making. It provides clear explanations and applications of these teachings‚ helping readers understand their relevance to daily life. This section encourages deeper reflection and testimony-building‚ guiding individuals to align their lives with eternal truths revealed in the scripture.

4.4 Maps‚ Charts‚ and Visual Aids

The study guide includes detailed maps‚ charts‚ and visual aids to enhance understanding of the Book of Mormon. These resources illustrate key events‚ journeys‚ and geographical locations‚ such as Lehi’s travels or the lands of the Nephites and Lamanites. Visual timelines and diagrams also clarify complex doctrines and historical contexts‚ making scripture study more engaging and accessible for both individual and group settings.

How to Use the Study Guide Effectively

Engage with weekly reading assignments‚ discussion questions‚ and application exercises to deepen understanding and apply teachings. Regular reflection and note-taking enhance spiritual growth and retention of key doctrines.

5.1 Weekly Reading Assignments

Structured reading assignments break the Book of Mormon into manageable sections‚ helping readers progress systematically. Each week’s focus includes key verses‚ doctrines‚ and historical context‚ ensuring a balanced understanding. Assignments are designed to deepen comprehension and facilitate personal application of the scripture’s teachings‚ making it easier to reflect‚ journal‚ and share insights with others.

5.2 Discussion Questions

Engaging discussion questions encourage deeper reflection and application of the Book of Mormon’s teachings. These questions‚ often included in study guides‚ help individuals and groups explore doctrines‚ historical context‚ and personal relevance. They foster meaningful conversations‚ allowing participants to share insights and strengthen testimonies‚ while making the scripture more relatable and impactful in daily life.

5.3 Application Exercises

Application exercises help individuals apply Book of Mormon teachings to their lives. These exercises include personal reflection prompts‚ practical tasks‚ and group activities. They encourage readers to connect scripture with real-life situations‚ fostering spiritual growth and helping to implement doctrine in daily living. Such exercises enhance understanding and reinforce the relevance of the Book of Mormon in modern contexts. Digital guides often include printable templates for these activities.

Additional Resources for Deeper Study

Explore online platforms‚ databases‚ and audio resources for enhanced understanding. Utilize images‚ commentary‚ and facsimiles to enrich your study of the Book of Mormon.

6.1 Online Platforms and Databases

Online platforms and databases offer extensive resources for deeper study‚ including images‚ commentary‚ and quick links to people‚ places‚ and events in the Book of Mormon. These tools provide historical and analytical insights‚ supported by facsimiles‚ maps‚ and charts‚ enabling comprehensive research and analysis; They are designed to enhance understanding and make study more efficient and engaging for learners of all levels.

6.2 Audio and Video Resources

Audio and video resources complement the Book of Mormon study guide‚ offering narrated scriptures‚ expert discussions‚ and visual explanations. These tools enhance understanding and engagement‚ providing learners with diverse ways to explore the text. They are particularly beneficial for auditory and visual learners‚ making complex concepts more accessible and enriching the study experience for individuals and groups alike.

6.4 Facsimiles and Archaeological Evidence

Facsimiles and archaeological evidence enrich the study guide by providing visual and historical context to the Book of Mormon. These resources include images of ancient artifacts‚ maps‚ and explanations of cultural symbols‚ helping learners connect the scripture to its historical setting. They also highlight archaeological findings that align with the text‚ deepening understanding and reinforcing its authenticity for both scholars and casual readers alike.

Benefits of Using a Digital (PDF) Format

The digital (PDF) format enhances accessibility‚ enabling users to study anytime‚ anywhere. It offers searchability for quick reference‚ is environmentally friendly‚ and often cost-free‚ making it a practical choice for learners.

7.1 Accessibility and Convenience

The digital (PDF) format of the Book of Mormon Study Guide offers unparalleled accessibility and convenience. Users can access the guide on multiple devices‚ including smartphones‚ tablets‚ and computers‚ making it ideal for on-the-go study. The PDF is easily downloadable and sharable‚ ensuring that learners can engage with the material anytime‚ anywhere‚ without the need for physical storage. This flexibility enhances the overall study experience‚ catering to diverse learning preferences and schedules.

7.2 Searchability and Cross-Referencing

The digital (PDF) format enhances searchability‚ allowing users to quickly locate specific verses‚ topics‚ or doctrines within the Book of Mormon Study Guide. Cross-referencing with other scriptures‚ such as the Bible or Doctrine and Covenants‚ becomes seamless‚ fostering a deeper understanding of interconnected gospel principles. Hyperlinks to maps‚ charts‚ and commentary further enrich the study experience‚ making it efficient and comprehensive.

7.3 Cost-Free Availability

The digital (PDF) format of the Book of Mormon Study Guide is available at no cost‚ making it accessible to everyone. This free resource ensures that individuals‚ families‚ and groups can benefit from its insights without financial burden‚ promoting widespread use and spiritual growth. Its availability online facilitates easy downloading and sharing‚ reaching a global audience effectively.

Advanced Study Methods

Advanced methods include cross-referencing‚ journaling‚ and group discussions‚ enhancing understanding and application of the Book of Mormon’s teachings through deeper analysis and collaborative learning experiences.

8.1 Cross-Referencing with Other Scriptures

Cross-referencing the Book of Mormon with the Bible and Doctrine and Covenants deepens understanding of shared doctrines‚ such as the Atonement. This method highlights consistent themes‚ enhancing spiritual insights and reinforcing testimony. The study guide provides commentary and reference tools to facilitate these connections‚ making scripture study more comprehensive and enriching.

8.2 Journaling and Note-Taking

Journaling and note-taking are powerful tools for engaging deeply with the Book of Mormon. Recording insights‚ questions‚ and reflections helps clarify understanding and retain key doctrines. Over time‚ these notes become a valuable record of spiritual growth‚ allowing readers to track their progress and witness how scriptures apply to their lives‚ fostering a stronger connection to the text and its teachings.

8.3 Group Study Techniques

Group study techniques enhance learning by fostering collaboration and shared insights. Participants can discuss challenging verses‚ explore doctrines‚ and apply teachings collectively. Using the study guide‚ groups can engage in structured discussions‚ role-playing‚ and problem-solving activities. Sharing perspectives enriches understanding‚ while collaborative note-taking and summaries reinforce retention‚ creating a supportive environment for deeper engagement with the Book of Mormon.

Historical Background of the Book of Mormon

The Book of Mormon’s historical background includes ancient civilizations‚ prophetic narratives‚ and divine covenants‚ with the small plates of Nephi and the atonement of Jesus Christ central to its teachings.

9.1 The Small Plates of Nephi

The small plates of Nephi are a foundational part of the Book of Mormon‚ containing Nephi’s personal narrative‚ prophetic insights‚ and spiritual teachings. They emphasize the importance of faith‚ obedience‚ and the central role of Jesus Christ. These plates provide historical context and doctrinal depth‚ serving as a testament of Nephi’s unwavering commitment to God’s commandments and promises.

9.2 The Atonement of Jesus Christ

The Atonement of Jesus Christ is central to the Book of Mormon‚ highlighted as the cornerstone of redemption. It underscores Christ’s sacrifice‚ offering forgiveness and mercy to all humanity. The study guide elucidates this doctrine through scriptural references and teachings‚ emphasizing its transformative power and universal application‚ guiding individuals to deepen their understanding of His divine mission and love.

9.3 Covenants and Promises

The Book of Mormon emphasizes the significance of covenants and promises between God and His children. These sacred agreements highlight obedience‚ faith‚ and the blessings that follow. The study guide provides insights into these covenants‚ aiding readers in understanding their role in God’s plan. The Holy Ghost is central in fulfilling these promises‚ guiding individuals to walk righteously and receive eternal blessings.

Doctrinal Themes in the Study Guide

The study guide explores key doctrines such as Jesus Christ’s mission‚ the Plan of Salvation‚ the Holy Ghost’s role‚ and the importance of covenants and righteousness in God’s plan.

10.1 Jesus Christ and His Mission

The study guide emphasizes Jesus Christ’s central mission‚ highlighting His teachings‚ Atonement‚ and resurrection. It explores His role as Redeemer‚ providing insights into His ministry and divine attributes. The guide helps readers understand how Christ’s mission relates to personal salvation‚ encouraging faith‚ repentance‚ and discipleship. It underscores the Book of Mormon’s witness of Jesus‚ aiding individuals in deepening their testimony and commitment to His gospel.

10.2 The Plan of Salvation

The Book of Mormon study guide illuminates the Plan of Salvation‚ detailing premortal life‚ mortal existence‚ the Atonement‚ resurrection‚ and eternal destiny. It emphasizes the purpose of life‚ the role of agency‚ and the ultimate goal of exaltation. The guide helps readers understand the sequence of events in God’s plan‚ highlighting the Savior’s role in redeeming humanity and the importance of making righteous choices to return to Heavenly Father.

10.3 The Role of the Holy Ghost

The Book of Mormon study guide highlights the Holy Ghost’s role in testifying of Jesus Christ‚ guiding individuals‚ and comforting them. It emphasizes the Spirit’s influence in revealing truth‚ strengthening faith‚ and bringing peace. The guide encourages readers to seek the Holy Ghost’s guidance in their personal study‚ fostering a deeper connection with the Savior and strengthening their testimonies through the Spirit’s promptings and wisdom.

Practical Application of the Study Guide

The Book of Mormon study guide helps individuals apply its teachings in daily life‚ fostering spiritual growth through family discussions‚ personal reflection‚ and sharing insights with others effectively.

11.1 Personal Reflection and Testimony

The study guide encourages individuals to deepen their faith through personal reflection and testimony building. By journaling insights and prayers‚ readers can connect spiritually with the Book of Mormon’s teachings‚ fostering a stronger relationship with God. This reflective process helps individuals internalize doctrines‚ leading to heartfelt testimonies and a greater commitment to living Christ-centered lives‚ as guided by the scripture’s principles and promises.

11.2 Teaching and Sharing with Others

The study guide provides practical strategies for teaching and sharing the Book of Mormon’s teachings with others. Discussion questions and application exercises empower individuals to convey gospel truths effectively. By sharing insights‚ individuals can foster spiritual unity and strengthen others’ testimonies‚ creating meaningful opportunities to invite the Spirit and deepen understanding of the scripture’s message‚ as guided by the study guide’s structured approach.

11.4 Family Study Ideas

The study guide offers engaging family study ideas‚ fostering spiritual growth and unity. Families can explore discussion questions‚ scripture marking‚ and application exercises together. Visual aids like maps and charts make lessons interactive for all ages. These activities‚ supported by the PDF format‚ create meaningful opportunities for families to deepen their understanding and testimony of the Book of Mormon collectively‚ enhancing their shared spiritual journey.

The Book of Mormon Study Guide enriches spiritual growth‚ deepens testimony‚ and fosters a meaningful connection with the scriptures‚ serving as a valuable tool for lifelong study and reflection.

12.1 The Impact of the Study Guide on Spiritual Growth

The Book of Mormon Study Guide facilitates profound spiritual growth by fostering deeper understanding‚ reflection‚ and application of its teachings. It enriches personal testimony‚ strengthens faith‚ and guides individuals in living gospel principles‚ ultimately drawing them closer to Jesus Christ and enhancing their discipleship. Regular use of the guide nurtures a meaningful and lasting connection with the scripture.

12.2 Encouragement to Continue Studying

Continuing to study the Book of Mormon with the guide fosters a deeper connection to its teachings‚ encouraging personal reflection‚ testimony building‚ and spiritual growth. The guide’s structured approach motivates learners to explore the scripture’s timeless truths‚ reinforcing faith and providing inspiration for daily living. Consistent study with the guide becomes a meaningful habit that enriches one’s spiritual journey.

12.3 Final Thoughts on the Book of Mormon

The Book of Mormon stands as a profound testament of Jesus Christ‚ offering timeless truths that guide individuals in their spiritual journey. The study guide enhances understanding‚ fostering a deeper connection to its doctrines and historical context. As a valuable resource‚ it invites readers to embrace its teachings‚ apply them in daily life‚ and find inspiration for continued growth and faith.

i wandered lonely as a cloud pdf

William Wordsworth’s timeless poem, “I Wandered Lonely as a Cloud,” is widely available as a PDF, offering readers accessible resources to explore its themes and significance.

Overview of the Poem

William Wordsworth’s “I Wandered Lonely as a Cloud,” also known as “Daffodils,” is a lyrical poem describing a solitary walk where the poet encounters a vibrant field of daffodils. Composed in 1798 and published in Lyrical Ballads, it captures the beauty of nature and its impact on the human spirit. The poem consists of four stanzas with a rhyme scheme that enhances its musicality; It reflects Wordsworth’s Romantic ideals, emphasizing the connection between nature, memory, and emotional well-being. The daffodils symbolize joy and resilience, while the poem itself remains a cornerstone of English literature, celebrated for its simplicity and profound imagery.

Significance of the Poem in Romantic Literature

“I Wandered Lonely as a Cloud” is a seminal work in Romantic literature, epitomizing the movement’s focus on nature, emotion, and the individual experience. Wordsworth’s vivid depiction of daffodils symbolizes the restorative power of nature, a central Romantic theme. The poem’s emphasis on personal reflection and memory aligns with the era’s shift toward subjective expression. Its publication in Lyrical Ballads alongside Samuel Taylor Coleridge’s works marked a turning point in English poetry, challenging traditional forms and embracing the sublime beauty of the natural world. This poem’s enduring popularity underscores its role in shaping Romantic ideals and influencing future literary movements.

Themes of the Poem

The poem explores themes of nature’s beauty, memory, and solitude, reflecting the Romantic emphasis on emotional and mental landscapes shaped by natural experiences.

The Beauty of Nature

The poem vividly captures the beauty of nature through its iconic imagery of golden daffodils swaying in the breeze beside a serene lake. These flowers symbolize natural splendor and joy, evoking a sense of wonder. Wordsworth portrays nature as a source of inspiration, highlighting its ability to uplift the human spirit. The daffodils, dancing in the breeze, embody the vibrant and dynamic aspects of the natural world. This depiction underscores the Romantic belief in nature’s restorative power and its role in fostering emotional and spiritual well-being. The poem’s focus on a simple yet profound natural scene emphasizes nature’s enduring beauty and significance.

The Power of Memory and Imagination

Wordsworth’s poem illustrates the transformative power of memory and imagination, as the daffodils reappear in the speaker’s mind long after the initial encounter. The vivid recollection of the golden flowers dancing in the breeze transcends time, showcasing how memory can evoke profound emotional responses. The imagination amplifies this experience, turning a fleeting moment into an enduring source of joy and inspiration. This interplay between memory and imagination highlights the Romantic emphasis on the inner world of the individual, where past experiences are reimagined to foster personal growth and introspection. The poem thus becomes a celebration of the mind’s ability to revisit and reinterpret natural beauty.

Solitude and Inner Reflection

The poem captures the essence of solitude, as the speaker wanders alone, immersed in thought, before encountering the daffodils. This isolation allows for deep introspection, highlighting the Romantic ideal of solitude as a catalyst for self-discovery. The quiet, individual experience of nature fosters a connection between the inner world of the mind and the external beauty of the natural landscape. The stillness of the moment enables the poet to reflect on the emotional and spiritual impact of the scene, illustrating how solitude enriches the human experience and inspires creative expression. The daffodils, in this context, symbolize the transformative power of quiet contemplation.

Structure and Style

The poem follows a lyrical structure with four stanzas, each containing six lines, and an ABABCC rhyme scheme, creating a rhythmic and harmonious flow that mirrors nature’s beauty. Wordsworth’s use of simple yet evocative language emphasizes the natural scene, while the consistent meter enhances the contemplative tone, drawing readers into the serene atmosphere. The structure reflects the organic progression of the poet’s emotions, from solitude to joy, aligning form with feeling to create a timeless aesthetic experience.

Stanza Structure and Rhyme Scheme

The poem is divided into four stanzas, each containing six lines, with a consistent rhyme scheme of ABABCC. This structure creates a rhythmic and harmonious flow, enhancing the lyrical quality of the verse. The meter is primarily iambic pentameter, adding to the poem’s musicality and natural cadence. The rhyme scheme contributes to the overall sense of balance and order, mirroring the serene and organized beauty of the natural scene described. Each stanza builds upon the last, maintaining a cohesive and flowing narrative that reflects the poet’s evolving emotions and observations.

Use of Imagery and Symbolism

Wordsworth’s poem is rich in vivid imagery, with descriptions of golden daffodils, a serene lake, and swaying trees creating a picturesque scene. The daffodils symbolize beauty, hope, and resilience, while the lake and trees evoke tranquility. The breeze adds dynamism, infusing life into the natural setting. The “host of golden daffodils” is a powerful symbol of joy and inspiration, while the “stars that shine” on the “milky way” extend the imagery, emphasizing vastness and timelessness. These elements collectively create a sense of wonder and connection to nature, central to Romantic ideals. The imagery is both evocative and symbolic, conveying deep emotional resonance.

Language and Tone

Wordsworth’s poem employs simple, yet evocative language, reflecting the Romantic emphasis on plain, accessible verse. The tone is contemplative and serene, capturing the poet’s emotional response to nature. Words like “lonely,” “crowd,” and “golden daffodils” evoke a sense of isolation followed by vibrant joy. The rhythm and cadence, influenced by natural speech, create a meditative atmosphere. The tone shifts from solitude to elation, mirroring the poet’s internal transformation. This balance of simplicity and depth allows readers to connect deeply with the poem’s emotional landscape, embodying the Romantic ideal of nature’s power to inspire and uplift the human spirit.

Historical Context

Written in 1798, the poem reflects the Romantic Movement’s emphasis on nature and emotion, published in Lyrical Ballads, showcasing Wordsworth’s innovative style and deep connection to the natural world.

William Wordsworth and the Romantic Movement

William Wordsworth was a central figure in the Romantic Movement, a literary era that celebrated nature, emotion, and individualism. His poem, “I Wandered Lonely as a Cloud,” exemplifies these themes, capturing the beauty of the natural world and the poet’s emotional response to it. Wordsworth’s work often emphasized the restorative power of nature, reflecting the movement’s focus on the sublime and the personal experience. His collaboration with Samuel Taylor Coleridge on Lyrical Ballads marked a turning point in Romantic literature, influencing generations of poets and writers. Wordsworth’s legacy continues to be celebrated through his timeless poetry.

Publication in “Lyrical Ballads”

William Wordsworth’s poem “I Wandered Lonely as a Cloud” was first published in the 1807 edition of Lyrical Ballads, a collaborative work with Samuel Taylor Coleridge. The collection aimed to revolutionize poetry by focusing on nature, emotion, and the common man. Wordsworth’s poem, with its vivid imagery of daffodils, became a standout piece, reflecting the anthology’s mission to connect readers with the natural world. Initially titled “I Wandered Lonely as a Cloud,” it gained popularity and underwent revisions, notably in the 1815 edition. Its inclusion in Lyrical Ballads solidified Wordsworth’s reputation as a leading Romantic poet, showcasing his unique voice and vision.

Influence of Dorothy Wordsworth’s Journal

Dorothy Wordsworth’s journal played a pivotal role in inspiring “I Wandered Lonely as a Cloud.” Her vivid descriptions of nature, including daffodils, provided William with poetic material. Dorothy’s entries captured the beauty of the Lake District, where the siblings often walked together. Her observations of the natural world, documented in her journal, offered William a wealth of imagery and emotion. Dorothy’s presence during the encounter with the daffodils is noted in her writings, showcasing her influence on William’s creative process. Her journal not only reflected their shared experiences but also enriched William’s poetry with its detailed and evocative accounts of nature.

The Poet’s Inspiration

William Wordsworth drew inspiration from nature and personal experiences, reflecting in his poem the joy of discovering daffodils. The PDF version highlights his emotional connection to the Lake District, where the daffodils inspired his creativity, blending natural beauty with inner reflection.

The Role of Daffodils as a Symbol

The daffodils in “I Wandered Lonely as a Cloud” symbolize nature’s vibrant beauty and the fleeting joy it brings. Wordsworth uses them to represent hope and renewal, their golden hue evoking feelings of warmth and inspiration. The daffodils also embody the transient yet profound impact of natural experiences on the human soul. As a symbol, they connect the poet to the cyclical rhythms of life, emphasizing the enduring power of memory. The PDF versions of the poem often highlight this symbolism, reinforcing the daffodils’ role as a timeless motif in Romantic literature.

The Lake District Setting

The serene beauty of the Lake District deeply inspired Wordsworth’s “I Wandered Lonely as a Cloud.” The poem’s vivid imagery of lakes, trees, and natural landscapes reflects the region’s captivating charm. The specific setting beside Ullswater Lake, where Dorothy Wordsworth first noted the daffodils, underscores the poem’s connection to real-life experiences. The Lake District’s tranquil atmosphere and picturesque vistas provided the perfect backdrop for Wordsworth’s reflections on nature and solitude. This setting not only shaped the poem’s content but also reinforced its themes of nature’s beauty and the poet’s emotional response to it, as detailed in the PDF versions of the poem.

Personal Experiences and Emotions

Wordsworth’s “I Wandered Lonely as a Cloud” is deeply rooted in personal experience, as the poem was inspired by a real-life encounter with daffodils during a walk with his sister Dorothy. The emotions conveyed in the poem reflect the poet’s intimate connection with nature and its ability to evoke joy and comfort. The daffodils symbolize beauty and resilience, resonating with Wordsworth’s inner state and offering solace in moments of solitude. PDF versions of the poem highlight how Wordsworth’s emotional response to nature transcends time, making the poem a timeless expression of personal reflection and the restorative power of the natural world.

Analysis of Key Lines

The poem’s opening line, “I wandered lonely as a cloud,” introduces themes of solitude and connection with nature, setting the tone for the daffodils’ vibrant imagery.

“I wandered lonely as a cloud”

The opening line, “I wandered lonely as a cloud,” sets the tone for the poem, evoking themes of solitude and connection with nature. Wordsworth uses the cloud as a symbol of freedom and drifting, reflecting his emotional state; This line introduces the idea of the speaker’s isolation, which contrasts with the vibrant imagery of the daffodils later in the poem. The cloud metaphor also highlights the fluidity of nature and the poet’s ability to observe and reflect on his surroundings. This line is central to the poem’s structure, establishing the speaker’s perspective and laying the groundwork for the transformative encounter with the daffodils.

“A host, of golden daffodils”

The line “A host, of golden daffodils” captures the vivid imagery of a vast, vibrant field of daffodils swaying in the breeze. Wordsworth uses the term “host” to convey the overwhelming number of flowers, creating a sense of natural abundance and joy. The golden color symbolizes brightness and hope, while the daffodils themselves represent resilience and beauty. This line is central to the poem’s celebration of nature’s splendor and its ability to inspire the human spirit. The image of the daffodils dancing beside the lake and under the trees further emphasizes their dynamic and life-affirming presence, which contrasts with the speaker’s initial solitude.

“Continuous as the stars that shine”

The line “Continuous as the stars that shine” reflects the enduring and infinite beauty of nature. Wordsworth compares the daffodils to the stars, emphasizing their vastness and timelessness. Just as the stars twinkle endlessly, the daffodils stretch in a “never-ending line,” symbolizing eternity and harmony. This simile connects the earthly scene with the celestial, highlighting the speaker’s awe and the profound impact of the moment. The continuity of natural beauty contrasts with the fleeting nature of human experience, offering solace and inspiration. This poetic device underscores the theme of nature’s transcendence and its lasting influence on the human soul, as explored in the PDF versions of the poem.

Cultural and Literary Impact

“I Wandered Lonely as a Cloud” is a celebrated Romantic poem, widely studied in schools and available as a PDF. Its manuscript, showcased by the British Library, highlights its enduring cultural and literary influence, making it a cornerstone of English literature education globally.

Popularity and Recognition

“I Wandered Lonely as a Cloud” is one of William Wordsworth’s most celebrated poems, widely recognized for its vivid depiction of nature and emotional depth. Its popularity endures, with the poem being extensively studied in educational settings and frequently downloaded as a PDF for personal reading and analysis. Featured in the groundbreaking collection Lyrical Ballads, it has become a cornerstone of Romantic literature. The poem’s accessible language and universal themes have contributed to its lasting appeal, making it a favorite among readers and scholars alike. Its influence is further evident in its numerous citations and adaptations, solidifying its place in literary history.

Adaptations and Interpretations

The poem has inspired numerous adaptations, including audio recordings and educational commentaries available in PDF formats. These resources enhance understanding and appreciation of the poem’s themes. Additionally, the British Library’s manuscript of the poem is displayed alongside the Wordsworth Trust’s exhibits, offering cultural and historical insights. Performances and exhibitions further celebrate its enduring relevance, making it accessible to diverse audiences while preserving its literary significance.

Educational Significance

“I Wandered Lonely as a Cloud” holds a prominent place in educational curricula, offering insights into Romantic literature and poetic techniques. PDF versions of the poem, often accompanied by editorial commentary and audio recordings, provide students with comprehensive study materials. The poem’s structure, themes, and imagery are frequently analyzed in classrooms to teach literary devices and historical context. Its inclusion in resources like Poetry Out Loud and its availability in educational databases make it a cornerstone for teaching Romanticism and the art of poetry. Educators use the poem to explore nature’s role in inspiring creativity and emotional reflection.

Modern Relevance

The poem remains widely accessible as a PDF, ensuring its modern relevance. Cultural events and exhibitions continue to celebrate its enduring appeal and digital availability.

Availability as a PDF and Online Resources

The poem “I Wandered Lonely as a Cloud” is widely available as a free PDF and text file for download or online reading. Platforms offer easy access to the poem, enabling readers to explore its themes and structure. Many PDF versions include editorial commentary, transcription corrections, and audio files, enhancing the learning experience. This digital accessibility ensures the poem remains a popular choice for educational purposes and personal enjoyment. Readers can find these resources through academic websites, poetry archives, and cultural platforms dedicated to Romantic literature.

Contemporary Readings and Performances

Contemporary readings of “I Wandered Lonely as a Cloud” bring the poem to life through various performances and adaptations. Audio files and YouTube videos feature actors and poets reciting the poem, offering a modern interpretation of Wordsworth’s work. Additionally, live readings and dramatic performances are often held during literary festivals and cultural events celebrating Romantic poetry. These performances not only honor the poem’s legacy but also introduce it to new audiences, ensuring its relevance in today’s world. The fusion of traditional text with modern presentation styles keeps the poem vibrant and engaging for contemporary listeners.

Exhibitions and Cultural Events

The British Library has showcased William Wordsworth’s manuscript of “I Wandered Lonely as a Cloud” in a special exhibition at Wordsworth Grasmere, offering insights into the poem’s creation. Cultural events celebrating the poem include guided walks in the Lake District, where visitors explore the landscapes that inspired Wordsworth. Additionally, exhibitions often feature rare editions of Lyrical Ballads, highlighting the poem’s historical significance. Interactive displays and workshops allow attendees to engage with the poem’s themes and imagery. These events not only honor the poem’s legacy but also foster a deeper connection with nature and Romantic literature for modern audiences.

William Wordsworth’s “I Wandered Lonely as a Cloud” remains a timeless masterpiece, with its PDF availability ensuring its enduring reach and accessibility for modern readers worldwide.

Legacy of the Poem

“I Wandered Lonely as a Cloud” is a cornerstone of Romantic literature, celebrated for its vivid imagery and emotional depth. Its PDF availability has made it accessible globally, ensuring its enduring legacy. The poem’s timeless themes of nature’s beauty and human emotion continue to inspire readers. As a cultural icon, it has influenced art, music, and literature, while its educational significance remains paramount in schools and universities. The British Library’s decision to lend the manuscript to Wordsworth Grasmere highlights its historical value. This poem’s exploration of nature and memory solidifies its place as a lasting masterpiece of world literature.

Enduring Appeal to Readers

The PDF availability of “I Wandered Lonely as a Cloud” has ensured its widespread reach, making it a beloved read for generations. The poem’s vivid imagery and emotional depth resonate deeply, offering solace and inspiration. Its themes of nature’s beauty and memory’s power connect with readers universally. The ease of access in digital formats has introduced the poem to new audiences, while its timeless messages continue to captivate scholars and poetry enthusiasts alike. The poem’s ability to evoke personal reflections and emotional responses ensures its lasting relevance in contemporary literature.

scotchbond universal plus instructions

Scotchbond Universal Plus Adhesive is a next-generation dental bonding agent designed for versatility and efficiency․ It offers enhanced performance, ease of use, and reliable results in various procedures․

Overview of Scotchbond Universal Plus Adhesive

Scotchbond Universal Plus Adhesive is a advanced, single-component dental adhesive designed for universal use in both direct and indirect restorative procedures․ It builds on the proven performance of its predecessor, Scotchbond Universal Adhesive, with enhanced features for greater control and predictability․ The adhesive is compatible with all etching techniques—total-etch, self-etch, and selective-etch—and works seamlessly with a wide range of dental materials, including composites, cements, and ceramics․ Its formulation includes optimized monomers, such as HEMA, to ensure strong and durable bonds․ Additionally, Scotchbond Universal Plus is radiopaque, making it easier to identify on radiographs, and it helps reduce dentin sensitivity by sealing the tubules effectively․ Available in convenient L-Pop blisters or bottles, it offers flexibility for clinical use while maintaining simplicity in application․ This adhesive is a trusted choice for clinicians seeking reliability and versatility in their restorative workflows․

Key Features and Benefits

Scotchbond Universal Plus Adhesive offers exceptional versatility and performance, making it a superior choice for dental bonding․ Its universal compatibility allows use with all etching techniques—total-etch, self-etch, and selective-etch—ensuring flexibility in clinical workflows․ The adhesive is radiopaque, aiding in radiographic identification, and contains optimized monomers like HEMA for reliable bonding․ It provides a strong, durable seal, reducing dentin sensitivity by effectively occluding tubules․ Compatibility with a wide range of materials, including composites, cements, and ceramics, ensures versatility in both direct and indirect restorations․ Its single-component design simplifies application, while the availability in L-Pop blisters or bottles offers convenience․ Enhanced control and predictability make it a trusted solution for clinicians, delivering consistent results across various procedures․ Its alignment with 3M RelyX Universal Resin Cement further streamlines workflows, eliminating the need for a separate light-curing step․

Application Methods

Scotchbond Universal Plus Adhesive supports total-etch, self-etch, and selective-etch techniques, offering flexibility in clinical workflows․ Its compatibility with multiple methods ensures efficient bonding for diverse restorative needs․

Total-Etch Technique

The total-etch technique involves etching both enamel and dentin to create microretentions for bonding․ Scotchbond Universal Plus Adhesive is applied after rinsing and drying the etched surface․ It ensures a strong bond by penetrating the etched tooth structure․ The adhesive is dispensed, spread thinly with a microbrush, and gently air-dried to evaporate excess solvent․ Light-curing follows for 10 seconds to polymerize the bond․ This method is ideal for direct restorations, offering durability and reduced post-operative sensitivity․ Proper preparation and adherence to instructions are crucial for optimal results․

Self-Etch Technique

The self-etch technique simplifies bonding by combining etching and priming in one step․ Scotchbond Universal Plus Adhesive is applied directly to the tooth surface without prior etching․ Use a microbrush to spread a thin, even layer, ensuring complete coverage․ Gently air-dry for 5 seconds to remove excess solvent, then light-cure for 10 seconds․ This technique minimizes post-operative sensitivity and preserves tooth structure․ It is ideal for patients with sensitive teeth and offers a time-efficient solution for direct restorations․ Adherence to manufacturer instructions ensures optimal bonding performance and durability․

Selective-Etch Technique

The selective-etch technique involves etching only specific areas of the tooth, typically the enamel, while leaving the dentin untouched․ This method helps preserve the dentin and reduces the risk of sensitivity․ For Scotchbond Universal Plus Adhesive, apply the etchant to the enamel surfaces for 15 seconds, rinse thoroughly, and blot dry․ Then, apply the adhesive according to the manufacturer’s instructions․ This technique is particularly useful for patients with dentin hypersensitivity․ It ensures a strong bond to enamel while minimizing exposure of dentin, thereby reducing post-operative sensitivity․ The selective-etch approach balances efficiency and patient comfort, making it a preferred method in many clinical scenarios․ Proper technique ensures long-lasting restorations and optimal outcomes․

Step-by-Step Instructions

Prepare the tooth surface, apply Scotchbond Universal Plus Adhesive, cure with light, and follow post-curing care for a strong, reliable bond and optimal results․

Preparation of the Tooth Surface

Proper preparation is crucial for optimal bonding․ Clean the tooth surface thoroughly to remove plaque, debris, or contaminants․ Isolate the tooth using rubber dam or cotton rolls to maintain a dry environment․ For total-etch techniques, apply phosphoric acid etchant for 15 seconds, rinse with water, and gently dry․ In self-etch or selective-etch methods, follow specific etching times as per clinical needs․ Ensure the surface is free of moisture and contaminants before applying Scotchbond Universal Plus Adhesive․ Proper preparation ensures a strong, reliable bond, minimizing post-procedure sensitivity and enhancing restoration longevity․

Application of Scotchbond Universal Plus Adhesive

Apply Scotchbond Universal Plus Adhesive using the disposable applicator․ Gently scrub the adhesive onto the prepared tooth surface for 20 seconds, ensuring full coverage․ Use light to moderate pressure to distribute evenly․ Allow excess solvent to evaporate by air-drying for 5-10 seconds․ Light-cure the adhesive for 10 seconds with a curing light of appropriate intensity․ Avoid pooling and ensure thin, uniform application for optimal bonding performance․ Proper application ensures a strong, durable bond between the tooth and restorative material, supporting long-term clinical success․

Curing the Adhesive

Curing Scotchbond Universal Plus Adhesive requires a curing light with an intensity of at least 400 mW/cm²․ Light-cure the adhesive for 10 seconds to ensure proper polymerization․ Avoid overexposure, as it may not enhance bond strength․ For optimal results, cure in a controlled environment, ensuring the adhesive is fully covered by the curing light․ In dual-cure modes, the adhesive can also be initiated by RelyX Universal Resin Cement, eliminating the need for a separate light-curing step․ Proper curing ensures a strong and durable bond, minimizing post-procedure sensitivity and enhancing clinical outcomes․ Always follow the manufacturer’s guidelines for curing times and intensity to achieve the best results․

Post-Curing Care

After curing, avoid exposing the adhesive to direct light or heat to prevent degradation․ The cured surface should be protected from contamination․ Gently rinse with water if needed, ensuring no residue remains․ For indirect restorations, handle the cured adhesive with clean, dry instruments to maintain bond integrity․ Store any unused adhesive in its original container, following the recommended storage conditions․ Proper post-curing care ensures the adhesive’s longevity and effectiveness, preventing any compromise in the bond strength․ Always adhere to the manufacturer’s instructions for handling and storage to maintain optimal results․

Compatibility with Dental Materials

Scotchbond Universal Plus Adhesive is compatible with a wide range of dental materials, including restorative composites, cements, and indirect restorations, ensuring reliable bonding across various procedures․

Compatibility with Restorative Materials

Scotchbond Universal Plus Adhesive demonstrates excellent compatibility with a variety of restorative materials, including composites, resins, and core build-up materials․ Its versatility ensures a strong bond with both self-cure and dual-cure restorative systems․ The adhesive is specifically designed to work seamlessly with 3M restorative materials, such as Filtek Ultimate Universal Restorative, for consistent and durable results․ It also supports compatibility with materials requiring self-cure mechanisms, making it a reliable choice for diverse clinical applications․ This broad compatibility reduces the need for multiple adhesives, streamlining the restorative process․ Additionally, its radiopacity enhances visibility on radiographs, aiding in accurate diagnosis and treatment monitoring․

Compatibility with Dental Cements

Scotchbond Universal Plus Adhesive is fully compatible with a wide range of dental cements, including resin cements like 3M RelyX Universal Resin Cement․ Its optimized formulation ensures a strong bond with both self-cure and dual-cure cements․ The adhesive is specifically designed to work seamlessly with 3M cements, eliminating the need for a separate light-curing step when used with RelyX Universal Resin Cement․ This compatibility streamlines clinical procedures and enhances efficiency․ Additionally, the adhesive is compatible with glass ionomer cements and resin-modified cements, making it a versatile choice for various restorative needs․ Its universal design ensures reliable performance across different cement types, providing consistent and durable results in diverse clinical applications․

Compatibility with Indirect Restorations

Scotchbond Universal Plus Adhesive is highly compatible with indirect restorations, ensuring a strong and durable bond with various restorative materials․ It works seamlessly with zirconia, glass ceramics, and metal restorations, making it ideal for both cementation and bonding procedures․ The adhesive is suitable for use with resin cements like RelyX Universal Resin Cement, providing a reliable bond for long-term clinical success․ Its compatibility extends to all etching techniques, including total-etch, self-etch, and selective-etch, allowing flexibility in different clinical scenarios․ This versatility ensures that Scotchbond Universal Plus Adhesive can be used effectively in a wide range of indirect restoration cases, from crowns to bridges, while maintaining its high performance and reliability․

Clinical Considerations

Scotchbond Universal Plus Adhesive offers excellent radiopacity for clear imaging and minimizes dentin sensitivity, ensuring a strong bond to tooth structures for optimal clinical outcomes․

Radiopacity of Scotchbond Universal Plus

Scotchbond Universal Plus Adhesive is the first universal adhesive with built-in radiopacity, ensuring clear visibility on radiographs for accurate diagnostic assessments․ This feature allows clinicians to easily identify the adhesive layer, preventing interference with radiographic evaluations of restorations․ Radiopacity is crucial for detecting marginal discrepancies or secondary caries, ensuring long-term restoration success․ The adhesive maintains its bonding efficiency while providing this diagnostic advantage, making it a reliable choice for both direct and indirect restorations․ This innovation enhances clinical confidence and streamlines post-procedure evaluations, aligning with modern dental practices that prioritize precision and patient care․ By integrating radiopacity, 3M has addressed a key clinical need, setting a new standard in adhesive technology․

Reducing Dentin Sensitivity

Scotchbond Universal Plus Adhesive is designed to effectively reduce dentin sensitivity by sealing dentin tubules, preventing fluid flow, and blocking nerve stimulation․ Its unique formula creates a hydrophobic barrier, ensuring long-lasting protection․ Used in both self-etch and total-etch techniques, the adhesive minimizes sensitivity in patients with exposed dentin․ Clinical studies show its effectiveness in reducing post-procedure sensitivity, making it ideal for restorative procedures․ The adhesive’s ability to seal dentin tubules ensures a strong, durable bond while addressing patient discomfort․ This feature is particularly beneficial for patients with hypersensitivity, providing both functional and comfort advantages․ Scotchbond Universal Plus Adhesive is a recommended solution for clinicians aiming to enhance patient comfort and restore dental health effectively․

Storage and Handling

Store Scotchbond Universal Plus Adhesive at 2-25°C, away from direct sunlight and moisture․ Keep in original container to maintain product integrity and shelf life․

Proper Storage Conditions

To maintain the effectiveness of Scotchbond Universal Plus Adhesive, store it at temperatures between 2°C and 25°C (36°F to 77°F)․ Keep the product away from direct sunlight, moisture, and extreme temperature fluctuations․ Store in the original container, ensuring it is tightly sealed after each use to prevent contamination․ Avoid storing in areas prone to humidity or exposure to chemicals․ The adhesive should be kept upright to prevent leakage․ For optimal performance, do not refrigerate or freeze the product unless specified․ Proper storage conditions ensure the adhesive retains its properties and shelf life, providing reliable bonding results in dental procedures․ Always follow the manufacturer’s guidelines for storage to maintain product integrity․

Shelf Life and Expiry

Scotchbond Universal Plus Adhesive has a shelf life of two years from the date of manufacture when stored under proper conditions․ The expiry date is printed on the product packaging and should be checked before use․ Always ensure the product is within its shelf life to guarantee optimal performance․ Improper storage or exposure to extreme conditions may reduce its effectiveness, even within the expiry period․ After the expiry date, the product should not be used, as its bonding properties may degrade․ Dental clinics should maintain a stock rotation policy to use the oldest stock first․ Adhering to these guidelines ensures the adhesive performs as intended and maintains patient treatment quality․ Proper handling and storage are critical to preserving the product’s shelf life and reliability․

Evolution from Scotchbond Universal

Scotchbond Universal Plus is the next evolution, offering enhanced control and predictability while maintaining the original’s versatility and benefits․ It builds on its predecessor’s strong clinical reputation․

Improvements in Scotchbond Universal Plus

Scotchbond Universal Plus Adhesive introduces several key improvements over its predecessor․ It offers enhanced bond strength, durability, and clinical performance․ The optimized formulation provides better control and predictability in dental procedures․ One notable improvement is the inclusion of an optimized amount of HEMA, which enhances bonding to various substrates․ Additionally, the adhesive is now radiopaque, aiding in better visibility during radiographic examinations․ It also streamlines the application process, reducing steps and saving time․ Furthermore, Scotchbond Universal Plus is fully compatible with 3M RelyX Universal Resin Cement, eliminating the need for a separate light-curing step․ These advancements make it a more versatile and efficient choice for both direct and indirect restorations, ensuring reliable outcomes in diverse clinical scenarios․

Comparison with the Original Scotchbond Universal

Scotchbond Universal Plus Adhesive builds upon the foundation of its predecessor while incorporating notable improvements․ Compared to the original Scotchbond Universal, the Plus version offers enhanced bond strength and durability․ It features an optimized HEMA content, which improves its compatibility with a wider range of dental materials․ Additionally, Scotchbond Universal Plus introduces radiopacity, a feature not present in the original, making it easier to detect during radiographic examinations․ The new formulation also provides better control and predictability in clinical applications․ While maintaining the versatility of the original, Scotchbond Universal Plus streamlines procedures, particularly when used with 3M RelyX Universal Resin Cement, as it eliminates the need for a separate light-curing step․ These advancements make it a superior choice for modern dental practices, offering improved efficiency and reliability without compromising on the benefits that made the original widely trusted․

Safety and Precautions

Handle Scotchbond Universal Plus Adhesive with care to avoid skin and eye contact․ Use in well-ventilated areas and follow instructions to minimize exposure and prevent allergic reactions․

Safety Guidelines for Use

When using Scotchbond Universal Plus Adhesive, always handle with care to avoid skin and eye contact․ Wear protective gloves and eyewear to minimize exposure․ Use in a well-ventilated area to prevent inhalation of volatile compounds․ Follow the instructions carefully to avoid unnecessary exposure․ In case of skin contact, wash thoroughly with soap and water․ For eye exposure, flush with water and seek medical attention if irritation persists․ Individuals with known allergies to dental materials should exercise caution․ Store the product away from direct sunlight and heat sources․ Dispose of waste materials according to local regulations․ Adhere to the recommended usage guidelines to ensure safe and effective application․

Precautions and Contraindications

Scotchbond Universal Plus Adhesive is contraindicated in patients with known hypersensitivity to any of its components, such as HEMA or other methacrylates․ Avoid use in cases of active oral infections or where the dental surface is severely compromised․ Take care to prevent prolonged exposure to the adhesive, as it may cause irritation․ Not recommended for patients with a history of allergic reactions to dental materials․ Use with caution in pediatric patients and those with sensitive teeth․ Ensure proper isolation of the treatment area to avoid contamination․ Follow all safety guidelines and manufacturer instructions to minimize risks and ensure optimal outcomes․

Troubleshooting Common Issues

Common issues with Scotchbond Universal Plus Adhesive include incomplete curing or inadequate bonding․ Ensure proper surface preparation and follow application instructions precisely․ Avoid contamination during application․ If sensitivity occurs, review technique and ensure proper sealing of dentin․ For bonding failures, check etching and drying steps․ Store products according to guidelines to maintain efficacy․ Consult manufacturer support for persistent issues․ Proper technique and adherence to instructions are key to optimal results․

Adhesive Failure and Remedies

Adhesive failure with Scotchbond Universal Plus Adhesive can occur due to improper surface preparation or insufficient etching․ To address this, ensure the tooth surface is clean and dry․ Re-etch the area if necessary, following the recommended etching time․ Apply a fresh layer of adhesive, adhering to the instructions for proper coverage and curing time․ Contamination during application should be avoided to maintain bond integrity․ If bonding fails, re-evaluate the etching and drying steps․ For cases of post-procedure sensitivity, check for incomplete sealing of dentin tubules; Reapply the adhesive and cure according to guidelines․ Proper technique and adherence to instructions are critical for achieving a durable bond and minimizing failures․

Post-Procedure Sensitivity Solutions

Post-procedure sensitivity can be addressed by ensuring proper adhesive application and dentin tubule sealing․ Reapply Scotchbond Universal Plus Adhesive to uncovered areas and cure as instructed․ Desensitizing varnishes or gels may be applied post-curing to reduce sensitivity․ Patients should avoid consuming hot or cold substances for 24 hours; If sensitivity persists, check for incomplete bonding or etching errors․ Re-evaluating the technique and ensuring strict adherence to instructions can prevent future issues․ Monitoring the patient’s symptoms and providing additional treatments as needed is essential for long-term success and patient comfort․

Scotchbond Universal Plus Adhesive offers enhanced performance, versatility, and reliability, making it a top choice for dental procedures․ Its advanced formulation ensures superior bonding and patient satisfaction, driving future innovations in adhesive technology․

Advantages of Using Scotchbond Universal Plus

Scotchbond Universal Plus Adhesive offers numerous advantages, including its universal compatibility with all dental materials and etching techniques․ It provides a strong, reliable bond, reducing the risk of restoration failure․ The adhesive is easy to apply, with a simplified process that saves clinical time․ Its radiopacity enhances visibility on radiographs, ensuring accurate diagnosis and monitoring; Additionally, it helps minimize dentin sensitivity, improving patient comfort․ The product is part of a fully aligned system with RelyX Universal Resin Cement, streamlining procedures․ Its optimized HEMA content ensures excellent bonding without compromising durability․ Overall, Scotchbond Universal Plus delivers exceptional performance, versatility, and predictability, making it a preferred choice for dental professionals seeking high-quality outcomes in restorative and preventive care․

Future Prospects in Dental Adhesive Technology

The future of dental adhesive technology is poised for significant advancements, with Scotchbond Universal Plus Adhesive leading the way․ Researchers are exploring enhanced formulations that integrate nanotechnology for stronger, more durable bonds․ Biocompatible and eco-friendly materials are expected to gain prominence, reducing environmental impact while maintaining high performance․ The development of smart adhesives that adapt to oral conditions could revolutionize dentistry, offering real-time protection against decay and sensitivity․ Additionally, advancements in digital dentistry may enable customized adhesive solutions tailored to individual patient needs․ As the industry evolves, the focus will remain on creating products that enhance clinical outcomes, simplify procedures, and prioritize patient well-being, ensuring Scotchbond Universal Plus Adhesive remains at the forefront of innovation․

counting by 7s pdf

Counting by 7s is a captivating novel by Holly Goldberg Sloan that tells the story of Willow Chance, a 12-year-old genius navigating life’s challenges. Adopted as a baby, Willow finds solace in counting by 7s and diagnosing medical conditions. After her parents’ tragic death in a car accident, she must rebuild her life and find a surrogate family. The book explores themes of loss, resilience, and human connection, offering a poignant yet uplifting journey through Willow’s unique perspective. This PDF version of the novel provides an accessible way to experience Sloan’s heartfelt storytelling and the inspiring world of Willow Chance.

1.1 Background Information

Counting by 7s, a novel by Holly Goldberg Sloan, introduces readers to Willow Chance, a 12-year-old genius whose life is shaped by her unique personality and circumstances. Adopted as a baby, Willow grows up in a loving family that embraces her eccentricities. Her parents encourage her intellectual curiosity, allowing her to thrive despite feeling like an outsider. Willow’s obsession with counting by 7s serves as a coping mechanism, reflecting her need for order and control in a chaotic world.

Willow’s journey takes a dramatic turn when her parents are killed in a car accident. This event forces her to confront loss and rebuild her life. The novel explores themes of resilience, identity, and the power of human connection. Willow’s intellectual gifts, such as her ability to diagnose medical conditions and her deep understanding of nature, set her apart but also provide her with tools to navigate her challenges.

The PDF version of Counting by 7s has become a popular choice for readers due to its accessibility and readability. The digital format allows readers to highlight passages, search for specific quotes, and easily navigate through the book. This convenience has made the novel a favorite among students and educators, particularly for classroom discussions and book clubs.

Holly Goldberg Sloan’s writing style in Counting by 7s is both heartfelt and humorous, making the story relatable and engaging. The novel has received widespread acclaim for its portrayal of a young girl’s struggle to find her place in the world. Willow’s story resonates with readers of all ages, offering insights into the complexities of growing up and the importance of finding one’s own path.

The book also delves into the foster care system and the challenges faced by children in such situations. Willow’s experiences with her foster family and the people she meets along the way highlight the resilience of the human spirit. Through her interactions, Willow learns the value of friendship and the importance of accepting help from others.

Counting by 7s is not just a story about loss; it is also a celebration of life, hope, and the power of the human spirit. Willow’s unique perspective and her ability to find meaning in the world around her make her one of the most memorable characters in contemporary young adult literature. The PDF format ensures that her story is accessible to a wide audience, allowing readers to connect with Willow’s journey in a convenient and engaging way.

1.2 Publication Details

Counting by 7s is a young adult novel written by Holly Goldberg Sloan and published by Dial Books for Young Readers in 2013. The book was released on August 27, 2013, and has since gained widespread recognition for its unique storytelling and heartfelt themes. With a total of 384 pages, the novel is categorized under young adult fiction, contemporary, and realistic fiction genres. The ISBN for the hardcover edition is 9781101591352, while the paperback and e-book versions are also widely available.

The PDF version of Counting by 7s has become a popular choice for readers who prefer digital formats. The PDF is easily accessible on various platforms, including online bookstores and libraries, making it convenient for students and educators to use for classroom discussions or personal reading. The digital format also allows readers to highlight passages, bookmark pages, and search for specific quotes, enhancing the overall reading experience.

The novel is primarily targeted at young adult readers, though its themes of resilience, identity, and human connection appeal to audiences of all ages. The book has been praised for its ability to balance humor and tragedy, making it a relatable and engaging read. Holly Goldberg Sloan’s writing style is both lyrical and accessible, ensuring that the story resonates with readers from diverse backgrounds.

Counting by 7s has received critical acclaim and has been recognized with several awards and nominations. The novel was named one of the best books of 2013 by The New York Times and was a finalist for the 2014 Schneider Family Book Award. These accolades highlight the book’s impact and its ability to address complex themes in a way that is both authentic and uplifting.

In addition to its literary success, the book has been adopted by schools and book clubs for its thought-provoking content. Teachers often use the novel to explore themes such as grief, perseverance, and the importance of relationships. The discussion questions provided in the PDF version of the book further enhance its educational value, making it a valuable resource for fostering meaningful conversations.

The PDF version of Counting by 7s is also notable for its readability and formatting. The text is clear and well-organized, ensuring that readers can easily follow Willow’s journey. The digital format has made the book more accessible to a global audience, allowing readers from different regions to experience Willow’s story without the need for physical copies.

Plot Summary

Counting by 7s follows the journey of Willow Chance, a brilliant and eccentric 12-year-old girl who finds comfort in counting by 7s. After her parents’ tragic death in a car accident, Willow’s life is turned upside down. She meets Dell Duke, a kind-hearted taxi driver, and his family, who take her under their wing. Alongside Mai and Quang-ha, Dell’s siblings, Willow learns to navigate her grief and find a sense of belonging. The story explores themes of loss, resilience, and the power of human connection, as Willow discovers that family can come in unexpected forms.

2.1 Main Plot Overview

Counting by 7s by Holly Goldberg Sloan is a heartwarming and thought-provoking novel that centers around Willow Chance, a 12-year-old genius who struggles to connect with others due to her unique personality and intellect. Willow’s life is turned upside down when her adoptive parents are killed in a car accident, leaving her alone and adrift. The story begins with Willow’s adoption as a baby and her upbringing by parents who embrace her quirks, including her obsession with counting by 7s and her talent for diagnosing medical conditions. Despite her brilliance, Willow feels like an outsider, and her oddities often make it difficult for her to fit in with her peers.

The main plot kicks into gear when Willow’s parents are tragically killed, and she is forced to navigate the complexities of grief and loss. With no biological family to turn to, Willow must rely on the kindness of strangers and the support of those around her. Enter Dell Duke, a taxi driver who becomes a pivotal figure in Willow’s life. Dell, along with his siblings Mai and Quang-ha, takes Willow under their wing, offering her a sense of belonging and a makeshift family. Together, they help Willow confront her grief and find a new sense of purpose.

Throughout the novel, Willow’s journey is marked by moments of resilience and growth. Her unique perspective on the world, shaped by her intellect and her counting habit, allows her to see things that others miss. The story explores themes of identity, family, and the power of human connection. Willow’s relationships with Dell, Mai, and Quang-ha are central to the plot, as they provide her with the support and love she needs to heal. The novel also delves into the challenges of being different and the importance of finding one’s place in the world.

The plot is driven by Willow’s internal struggles and her interactions with the people around her. Her ability to count by 7s becomes a coping mechanism, helping her to process her emotions and find order in a chaotic world. The novel’s title reflects this theme, as Willow’s counting becomes a symbol of her resilience and her ability to find meaning in life’s challenges. The story is both poignant and uplifting, offering a message of hope and the possibility of finding family in unexpected places.

Overall, the main plot of Counting by 7s is a powerful exploration of loss, resilience, and the human spirit. Willow’s journey is one of self-discovery and growth, as she learns to embrace her differences and find her place in the world. The novel’s themes of family, love, and connection resonate deeply, making it a compelling and unforgettable read.

2.2 Key Subplots

Within the broader narrative of Counting by 7s, several key subplots add depth and complexity to the story, exploring themes of identity, family, and personal growth. One of the most significant subplots revolves around Dell Duke, a taxi driver who becomes a surrogate father figure to Willow. Dell’s backstory reveals his struggles with raising his younger siblings, Mai and Quang-ha, after their parents abandoned them. His relationship with his cat, Cheddar, also plays a symbolic role, highlighting Dell’s capacity for love and responsibility despite his tough exterior. Dell’s journey from being a self-centered individual to someone who prioritizes Willow’s well-being underscores the transformative power of human connection.

Another subplot focuses on Willow’s unique talents and how they shape her interactions with others. Her ability to diagnose medical conditions and her obsession with counting by 7s are not just quirks but integral parts of her identity. These traits often set her apart from her peers, but they also serve as tools for connecting with others, such as when she helps diagnose a classmate’s illness. This subplot emphasizes the idea that being different can be both a challenge and a strength, as Willow learns to embrace her individuality while finding ways to relate to others.

The relationship between Mai and Quang-ha is another subplot that enriches the story. Mai, who is pregnant and struggling to balance her ambitions with her responsibilities, represents the complexities of adolescence and the challenges of growing up too quickly. Quang-ha, on the other hand, embodies resilience and adaptability, as he navigates his role as both a brother and a caregiver. Their dynamic with Willow adds layers to the narrative, as they learn to support her while confronting their own personal struggles. Together, they form an unconventional but loving family unit that becomes Willow’s source of strength.

Additionally, the subplot involving Willow’s adoption and her biological parents serves as a backdrop for her identity crisis. While Willow loves her adoptive parents deeply, she often wonders about her roots and the circumstances of her adoption. This curiosity is heightened after their death, as she grapples with the loss of the only family she has ever known. Her journey to understand her past and her place in the world is a recurring theme throughout the novel, adding emotional depth to her character.

Finally, the subplot of Willow’s friendship with her classmates, particularly her interactions with Pattie, highlights her isolation and her longing for connection. Pattie’s initial reluctance to befriend Willow due to her eccentricities reflects the broader theme of societal judgment and the challenges of being different. However, their eventual bond shows that even the most unlikely relationships can provide support and understanding.

These subplots intertwine seamlessly with the main plot, creating a rich tapestry of characters and experiences. They not only deepen the reader’s understanding of Willow’s world but also explore universal themes of belonging, love, and self-acceptance. Together, they make Counting by 7s a compelling and emotionally resonant story.

bandsaw box templates free pdf

Bandsaw box templates offer a creative way to craft unique wooden boxes using precise cuts and designs. These free PDF templates provide step-by-step guides for all skill levels, ensuring professional results and endless customization opportunities.

What Are Bandsaw Box Templates?

Bandsaw box templates are pre-designed patterns available as free PDF downloads, guiding the creation of intricate wooden boxes. They include detailed layouts, measurements, and material lists, suitable for all skill levels. These templates streamline the woodworking process, offering precise cutting guides for lids, drawers, and compartments. They cater to various designs, from simple to complex, allowing customization. Perfect for DIY enthusiasts, the templates ensure accuracy and professionalism, making it easier to achieve stunning results. They are ideal for crafting unique, functional pieces with a personal touch, leveraging the versatility of bandsaw techniques.

Why Use Free PDF Templates for Bandsaw Boxes?

Free PDF templates for bandsaw boxes are an excellent resource for woodworkers of all skill levels. They offer detailed designs, measurements, and step-by-step instructions, ensuring precise cuts and professional results. These templates save time by eliminating the need to create patterns from scratch. They also provide endless customization options, allowing craftsmen to personalize their projects. Additionally, free PDF templates are cost-effective, making them accessible to hobbyists and professionals alike. They are perfect for DIY enthusiasts looking to create unique, functional pieces with ease and accuracy, leveraging the versatility of bandsaw techniques.

Popular Designs and Patterns for Bandsaw Boxes

Popular bandsaw box designs include jewelry boxes, drawer boxes, and intricate patterned containers. Many templates feature unique shapes, such as circular drawers or heart-shaped designs. Woodworkers often choose materials like Baltic birch plywood or exotic woods for their aesthetic appeal. Patterns range from simple, elegant styles to complex, whimsical designs, allowing for endless creativity. Free PDF templates also include step-by-step instructions for cutting curves and creating compartments, making these designs accessible to both beginners and experienced craftsmen. These versatile patterns inspire experimentation with various woodworking techniques and materials, ensuring each box is a one-of-a-kind creation.

Benefits of Using Bandsaw Box Templates

Bandsaw box templates save time, offering pre-designed patterns and step-by-step guides. They enable customization, allowing creators to craft unique, professional-looking boxes. Perfect for all skill levels, these templates ensure precision and creativity in every project.

Time-Saving Designs for Woodworking Projects

Free PDF bandsaw box templates streamline the woodworking process by providing pre-designed patterns and detailed instructions. These templates eliminate the need to create designs from scratch, saving hours of planning time. With precise measurements and step-by-step guides, woodworkers can focus on cutting and assembling rather than drafting. This efficiency allows for faster project completion, making it ideal for both beginners and experienced craftsmen. By utilizing these templates, creators can quickly bring their ideas to life, ensuring professional results without the hassle of complex design work.

Customization Options for Unique Creations

Free PDF bandsaw box templates offer endless customization possibilities, allowing woodworkers to tailor designs to their preferences. Users can experiment with various shapes, sizes, and intricate patterns, ensuring each box is one-of-a-kind. The ability to modify templates enables the incorporation of personal style, such as adding inlays or unique hardware. Whether crafting a simple jewelry box or a complex themed design, these templates empower creators to bring their vision to life with ease, making every project truly distinctive and reflective of their craftsmanship.

Step-by-Step Instructions for Beginners

Free PDF bandsaw box templates often include detailed, step-by-step instructions, making them ideal for beginners. These guides typically start with preparing the wood blank, attaching the template using spray adhesive, and cutting out the design. They emphasize proper blade selection and safety practices. Many templates also provide tips for sanding and assembling the box. By following these instructions, newcomers can confidently create intricate designs, learning essential bandsaw techniques while producing functional and beautiful pieces. This structured approach ensures a smooth learning curve and successful outcomes.

Materials and Tools Needed

Essential materials include high-quality wood blanks, spray adhesive, and sandpaper. Tools like bandsaws, drill presses, and sanders are crucial. Safety equipment such as goggles and dust masks is recommended.

Wood Selection for Bandsaw Boxes

Selecting the right wood is crucial for bandsaw boxes. Popular choices include Baltic birch plywood for its stability and smooth surface, or Mexican ebony for a luxurious finish. Maple and cherry woods are ideal for intricate inlays, adding visual appeal. Exotic hardwoods like walnut or mahogany offer rich colors and grain patterns. For beginners, consider softer woods like pine or poplar for easier cutting. Always ensure the wood is dry and free of warping. Proper wood selection enhances both the aesthetic and structural integrity of your bandsaw box, making it a standout piece.

Essential Tools for Bandsaw Box Making

A bandsaw is the primary tool for cutting intricate designs and curves. A 3/16″ or 1/4″ blade is ideal for detailed work. Spray adhesive is used to secure templates to wood blanks. Sanders, such as belt or orbital sanders, are essential for smoothing edges and surfaces. A drill press or hand drill is necessary for adding hardware like hinges or knobs. Clamps help in assembling and aligning box components. Safety equipment, including push sticks and dust masks, is crucial for protecting yourself during the process. These tools ensure precision and safety while bringing your bandsaw box designs to life.

Safety Equipment for Woodworking

Safety is paramount when working with power tools like bandsaws. Essential equipment includes safety glasses to protect eyes from debris and dust masks to prevent inhaling wood particles. Hearing protection, such as earplugs or headphones, is crucial when operating loud machinery. A push stick or other safety accessories can help maintain control and prevent accidents. Wearing loose-fitting clothing and keeping long hair tied back reduces the risk of entanglement. Proper safety gear ensures a secure and efficient woodworking experience, allowing you to focus on creating precise cuts and intricate designs for your bandsaw box projects.

Downloading Free PDF Templates

Free PDF templates for bandsaw boxes are readily available online, offering detailed designs and instructions. These templates provide precise patterns and measurements, making your woodworking projects easier and more accurate.

Where to Find Reliable Free Templates

Reliable free PDF templates for bandsaw boxes can be found on trusted woodworking websites, such as Woodworking Plans and Projects Resource since 1998. These sites offer detailed designs and step-by-step instructions for various skill levels. Additionally, platforms like Pinterest and YouTube provide inspiration and direct links to free templates. Specific projects, such as the “Band Saw Jewelry Box” by Steve French and the “Hedgehog Pencil Holder” by Prodigal Pieces, are available for download. Ensure templates are full-sized and printed at 100% scale for accuracy. Always verify the source for reliability and quality.

How to Download and Print Templates

To download free PDF bandsaw box templates, visit trusted woodworking websites like Woodsmith or Prodigal Pieces. Select the desired design, then click the download link to save the PDF. Ensure your printer is set to 100% scale to maintain template accuracy. Use standard letter-sized paper or adjust settings for larger templates. Some templates may require creating an account or subscribing to a newsletter. After printing, review the instructions and patterns carefully before cutting. For precise results, ensure the printer’s scaling options are correctly configured. Some templates may also be accessed via secret URLs found in related books or tutorials.

Ensuring Template Accuracy and Scale

Ensure your bandsaw box templates are accurate by printing them at 100% scale. Verify scaling by measuring the template’s dimensions against the provided reference lines. Use a ruler or caliper to confirm the size. Avoid resizing, as it can distort the design. Check for any printer scaling settings like “Fit to Page” and disable them. For multi-page templates, align pages carefully using the provided grid or markers. Test the template on scrap wood before cutting the final piece to ensure precision and avoid costly mistakes. Proper alignment ensures smooth cuts and professional-looking results.

Design Considerations

Design considerations for bandsaw box templates include size, shape, and intricate patterns. Choose templates that align with your skill level and desired aesthetic, ensuring proper grain direction for visual appeal.

Choosing the Right Size and Shape

Selecting the appropriate size and shape for your bandsaw box is crucial. Templates vary widely, offering options from small jewelry boxes to larger storage containers. Consider the intended use and available materials when choosing a design. For beginners, simpler shapes like rectangular or square boxes are ideal, while experienced craftsmen might opt for intricate curved designs. Ensure the template aligns with your bandsaw blade’s capabilities, especially regarding radius limits. Proper scaling and measurement are essential for a polished final product.

Incorporating Intricate Patterns and Details

Incorporating intricate patterns and details into your bandsaw box enhances its visual appeal and uniqueness. Free PDF templates often include designs with curved lines, inlays, or carved motifs. To achieve precise cuts, use a narrow bandsaw blade, such as a 1/8″ or 1/16″ blade, which allows for tighter radius turns. Detailed patterns can be traced onto the wood using spray adhesive or carbon paper. For complex designs, consider layering or combining multiple templates. Symmetry and balance are key to ensuring the final piece looks polished and professional. Experiment with materials like contrasting wood species or metal inlays for added depth.

Considering Grain Direction for Aesthetic Appeal

Considering grain direction is crucial for achieving a visually appealing bandsaw box. Aligning the wood grain with the box’s design enhances its natural beauty and structural integrity. For intricate patterns, choose wood with a straight or figured grain, such as maple or walnut, to highlight details. When cutting, ensure the grain runs parallel to the box’s length for a smoother finish. Proper grain alignment also minimizes warping and strengthens the box. Experiment with contrasting grain directions for unique visual effects, but always prioritize stability and aesthetics in your design.

Step-by-Step Guide

Start by preparing your blank, then attach the template using spray adhesive. Cut along the pattern, sand edges for smoothness, and assemble the box for a polished finish.

Preparing the Blank for Cutting

Begin by selecting the appropriate wood for your project, such as Baltic birch plywood or exotic hardwoods. Cut the blank to the dimensions specified in your template, ensuring the height, width, and depth align with your design. Sand the blank to achieve a smooth surface, starting with coarse grit and progressing to finer grits. Attach the template to the blank using spray adhesive, centering it carefully. Double-check the alignment to ensure accurate cuts during the bandsaw process. A well-prepared blank is essential for achieving professional-looking results.

Attaching and Cutting the Template

Attach the template to the prepared blank using spray adhesive, ensuring proper alignment. Allow the adhesive to set before cutting. Use a bandsaw blade of 3/16″ or 1/4″ width for precise cuts. Cut along the template’s edge, maintaining steady control to follow the design accurately. Avoid applying too much pressure, as this can cause the blade to wander. After cutting the exterior, remove the template and sand the edges to smooth them. This step ensures clean lines and prepares the box for further detailing or assembly, achieving a professional finish.

Creating Drawers and Compartments

Once the main box is cut, focus on crafting drawers and compartments. Use the bandsaw to create openings for drawers by cutting from opposite sides for even compression. Remove the waste material to form the compartments. Sand the interior surfaces for smoothness. Attach small handles or knobs for functionality. Ensure precise alignment when assembling drawers to fit seamlessly into the box. This step adds functionality and detail, enhancing the box’s utility and aesthetic appeal, making it a practical and beautiful piece of craftsmanship.

Sanding and Smoothing the Edges

Sanding is a crucial step in creating a professional finish for your bandsaw box. Start with coarse-grit sandpaper to smooth out rough edges and gradually progress to finer grits for a polished surface. Use a sanding block to maintain even pressure and avoid uneven areas. For intricate details, opt for small, handheld sanders or files. After sanding, wipe away dust with a tack cloth to prepare the surface for finishing. Proper sanding ensures a smooth, splinter-free edge, enhancing both the functionality and aesthetic appeal of your bandsaw box.

Assembling the Final Box

Finally, bringing your bandsaw box project together requires careful assembly. Follow the template’s instructions to ensure accurate alignment of all components. Attach sides, lids, and drawers securely, using clamps to hold pieces in place while applying wood glue or screws. Properly aligning hinges and handles is essential for smooth operation. Once assembled, double-check the fit and functionality of each part. The result is a beautifully crafted box that showcases your woodworking skills and attention to detail.

Tips and Tricks

Master blade selection for clean cuts, use spray adhesive for secure template attachment, and sand thoroughly before assembly to ensure smooth, professional-looking finishes on your bandsaw box.

Mastering Blade Selection for Clean Cuts

Selecting the right bandsaw blade is crucial for clean cuts. Use a 3/16″ or 1/4″ blade for most boxes, as they balance precision and maneuverability. Choose blades with fewer teeth per inch (TPI) for faster cuts and more TPI for smoother finishes. Proper blade tension ensures straight cuts and prevents drift. Always match the blade width to the design’s smallest radius. For intricate patterns, narrower blades are ideal. Maintain sharp blades to avoid tearing wood. Experiment with different blade types, like skip-tooth or hook-tooth, depending on your material. This ensures precise, professional results every time.

Techniques for Cutting Curves Accurately

Cutting curves accurately requires careful blade control and technique. Use a narrow blade for tight turns and maintain consistent tension to prevent drift. Move slowly and smoothly through the wood, following the template closely; Apply steady pressure and keep the workpiece firmly against the table. For intricate designs, use spray adhesive to attach the template, ensuring precise alignment. Avoid applying too much pressure, which can cause the blade to wander. Practice on scrap wood to refine your skills and achieve smooth, clean curves consistently.

Avoiding Common Mistakes in Bandsaw Box Making

Beginners often encounter issues like uneven cuts or misaligned templates. To avoid these, ensure the template is securely attached with spray adhesive and follow it closely. Check blade tension and alignment before cutting, as improper setup can lead to drift. Sand thoroughly after cutting to smooth edges and prevent splinters. Keep the workpiece steady on the table to maintain control. Overestimating blade width is another common error; account for it when tracing patterns. Lastly, avoid rushing, as patience is key to achieving precise, professional results in bandsaw box making.

Finishing Touches

Apply wood finishes and sealants to protect and enhance the box’s appearance. Add hardware for functionality and personalize with engravings or paint for a unique, professional finish.

Applying Wood Finishes and Sealants

Enhance the beauty and durability of your bandsaw box by applying wood finishes and sealants. Start with a sanding process to ensure a smooth surface. Use oil-based or water-based stains to bring out the grain and color of the wood. Follow with a clear coat of polyurethane or varnish to protect the finish. For a natural look, consider using wax or oil. Always apply finishes in a well-ventilated area and follow the manufacturer’s instructions for optimal results. This step ensures your box remains protected and visually appealing for years to come.

Adding Hardware for Functionality

Add functionality to your bandsaw box with carefully selected hardware. Install hinges for smooth lid operation and latches or knobs for secure closure. Choose from a variety of styles, such as brass, nickel, or decorative options, to match your design. Measure and mark placement accurately for proper alignment. Attach hardware using screws or adhesive, ensuring a sturdy fit. This step enhances usability while maintaining the box’s aesthetic appeal. Properly installed hardware ensures your bandsaw box is both functional and visually striking, making it a practical and beautiful creation.

Personalizing Your Bandsaw Box

Personalize your bandsaw box by adding unique touches that reflect your style. Experiment with wood finishes, stains, or paints to create vibrant colors. Engrave names, patterns, or designs for a meaningful finish. Incorporate decorative hardware or inlays to enhance visual appeal. Consider adding functional elements like dividers or compartments. Use templates as a base and adapt them to suit your creativity. Whether it’s a gift or a personal project, customization ensures your bandsaw box is one-of-a-kind, making it a truly special and memorable piece.

Sharing Your Creations

Share your bandsaw box creations with woodworking communities, showcasing your craftsmanship. Gift or sell your unique designs, inspiring others to explore their own creative woodworking journeys online.

Displaying Your Work in Woodworking Communities

Sharing your bandsaw box creations in woodworking communities allows you to connect with fellow enthusiasts. Online forums, social media, and platforms like Pinterest and Instagram are ideal for showcasing your work. High-quality photos and detailed descriptions can highlight your craftsmanship. Engage with others by commenting on their projects and seeking feedback. This interaction fosters inspiration and learning, helping you refine your skills. Displaying your work also encourages others to try bandsaw box making, creating a supportive and creative community for woodworkers of all levels.

Gifting or Selling Your Bandsaw Boxes

Bandsaw boxes make thoughtful gifts and can be sold as unique, handcrafted items. Personalize them with intricate designs or custom finishes to enhance their appeal. Online marketplaces like Etsy or local craft fairs are great platforms for selling. When gifting, consider the recipient’s style or preferences to create a meaningful piece. Each box reflects your craftsmanship, making it a valuable and memorable gift or product. This approach not only shares your creativity but also turns your hobby into a potential income source.

Inspiring Others with Your Designs

Sharing your bandsaw box creations can inspire others to explore woodworking. Post your designs on platforms like Pinterest or YouTube, offering step-by-step tutorials and free PDF templates. Detailed photos and instructions help others replicate your work. By showcasing unique patterns and techniques, you encourage creativity and growth in the woodworking community. Your designs can motivate beginners to try new projects and experienced crafters to experiment with fresh ideas, fostering a culture of shared knowledge and artistic expression.

With free PDF bandsaw box templates, woodworkers of all levels can create unique, intricate designs. These templates inspire creativity and provide a solid foundation for crafting beautiful boxes.

Final Thoughts on Making Bandsaw Boxes

Making bandsaw boxes is a rewarding woodworking project that combines creativity with precision. Free PDF templates simplify the process, offering step-by-step guides for all skill levels. These templates enable woodworkers to craft intricate designs, from simple to complex patterns. The ability to customize and experiment with various woods and finishes makes each box unique. Whether for personal use, gifting, or selling, bandsaw boxes are a testament to woodworking skill and artistry. They inspire creativity and provide a sense of accomplishment with every completed project.

Encouragement to Experiment and Create

Embrace the freedom to experiment with bandsaw box templates! Free PDF templates empower you to explore diverse designs, from intricate patterns to minimalist styles. Don’t hesitate to try new woods, finishes, or hardware to make your creations truly unique. The process of making bandsaw boxes is as rewarding as the final product. Let your creativity shine by pushing boundaries and exploring endless possibilities. Every box you craft is a chance to learn, grow, and express your personal style. Happy building!