water well pump manual

Water well pumps are essential devices for extracting water from underground sources, ensuring reliable access to clean water for residential, agricultural, and emergency needs.

What is a Water Well Pump?

A water well pump is a device designed to extract water from an underground well for residential, agricultural, or emergency use. It operates by creating suction or pressure to lift water from beneath the ground surface to the surface. These pumps are typically categorized into manual and submersible types, with manual pumps being ideal for shallow wells and off-grid applications, while submersible pumps are suited for deeper wells and higher water demands. Jet pumps, a common type, are single-stage domestic pumps capable of lifting water up to 90 feet. Deep well pumps often include pressure switches and control valves for efficient operation. Proper installation and maintenance are crucial to ensure reliable performance and longevity of the pump. Regular testing for water purity and temperature is also essential to ensure safe and consistent water supply.

Importance of Water Well Pumps

Water well pumps are vital for providing reliable access to clean water, essential for drinking, irrigation, and household needs. They enable communities, especially in remote areas, to harness underground water resources sustainably. These pumps are crucial for emergency preparedness, offering a backup water supply during power outages or natural disasters. Manual and submersible pumps cater to various depths and flow requirements, ensuring versatility for different applications. By maintaining consistent water pressure and flow, they support agricultural activities and residential comfort. Regular maintenance and proper installation are key to their longevity and efficiency. Moreover, they contribute to water conservation by preventing over-extraction and ensuring optimal resource management. Overall, water well pumps are indispensable for securing and managing water supplies in diverse settings.

Types of Water Well Pumps

Water well pumps include manual, submersible, and jet pumps, each designed for specific depths and flow requirements. Manual pumps are ideal for shallow wells, while submersible pumps handle deep wells and high water demands. Jet pumps are versatile, suitable for both shallow and deep applications, making them a popular choice for residential use.
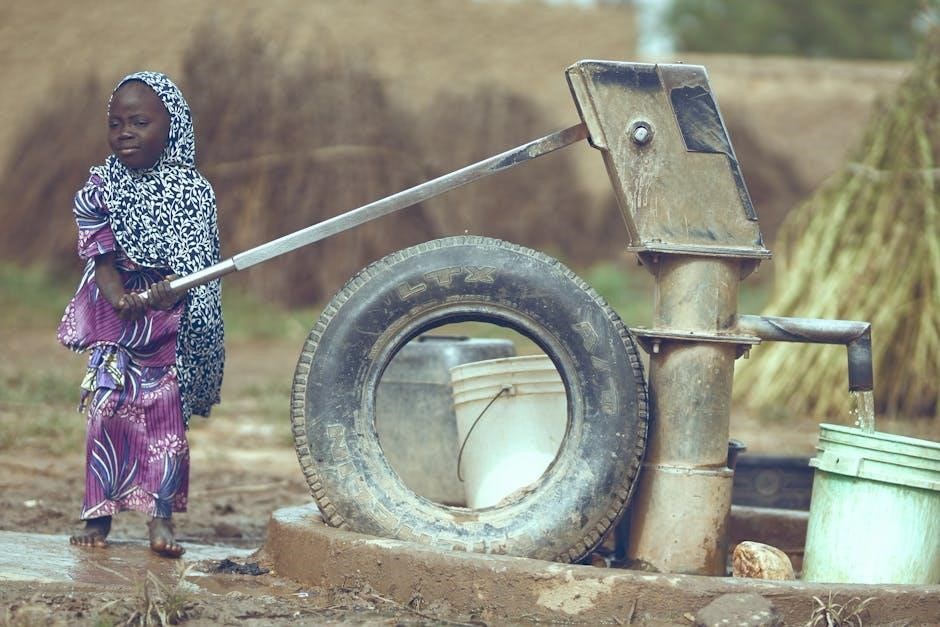
Manual Well Pumps

Manual well pumps are simple, cost-effective solutions for accessing water from shallow wells, typically up to 25 feet deep. These pumps operate without electricity, making them ideal for off-grid locations, emergencies, or areas with frequent power outages. They are often used in rural settings, farms, and homesteads where reliability and simplicity are key. Manual pumps come in various designs, such as suction pumps and pitcher pumps, and are known for their durability and low maintenance requirements. Popular brands like Simple Pump and Bison Pumps offer high-quality manual options that are easy to install and maintain. These pumps are also environmentally friendly, as they rely on human power rather than electricity. Regular maintenance, such as checking valves and ensuring proper lubrication, ensures long-term functionality. Manual well pumps are a practical choice for those seeking sustainable and self-sufficient water solutions.

Submersible Well Pumps

Submersible well pumps are high-efficiency devices designed for deep wells, typically installed underground and fully submerged in water. These pumps are ideal for wells with depths exceeding 100 feet and are known for their quiet operation and energy efficiency. They are constructed with durable materials, such as stainless steel, to withstand harsh underwater conditions. Submersible pumps are widely used in residential and agricultural settings, providing consistent water pressure and flow. Installation requires careful planning to ensure proper placement below the water level and above the well screen. Regular maintenance involves checking for sediment buildup and ensuring the pump is not exposed to dry running, which can cause damage. These pumps are a reliable choice for long-term water supply solutions, offering both performance and durability.

Shallow Well vs. Deep Well Pumps

Shallow well pumps are designed for wells with water levels up to 25 feet deep, while deep well pumps handle depths exceeding 100 feet. Shallow well pumps are typically jet pumps, suitable for low-pressure applications, and are easier to install and maintain. They are ideal for small homes or farms with minimal water needs. Deep well pumps, often submersible, are more powerful and efficient for higher demands. They are submerged entirely in water, providing consistent pressure and flow. Choosing the right pump depends on the well’s depth and water usage requirements. Proper installation and maintenance are crucial for both types to ensure long-term functionality and water quality.

Installation of Water Well Pumps

Proper installation involves placing the pump below the water level, ensuring the casing is secure, and connecting pipes correctly to avoid sediment and ensure efficient water flow.

Pre-Installation Checks

Before installing a water well pump, several critical checks must be performed to ensure optimal functionality and safety. First, verify the well’s water level and flow rate to determine the appropriate pump size and type. The well casing should be inspected for damage or corrosion to prevent leaks or contamination. Additionally, check the electrical supply to ensure compatibility with the pump’s voltage and power requirements. The surrounding area should be clear of debris, and the pump’s intake must be positioned at least 10 feet above the well’s bottom to avoid sediment. Testing the water quality is also essential to ensure it meets safety standards for consumption or usage. These pre-installation checks help prevent future issues and ensure the pump operates efficiently for years to come.

Step-by-Step Installation Process

Installing a water well pump requires careful planning and execution. Begin by preparing the well casing and ensuring all necessary components, such as pipes and fittings, are ready. For submersible pumps, lower the pump and motor assembly into the well, securing it to the discharge pipe. Connect the electrical wiring to the control box and ensure all connections are watertight. For shallow well pumps, mount the jet pump above ground and connect the suction and discharge pipes to the well. After installation, fill the system with water and test for leaks. Finally, connect the pump to a pressure tank and switch, then run a test cycle to ensure proper operation. Always follow the manufacturer’s instructions and safety guidelines to avoid damage or injury.

Post-Installation Testing

After installing a water well pump, thorough testing is crucial to ensure optimal performance and safety. Begin by checking for leaks in all connections, including pipes, fittings, and electrical components. Activate the pump and monitor its operation for smooth, consistent water flow. Measure the water pressure and flow rate to ensure they meet the system’s specifications. Test the pressure switch to confirm it cycles on and off correctly. For submersible pumps, verify that the motor is operating within the recommended temperature range. Finally, conduct a water quality test by collecting samples and analyzing for purity. Address any issues promptly to prevent long-term damage and ensure reliable water supply.

Maintenance and Repair

Regular maintenance ensures optimal performance and longevity of water well pumps. Inspect for leaks, check electrical connections, and replace worn parts promptly. Lubricate moving components and ensure proper water flow to prevent damage and maintain efficiency.

Regular Maintenance Tasks

Regular maintenance tasks for water well pumps include checking for leaks and ensuring all connections are secure. Inspect the pump’s electrical components and wiring for damage or wear. Lubricate moving parts to reduce friction and prevent overheating. Additionally, monitor water flow rates and pressure to detect potential issues early. Clean or replace filters and screens to maintain water quality and pump efficiency. Schedule annual professional inspections to address any hidden problems. Proper maintenance ensures reliable operation, extends the pump’s lifespan, and prevents costly repairs. Always refer to the manufacturer’s manual for specific guidance tailored to your pump model. Regular upkeep safeguards your water supply and system integrity.

Troubleshooting Common Issues

Troubleshooting common issues with water well pumps involves identifying symptoms and addressing root causes. Low water pressure or no water flow may indicate clogged intake screens, worn valves, or insufficient water levels. Strange noises, such as grinding or rattling, could signal loose parts or sediment buildup. Excessive heat from the motor may point to overloading or poor lubrication. Water hammer, causing pressure surges, can damage pipes and valves. For submersible pumps, check for proper motor cooling and wiring connections. If no water flows, ensure the pump is primed and check for leaks. Always unplug the pump before servicing and follow safety guidelines to avoid injury. Refer to the manual for specific troubleshooting steps and consider professional assistance for complex issues.

Water Quality Testing

Regular water quality testing is crucial to ensure safe and clean water from your well. Test for bacteria, nitrates, pH levels, and dissolved solids annually. High levels of contaminants like arsenic or lead require immediate action. Use certified kits or consult local health departments for accurate results. Maintain records of test outcomes to monitor changes over time. If issues arise, consider filtration systems or treatment solutions. Always follow the pump manual’s guidelines for water testing to ensure optimal performance and safety. Proper testing helps protect both the well system and the health of those using the water.

Safety Precautions

Always disconnect power before servicing pumps to avoid electrical shocks. Handle hot components with care and relieve pressure slowly to prevent scalding or injury from pressurized systems.

Handling Hot Water and Pressurized Systems

When working with water well pumps, it’s crucial to handle hot water and pressurized systems with caution to avoid injuries and equipment damage. Always disconnect the power supply before servicing the pump to prevent electrical shocks. If the pump or its components are hot, allow them to cool down naturally to avoid burns. Pressurized systems require careful handling; relieve pressure gradually by opening a discharge tap to prevent sudden releases of hot water or steam, which can cause severe scalding. Never dismantle a pump while it contains hot or pressurized water, as this can lead to accidents. Additionally, ensure the pump is installed at least 10 feet above the well’s bottom to prevent sediment interference and maintain optimal performance. Always follow the manufacturer’s guidelines for safe operation and maintenance.

Electrical Safety Measures

Ensuring electrical safety is paramount when installing and operating water well pumps. Always disconnect the power supply before performing any maintenance or repairs to prevent electrical shocks. Verify that the pump’s voltage matches the power source to avoid damage or hazards. Use ground fault circuit interrupters (GFCIs) to protect against ground faults, especially in wet environments. Keep electrical components dry and avoid exposing them to water. Regularly inspect wiring and connections for wear or damage, and replace any compromised parts immediately. Never attempt to repair live electrical systems, and always follow the manufacturer’s wiring diagrams and instructions. Additionally, ensure that all electrical installations comply with local codes and regulations to maintain a safe operating environment. Proper electrical safety measures protect both the equipment and the user from potential hazards.

Emergency Procedures

In case of an emergency involving a water well pump, immediate action is required to ensure safety and prevent further damage. First, turn off the power supply to the pump at the electrical panel or breaker box. If the pump is submerged, do not attempt to retrieve it yourself; contact a professional. For overheating or excessive pressure, relieve pressure by opening a tap on the discharge side and allow the system to cool. In case of water contamination, isolate the system and contact a water treatment specialist. Keep emergency contact information, such as a licensed well technician, readily available. Regular inspections and maintenance can help prevent emergencies, but always be prepared with a backup water supply and first aid kit. Safety should never be compromised when dealing with electrical or pressurized systems.

Additional Resources

Explore our Glossary of Terms for detailed explanations of technical phrases. Visit the Pump Manual Library for installation guides and maintenance tips. Check out the Simple Pump Hand Well Pump manual for off-grid solutions.

Glossary of Terms

A collection of key terms and definitions related to water well pumps:

  • Submersible Pump: A pump placed below the water level in a well, designed for deep wells and high water demand.
  • Jet Pump: A surface-mounted pump that uses suction to draw water from a well, ideal for shallow wells.
  • Static Water Level: The natural water level in a well when not being pumped.
  • Drawdown: The drop in water level when the pump is operating.
  • Foot Valve: A one-way valve installed at the bottom of the well to prevent water from draining back.
  • Check Valve: Ensures water flows in one direction, preventing backflow in the system.

These terms are essential for understanding the installation, operation, and maintenance of water well pumps.

Further Reading and Manuals

For comprehensive understanding, explore detailed manuals and guides available online, such as the Goulds Submersible Pump Manual and the Simple Pump Deep Well Hand Pump Manual.

These resources provide in-depth installation, operation, and maintenance instructions, ensuring optimal performance and longevity of your water well pump system.

Additional materials, such as troubleshooting guides and diagrams, are available on manufacturer websites like Hallmark Industries and Bison Pumps.

Visit the Pump Manual Library for preventative maintenance tips and step-by-step repair instructions.

Free downloadable PDFs, such as the Webtrol Pump Installation Manual, offer detailed procedures for submersible and jet pumps.

These resources are regularly updated to reflect the latest advancements in water well technology and safety standards.

Consulting these manuals ensures you can effectively manage and maintain your water well pump system for years to come.

bible study on ruth pdf

The Book of Ruth‚ a beautiful story of love‚ devotion‚ and redemption‚ highlights God’s grace and providence. It follows Ruth‚ a Moabite widow‚ as she embraces Naomi’s faith‚ demonstrating loyalty and trust in God. This narrative‚ set during the time of the judges‚ showcases God’s plan to include Gentiles in His redemptive story‚ ultimately linking Ruth to the lineage of King David and Jesus. The book serves as a powerful example of divine sovereignty‚ faithfulness‚ and cultural inclusion‚ offering timeless lessons for modern readers.

Overview of the Book

The Book of Ruth is a captivating narrative of loyalty‚ redemption‚ and divine providence. It tells the story of Naomi and her Moabite daughter-in-law Ruth‚ who return to Bethlehem after a famine. Through Ruth’s faithfulness and Boaz’s kindness‚ the story unfolds to reveal God’s plan of redemption. This four-chapter book emphasizes themes of loyalty‚ grace‚ and cultural inclusion‚ highlighting God’s sovereignty in weaving Gentiles into His redemptive plan‚ ultimately connecting to the lineage of King David and Jesus Christ.

Historical Context

The Book of Ruth is set during the era of the judges‚ a period marked by moral and political instability in Israel. Famine drove Naomi’s family to Moab‚ where her sons married Moabite women‚ including Ruth. After losing her husband and sons‚ Naomi returned to Bethlehem with Ruth‚ illustrating divine providence amidst hardship. This historical backdrop underscores themes of survival‚ migration‚ and cultural integration‚ reflecting God’s redemptive work among His people and the inclusion of Gentiles in His plan‚ as Ruth‚ a foreigner‚ became part of the royal lineage leading to King David and Jesus.

Key Themes and Significance

The Book of Ruth explores themes of redemption‚ loyalty‚ and divine providence‚ showcasing God’s grace toward a Gentile woman. Ruth’s unwavering commitment to Naomi reflects faithfulness and trust in God’s plan. The narrative highlights cultural inclusion‚ as Ruth‚ a Moabite‚ becomes part of the Messiah’s lineage. This story underscores God’s sovereignty in transforming suffering into blessing and demonstrates how obedience and humility lead to redemption. It serves as a powerful reminder of God’s universal love and the importance of trusting His providence in life’s challenges‚ offering timeless lessons for modern readers seeking hope and guidance.

Chapter-by-Chapter Analysis

The Book of Ruth is divided into four chapters‚ each detailing pivotal moments in Ruth and Naomi’s journey. Chapter 1 introduces their hardships and Ruth’s loyalty. Chapter 2 highlights Ruth’s encounter with Boaz‚ showcasing divine providence. Chapter 3 focuses on Naomi’s strategic plan to secure Ruth’s future. Chapter 4 culminates in Ruth’s redemption and integration into the royal lineage‚ emphasizing God’s faithfulness and grace throughout their story.

Chapter 1: Naomi and Ruth’s Journey

Chapter 1 sets the stage for the story‚ detailing Naomi’s journey from Bethlehem to Moab and back. Faced with famine and loss‚ Naomi returns with Ruth‚ her loyal daughter-in-law‚ after the deaths of her husband and sons. Despite Naomi’s bitterness‚ Ruth’s devotion shines through her famous pledge of loyalty. The chapter highlights themes of divine providence‚ faithfulness‚ and cultural bridging‚ as Ruth‚ a Moabite‚ commits to Naomi’s God and people‚ setting the foundation for redemption and grace in their lives.

Chapter 2: Ruth Meets Boaz

Chapter 2 introduces Boaz‚ a wealthy relative of Naomi’s late husband‚ who notices Ruth gleaning in his barley field; Boaz‚ impressed by Ruth’s humility and loyalty‚ shows her kindness by offering food and protection. Naomi recognizes God’s providence in their encounter‚ understanding its potential to secure their future. This chapter highlights Ruth’s diligence‚ Boaz’s generosity‚ and the divine orchestration of their meeting‚ setting the stage for redemption and illustrating God’s care for the vulnerable.

Chapter 3: Naomi’s Plan for Ruth

Naomi devises a plan to secure Ruth’s future by instructing her to approach Boaz at the threshing floor. Ruth obediently follows‚ demonstrating her loyalty and trust in Naomi’s guidance. Boaz‚ moved by Ruth’s character‚ responds favorably‚ highlighting her virtue. This chapter emphasizes Naomi’s strategic thinking and Ruth’s humility‚ showcasing God’s providence in their lives. The encounter sets the stage for redemption‚ illustrating how divine sovereignty and human obedience work together to fulfill God’s plan.

Chapter 4: The Redemption and Conclusion

Chapter 4 concludes with Boaz redeeming Naomi’s land and marrying Ruth‚ symbolizing God’s faithfulness. Ruth gives birth to Obed‚ grandfather of King David‚ linking her to Jesus’ lineage. The community blesses Naomi‚ recognizing God’s providence. This chapter highlights redemption through Boaz‚ a kinsman redeemer‚ and demonstrates God’s sovereignty in weaving Ruth‚ a Gentile‚ into His plan. The story ends on a hopeful note‚ showcasing divine grace and the fulfillment of God’s promises‚ leaving readers with a deep appreciation for His faithfulness and redemptive love.

Key Characters in the Book of Ruth

The Book of Ruth features Ruth‚ a faithful Moabite widow‚ Naomi‚ her loyal mother-in-law‚ Boaz‚ the noble kinsman redeemer‚ and the unnamed kinsman. Each plays a vital role in the redemption story‚ showcasing loyalty‚ faith‚ and God’s grace.

Ruth: The Faithful Daughter-In-Law

Ruth‚ a Moabite widow‚ exemplifies unwavering loyalty and faith. Despite her foreign background‚ she chose to remain with Naomi‚ embracing her God and culture. Her commitment was evident when she refused to leave Naomi‚ declaring her famous vow of devotion. Ruth’s faithfulness led her to work tirelessly in Boaz’s fields‚ demonstrating humility and trust in God’s provision. Her journey reflects divine grace‚ as she became part of King David’s lineage‚ a testament to God’s inclusive plan of redemption for all nations‚ including Gentiles like herself.

Naomi: The Mother-In-Law’s Journey

Naomi’s journey is one of profound transformation‚ marked by loss and redemption. Once a wife and mother‚ she faced widowhood and the death of her sons‚ leaving her destitute. Returning to Bethlehem with Ruth‚ Naomi struggled with bitterness but ultimately trusted God. Her plan to secure Ruth’s future through Boaz showcased her wisdom and care. Naomi’s story highlights resilience‚ the power of relationships‚ and God’s faithfulness in restoring hope and provision‚ even in the darkest circumstances.

Boaz: The Kinsman Redeemer

Boaz‚ a wealthy relative of Naomi‚ emerges as a key figure in Ruth’s story‚ embodying kindness‚ integrity‚ and faithfulness. His generosity toward Ruth‚ demonstrated through allowing her to glean in his fields‚ reflects his godly character. As the kinsman redeemer‚ Boaz fulfilled the role of restoring Naomi’s family legacy by marrying Ruth. His actions symbolize divine redemption‚ foreshadowing Christ’s role as humanity’s ultimate Redeemer. Boaz’s noble deeds highlight God’s providence and grace‚ showcasing how faith and obedience lead to blessings that extend beyond individual lives‚ impacting generations.

The Kinsman Redeemer: Symbolism and Role

The kinsman redeemer‚ a cultural and legal figure in ancient Israel‚ was responsible for restoring family honor‚ land‚ and legacy. This role symbolizes divine redemption‚ as seen in Boaz’s actions. His willingness to redeem Naomi’s property and marry Ruth‚ a Gentile‚ reflects God’s grace and plan to include all nations in His redemptive story. The kinsman redeemer foreshadows Christ‚ who‚ as humanity’s ultimate Redeemer‚ restores spiritual inheritance and unites people across cultures. This symbolism underscores God’s sovereignty and love‚ bridging cultural divides through redemption.

Themes of the Book of Ruth

The Book of Ruth explores themes of God’s sovereignty‚ grace‚ and faithfulness‚ highlighting His plan to include Gentiles in His redemptive story through Ruth’s journey.

Redemption and Grace

The Book of Ruth beautifully illustrates God’s redemption and grace through the story of Ruth‚ a Moabite widow. Boaz‚ as the kinsman redeemer‚ embodies divine grace by taking Ruth under his care‚ symbolizing God’s love for the outsider. Ruth’s journey from a foreigner to a member of King David’s lineage highlights God’s plan to include Gentiles in His redemptive story. The narrative shows that grace transcends cultural boundaries‚ offering hope and belonging to those who trust in God. This theme reflects the broader biblical message of salvation through faith‚ not heritage‚ and points to the ultimate redeemer‚ Jesus Christ.

Loyalty and Faithfulness

Ruth’s unwavering loyalty and faithfulness are central themes in the book. Despite losing her husband and facing poverty‚ Ruth remains devoted to Naomi‚ declaring‚ “Where you go‚ I will go” (1:16). Her commitment reflects a deep trust in God and His providence. Similarly‚ Ruth’s faithfulness in gleaning and trusting Boaz’s kindness demonstrates her integrity and perseverance. These virtues inspire believers to remain steadfast in their relationships and faith‚ embodying the heart of loyal service and trust in God’s plan‚ even in challenging circumstances.

Providence and God’s Sovereignty

The Book of Ruth vividly illustrates God’s providence and sovereignty in orchestrating life’s events. Despite Ruth’s hardships‚ God’s unseen hand guides her journey‚ transforming her sorrow into blessing. Her unexpected encounter with Boaz‚ a kinsman redeemer‚ highlights divine intervention. Through Ruth’s story‚ we see how God weaves individual lives into His larger redemptive plan‚ ultimately connecting her to the lineage of King David and Jesus. This narrative underscores God’s faithfulness in turning struggles into opportunities for His glory‚ revealing His masterful control over human affairs.

Cultural Inclusion and Diversity

Ruth’s story powerfully exemplifies cultural inclusion and diversity‚ as she‚ a Moabite‚ becomes a key figure in Israel’s history. Despite being a Gentile‚ Ruth’s faith and loyalty are celebrated‚ showing God’s heart for all nations. Her integration into Naomi’s family reflects the breaking down of cultural barriers‚ demonstrating that God’s grace transcends ethnic boundaries. This theme highlights the universality of God’s redemptive plan‚ as Ruth’s lineage becomes part of the Messiah’s heritage‚ illustrating the inclusion of all people in God’s kingdom. Boaz’s acceptance of Ruth further underscores this principle of unity in diversity.

Practical Applications for Modern Readers

Applying loyalty and faithfulness‚ trusting in God’s providence‚ and embracing cultural diversity are timeless lessons from Ruth‚ offering practical guidance for modern believers in everyday life.

Applying Loyalty and Faithfulness

Ruth’s unwavering loyalty to Naomi and her faithfulness in the face of adversity serve as a powerful example for modern believers. Her commitment to trust God’s plan‚ even in challenging circumstances‚ encourages readers to remain steadfast in their own relationships and spiritual journeys. By prioritizing faithfulness‚ believers can reflect God’s love and integrity in their daily lives‚ just as Ruth did. This principle reminds us that true loyalty and faithfulness are not contingent on circumstances but rooted in trust and devotion to God.

Trusting in God’s Providence

Ruth’s journey exemplifies trusting in God’s providence amidst life’s uncertainties. Despite facing widowhood‚ poverty‚ and cultural barriers‚ Ruth trusted God’s sovereignty‚ believing He was working for her good. Her faith in God’s timing and provision‚ as seen in her relationship with Boaz‚ teaches believers to rely on divine guidance. This trust in God’s plan encourages modern readers to embrace His providence‚ even in challenging circumstances‚ knowing that His purposes are always greater than our understanding. Ruth’s story reminds us that faith and trust in God lead to redemption and hope.

Embracing Cultural Diversity

Ruth’s story beautifully illustrates God’s heart for cultural diversity. As a Moabite‚ Ruth‚ a Gentile‚ was welcomed into the family of God‚ highlighting His plan to include all nations in His redemptive story. Her integration into Jewish society through marriage and faith demonstrates that God’s love transcends cultural boundaries. This theme encourages modern readers to embrace diversity‚ recognizing that everyone‚ regardless of background‚ is valued by God. Ruth’s inclusion in the lineage of King David and Jesus underscores the universal scope of God’s salvation‚ uniting people across cultures and generations.

The Book of Ruth inspires with its timeless themes of redemption‚ faithfulness‚ and divine sovereignty. Its message of God’s grace transcends cultures‚ offering hope and guidance for modern life.

The Book of Ruth offers profound lessons on redemption‚ faithfulness‚ and divine sovereignty. Ruth’s loyalty to Naomi and her trust in God exemplify sacrificial love and obedience. Boaz’s role as a kinsman redeemer highlights God’s providence and grace. The story underscores the inclusion of Gentiles in God’s redemptive plan‚ reflecting His universal love. It also emphasizes the importance of community‚ kindness‚ and humility. These themes inspire believers to trust God’s sovereignty‚ embrace diversity‚ and live faithfully‚ making Ruth a timeless and transformative study for spiritual growth and reflection.

Reflecting on the Study’s Significance

Studying the Book of Ruth deepens our understanding of God’s sovereignty‚ grace‚ and redemption. It reminds us of the importance of loyalty‚ faithfulness‚ and trust in divine providence. Ruth’s journey highlights how God weaves individual stories into His larger plan‚ emphasizing His heart for all nations. This study also underscores the value of community‚ kindness‚ and humility‚ inspiring believers to reflect these virtues in their lives. Ultimately‚ Ruth’s story invites us to trust God’s plan‚ embrace diversity‚ and live with purpose‚ making it a rich and transformative biblical text for personal and communal reflection.

Additional Resources for Further Study

Explore free Bible study PDFs and online resources for deeper insights into Ruth. Websites like Sound Bible Study offer comprehensive guides and verse-by-verse analyses to enrich your understanding.

Recommended Books and Commentaries

For a deeper dive into the Book of Ruth‚ explore recommended books and commentaries. Resources like F. B. Meyer’s “Through the Bible Day by Day” and Sound Bible Study’s teaching notes provide insightful commentary. These guides offer verse-by-verse analysis‚ historical context‚ and practical applications‚ making them invaluable for personal or group study. Additionally‚ downloadable PDF study guides are available online‚ featuring detailed lessons and reflection questions to enhance your understanding of Ruth’s story and its timeless lessons on faith‚ redemption‚ and divine providence.

Online Resources and Study Guides

Enhance your study with online resources and guides available for the Book of Ruth. Websites like Sound Bible Study offer free downloadable PDFs and verse-by-verse teaching notes. These guides provide detailed insights‚ reflection questions‚ and historical context‚ perfect for personal or group study. Additionally‚ platforms like Bible Journaling and YouTube offer video studies and creative tools to deepen your understanding. These resources are designed to help you explore themes such as redemption‚ loyalty‚ and divine providence in Ruth’s story‚ making your study both enriching and accessible.

factoring trinomials worksheet with answers pdf

Factoring trinomials is a fundamental algebraic skill that involves expressing a polynomial with three terms as a product of simpler expressions. Factoring Trinomials Worksheets provide structured practice, helping students master techniques like the AC method, factoring by grouping, and completing the square. These resources, often available as PDFs with answer keys, are essential for building proficiency and confidence in solving quadratic equations and polynomials. They cater to various skill levels, offering step-by-step solutions and scaffolded exercises to ensure comprehensive understanding.

What Are Trinomials?

A trinomial is a polynomial consisting of three terms. It can be expressed in the form ( ax^2 + bx + c ), where ( a ), ( b ), and ( c ) are coefficients, and ( a
eq 0 ). Trinomials are quadratic if the highest power of the variable is 2, making them essential in solving quadratic equations. They can have a leading coefficient of 1 or any other number and may include positive or negative terms. Trinomials are fundamental in algebra, as they often appear in factoring, graphing, and real-world applications. Understanding trinomials is crucial for mastering factoring techniques, completing the square, and solving systems of equations. Factoring Trinomials Worksheets provide ample practice to identify and factor these expressions effectively.

Why Factoring Trinomials Is Important

Factoring trinomials is a cornerstone of algebra, essential for solving quadratic equations and simplifying expressions. It helps identify roots, graph parabolas, and analyze real-world phenomena modeled by quadratic relationships. Mastering this skill enhances problem-solving abilities and logical thinking. Factoring Trinomials Worksheets with answers provide a structured way to practice, ensuring proficiency and reinforcing mathematical concepts. Regular practice builds confidence and fluency, preparing students for advanced algebra and its applications in science, engineering, and finance. Understanding trinomials is vital for progressing in mathematics, as it lays the foundation for more complex polynomial factorization and equation solving.

Common Methods of Factoring Trinomials

There are several widely used methods for factoring trinomials, each suited for specific types of polynomials. The AC Method is effective for trinomials with a leading coefficient of 1 or when the product of the first and last coefficients (AC) factors easily. Factoring by Grouping works well when the trinomial can be split into two groups with common binomial factors. Additionally, Factoring by Completing the Square is a reliable method for converting quadratic trinomials into perfect square trinomials. These techniques are often practiced using Factoring Trinomials Worksheets, which provide structured exercises and answers for self-assessment. Mastery of these methods is crucial for solving quadratic equations and simplifying complex polynomials efficiently.

Types of Trinomials

Trinomials are classified based on their leading coefficients: a = 1, a ≠ 1, or negative leading coefficients. These categories determine the factoring approach and complexity.

Trinomials with a Leading Coefficient of 1 (a = 1)

Trinomials with a leading coefficient of 1 (a = 1) are the simplest to factor. They follow the form x² + bx + c, where the coefficient of the squared term is 1. Factoring these trinomials involves finding two numbers that multiply to c (the constant term) and add to b (the coefficient of the linear term). This method is often referred to as the “AC method” or “splitting the middle term.” For example, in the trinomial x² + 5x + 6, the numbers 2 and 3 satisfy the conditions (2 * 3 = 6 and 2 + 3 = 5). Thus, it factors to (x + 2)(x + 3). Worksheets often include these types of problems to help students master the technique.

Trinomials with a Leading Coefficient Not Equal to 1 (a ≠ 1)

When the leading coefficient a is not equal to 1, factoring trinomials becomes more complex. These trinomials are in the form ax² + bx + c. The process involves finding the product of a and c (often called the “ac method”), then determining two numbers that multiply to ac and add to b. These numbers are used to break the middle term, allowing the trinomial to be factored by grouping. For example, 2x² + 5x + 3 can be factored by finding numbers that multiply to 2 * 3 = 6 and add to 5, which are 2 and 3. The trinomial then factors to (2x + 3)(x + 1). Worksheets often include these problems to help students practice advanced factoring techniques.

Trinomials with Negative Leading Coefficients

Trinomials with negative leading coefficients present unique challenges in factoring. These expressions, such as -2x² + 4x ౼ 6, require careful handling to ensure proper factorization. The process often begins by factoring out the negative sign, which changes the signs of all terms. For example, -2x² + 4x ─ 6 can be rewritten as -(2x² ౼ 4x + 6). Factoring the remaining trinomial inside the parentheses follows standard methods, such as the AC method or factoring by grouping; Worksheets dedicated to these cases emphasize the importance of maintaining the correct sign throughout the process. Common mistakes include forgetting to distribute the negative sign or misapplying factoring techniques. Practice with such problems is essential for mastery, and worksheets with answers provide valuable feedback and guidance for improvement.

Methods for Factoring Trinomials

Key methods for factoring trinomials include the AC method, factoring by grouping, and completing the square. Worksheets with answers provide essential practice and self-assessment tools for mastery.

The AC Method for Factoring

The AC method is a popular technique for factoring trinomials, especially when the leading coefficient is not 1. Begin by multiplying the first and last coefficients (A and C) to find a product. Next, identify two numbers that multiply to this product and add up to the middle term’s coefficient (B). Use these numbers to rewrite the middle term, then factor by grouping. For example, to factor (2x^2 + 5x + 3), multiply 2 and 3 to get 6, find numbers 2 and 3, rewrite as (2x^2 + 2x + 3x + 3), and factor to ((2x + 1)(x + 3)). Worksheets with answers provide ample practice, starting with simple cases and progressing to more complex problems, ensuring mastery of this essential algebraic skill.

Factoring by Grouping

Factoring by grouping is a method used to factor trinomials that can be divided into two groups of two terms each. Start by grouping the first two and last two terms, then factor out the greatest common factor (GCF) from each group. If the resulting binomials have a common factor, factor it out to achieve the final factored form. For example, to factor x² + 4x + 3x + 12, group as (x² + 4x) + (3x + 12), factor out the GCF from each group to get x(x + 4) + 3(x + 4), then factor out (x + 4) to get (x + 3)(x + 4). Worksheets with answers provide numerous practice problems, allowing students to master this technique efficiently. This method is particularly effective for trinomials where grouping is straightforward and leads to a common binomial factor.

Factoring by Completing the Square

Factoring by completing the square is a method used to factor quadratic trinomials into the square of a binomial. This technique is applied when the trinomial is a perfect square, such as (x^2 + 6x + 9), which factors to ((x + 3)^2). To complete the square, start with a trinomial in the form (x^2 + bx + c). Move the constant term to the other side, find the number to complete the square by dividing (b) by 2 and squaring it, add this number to both sides, and factor the left side as a perfect square. For example, (x^2 + 5x + 6) becomes ((x + 2)(x + 3)) after completing the square. Worksheets with answers provide step-by-step guidance and practice problems to master this method, ensuring students can factor trinomials efficiently and accurately.

Factoring Trinomials Worksheets

Factoring Trinomials Worksheets are essential tools for mastering quadratic factoring. They include structured problems, answer keys, and step-by-step solutions, making them ideal for self-assessment and practice.

Features of a Good Factoring Trinomials Worksheet

A good Factoring Trinomials Worksheet should include a variety of problems that cover different types of trinomials, such as those with leading coefficients of 1 or other values. It should provide clear instructions and examples to guide students. Answer keys are essential for self-assessment, allowing students to verify their solutions. The worksheet should also include step-by-step solutions for complex problems to help students understand the process. Additionally, it should be organized in a logical sequence, starting with simpler problems and progressing to more challenging ones. A good worksheet should be printable and available in PDF format for easy access. Visual aids or diagrams can also enhance understanding, making the worksheet a valuable resource for learning and practice.

How to Create an Effective Factoring Trinomials Worksheet

Creating an effective Factoring Trinomials Worksheet involves several key steps. Start by identifying the skill level of the students and tailor problems accordingly. Include a mix of trinomials, such as those with leading coefficients of 1 or other values, and vary the difficulty. Provide clear instructions and examples at the beginning to guide students. Answer keys should be included for self-assessment. Use software like Kuta or online tools to generate problems and ensure accuracy. Organize the worksheet logically, starting with simpler problems and progressing to more complex ones. Add visual aids or diagrams if needed. Finally, save the worksheet in PDF format for easy sharing and printing. This structured approach ensures a comprehensive and effective learning tool.

Where to Find Free Factoring Trinomials Worksheets with Answers

Free Factoring Trinomials Worksheets with Answers are widely available online. Websites like Math Monks, Kuta Software, and Brighterlys offer downloadable PDF resources. These worksheets include problems for various skill levels, from basic to advanced. Many platforms provide answer keys, enabling self-assessment. Educators and students can also explore EffortlessMath.com and Math Warehouse for printable materials. Additionally, tools like Kuta Software allow customization to suit specific learning needs. These resources are ideal for practice, homework, or classroom activities, ensuring access to high-quality materials for mastering factoring trinomials.

Practice Problems and Solutions

Practice Problems and Solutions are essential for mastering factoring trinomials. Worksheets with answers provide step-by-step solutions, allowing students to understand and correct their work effectively.

Examples of Factored Forms of Trinomials

Factoring trinomials involves expressing a polynomial with three terms as a product of binomials. For example, the trinomial (3p^2 + 2p ─ 5) can be factored into ((3p ─ 5)(p + 1)). Similarly, (2n^2 + 3n ─ 9) factors to ((2n + 3)(n ─ 3)). These examples demonstrate how trinomials are broken down into simpler expressions. Worksheets often include problems like (7a^2 + 53a + 28), which factors to ((7a + 4)(a + 7)). Such exercises help students recognize patterns and apply methods like the AC technique. By practicing with these examples, learners improve their ability to factor various types of trinomials accurately. These examples are typically included in factoring trinomials worksheets with answers for self-assessment.

Step-by-Step Solutions for Factoring Trinomials

Step-by-step solutions for factoring trinomials provide a clear, systematic approach to mastering this algebraic skill. Begin by identifying the type of trinomial (e.g., with a leading coefficient of 1 or not). For trinomials like (3p^2 + 2p ౼ 5), use the AC method: multiply the first and last coefficients (3 * -5 = -15), find two numbers that multiply to -15 and add to 2, then rewrite and factor by grouping. Detailed solutions in worksheets guide learners through each step, ensuring understanding. For example, (2n^2 + 3n ౼ 9) factors to ((2n + 3)(n ─ 3)) by finding pairs that multiply to -18 and add to 3. These structured solutions help students grasp the logic behind factoring, making practice more effective and confident.

Common Mistakes to Avoid When Factoring Trinomials

When factoring trinomials, common mistakes include incorrect identification of the leading coefficient and improper pairing of terms during factoring by grouping. Students often overlook the need to factor out the greatest common factor first, leading to unnecessary complexity. Additionally, errors arise from miscalculating the product of the first and last coefficients in the AC method, resulting in incorrect binomials. Another mistake is assuming all trinomials can be factored, which is not true—some may require advanced techniques or remain unfactorable. Worksheets with answers highlight these pitfalls, emphasizing the importance of careful calculation and systematic approaches, helping learners refine their skills and avoid recurring errors in quadratic factoring.

Answer Keys and Resources

Answer keys for factoring trinomials worksheets provide valuable feedback, enabling self-assessment and improved learning. Reliable resources like Kuta Software and Math Monks offer comprehensive PDF worksheets with detailed solutions, ensuring mastery of quadratic factoring techniques.

How to Use Answer Keys for Self-Assessment

Using answer keys from factoring trinomials worksheets is an effective way to evaluate your progress. Start by completing the worksheet independently, then compare your answers with the provided key. Identify incorrect responses and analyze the steps where errors occurred. This process helps pinpoint areas needing improvement. For each wrong answer, review the factoring method used, ensuring proper application of techniques like the AC method or factoring by grouping. Many worksheets, such as those from Kuta Software or Math Monks, include detailed solutions, allowing you to understand the correct approach. Regular self-assessment with answer keys builds confidence and mastery in factoring quadratic expressions.

Additional Resources for Mastering Factoring Trinomials

Beyond worksheets, there are multiple resources to enhance your understanding of factoring trinomials. Online platforms like Khan Academy and Mathway offer video tutorials and interactive tools to practice factoring. Additionally, educational websites such as Brighterlys and EffortlessMath provide downloadable PDF guides and step-by-step solutions. For in-depth learning, textbooks like “Algebra 1” by Kuta Software include comprehensive chapters on factoring techniques. Many teachers and educators share free resources on their websites, featuring scaffolded problems and detailed explanations. Utilizing these diverse resources can help reinforce concepts and improve problem-solving skills in factoring trinomials.

i stand here ironing pdf

Tillie Olsen’s I Stand Here Ironing is a poignant short story exploring a mother’s complex relationship with her daughter, Emily, through a reflective narrative. The story delves into themes of motherhood, socioeconomic struggles, and identity, using the metaphor of ironing to symbolize the routine and emotional burdens of parenting. Olsen’s vivid prose captures the internal conflicts and societal pressures faced by the narrator, offering a deeply human portrayal of love, regret, and resilience. Available as a PDF, the story remains a powerful exploration of maternal challenges and societal expectations.

Overview of the Short Story

Tillie Olsen’s I Stand Here Ironing is a deeply emotional and introspective narrative that explores the complexities of motherhood, poverty, and societal expectations. The story centers on an unnamed mother who, while ironing, reflects on her relationship with her daughter, Emily, and grapples with feelings of guilt and regret. Set against the backdrop of economic hardship, the mother recounts her struggles to provide for her family and the sacrifices she made, which she fears have shaped Emily’s identity. The narrative unfolds in a stream-of-consciousness style, offering a raw and intimate portrayal of a mother’s internal turmoil. Olsen’s masterful use of the ironing metaphor symbolizes the repetitive and exhausting nature of daily life, while also serving as a space for reflection and self-examination. The story is both a personal confession and a broader commentary on the challenges faced by women in the early 20th century. Available as a PDF, it remains a powerful exploration of maternal love, sacrifice, and resilience.

Author Tillie Olsen and Her Literary Significance

Tillie Olsen was a celebrated American writer, feminist, and social activist, best known for her poignant portrayals of women’s lives and societal inequalities. Born in 1912, Olsen’s work often reflected her own experiences with poverty and motherhood, infusing her writing with authenticity and emotional depth. I Stand Here Ironing is among her most renowned works, showcasing her ability to capture the inner lives of women through concise yet powerful prose. Olsen’s literary significance lies in her unflinching exploration of themes such as motherhood, class, and identity, which resonated deeply with readers. Her influence extends beyond literature, as her work has become a cornerstone of feminist studies and continues to inspire writers and scholars today. Olsen’s legacy endures as a champion of marginalized voices and a masterful storyteller.

Themes Explored in the Story

The story explores themes of motherhood, poverty, and identity, delving into the emotional struggles of a mother-daughter relationship shaped by societal expectations and economic hardships.

Motherhood and Parental Struggles

The story profoundly explores the complexities of motherhood, capturing the narrator’s internal turmoil and sense of inadequacy in raising her daughter, Emily. The mother grapples with guilt, questioning whether she could have done more to support Emily’s development amidst poverty and societal pressures. Olsen vividly portrays the emotional weight of parenting, where love and sacrifice intertwine with regret and doubt. The narrator’s reflections reveal the struggles of balancing personal aspirations with the demands of motherhood, highlighting the resilience required to navigate these challenges. Through this, Olsen sheds light on the universal difficulties of parenting, particularly for women facing economic and social adversity.

Socioeconomic Challenges and Poverty

Tillie Olsen’s I Stand Here Ironing vividly portrays the impact of socioeconomic challenges on family life, particularly during the Great Depression. The narrator’s struggles with poverty are evident as she reflects on her inability to provide Emily with the resources and attention she needed. Financial constraints and the demands of survival dominate the mother’s life, leaving little room for emotional nurture. Olsen highlights how societal indifference exacerbates the difficulties faced by single mothers, trapping them in cycles of hardship. The story underscores the profound effects of economic inequality on individuals, especially women, and the ways in which poverty shapes their opportunities and relationships. Through this lens, Olsen critiques the systemic factors that perpetuate suffering and limit personal potential.

Identity and Adolescence

Tillie Olsen’s I Stand Here Ironing explores Emily’s journey through adolescence, marked by struggles to establish her identity. The narrator reflects on how her own circumstances hindered her ability to support Emily’s growth. Emily’s adolescence is portrayed as a period of vulnerability, where societal expectations and economic hardships converge to shape her self-perception. Olsen illustrates the tension between Emily’s desire for individuality and the limitations imposed by her environment. The story highlights the challenges of navigating adolescence amidst poverty and the narrator’s internal conflict about her role in Emily’s development. Through this, Olsen sheds light on the interplay between personal identity and external circumstances, emphasizing the resilience required to find one’s place in the world.

Narrative Structure and Style

Tillie Olsen’s I Stand Here Ironing employs a first-person stream-of-consciousness narrative, symbolizing the monotony and emotional weight of the narrator’s experience through the repetitive act of ironing.

First-Person Narrative Perspective

Tillie Olsen’s I Stand Here Ironing is told through a first-person narrative, immersing readers in the mother’s intimate thoughts and emotions. The narrator’s internal monologue, woven with the rhythmic motion of ironing, creates a sense of immediacy and introspection. This perspective allows readers to experience the narrator’s guilt, love, and struggles firsthand, fostering a profound emotional connection. The first-person voice also highlights the narrator’s self-reflection and inner turmoil, emphasizing her complex relationship with her daughter, Emily. By focusing on the narrator’s personal journey, Olsen crafts a deeply human story that explores the challenges of motherhood and societal expectations. The narrative style underscores the universality of the narrator’s experiences, making her story relatable and poignant.

Stream-of-Consciousness Technique

Tillie Olsen’s I Stand Here Ironing employs a stream-of-consciousness narrative, mirroring the natural flow of the narrator’s thoughts and emotions. The story unfolds through the mother’s unstructured reflections, blending past memories with present concerns. This technique creates a fluid, unedited portrayal of her inner world, capturing the complexity of her feelings toward her daughter, Emily. The narrative jumps between moments of joy, regret, and longing, mimicking the way memories surface and fade; By using this style, Olsen conveys the raw, unfiltered nature of the narrator’s experiences, offering readers a profound insight into her emotional state. The stream-of-consciousness approach heightens the story’s emotional intensity, making the narrator’s struggles and loves feel deeply personal and relatable. This method also underscores the timelessness of the themes, resonating with readers across generations.

The Symbolism of Ironing

In I Stand Here Ironing, the act of ironing serves as a powerful symbol, reflecting the narrator’s internal struggles and societal constraints. The ironing process mirrors the monotony and drudgery of daily life, emphasizing the narrator’s entrapment in repetitive, unfulfilling tasks. The iron itself symbolizes control and the pressure to conform, while the ironing board becomes a space for reflection, where the narrator grapples with her past and present. The smoothing of wrinkles parallels her attempts to “iron out” the challenges in her life and her daughter’s future. This symbolism underscores themes of identity and the struggle to maintain a sense of self amidst economic hardship and societal expectations, offering a poignant metaphor for the human experience of resilience and quiet despair.

Character Analysis

In I Stand Here Ironing, the unnamed narrator reflects on motherhood and her complex relationship with her daughter, Emily, while an interlocutor offers external perspective.

The Unnamed Narrator: A Mother’s Internal Conflict

The unnamed narrator of I Stand Here Ironing embodies a deeply personal and emotional journey, as she grapples with feelings of guilt, regret, and love. Through her internal monologue, Olsen masterfully portrays the narrator’s inner turmoil, revealing her struggle to balance societal expectations with her own limitations. The narrator’s voice is both raw and intimate, as she reflects on her inability to provide the nurturing environment she desires for her daughter, Emily. This conflict is heightened by the pressures of poverty and the constraints placed on women during the Great Depression. The narrator’s honesty and vulnerability create a relatable and poignant figure, making her one of Olsen’s most compelling characters.

Emily: The Daughter’s Journey and Struggles

Emily, the daughter in I Stand Here Ironing, is portrayed as a sensitive and creative child whose potential was stifled by the harsh realities of poverty and societal indifference. The narrator reflects on Emily’s journey, highlighting her early curiosity and desire for beauty, which were gradually suppressed by the limitations of her environment. Emily’s struggles are deeply intertwined with her mother’s guilt and regret, as the narrator acknowledges the sacrifices and neglect that shaped her daughter’s life. Through the narrator’s recollections, Olsen illustrates the long-term effects of socioeconomic challenges on a child’s development and the emotional toll on both mother and daughter. Emily’s story serves as a poignant reminder of the fragility of childhood and the resilience required to navigate adversity.

The Role of the Interlocutor (Social Worker, Teacher, or Counselor)

The unnamed interlocutor in I Stand Here Ironing serves as a catalyst for the narrator’s introspection, prompting her to confront her feelings about Emily. Likely a social worker, teacher, or counselor, this figure represents societal expectations and interventions that often fail to comprehend the complexities of poverty and single motherhood. The interlocutor’s request to discuss Emily highlights the tension between institutional concern and personal understanding. Through this interaction, Olsen critiques the limitations of external support systems, emphasizing their inability to fully grasp the emotional and financial challenges faced by the narrator. The interlocutor’s presence underscores the story’s themes of judgment, helplessness, and the gap between intention and true assistance, adding depth to the narrative’s exploration of maternal struggles.

Historical Context

Tillie Olsen’s I Stand Here Ironing is set against the backdrop of the Great Depression, reflecting the economic hardships and societal expectations of women during the early 20th century. The story highlights the struggles of single mothers and the limitations imposed by poverty, mirroring Olsen’s own experiences and socialist perspectives. The historical context underscores the narrator’s challenges in balancing work and motherhood, emphasizing the systemic barriers faced by women in that era. Olsen’s work captures the emotional and financial toll of these circumstances, offering a poignant glimpse into the lives of marginalized women during a tumultuous period in American history.

The Great Depression and Its Impact on Families

Tillie Olsen’s I Stand Here Ironing is deeply rooted in the context of the Great Depression, a period of economic devastation that profoundly affected families. The story reflects the struggles of poverty, unemployment, and the breakdown of social support systems. Single mothers, like the narrator, faced immense challenges in providing for their children, often forced to juggle multiple jobs while managing household responsibilities. The emotional toll of these circumstances is evident in the narrator’s feelings of guilt and helplessness. The Great Depression also heightened societal expectations of women, trapping them in roles that offered little opportunity for personal growth or escape. Olsen’s portrayal of these struggles underscores the long-term impact of economic hardship on family dynamics and individual well-being, particularly for women and children. The story serves as a powerful critique of the era’s economic and social systems.

Societal Expectations of Women in the Early 20th Century

Tillie Olsen’s I Stand Here Ironing reflects the oppressive societal expectations placed on women during the early 20th century; Women were often confined to domestic roles, with little opportunity for personal or professional growth. The narrator’s struggles highlight the limitations imposed by a society that prioritized family obligations over female autonomy. Women were expected to manage households, raise children, and sacrifice their own aspirations, even in the face of poverty and hardship. Olsen’s story critiques these norms, showing how they trapped women in cycles of drudgery and unfulfilled potential. The narrator’s internalized guilt and regret further illustrate the emotional toll of societal pressures, as women were often blamed for circumstances beyond their control. The story serves as a powerful indictment of the era’s restrictive gender roles.

Symbolism and Metaphors

The iron symbolizes the monotony and drudgery of daily life, while the ironing board serves as a space for reflection and emotional processing, connecting past and present struggles.

The Iron as a Symbol of Routine and Drudgery

The iron in I Stand Here Ironing embodies the relentless routine and physical labor that define the narrator’s life. Its repetitive motion mirrors the cyclical nature of her daily tasks, emphasizing the monotony and drudgery she endures. The iron also symbolizes the emotional weight she carries, as her thoughts move “tormented back and forth” with the iron’s rhythm. This object, often overlooked, becomes a powerful metaphor for the unseen toll of motherhood and poverty. Through the iron, Olsen highlights the ways in which domestic work, though essential, is often undervalued and contributes to the narrator’s sense of being trapped in an endless cycle of responsibility and sacrifice.

The Ironing Board as a Space for Reflection

The ironing board in I Stand Here Ironing serves as a metaphorical space for the narrator’s introspection and emotional processing. While physically ironing, the narrator mentally unpacks her relationship with her daughter, Emily, and the challenges of motherhood. The ironing board becomes a silent witness to her internal struggles, symbolizing a private, almost sacred space where she can reflect on past decisions and societal pressures. The rhythmic motion of ironing allows her to confront her guilt, regret, and the sacrifices made for her family. This space underscores the narrator’s need to reconcile her identity as a mother with the demands of her reality, making it a poignant symbol of quiet contemplation amidst chaos.

Themes of Guilt and Regret

The narrator grapples with internal conflict, self-blame, and doubts about her parenting decisions, reflecting on the unfulfilled potential of her daughter, burdened by circumstances and regret.

The Mother’s Self-Blame and Doubts

The narrator in I Stand Here Ironing is consumed by self-blame and doubts about her ability to nurture her daughter, Emily, amidst poverty and societal pressures. She reflects on the sacrifices and choices made, questioning whether she failed to provide the care and support Emily needed. The mother’s internal conflict is heightened by the realization of her limitations, exacerbated by the demands of raising a child in a challenging economic environment. Her guilt is intertwined with the belief that she could not offer Emily the childhood she deserved, leading to a profound sense of regret and emotional distance. This self-blame underscores the complexities of motherhood and the weight of unmet expectations.

Unfulfilled Potential and Lost Opportunities

The narrator in I Stand Here Ironing grapples with the unfulfilled potential of her daughter, Emily, reflecting on the opportunities lost due to poverty and personal circumstances. She acknowledges the sacrifices made, such as working tirelessly and neglecting emotional nurturing, which left Emily without the guidance she needed. The mother mourns the gap between Emily’s potential and the reality of her upbringing, recognizing the limitations imposed by socioeconomic struggles. This regret is compounded by the awareness of missed chances to foster Emily’s growth, leaving a lingering sense of loss and “what ifs.” The story poignantly captures the emotional weight of unmet aspirations and the enduring impact of societal constraints on individual lives.

The Mother-Daughter Relationship

The mother-daughter relationship in ‘I Stand Here Ironing’ is complex, marked by love, sacrifice, and emotional distance, reflecting societal pressures and the mother’s internal conflict.

Complex Dynamics and Emotional Distance

The relationship between the narrator and Emily is intricate, blending affection with detachment. The mother’s reflections reveal a deep emotional gap, shaped by her struggles and societal expectations. Poverty and maternal responsibilities have strained their bond, leaving unspoken sentiments and unresolved conflicts. Olsen masterfully captures the tension between love and resentment, illustrating how external pressures can affect intimacy. The narrator’s internal monologue exposes her guilt and regret, highlighting the emotional distance that has grown over time. Through this, Olsen portrays the challenges of motherhood and the silent suffering of women in difficult circumstances, making the story a powerful exploration of human emotions and societal influences.

Love, Sacrifice, and Resentment

The narrator’s relationship with Emily is marked by profound love intertwined with sacrifice and subtle resentment. The mother’s devotion is evident in her efforts to provide for Emily, despite the hardships of poverty and societal constraints. However, her inability to fully connect with her daughter fosters a sense of unspoken resentment, rooted in her own unmet needs and the sacrifices she has made. Olsen portrays this duality, highlighting how love can coexist with frustration and regret. The narrator’s reflections reveal a complex interplay of emotions, where her deep care for Emily is shadowed by the burdens of her circumstances. This emotional tension underscores the story’s exploration of maternal love and its vulnerabilities in the face of adversity.

Reception and Impact

I Stand Here Ironing has received critical acclaim for its emotional depth and exploration of maternal struggles. It remains a significant work in feminist literature, resonating with readers today.

Critical Acclaim and Literary Recognition

Tillie Olsen’s I Stand Here Ironing has garnered widespread critical acclaim for its profound exploration of motherhood, identity, and socioeconomic challenges. The story is celebrated for its emotional depth and its ability to capture the internal struggles of a mother navigating societal expectations. Olsen’s use of the first-person narrative and stream-of-consciousness technique has been praised for its intimacy and authenticity. The work is often highlighted as a significant contribution to feminist literature, offering a poignant portrayal of women’s experiences in the early 20th century. Its inclusion in various anthologies and academic curricula underscores its literary importance. The story’s enduring relevance continues to resonate with readers, solidifying its place as a timeless classic in American literature.

Popular Response and Reader Interpretations

Readers have deeply connected with I Stand Here Ironing due to its raw emotional authenticity and relatable portrayal of motherhood. The story’s availability as a PDF has made it accessible to a wide audience, sparking discussions about its universal themes. Many readers empathize with the narrator’s internal struggles, seeing reflections of their own experiences with parenting and societal pressures. The story’s emotional depth and vivid imagery resonate particularly with mothers, who appreciate its honest depiction of love, sacrifice, and regret. Its ability to evoke strong emotions and provoke thought has made it a favorite among readers, while its concise yet powerful narrative continues to inspire personal reflections and shared conversations about identity, class, and family dynamics.

I Stand Here Ironing remains a timeless reflection on motherhood, societal expectations, and personal regret, its emotional depth and accessibility as a PDF ensuring its enduring relevance and impact.

Tillie Olsen’s

The Timeless Relevance of the Story

Tillie Olsen’s I Stand Here Ironing remains a timeless exploration of universal human experiences, resonating across generations. Its themes of motherhood, guilt, and identity transcend time, speaking to readers grappling with similar emotional and societal challenges. The story’s focus on the struggles of caregiving, unmet potential, and systemic inequities continues to evoke empathy and reflection. Olsen’s vivid portrayal of a mother’s internal conflict and the complexities of family dynamics ensures its relevance in contemporary discussions about parenthood, gender roles, and socioeconomic disparities. The availability of the story in PDF format has further widened its reach, allowing new audiences to engage with its profound and enduring messages. Its emotional depth ensures it remains a vital work in literary conversations about human struggle and resilience.

cat pancreatitis chart pdf

Feline pancreatitis is a common exocrine pancreatic disorder in cats, characterized by inflammation of the pancreas. It is increasingly recognized due to improved diagnostic tools like the cat pancreatitis chart PDF, which aids in understanding and managing this condition effectively.

1.1 Definition and Overview

Feline pancreatitis is an inflammatory condition affecting the pancreas, often categorized as acute or chronic. It is a multifactorial disease with variable clinical outcomes. The cat pancreatitis chart PDF serves as a valuable resource for understanding this condition, providing insights into its diagnosis, symptoms, and management strategies. Pancreatitis in cats has gained increasing recognition due to advancements in diagnostic tools like Spec fPL and imaging techniques. This condition can significantly impact a cat’s quality of life, making early detection and appropriate care essential for improving prognosis and managing symptoms effectively.

1.2 Importance of Understanding Pancreatitis in Cats

Understanding feline pancreatitis is crucial for early detection and effective management. Once considered rare, it is now recognized as a common condition impacting cats’ quality of life. The cat pancreatitis chart PDF highlights the importance of recognizing nonspecific symptoms like lethargy and anorexia, which can overlap with other diseases. Accurate diagnosis and timely intervention are vital, as pancreatitis can be life-threatening if left untreated. This knowledge empowers pet owners and veterinarians to take proactive steps, improving outcomes and ensuring proper care for affected cats.

Clinical Signs of Feline Pancreatitis

Cats with pancreatitis often exhibit nonspecific symptoms like lethargy, anorexia, vomiting, and abdominal pain. These signs can vary in severity and overlap with other conditions, complicating diagnosis.

2.1 Common Symptoms in Cats

Cats with pancreatitis often show nonspecific symptoms such as lethargy, anorexia, vomiting, and abdominal pain. These signs can vary in severity and may overlap with other conditions, making diagnosis challenging. Additionally, some cats may experience diarrhea, fever, or weight loss. The cat pancreatitis chart PDF highlights these common symptoms, aiding veterinarians and owners in early detection and appropriate management. Recognizing these signs promptly is crucial for effective treatment and improving the cat’s quality of life.

2.2 Nonspecific Nature of Clinical Signs

The clinical signs of feline pancreatitis are often nonspecific, making diagnosis challenging. Cats may exhibit lethargy, anorexia, vomiting, or abdominal pain, which can also occur in other conditions. These overlapping symptoms complicate early detection, as they do not uniquely point to pancreatitis. The cat pancreatitis chart PDF emphasizes this nonspecificity, helping veterinarians and owners recognize the need for thorough diagnostic evaluation. Early identification of these signs improves the likelihood of timely intervention and effective management of the condition.

2.3 Severity Categorization Based on Symptoms

The severity of feline pancreatitis is categorized based on clinical symptoms, ranging from mild to severe. Mild cases may present with minimal signs, while severe cases can include pronounced vomiting, abdominal pain, and lethargy. The cat pancreatitis chart PDF aids in assessing symptom severity, helping veterinarians classify the condition and determine appropriate interventions; This categorization is crucial for developing effective treatment plans and improving patient outcomes.

Acute vs. Chronic Pancreatitis in Cats

Acute pancreatitis is a sudden, reversible inflammation, while chronic pancreatitis involves long-term damage and irreversible changes. The cat pancreatitis chart PDF helps differentiate these forms for accurate diagnosis and management.

3.1 Acute Pancreatitis: Causes and Characteristics

Acute pancreatitis in cats is often caused by factors like dietary indiscretion, hyperlipidemia, or trauma. It presents with sudden inflammation, leading to symptoms such as vomiting, lethargy, and abdominal pain. The cat pancreatitis chart PDF outlines these causes and characteristics, aiding veterinarians in prompt diagnosis. Key features include rapid onset and potential severity, necessitating immediate treatment to prevent complications. Early recognition using diagnostic tools like Spec fPL can significantly improve outcomes for affected cats.

3.2 Chronic Pancreatitis: Long-Term Implications

Chronic pancreatitis in cats leads to long-term inflammation and irreversible pancreatic damage. Over time, this can result in fibrosis, atrophy, and reduced pancreatic function. The cat pancreatitis chart PDF highlights these implications, emphasizing the need for ongoing management. Chronic cases often coincide with other health issues, such as liver disease or diabetes, complicating the prognosis. Regular monitoring and tailored dietary adjustments are crucial to manage symptoms and prevent further deterioration, ensuring a better quality of life for affected cats.

3.3 Recurrence of Acute Episodes

Some cats with acute pancreatitis may experience recurrent episodes, especially if underlying causes like dietary indiscretion or metabolic disorders are not addressed. The cat pancreatitis chart PDF emphasizes the importance of monitoring these cases to identify patterns and triggers. Recurrence can lead to chronic inflammation, worsening pancreatic damage, and long-term health complications. Regular veterinary checkups and adherence to preventive measures are essential to reduce the likelihood of future acute episodes and improve the cat’s overall prognosis.

Diagnosis of Feline Pancreatitis

The diagnosis of feline pancreatitis involves laboratory tests, imaging techniques, and the use of the cat pancreatitis chart PDF to assess symptoms and pancreatic markers accurately.

4.1 Laboratory Tests and Markers

Diagnosing feline pancreatitis involves laboratory tests to evaluate pancreatic function and inflammation. Key markers include serum alanine transaminase (ALT) and alkaline phosphatase (ALP), which are often elevated in affected cats. The feline pancreas-specific lipase (Spec fPL) test is highly sensitive and specific for pancreatitis. These tests, along with the cat pancreatitis chart PDF, help guide accurate diagnosis and differentiate pancreatitis from other conditions. Regular monitoring of these markers is essential for managing both acute and chronic cases effectively.

4.2 Imaging Techniques for Pancreatic Evaluation

Imaging techniques play a crucial role in evaluating pancreatic health in cats. Abdominal ultrasound is commonly used to detect pancreatic enlargement, nodules, or hyperechogenicity. Computed tomography (CT) scans provide detailed cross-sectional images, aiding in identifying inflammation or complications. Magnetic resonance imaging (MRI) offers high-resolution soft tissue imaging but is less frequently used due to cost and availability. These imaging methods, guided by the cat pancreatitis chart PDF, help veterinarians assess pancreatic abnormalities and monitor disease progression, ensuring accurate diagnosis and effective treatment planning.

4.3 Role of Spec fPL (Feline Pancreas-Specific Lipase)

Spec fPL (feline pancreas-specific lipase) is a critical biomarker for diagnosing pancreatitis in cats. Elevated Spec fPL levels in blood or fluid samples indicate pancreatic inflammation. This test is highly specific to feline pancreatic tissue, reducing false positives. The cat pancreatitis chart PDF often includes reference ranges and interpretation guidelines for Spec fPL, helping veterinarians accurately diagnose and monitor pancreatitis; While not definitive alone, Spec fPL, combined with clinical signs and imaging, significantly enhances diagnostic accuracy and informs treatment decisions.

Treatment Options for Feline Pancreatitis

Treatment focuses on managing symptoms, supporting recovery, and preventing complications. This includes fluid therapy, pain relief, and dietary adjustments. The cat pancreatitis chart PDF provides guidance on tailored approaches for acute and chronic cases, ensuring optimal care and improving outcomes for affected cats.

5.1 Management of Acute Pancreatitis

Management of acute feline pancreatitis involves immediate supportive care to stabilize the cat. Fluid therapy is essential to prevent dehydration, while pain relief and anti-nausea medications are administered to improve comfort. In some cases, withholding food temporarily may be recommended to rest the pancreas. Monitoring for complications, such as organ failure, is crucial. The cat pancreatitis chart PDF provides a structured guide for diagnosing and managing acute episodes, ensuring tailored treatment plans for optimal recovery.

5.2 Chronic Pancreatitis Management Strategies

Managing chronic feline pancreatitis focuses on long-term strategies to reduce inflammation and improve quality of life. Dietary adjustments are critical, often involving low-residue or novel protein diets to minimize pancreatic stress. Pain management, such as buprenorphine, may be necessary for discomfort. Regular monitoring of liver enzymes and pancreatic function helps track disease progression. The cat pancreatitis chart PDF provides guidance on creating personalized care plans, emphasizing the importance of avoiding high-fat foods and managing concurrent health issues to prevent exacerbations.

5.3 Pain Management and Supportive Care

Pain management is crucial for cats with pancreatitis, often involving medications like buprenorphine or fentanyl patches. Supportive care includes hydration, anti-nausea therapy, and nutritional support to prevent malnutrition. The cat pancreatitis chart PDF provides guidance on pain assessment and treatment options. Ensuring a stress-free environment and monitoring for discomfort are key. These strategies aim to improve comfort and quality of life, especially during recovery phases, while addressing both physical and emotional needs effectively.

Dietary Considerations for Cats with Pancreatitis

Dietary management is crucial for cats with pancreatitis. Veterinarians recommend low-residue or novel protein diets to reduce pancreatic strain. Avoiding table scraps and fatty foods is essential. The cat pancreatitis chart PDF provides detailed dietary guidelines to support recovery and prevent recurrence.

6.1 Recommended Diets for Managing Pancreatitis

For cats with pancreatitis, veterinarians often recommend diets low in fat and high in digestible proteins. Novel protein diets, such as those using venison or duck, can reduce inflammation. Low-residue diets minimize pancreatic stimulation, aiding recovery. The cat pancreatitis chart PDF outlines specific nutritional guidelines, emphasizing the avoidance of fatty foods and table scraps. These dietary adjustments help manage symptoms and support long-term health, especially in chronic cases.

6.2 Foods to Avoid and Nutritional Guidelines

Cats with pancreatitis should avoid fatty foods, table scraps, and fat supplements, as these can trigger inflammation; The cat pancreatitis chart PDF recommends a low-fat, easily digestible diet to minimize pancreatic stress. Avoid high-residue foods that may exacerbate symptoms. Nutritional guidelines emphasize lean proteins, such as novel protein sources, and limited carbohydrates. Managing weight and avoiding overfeeding are also crucial. These dietary adjustments, outlined in the chart, help reduce the risk of recurrence and support overall feline health effectively.

6.3 Role of Low-Residue and Novel Protein Diets

Low-residue diets reduce pancreatic workload, benefiting cats with pancreatitis. Novel protein sources, like venison or duck, minimize allergic reactions and inflammation. The cat pancreatitis chart PDF highlights these diets’ role in managing symptoms and preventing recurrence. By avoiding common allergens and focusing on easily digestible ingredients, these diets support feline health without overburdening the pancreas, aligning with recommendations for long-term management of pancreatitis in cats.

Prognosis and Quality of Life

The cat pancreatitis chart PDF aids in understanding prognosis and improving quality of life for affected cats, emphasizing the importance of proper care and management strategies.

7.1 Factors Influencing Prognosis

Several factors influence the prognosis of cats with pancreatitis, including the severity of inflammation, presence of concurrent diseases, and promptness of treatment. According to the cat pancreatitis chart PDF, acute cases often have a better outlook than chronic ones. Early diagnosis and appropriate management, such as dietary changes and pain control, significantly improve outcomes. The chart also highlights that cats with chronic pancreatitis may face long-term health challenges, necessitating regular monitoring and tailored care to enhance their quality of life and prevent complications.

7.2 Improving Quality of Life for Affected Cats

Improving the quality of life for cats with pancreatitis involves a comprehensive approach, including dietary adjustments, pain management, and avoiding triggers. The cat pancreatitis chart PDF provides guidance on selecting low-residue or novel protein diets to reduce pancreatic stress. Additionally, avoiding fatty or high-residue foods and table scraps is crucial. Regular veterinary checkups and monitoring for recurrence are essential. Pain relief options, such as sublingual buprenorphine, can enhance comfort. By adhering to these strategies, owners can significantly improve their cat’s well-being and manage the condition effectively, ensuring a better quality of life.

Prevention and Monitoring

Preventing pancreatitis recurrence involves dietary adjustments, avoiding triggers, and regular monitoring. The cat pancreatitis chart PDF aids in tracking symptoms and ensuring early detection of potential episodes.

8.1 Preventive Measures for Recurrence

Preventing pancreatitis recurrence requires a multi-faceted approach. Feeding a low-residue or novel protein diet can reduce pancreatic strain. Avoiding table scraps, fatty foods, and supplements is crucial. Regular veterinary checkups and monitoring of liver enzymes help identify early signs of recurrence. Using tools like the cat pancreatitis chart PDF can aid in tracking a cat’s health and dietary adjustments, ensuring prompt intervention. Maintaining a healthy weight and managing concurrent diseases also play significant roles in prevention.

8.2 Regular Veterinary Checkups and Monitoring

Regular veterinary checkups are vital for managing feline pancreatitis. Monitoring serum alanine transaminase and alkaline phosphatase levels helps detect early signs of recurrence. Imaging techniques, such as ultrasonography, assess pancreatic health. The cat pancreatitis chart PDF provides a structured approach to tracking these metrics, ensuring consistency in care. Veterinarians can use this tool to guide treatment adjustments and maintain a cat’s quality of life, emphasizing the importance of proactive monitoring in preventing complications and managing chronic conditions effectively.

The Role of the Cat Pancreatitis Chart PDF

The cat pancreatitis chart PDF serves as a diagnostic and management aid, providing structured guidelines for identifying symptoms, tracking progression, and optimizing treatment plans for feline pancreatitis.

9.1 Overview of the Chart and Its Purpose

The cat pancreatitis chart PDF is a comprehensive tool designed to help veterinarians and cat owners understand and manage feline pancreatitis. It provides a detailed overview of the condition, including clinical signs, diagnostic markers, and treatment options. The chart organizes information on acute and chronic forms, offering a clear framework for identifying symptoms, monitoring progression, and implementing effective care strategies. Its purpose is to enhance diagnostic accuracy and streamline treatment plans, ensuring better outcomes for affected cats.

9.2 Key Information Included in the Chart

The cat pancreatitis chart PDF includes essential details such as clinical signs, diagnostic markers, and treatment options. It outlines acute and chronic symptoms, lab tests like Spec fPL, and imaging techniques. The chart also covers dietary recommendations, pain management strategies, and severity categorization. Additionally, it provides insights into recurrence prevention and prognosis factors, serving as a practical guide for veterinarians and cat owners to monitor and adjust treatment plans effectively.

Using the Cat Pancreatitis Chart PDF

The chart serves as a practical guide for diagnosing and managing feline pancreatitis, aiding veterinarians and cat owners in understanding symptoms, treatments, and monitoring strategies effectively.

10.1 How to Interpret the Chart for Diagnosis

The chart provides a structured approach to diagnosing feline pancreatitis by categorizing clinical signs, lab results, and imaging findings. Veterinarians can cross-reference symptoms like lethargy, anorexia, and abdominal pain with diagnostic markers such as elevated serum lipase levels or ultrasonographic evidence of pancreatic enlargement. The chart also helps differentiate between acute and chronic forms by highlighting recurring symptoms or progressive laboratory abnormalities. This systematic interpretation ensures accurate and timely diagnosis, guiding appropriate treatment plans for affected cats.

10.2 Practical Application in Veterinary Care

The cat pancreatitis chart PDF serves as a valuable tool for veterinarians to develop tailored treatment plans. It aids in managing both acute and chronic cases by outlining appropriate interventions, such as dietary adjustments and pain relief strategies. The chart also guides the use of diagnostic markers like Spec fPL and imaging results to monitor disease progression. Regular veterinary checkups, as suggested by the chart, ensure continuous assessment and adjustments to therapy, improving the overall quality of life for cats with pancreatitis while preventing recurrence.

The cat pancreatitis chart PDF is a comprehensive resource for diagnosing and managing feline pancreatitis, enhancing treatment efficacy and improving the quality of life for affected cats.

11.1 Summary of Key Points

Feline pancreatitis is a multifactorial disease with nonspecific clinical signs, making diagnosis challenging. The cat pancreatitis chart PDF provides a structured approach to identifying symptoms, diagnostic markers, and treatment strategies. It highlights the importance of laboratory tests, imaging techniques, and biomarkers like Spec fPL. Managing both acute and chronic forms requires tailored dietary plans and supportive care. Regular monitoring and preventive measures can improve prognosis and quality of life for affected cats, emphasizing the chart’s role as a vital tool for veterinarians and cat owners alike.

11.2 Final Thoughts on Managing Feline Pancreatitis

Effectively managing feline pancreatitis requires early diagnosis, tailored treatment plans, and ongoing care. Utilizing tools like the cat pancreatitis chart PDF can guide veterinarians and owners in identifying symptoms and implementing appropriate strategies. Pain management, dietary adjustments, and supportive care are critical for improving quality of life. Regular monitoring and preventive measures can reduce recurrence risks. While challenges remain, especially in chronic cases, a proactive and informed approach ensures many cats lead fulfilling lives, emphasizing the importance of the chart as a comprehensive resource.

gw2 vision guide

Vision is a legendary accessory in Guild Wars 2, obtained through completing challenging collection achievements and gathering rare materials. It represents a pinnacle of endgame crafting, offering unique visual effects and lore significance, making it a sought-after item for dedicated players.

1.1 What is Vision?

Vision is a prestigious legendary accessory in Guild Wars 2, renowned for its intricate design and unique visual effects. It is part of a series of legendary trinkets, with Vision I: Awakening being the first collection in the series. This accessory is deeply tied to the game’s lore, particularly involving the Scrying Pool and Aurene’s guidance. Unlike other legendary items, Vision emphasizes completion of specific achievements and time-gated content, such as the Astral weapons, which are central to its crafting process. The ethereal aura it grants when weapons are stowed adds to its aesthetic appeal. Vision is a testament to a player’s dedication and mastery, as it requires a combination of crafting, exploration, and achievement hunting. It is considered a milestone for endgame players, offering both practical use and a showcase of accomplishment.

1.2 Importance of Vision in GW2

Vision holds significant prestige as a legendary accessory in Guild Wars 2, offering unique visual effects and enhancing gameplay through potential stat boosts. Its connection to the game’s lore, particularly involving the Scrying Pool and Aurene’s guidance, makes it integral to story progression. Vision serves as both a symbol of a player’s dedication and skill, and a motivational goal encouraging deep engagement with the game’s systems and events. It may offer competitive advantages in PvP and challenging content, while also holding economic value in the marketplace. Crafting Vision fosters community collaboration, whether through material trading or strategy sharing. Overall, Vision is a desirable item for its aesthetics, lore significance, and as a testament to a player’s commitment, making it a key objective for many in the GW2 community.

Crafting Vision

Crafting Vision involves gathering rare materials and completing specific achievements, requiring a blend of skill, resources, and time to unlock its full potential in Guild Wars 2.

2.1 Overview of the Crafting Process

The crafting process for Vision is intricate, involving multiple steps and components. Players must first acquire key items like Mystic Tribute, Gift of Prescience, and Glimpse, each requiring specific materials and achievements; Time-gated content, such as Astral weapons, plays a crucial role, as these can only be obtained during certain periods. Crafting Vision also demands a significant investment of in-game resources, including gold, mastery points, and materials gathered from various regions. The process is divided into stages, each unlocking new components and progressing the player closer to completing the legendary accessory. Proper planning and management of daily and weekly tasks are essential to efficiently navigate the crafting journey. Patience and dedication are key, as the process can be lengthy and challenging. Understanding the interdependencies of each step ensures a smoother progression toward crafting Vision.

2.2 Key Steps in Crafting Vision

Crafting Vision involves several critical steps that must be executed in sequence. First, players must unlock the recipe for Vision, which requires completing specific achievements and progressing through the associated collection. Next, gathering the necessary components is essential, with a focus on acquiring rare materials like Mystic Tributes and Gifts of Prescience. These items often require completing challenging content or trading with other players. Time-gated content, such as Astral weapons, must also be addressed, as these can only be obtained during weekly resets. Once all components are secured, the final crafting process can begin, combining the items in a specific order to complete Vision. Each step is interconnected, and delaying one part can hinder progress. Proper planning and execution are vital to successfully crafting this legendary accessory.

Achievement Collections

Achievement collections play a central role in crafting Vision, requiring players to complete specific tasks and milestones. These collections often involve challenging content and progression.

3.1 Required Achievements for Vision

Crafting Vision requires completing specific achievement collections, each with its own set of challenges. These achievements often involve mastery of certain skills, completion of difficult content, or gathering rare items. Players must progress through multiple collections, each unlocking the next step in the crafting process. Daily and weekly tasks play a significant role, as they provide essential materials and progress toward these achievements. Time-gated content, such as the Astral weapons, is particularly important, as it cannot be rushed and requires careful planning. Additionally, some achievements may involve completing specific storylines or mastery tracks, adding depth and variety to the process. Consulting guides or community resources, like Dulfy’s, can help streamline progress and ensure no step is overlooked.

3.2 Strategies for Completing Achievements

To efficiently complete the achievements required for Vision, focus on planning and consistency. Prioritize daily tasks that contribute to multiple achievements simultaneously, such as participating in meta-events or farming specific materials. Weekly tasks, like completing certain dungeons or raids, should be scheduled in advance to ensure progress. Utilize time-gated content wisely, as items like Astral weapons cannot be rushed and require patience. Leverage community guides, such as Dulfy’s, to identify optimal routes and strategies for challenging achievements. Avoid burnout by breaking tasks into manageable sessions and celebrating small milestones. Coordination with guildmates or friends can also simplify group-based achievements. Stay organized by tracking progress in a journal or spreadsheet, ensuring no requirement is overlooked. With dedication and strategic planning, completing the Vision achievements becomes achievable.

Material Requirements

Crafting Vision demands rare materials, requiring time and effort to gather. This process is central to achieving the legendary accessory, reflecting dedication and perseverance in GW2.

4.1 Essential Materials Needed

Crafting Vision requires several rare and challenging-to-obtain materials. These include a Mystic Tribute, Gift of Prescience, Gift of Arid Mastery, and Glimpse; Each of these items plays a critical role in the crafting process. The Mystic Tribute is often obtained through time-gated content, while the Gift of Prescience and Gift of Arid Mastery involve completing specific achievements. Glimpse is a rare drop from high-level content. Gathering these materials demands patience and dedication, as they are not easily accessible. Players must plan ahead, focusing on daily and weekly tasks to accumulate the necessary resources efficiently. Understanding the sources and requirements for each material is essential to progressing through the crafting process. This step is foundational, as missing even one component can halt progress. Proper planning ensures a smoother journey toward crafting Vision.

4.2 Sources for Gathering Materials

Gathering materials for Vision requires a strategic approach. The Mystic Tribute can be obtained through time-gated content, such as completing weekly tasks associated with Astral weapons. The Gift of Prescience and Gift of Arid Mastery are tied to specific achievements, often requiring completion of challenging in-game objectives. Glimpse is typically acquired as a rare drop from high-level content, such as raids or dungeons. Players should focus on completing daily and weekly tasks to accumulate materials efficiently. Additionally, mastering certain skills and exploring high-end content can yield the necessary resources. Proper planning and consistent effort are key to gathering these materials without delays. Utilizing in-game tools and guides can help streamline the process and ensure progress.

Daily and Weekly Tasks

Daily and weekly tasks are crucial for steady progress. Focus on time-gated content like Astral weapons and manage tasks efficiently to avoid delays. Consistency ensures progress.

5.1 Managing Daily Tasks Efficiently

Managing daily tasks efficiently is key to progressing through the Vision collection. Prioritize time-gated activities, such as crafting Astral weapons, which require daily attention. Allocate specific times for logging in to ensure tasks are completed without missing deadlines. Utilize in-game tools like the calendar to track important dates and deadlines. Focus on completing daily achievements and crafting sessions to accumulate materials steadily. Avoid procrastination by breaking tasks into smaller, manageable chunks. Stay organized by maintaining a checklist of daily objectives. Consistency is vital, as even small progress each day contributes significantly over time. By maintaining a disciplined routine, you can efficiently manage daily tasks and keep your Vision collection on track.

5.2 Weekly Tasks to Prioritize

Weekly tasks play a crucial role in progressing toward the Vision collection. Prioritize completing time-gated achievements and events, such as those tied to Astral weapons, which are essential for progression. Dedicate time each week to crafting sessions, ensuring materials are being accumulated steadily. Focus on completing specific achievements linked to Vision, such as those requiring participation in meta-events or daily tasks. Use in-game tools like the calendar to track weekly resets and plan accordingly. Avoid missing out on weekly rewards that contribute to material gathering. By prioritizing these tasks, you can maintain consistent progress without feeling overwhelmed. Consistency is key, and staying on top of weekly objectives ensures you’re always moving closer to crafting Vision.

Time-Gated Content

Time-gated content plays a significant role in Vision progression. Completing weekly requirements, such as Astral weapon progression, is essential to advance efficiently and unlock key components.

6.1 Understanding Time-Gated Requirements

Time-gated requirements in Vision crafting introduce progression barriers tied to weekly cycles. These mechanics ensure players cannot rush through content, balancing accessibility with long-term engagement. Key components like Astral weapons require weekly investments, such as collecting essences or completing specific events. Understanding these gates helps players plan efficiently, avoiding setbacks. Regularly tracking weekly resets and prioritizing tasks ensures steady progress. While time-gating may slow progress, it encourages consistent gameplay and strategic planning.

6.2 Astral Weapons and Their Role

Astral weapons are a critical component in the Vision crafting process, serving as a cornerstone for progression. These weapons are tied to weekly objectives, requiring players to gather specific essences and materials over time. Each week, players must charge their Astral weapon through activities like dungeons, raids, or open-world events. Once fully charged, the weapon unlocks, providing essential components for Vision. The process is time-intensive, ensuring players commit to regular gameplay. Astral weapons also offer unique visual and lore-related benefits, enhancing the overall experience. Their role in Vision crafting underscores the importance of patience and consistent effort, as they cannot be bypassed or rushed. This mechanic ensures that Vision remains an achievement for dedicated players who invest time and effort into their progression.

Tips and Strategies

Plan ahead for time-gated content, use efficient crafting techniques, and avoid common mistakes by staying organized and focused on progression milestones.

7.1 Efficient Crafting Techniques

To craft Vision efficiently, prioritize daily tasks and weekly achievements. Focus on time-gated content first, as completing Astral weapons early ensures other components fall into place. Use crafting disciplines like Tailoring and Leatherworking to reach high levels, which unlock essential recipes. Plan your material gathering in advance, utilizing maps with abundant resource nodes. Rotate between characters to maximize daily crafting cooldowns and progression. Stay organized with a checklist of required achievements and materials, ensuring no step is overlooked. Regularly check the in-game wiki or community guides for optimized routes and strategies. By maintaining consistency and focusing on high-reward activities, you can progress steadily toward crafting Vision without unnecessary delays or material shortages. This structured approach minimizes wasted time and resources.

7.2 Avoiding Common Mistakes

Crafting Vision requires careful planning and attention to detail. One common mistake is neglecting time-gated content, such as missing deadlines for Astral weapons, which can significantly delay progress. Players often overlook the importance of organizing material gathering, leading to wasted time searching for resources. Another error is ignoring daily tasks, as consistent progress is key to unlocking achievements. Some players underestimate the need for high-level crafting disciplines, which are essential for crafting certain components. Additionally, failing to consult guides or community resources can result in inefficient strategies. Avoiding these mistakes ensures a smoother and more efficient crafting experience, saving both time and resources. By staying organized and proactive, players can avoid frustration and maintain steady progress toward crafting Vision.

Crafting Vision is a rewarding yet challenging journey, requiring dedication and strategic planning; With persistence and the right strategies, players can unlock this legendary accessory and showcase their achievements.

8.1 Final Thoughts on Crafting Vision

Crafting Vision is a testament to dedication and perseverance in Guild Wars 2. Completing this journey requires meticulous planning, time management, and a thorough understanding of the game’s mechanics. While the process can be daunting, the sense of accomplishment upon equipping Vision is unparalleled. It’s essential to stay organized, especially with time-gated content and material gathering. Leveraging daily and weekly tasks effectively can significantly streamline progress. Remember, Vision is not just an accessory but a symbol of mastery and commitment. With the right mindset and strategies, any player can achieve this legendary feat and enjoy the unique benefits it offers. Embrace the challenge and let your efforts shine in Tyria.

as long as the lemon trees grow pdf

Zoulfa Katouh’s debut novel, As Long as the Lemon Trees Grow, is a poignant and powerful tale set during the Syrian Revolution, following Salama Kassab, a young pharmacy student navigating the horrors of war, loss, and love. The book is celebrated for its vivid storytelling, emotional depth, and exploration of hope, resilience, and family bonds amidst chaos. A must-read for fans of historical fiction and contemporary literature.

Overview of the Book

Zoulfa Katouh’s As Long as the Lemon Trees Grow is a heart-wrenching and emotional tale set against the backdrop of the Syrian Revolution. The story follows Salama Kassab, a young pharmacy student, as she navigates the chaos of war, loss, and love. The novel vividly captures the horrors of the conflict while exploring themes of hope, resilience, family bonds, and the enduring strength of the human spirit. With lyrical prose and a compelling narrative, it offers a poignant glimpse into the lives of those affected by the Syrian Civil War, making it a must-read for fans of historical and contemporary fiction.

Historical Context of Syria

The novel is set against the backdrop of the Syrian Revolution, which began in 2011 as part of the Arab Spring. Protests against the regime escalated into a brutal civil war, marked by widespread violence, displacement, and human rights abuses. The conflict devastated Syria, leading to the rise of extremist groups like ISIS and a massive humanitarian crisis. The book captures the chaos and resilience of Syrians during this period, offering a personal and emotional perspective on the war’s impact on ordinary lives and the enduring hope for freedom and reconstruction.

Author Background: Zoulfa Katouh

Zoulfa Katouh is a Syrian-American debut author renowned for her haunting storytelling and emotional depth in her debut novel, ‘As Long as the Lemon Trees Grow.’

Biography of Zoulfa Katouh

Zoulfa Katouh is a Syrian-American author, known for her deeply moving debut novel, As Long as the Lemon Trees Grow. Her work captures the resilience and hope of the Syrian people during the civil war. Katouh’s personal experiences and connection to her homeland heavily influence her writing, creating a vivid and emotional portrayal of life in war-torn Syria. Her storytelling has been praised for its lyrical prose and ability to weave personal and political narratives seamlessly.

Her Writing Style and Influences

Zoulfa Katouh’s writing is characterized by lyrical prose and emotional depth, blending personal and political narratives seamlessly. Her debut novel, As Long as the Lemon Trees Grow, reflects her deep connection to Syria and its people, drawing inspiration from the resilience and hope amidst war. Katouh’s storytelling is influenced by her Syrian heritage and experiences, creating a vivid and heartfelt portrayal of life during the Syrian Civil War. Her unique voice and ability to weave historical context with personal stories have earned her acclaim, making her a compelling new talent in contemporary literature.

Plot Summary

Set during the Syrian Revolution, As Long as the Lemon Trees Grow follows Salama Kassab, a pharmacy student turned hospital volunteer in war-torn Homs, as she navigates loss, love, and hope amidst chaos.

Protagonist: Salama Kassab

Salama Kassab is a young pharmacy student whose life is upended by the Syrian Revolution. Volunteering at a hospital in Homs, she witnesses the horrors of war while navigating personal loss and newfound love. Her journey highlights resilience, hope, and the strength of the human spirit. Through her eyes, the story unfolds, showcasing her growth from a sheltered student to a determined individual fighting for survival and justice. Salama’s story is a testament to the enduring power of love, family, and hope amidst unimaginable adversity.

Setting: The Syrian Revolution

The Syrian Revolution forms the backdrop of Zoulfa Katouh’s poignant novel, immersing readers in the chaos and destruction of war-torn Syria. The story unfolds in cities like Homs, where hospitals become battlegrounds and ordinary citizens face unimaginable horrors. Amidst the rubble and loss, the setting reflects the resilience of the Syrian people, their culture, and their hope for freedom. The revolution’s brutality contrasts with moments of beauty, such as the symbolic lemon trees, which represent enduring life and the longing for a peaceful past. This vivid portrayal brings the harsh realities of war to life.

Key Plot Points and Conflict

Salama Kassab’s journey from a pharmacy student to a hospital volunteer in Homs forms the core of the narrative. As the Syrian Revolution escalates, she faces the brutal realities of war, including the disappearance of her brother and the fragmentation of her family. The story explores her internal conflict between hope and despair, as well as her blossoming romance with Kenan, a fellow revolutionary. The lemon trees symbolize the enduring spirit of her homeland, even as the war rages on. The novel’s tension arises from her struggle to survive, protect her loved ones, and hold onto her humanity amidst unimaginable loss and destruction.

Themes Explored in the Book

Hope and resilience shine through Salama’s journey, as she navigates love, loss, and war. The novel explores family bonds, survival, and sacrifice, highlighting the strength of the human spirit in crisis.

Hope and Resilience

Hope and resilience are central themes in Zoulfa Katouh’s novel, as Salama Kassab navigates the devastation of war-torn Syria. Despite losing her sense of security and future, Salama finds strength in her community and the enduring presence of lemon trees, which symbolize hope and continuity. Her journey highlights the human capacity to persevere even in the face of unimaginable loss, offering a powerful message about the resilience of the human spirit. The novel underscores how hope, though fragile, can sustain individuals and communities through their darkest hours.

Family and Community Bonds

Family and community bonds are a cornerstone of Salama’s story in Zoulfa Katouh’s novel. Her relationships with her parents and brother provide emotional support amidst the chaos of war. The community’s collective resilience and solidarity are portrayed through their shared struggles and acts of kindness. These bonds not only offer comfort but also serve as a source of strength, enabling Salama and others to navigate the harsh realities of their environment. The novel illustrates how such connections are vital for survival and maintaining hope during times of crisis.

Love Amidst War

The novel beautifully portrays the blossoming romance between Salama and Kenan, set against the backdrop of war-torn Syria. Their love story, marked by tender moments and shared hopes, offers a glimmer of light in the darkness. The relationship underscores the human capacity for connection and intimacy even in the most dire circumstances. Through their bond, Katouh highlights the enduring power of love as a source of strength and solace, reminding readers of the beauty that persists amidst chaos and loss. This poignant portrayal enriches the narrative, making it deeply emotional and relatable.

Survival and Sacrifice

The novel vividly portrays the struggle for survival in war-torn Syria, where characters like Salama Kassab risk everything to care for others. volunteering at a hospital in Homs, Salama faces unimaginable horrors, yet her determination to help embodies the spirit of sacrifice. The narrative highlights how ordinary people endure extraordinary hardships, sacrificing their safety and well-being for the greater good. Through these acts of courage, Katouh underscores the resilience of the human spirit and the moral choices that define us in the face of overwhelming adversity. Survival becomes a testament to both personal and collective strength.

Reception and Awards

As Long as the Lemon Trees Grow received critical acclaim, being named an Amazon Best Book of the Month and shortlisted for the British Book Awards.

Critical Acclaim and Reviews

Critical Acclaim and Reviews

As Long as the Lemon Trees Grow has garnered widespread critical acclaim for its powerful storytelling and emotional depth. Reviewers praise Zoulfa Katouh’s lyrical prose and her ability to weave a poignant tale of hope and resilience. The novel has been described as a “love letter to Syria” and compared to works like The Book Thief and Salt to the Sea. Critics highlight its vivid portrayal of life during the Syrian Revolution, with many calling it a “must-read” for its raw honesty and emotional impact. The book has also been endorsed by award-winning authors, further cementing its literary significance.

Awards and Nominations

Zoulfa Katouh’s As Long as the Lemon Trees Grow has received notable recognition, including being shortlisted for the British Book Awards Discover Book of the Year. The novel has also been named an Amazon Best Book of the Month, showcasing its literary impact. Acclaimed author Elizabeth Laird praised it as “an important book everyone should read.” These accolades highlight the book’s emotional depth and its ability to resonate with readers, further solidifying its place in contemporary literature. The nominations underscore its relevance and the power of its storytelling.

Impact on Readers

Zoulfa Katouh’s As Long as the Lemon Trees Grow has left a profound impact on readers, offering a deeply emotional and personal connection to the story of Salama Kassab. The novel’s vivid portrayal of hope, loss, and resilience resonates universally, creating a sense of empathy and understanding for the Syrian people’s struggles. Readers have praised the book for its ability to humanize the conflict, fostering a deeper connection to the characters and their experiences. The story’s emotional depth and authenticity have made it a memorable read, inspiring reflection on the strength of the human spirit.

Historical Context of the Syrian Civil War

The Syrian Civil War began in 2011 with peaceful protests against the regime, escalating into a brutal conflict involving government forces, rebels, and international factions. The war caused massive displacement, loss of life, and widespread devastation, shaping the backdrop of Zoulfa Katouh’s novel, which vividly portrays the resilience and humanity of Syrians amidst unparalleled chaos and destruction.

Causes and Key Events

The Syrian Civil War, beginning in 2011, stemmed from peaceful protests against President Bashar al-Assad’s regime, demanding political reform and freedom. The government’s violent crackdown escalated tensions, leading to widespread rebellion. Key events include the rise of rebel groups, foreign intervention from Russia and Iran, and the emergence of extremist groups like ISIS. The war intensified with chemical attacks, sieges, and mass displacements, creating a humanitarian crisis. These events form the backdrop of Zoulfa Katouh’s novel, highlighting the resilience and struggles of Syrians amidst unimaginable chaos and devastation.

Humanitarian Impact

The Syrian Civil War has caused unparalleled human suffering, with millions displaced, countless casualties, and infrastructure destroyed. Civilians, including healthcare workers like Salama, face immense risks, while families are torn apart. The book highlights the emotional toll of war, showcasing resilience amid loss. The humanitarian crisis remains severe, with limited access to basic necessities and medical care. Zoulfa Katouh’s narrative underscores the devastating realities of war, offering a poignant reflection on the human cost and the enduring hope for peace and rebuilding in Syria.

Cultural Significance in the Book

Zoulfa Katouh’s As Long as the Lemon Trees Grow is a cultural testament to Syria’s rich heritage, weaving traditional values, family bonds, and love into the narrative. The lemon trees symbolize resilience and hope, reflecting the enduring spirit of the Syrian people. By portraying Salama’s journey, the novel preserves the cultural identity of a nation amidst war, offering a bridge between Syria’s past and its uncertain future. This cultural depth enriches the story, making it a heartfelt tribute to a nation’s history and its people’s unyielding spirit.

Symbolism in the Novel

The lemon trees symbolize resilience and enduring love, reflecting Syria’s harsh realities and its people’s hope amidst war and loss, central to the story’s emotional core.

The Lemon Trees as a Symbol

The lemon trees in Zoulfa Katouh’s novel are a potent symbol of resilience, hope, and enduring love. They represent the harsh realities of loss and the tender roots of love amidst war. The trees embody the duality of life in Syria—both the beauty of its culture and the brutality of conflict. Through Salama’s journey, the lemon trees serve as a metaphor for her own growth, tying her to her homeland and its history. Their presence underscores themes of survival, memory, and the enduring spirit of a nation, making them a central and evocative element of the story.

Other Symbolic Elements

Beyond the lemon trees, the novel incorporates other symbolic elements that enrich its emotional and cultural depth. The pharmacy where Salama works represents her connection to healing and life amidst destruction. The hospital, filled with wounded bodies, symbolizes the collective suffering of Syrians. Even the simple act of tending to plants reflects the enduring hope for renewal. These elements weave together to create a vivid tapestry of resilience, loss, and love, highlighting the human spirit’s capacity to endure even in the darkest times, while preserving the essence of Syrian culture and identity.

Character Analysis

Salama Kassab, a determined pharmacy student, evolves from a sheltered life to a resilient hospital volunteer, embodying hope and sacrifice. Her journey highlights personal growth amidst war’s chaos, while Kenan, her love interest, symbolizes enduring affection and shared longing for Syria’s future. Supporting characters add depth, illustrating the collective struggle and humanity in dire circumstances, making each character a testament to the strength of the human spirit and the power of love in adversity.

Salama Kassab: Growth and Development

Salama Kassab, the protagonist, evolves from a sheltered pharmacy student to a resilient hospital volunteer, navigating the brutal realities of the Syrian Revolution. Her journey is marked by profound personal growth, as she confronts loss, sacrifice, and the erosion of her once-stable life. Through her experiences, Salama discovers inner strength, embracing hope and resilience amidst unimaginable hardship. Her transformation underscores the human capacity to adapt and survive, while her unwavering commitment to her family and community highlights the enduring power of love and solidarity in the face of war.

Kenan: The Love Interest

Kenan emerges as a pivotal figure in Salama’s life, embodying love and hope amidst the devastation of war. Their relationship, rooted in shared experiences and a deep connection to Syria, becomes a source of strength for both characters. Kenan’s unwavering dedication to his country and his family mirrors Salama’s resilience, creating a bond that transcends the chaos around them. Through their love story, Katouh highlights the enduring power of human connection and the light it brings in the darkest times, making Kenan an integral part of Salama’s journey and the novel’s emotional core.

Supporting Characters and Their Roles

The novel is enriched by a cast of supporting characters who play crucial roles in Salama’s journey. Her parents and brother provide emotional anchors, while her colleagues at the hospital embody the resilience of healthcare workers in wartime. Resistance fighters and community members add depth, showcasing the collective struggle and solidarity. Each character contributes to the narrative’s emotional landscape, highlighting themes of family, sacrifice, and survival. Their stories intertwine with Salama’s, creating a tapestry of hope and resilience that underscores the human cost of war and the enduring strength of community bonds.

Literary Style and Prose

Zoulfa Katouh’s prose is lyrical and evocative, blending vivid imagery with emotional depth. Her writing weaves personal and national narratives, creating a poignant yet hopeful portrait of war-torn Syria.

Narrative Technique

Zoulfa Katouh employs a first-person narrative voice in As Long as the Lemon Trees Grow, immersing readers in Salama Kassab’s intimate journey. The prose balances poetic imagery with raw realism, capturing the emotional intensity of war. Katouh’s non-linear storytelling weaves past and present, reflecting Salama’s fragmented yet resilient psyche. Through vivid descriptions of Syria’s landscapes and culture, the narrative connects personal loss to the broader national tragedy. This technique fosters a deep emotional connection, making the horrors of war relatable while highlighting the enduring strength of the human spirit.

Use of Language and Imagery

Zoulfa Katouh’s prose in As Long as the Lemon Trees Grow is lyrical and evocative, blending vivid imagery with emotional depth. The novel’s language paints a stark yet beautiful portrait of war-torn Syria, contrasting its vibrant culture with the devastation of conflict. Katouh’s imagery, such as the recurring symbol of lemon trees, evokes both hope and heartache, reflecting Salama’s inner turmoil. The descriptive language immerses readers in the setting, making the horrors of war and the resilience of the human spirit deeply relatable and visceral.

Educational Resources and Teaching

An educational resource pack based on the book provides teaching materials, including a 15-page guide for educators. Ideal for curriculum integration and classroom discussions.

Teaching Resources Available

A comprehensive educational resource pack is available for Zoulfa Katouh’s novel, offering lesson plans, discussion guides, and activity ideas tailored for classroom use. Designed for educators, this 15-page pack provides tools to explore themes, characters, and historical context. It includes prompts for reflective writing, group discussions, and multimedia projects, making it an invaluable resource for integrating the book into English, history, or social studies curricula. These materials are particularly suitable for high school students, fostering deeper engagement with the novel’s poignant themes and its relevance to global issues.

Curriculum Integration

Zoulfa Katouh’s As Long as the Lemon Trees Grow is an excellent choice for curriculum integration in English, history, and social studies. Its vivid portrayal of the Syrian Civil War offers students a personal and emotional connection to historical events. The novel aligns with themes of resilience, hope, and cultural identity, making it ideal for exploring literary devices, historical context, and multicultural perspectives. Educators can use the accompanying 15-page educational resource pack, which includes lesson plans and discussion guides, to facilitate deeper engagement and critical thinking among students.

Comparison to Other Works

As Long as the Lemon Trees Grow draws comparisons to works like The Book Thief and Salt to the Sea, sharing similar themes of war, hope, and resilience. Katouh’s vivid storytelling and emotional depth elevate the novel, offering a unique perspective on the Syrian conflict. Its blend of personal and collective struggle resonates deeply, making it a standout in contemporary war literature.

Similar Themes in Other Literature

As Long as the Lemon Trees Grow shares thematic similarities with works like The Book Thief and Salt to the Sea, which also explore war, hope, and human resilience. These novels, like Katouh’s, emphasize the personal and collective struggles of characters amidst conflict, highlighting the enduring strength of love, family, and community. The focus on a young protagonist navigating immense hardship echoes coming-of-age themes found in other war literature. Katouh’s unique voice, however, brings a fresh perspective to the Syrian Civil War, blending cultural depth with universal human emotions, making her work both relatable and distinctive.

Unique Aspects of Katouh’s Work

Zoulfa Katouh’s As Long as the Lemon Trees Grow stands out for its vivid portrayal of Syria’s cultural richness and its people’s resilience. The novel’s speculative elements and lyrical prose offer a fresh perspective on the Syrian Civil War, blending hope with harsh realities. Katouh’s use of the lemon tree as a symbol of enduring life and loss adds depth, distinguishing her work from other war narratives. Her personal connection to Syria infuses the story with authenticity, making it a heartfelt tribute to her homeland and its people. This unique blend sets her debut apart in contemporary literature.

Availability and Formats

As Long as the Lemon Trees Grow is available in multiple formats, including PDF, EPUB, and MOBI. Readers can download the eBook from platforms like Open Library and Zoboko.

PDF and eBook Options

As Long as the Lemon Trees Grow is widely available in digital formats, including PDF and EPUB, ensuring accessibility for readers worldwide. The PDF version retains the book’s original formatting, making it ideal for devices like tablets and e-readers. Platforms such as Open Library and Zoboko offer free downloads of the PDF, while paid options are available on Amazon and Bloomsbury Publishing. The eBook is compatible with popular reading apps, providing a seamless experience. Readers can easily download and enjoy Zoulfa Katouh’s poignant narrative on their preferred devices, making the story of Salama Kassab and her journey readily accessible.

Downloading and Accessing the Book

As Long as the Lemon Trees Grow is easily accessible in digital formats. Readers can download the PDF or EPUB versions from platforms like Open Library, Zoboko, or purchase from Amazon and Bloomsbury Publishing. The PDF is free on Open Library, while paid options ensure high-quality formatting. The eBook is compatible with popular reading apps, allowing seamless access on tablets, e-readers, and smartphones. Whether for educational purposes or personal reading, the book is readily available, ensuring Zoulfa Katouh’s poignant story reaches a global audience with ease and convenience.

act vocabulary list pdf

The ACT Vocabulary List is a curated collection of words essential for ACT test preparation, focusing on medium-difficulty terms․ It aids students in improving reading comprehension and verbal skills, with many words overlapping with SAT vocabulary․ The list is widely available in PDF format, allowing easy access for studying․ Mastery of these words enhances test performance and overall academic language proficiency․

What is the ACT Vocabulary List?

The ACT Vocabulary List is a comprehensive collection of words designed to help students prepare for the ACT exam․ It includes terms that frequently appear on the test, focusing on medium-level difficulty․ The list is often available in PDF format, making it easy to download and study․ Each word is typically accompanied by its definition, example sentences, and contextual usage․ This resource is invaluable for improving reading comprehension and verbal reasoning skills․ By mastering these words, students can enhance their performance on the ACT’s reading and writing sections․ The PDF format allows for convenient access and organization, enabling personalized study plans and efficient vocabulary building․

Importance of the ACT Vocabulary List

The ACT Vocabulary List is crucial for students aiming to excel in the ACT exam, as it focuses on words commonly tested, enhancing reading comprehension and verbal skills․ This targeted approach allows efficient study, ensuring students concentrate on relevant terms rather than overwhelming themselves with vast dictionaries․ Mastery of these words not only improves test performance but also boosts academic language proficiency․ The list, often in PDF format, offers convenient access for personalized study plans, making it an essential tool for achieving higher scores and broader educational success․ Its importance lies in its ability to streamline preparation, build confidence, and provide a clear path to understanding complex texts both during the test and in future academic pursuits․

Structure of the ACT Vocabulary List

The ACT Vocabulary List is organized to facilitate effective learning, typically divided into categories like alphabetical order and difficulty levels․ This structure helps students systematically study words, starting from basic to advanced terms․ Many PDF versions include word definitions, example sentences, and usage contexts, enhancing understanding․ The list often covers words from A to Z, with each section focusing on specific letters, making it easy to navigate․ Some resources also categorize words by their appearance in past exams, ensuring relevance․ This clear organization allows students to track progress and focus on challenging areas, making the study process efficient and goal-oriented․ The structured format ensures comprehensive preparation for the ACT’s reading and writing sections․ Effective use of this list can significantly improve test performance and overall vocabulary mastery․

Understanding the ACT Vocabulary Test

The ACT Vocabulary Test assesses a student’s ability to understand and use words effectively․ It focuses on medium-level vocabulary, similar to the SAT, with words that are familiar yet challenging․ The test evaluates contextual understanding, requiring students to apply words in sentences or passages․ A well-prepared vocabulary list in PDF format is essential for targeted study, helping students identify and master the words most likely to appear on the exam․ Regular practice with these words enhances reading comprehension and verbal skills, ensuring better test performance․

What Type of Vocabulary Does the ACT Test?

The ACT primarily tests mid-level vocabulary, focusing on words commonly used in academic contexts․ These words are challenging but not overly obscure, often resembling those found on the SAT․ While some may be familiar, others require dedicated study to master․ The ACT emphasizes words that are practical for reading comprehension and writing tasks, avoiding extremely rare or archaic terms․ This approach ensures the test assesses a student’s ability to understand and use vocabulary effectively in real-world academic scenarios, making it essential for college readiness․ Mastering these words significantly improves performance across both reading and writing sections of the exam․

Qualities of ACT Vocabulary Words

ACT vocabulary words are characterized by their medium difficulty level, balancing familiarity with challenge․ They are often encountered in academic texts and are relevant to various subjects, ensuring their practicality․ These words typically have multiple meanings, with context playing a crucial role in determining the correct definition․ Many words are roots or prefixes that appear in more complex terms, aiding in deciphering unfamiliar vocabulary․ Additionally, ACT vocabulary often includes words with connotative or nuanced meanings, requiring students to understand subtleties in language․ Mastery of these qualities enhances reading comprehension and verbal expression, skills essential for success on the ACT and beyond․ Regular practice with these words is vital for building a robust vocabulary․

How to Identify and Learn ACT Vocabulary Words

Identifying ACT vocabulary words begins with reviewing practice tests to pinpoint unfamiliar terms․ Focus on words that frequently appear in official materials, as these are likely to recur․ Contextual learning is highly effective—understand how words function in sentences rather than memorizing definitions alone․ Active recall, such as self-testing with flashcards, strengthens retention․ Organize words into categorized lists or concept maps to enhance understanding․ Prioritize words with multiple meanings or those that are roots of other terms․ Regular review, even briefly, ensures long-term retention․ Combining these strategies creates a systematic approach to mastering ACT vocabulary efficiently and effectively․

How to Study ACT Vocabulary Effectively

Use spaced repetition and interactive exercises to master ACT vocabulary․ Prioritize high-frequency words and practice them in context․ Regularly review and test yourself using flashcards or practice tests․

The Waterfall Method for Learning ACT Vocabulary

The Waterfall Method is a structured approach to learning ACT vocabulary, starting with identifying unfamiliar words from practice tests․ Begin by creating flashcards for each word, noting definitions and example sentences․ Regularly review these cards, gradually increasing the difficulty as you progress․ Practice active recall by testing yourself without looking at the definitions․ Use spaced repetition to revisit words at intervals, reinforcing memory retention․ Incorporate words into sentences to enhance contextual understanding․ Finally, apply learned vocabulary in practice exercises or past ACT tests to refine comprehension and usage․ This method ensures steady progress and long-term retention of ACT vocabulary․

Using Flashcards for ACT Vocabulary Practice

Flashcards are a highly effective tool for mastering ACT vocabulary․ Begin by writing each word on one side and its definition, pronunciation, and an example sentence on the other․ Review the cards regularly, focusing on words you find challenging․ Use active recall by quizzing yourself without peeking at the answers․ Incorporate spaced repetition, revisiting words at increasing intervals to enhance retention․ Digital flashcard apps like Anki or Quizlet can track your progress and provide randomized practice․ For offline use, print your flashcards from a customized ACT vocabulary PDF list․ Consistency is key—spend 10-15 minutes daily reviewing and testing yourself to build familiarity and confidence with ACT vocabulary words․

Practicing with ACT Vocabulary in Context

Practicing ACT vocabulary in context enhances understanding and retention by presenting words within sentences or passages․ This method encourages students to infer meanings based on surrounding clues․ Utilize practice tests and past papers to encounter words in real-test scenarios․ Reading comprehension exercises and fill-in-the-blank questions also provide valuable context․ Incorporate contextual learning by using online tools or PDF resources that offer example sentences and usage․ Regularly reviewing words in context helps build familiarity and improves the ability to apply them correctly․ This approach not only enriches vocabulary knowledge but also strengthens critical thinking and analytical skills essential for the ACT Reading and English sections․

Timing and Consistency in Vocabulary Study

Effective vocabulary study requires consistent timing and a structured approach․ Allocate 15-30 minutes daily to review and practice ACT vocabulary words․ Use a timer during practice tests to simulate real-test conditions․ Create a study schedule, spreading out learning over weeks or months to avoid cramming․ Consistency ensures long-term retention and gradual improvement․ Incorporate spaced repetition by revisiting words periodically․ Track progress to identify gaps and adjust study plans․ Regular practice builds confidence and familiarity with the vocabulary, making it easier to apply during the ACT․ A disciplined and consistent routine is essential for mastering the ACT vocabulary list and achieving a high score․

Obtaining an ACT Vocabulary List in PDF Format

You can obtain an ACT Vocabulary List in PDF format by downloading it from reliable educational websites or using online tools to create a customized list instantly․

Creating a Customized ACT Vocabulary PDF

Creating a customized ACT Vocabulary PDF allows you to tailor the list to your needs, focusing on specific words and their definitions․ Use online tools or web apps like Print Vocabulary in PDF to generate a personalized list․ These tools enable you to select words, add definitions, and include example sentences, making your study material more effective․ You can also organize the words alphabetically or by difficulty level for easier review․ This method ensures you study efficiently, targeting only the words you need to improve your ACT score․ Additionally, customization helps in creating a structured and visually appealing study guide, enhancing your learning experience․ This approach is ideal for students seeking a focused and organized vocabulary study plan․

Downloading ACT Vocabulary Lists from Reliable Sources

Downloading ACT Vocabulary Lists from reliable sources ensures access to high-quality, accurate materials for effective test preparation․ Trusted websites like PrepScholars and Ivy Bloom Academics offer free PDF downloads of curated word lists․ These lists often include definitions, example sentences, and contextual uses, making them invaluable for study․ You can also find lists categorized by difficulty level or alphabetically, aiding targeted learning․ Ensure the source is reputable to avoid outdated or incorrect information․ Additionally, some platforms provide interactive exercises and quizzes within their downloadable materials, enhancing your study experience․ By leveraging these resources, you can efficiently prepare for the ACT, focusing on the most relevant vocabulary․ Reliable sources guarantee comprehensive and up-to-date content, essential for achieving your desired score․ Always verify the credibility of the source before downloading to ensure the material aligns with your needs․ This approach streamlines your study process, saving time and effort while maximizing results․ Accessing these resources is straightforward, with many sites offering direct downloads, allowing you to begin your preparation immediately․ Utilizing these tools is a smart way to enhance your vocabulary knowledge and improve your test performance․

Using Online Tools to Generate ACT Vocabulary PDFs

Online tools offer a convenient way to create customized ACT Vocabulary PDFs tailored to your study needs․ Websites like VocabVideos and ACT Vocabulary List provide generators that allow you to input specific words, definitions, and examples․ These tools often include features such as alphabetical sorting, difficulty level categorization, and the ability to add contextual sentences․ Some platforms also offer interactive exercises and quizzes within the generated PDFs, enhancing your learning experience․ Additionally, you can combine multiple word lists into a single document for comprehensive study material․ This flexibility ensures that your study resources are both personalized and efficient, helping you master the vocabulary essential for the ACT․ By utilizing these tools, you can streamline your preparation and focus on the words that matter most․ This method saves time and effort, allowing you to concentrate on understanding and retaining the vocabulary․ Overall, online tools provide a dynamic and effective way to prepare for the test․

ACT Vocabulary Words by Difficulty Level

ACT vocabulary words are categorized into beginner, intermediate, and advanced levels․ Beginner words are foundational, while intermediate and advanced words challenge deeper understanding and application․ Examples include abhor (intermediate) and abstruse (advanced), aiding structured learning and mastery․

Beginner-Level ACT Vocabulary Words

Beginner-level ACT vocabulary words are foundational terms that are essential for building a strong lexical base․ These words are commonly encountered in everyday reading and are likely to appear on the ACT․ Examples include divulge (to reveal a secret), abhor (to hate), and adhere (to stick to something)․ These words are considered entry-level but are crucial for understanding more complex texts․ Students can find these words in ACT vocabulary PDF lists and practice them using flashcards or online tools․ Mastering these terms is the first step toward improving reading comprehension and verbal scores on the ACT․

Intermediate-Level ACT Vocabulary Words

Intermediate-level ACT vocabulary words are moderately challenging terms that require a deeper understanding of language and context․ These words are less common in everyday conversation but frequently appear in academic texts and ACT passages․ Examples include abstinence (self-restraint), adversity (misfortune), and aesthetic (pertaining to beauty)․ These words test a student’s ability to comprehend nuanced meanings and apply them in complex sentences․ They are essential for improving reading comprehension and writing skills․ Students can find these words in ACT vocabulary PDF lists and practice them through exercises like fill-in-the-blanks and multiple-choice questions․ Mastering intermediate-level words strengthens vocabulary retention and enhances overall test performance․

Advanced-Level ACT Vocabulary Words

Advanced-level ACT vocabulary words are sophisticated terms that require a deep understanding of nuanced meanings and contexts․ These words are less commonly encountered in everyday language but frequently appear in complex academic texts and ACT passages․ Examples include abhor (to hate intensely), abstruse (difficult to understand), and acerbic (bitter in tone)․ These words challenge test-takers to demonstrate a high level of lexical proficiency․ Advanced words often appear in reading comprehension questions, testing the ability to interpret subtle shades of meaning․ Students can find these words in detailed ACT vocabulary PDF lists and practice them using flashcards or contextual exercises to enhance retention and mastery․

ACT Vocabulary Words by Alphabetical Order

ACT vocabulary words are often organized alphabetically in PDF lists, making it easy to locate and study specific terms․ This structured approach enhances quick reference and systematic learning․

ACT Vocabulary Words Starting with A

A comprehensive list of ACT vocabulary words starting with the letter A is available in PDF format for easy study․ These words include terms like Abate (to reduce), Aberration (deviation from normal), and Abhor (intense dislike)․ Such lists often feature definitions and example sentences, aiding in contextual understanding․ This alphabetical approach helps students systematically master words like Abstain (refrain) and Abstruse (complex)․ Regular review of these PDF documents ensures familiarity and confidence with words starting with A, enhancing overall ACT performance․

ACT Vocabulary Words Starting with B

The ACT vocabulary list includes numerous words starting with the letter B, such as Banality (lack of originality) and Belligerent (hostile)․ These words are often featured in PDF study guides, providing definitions and contextual examples․ Terms like Brevity (conciseness) and Burgeon (to grow rapidly) are commonly tested․ Students can download PDF lists to systematically review words like Buffer (to reduce impact) and Bolster (to strengthen)․ Mastering these B words enhances reading comprehension and verbal skills, crucial for achieving a high ACT score․ Regular practice with these terms ensures familiarity and confidence during the test․

ACT Vocabulary Words Starting with C

The ACT vocabulary list includes a variety of words starting with the letter C, such as Capitulate (to surrender) and Cacophony (harsh noise)․ These terms are often included in PDF study materials, offering clear definitions and usage examples․ Words like Conspicuous (easily seen) and Condescending (talking down to others) are frequently tested․ Students can access PDF lists to review words like Catalyst (a trigger for events) and Coalesce (to come together)․ Understanding these C words is vital for excelling in the ACT Reading and English sections․ Regular practice with these terms ensures students can recognize and use them effectively during the exam, improving their overall score․

ACT Vocabulary Practice Exercises

ACT Vocabulary Practice Exercises enhance test preparation through fill-in-the-blanks, multiple-choice questions, and contextual learning activities, all available in PDF format for convenient study․

Fill-in-the-Blank Exercises with ACT Vocabulary

Fill-in-the-blank exercises are an effective way to practice ACT vocabulary by testing your ability to use words in context․ These exercises typically provide sentences with missing words and ask you to select or supply the correct term from your vocabulary list․ They are designed to simulate real test conditions, helping you understand how words function in different contexts․ Many resources, including PDF guides, offer these exercises, which are ideal for self-study․ By completing them regularly, you can improve your comprehension, critical thinking, and ability to apply vocabulary accurately․ They also help identify weak areas, allowing you to focus on challenging words and enhance your overall test readiness․

Multiple-Choice Questions for ACT Vocabulary

Multiple-choice questions are a cornerstone of ACT vocabulary practice, offering a structured way to assess your understanding of word meanings․ These questions typically present a sentence with a missing word and provide four to five answer choices․ They test your ability to choose the most appropriate word based on context, which is a key skill for the ACT test․ PDF resources often include these exercises, making them convenient for self-study․ Regular practice with multiple-choice questions helps refine your vocabulary recall and critical thinking skills․ Over time, this practice not only improves test performance but also enhances your overall command of academic language, ensuring better comprehension and application of complex terms in various contexts․

Contextual Learning Activities for ACT Vocabulary

Contextual learning activities are an effective way to engage with ACT vocabulary words by using them in meaningful sentences or passages․ These activities, often found in PDF resources, help students understand how words function in real-world contexts․ Exercises like fill-in-the-blanks, sentence completion, and reading comprehension passages are common․ By learning words in context, students develop a deeper understanding of their meanings and usage․ PDF guides frequently include these exercises, making them accessible for self-study․ Contextual learning enhances retention and application, as it mimics how vocabulary appears on the actual ACT test․ Regular practice with these activities ensures that students can confidently use and recognize words in various scenarios, improving both their test performance and overall language skills․

Resources for ACT Vocabulary Preparation

Utilize websites like Ivy Bloom Academics and PrepScholars for interactive exercises and PDF downloads․ Recommended books and apps provide comprehensive lists and study tools to master ACT vocabulary effectively․

Best Websites for ACT Vocabulary Practice

Top websites like Ivy Bloom Academics and PrepScholars offer comprehensive ACT vocabulary resources․ These platforms provide interactive exercises, customizable flashcards, and downloadable PDF lists․ Ivy Bloom Academics features a word list with definitions and contextual examples, while PrepScholars offers a curated selection of the most frequently tested terms․ Additionally, these sites often include practice tests and tracking tools to monitor progress․ They are ideal for targeted study sessions and ensuring mastery of the ACT vocabulary․ Utilizing these resources can significantly enhance preparation and confidence for the exam․ Make the most of these tools to build a strong foundation in ACT vocabulary effectively․

Recommended Books for ACT Vocabulary Study

Several books are highly recommended for effective ACT vocabulary preparation․ Vocabulary Power Plus for the ACT is a top choice, offering drills and exercises tailored to the test․ Another excellent resource is ACT Vocabulary Workbook, which provides targeted practice with word lists and definitions․ Additionally, WordSmart for the ACT focuses on high-impact words and their usage in context․ These books complement online resources and PDF lists, ensuring a well-rounded study approach․ They are designed to help students master the vocabulary efficiently and confidently, making them indispensable tools for ACT success․ Invest in these books to enhance your preparation and achieve your goals․

ACT Vocabulary Apps and Tools

There are several apps and tools available to help you master ACT vocabulary efficiently․ Quizlet is a popular platform offering digital flashcards and interactive exercises tailored to ACT vocabulary․ Magoosh ACT Prep provides a comprehensive vocabulary section with definitions and example sentences․ Additionally, Vocabulary․com features adaptive learning tools that adjust to your progress․ Apps like ACT Vocabulary Prep focus on contextual learning, helping you understand words in real-world scenarios․ These tools often include progress tracking, making it easier to stay motivated․ Utilizing these apps alongside PDF lists ensures a well-rounded study approach, helping you build and retain a strong vocabulary for the ACT test․

Mastering ACT vocabulary requires consistent practice and review․ Utilize PDF lists, flashcards, and online tools to build your skills․ Stay motivated, and you’ll achieve success on test day!

Final Tips for Mastering ACT Vocabulary

To excel in ACT vocabulary, integrate learning into your daily routine․ Use flashcards and practice tests to reinforce memory․ Focus on understanding contexts rather than mere memorization․ Prioritize high-frequency words and review consistently․ Employ the waterfall method to build a strong foundation․ Leverage online tools and PDF resources for structured study․ Engage in active learning by using words in sentences․ Stay motivated and track your progress to ensure steady improvement․ Remember, mastery requires time and dedication․ By following these strategies, you’ll be well-prepared for the ACT and enhance your overall verbal skills․

Encouragement and Next Steps

Mastering ACT vocabulary is achievable with consistent effort and the right strategies․ Celebrate small victories, like learning a set of words each week, to stay motivated․ Utilize the resources available, such as PDF lists and online tools, to streamline your study process․ Remember, vocabulary mastery is a gradual journey—stay patient and persistent․ Once you’ve built a strong foundation, apply your knowledge through practice tests and real-world reading․ Encourage yourself to explore beyond the list, as a robust vocabulary benefits not just the ACT but lifelong communication skills․ Take the next step by creating a study schedule and sticking to it․ Your dedication will pay off, so keep pushing forward with confidence!

hoover powerscrub xl manual

The Hoover PowerScrub XL is a powerful carpet cleaner designed for deep cleaning. It features SpinScrub Technology and HeatForce for faster drying, making it ideal for home use.

1.1 Overview of the Hoover PowerScrub XL Carpet Cleaner

The Hoover PowerScrub XL is a robust carpet cleaner designed for deep cleaning. It features SpinScrub Technology for tough stains and HeatForce for faster drying. Lightweight and easy to maneuver, it includes a large capacity tank for extended cleaning sessions, making it ideal for tackling deep-seated dirt and stains in home environments effectively.

1.2 Importance of Reading the Manual

Reading the Hoover PowerScrub XL manual ensures safe and effective use. It provides essential safety warnings, operating instructions, and maintenance tips. Understanding the manual helps maximize cleaning performance and prolong the cleaner’s lifespan. It also highlights troubleshooting steps and guidelines for using recommended accessories and cleaning solutions, ensuring optimal results and user satisfaction.

Key Features of the Hoover PowerScrub XL

The Hoover PowerScrub XL features SpinScrub Technology for deep cleaning, HeatForce for faster drying, and a TruMax Recovery Tank for efficient cleaning, ensuring superior carpet care and performance.

2.1 SpinScrub Technology for Deep Cleaning

The SpinScrub Technology uses five counter-rotating brushes to tackle deep stains and embedded dirt. It gently cleans various carpet types while effectively removing tough messes, ensuring a thorough and refreshing cleaning experience for your home.

2.2 HeatForce for Faster Drying

HeatForce technology accelerates drying time by directing warm air flow across the carpet. This feature helps prevent moisture buildup, reducing the risk of mold and mildew, while leaving carpets fresh and dry sooner after cleaning.

2.3 TruMax Recovery Tank for Efficient Cleaning

The TruMax Recovery Tank optimizes cleaning efficiency by separating clean and dirty water. Its large capacity reduces the need for frequent emptying, allowing for longer cleaning sessions and ensuring a thorough removal of dirt and debris from carpets.

Safety Precautions and Warnings

Always read the manual before use. Avoid damaged cords and plugs. Keep the appliance attended while in use. Use indoors only and avoid immersion in water.

3.1 General Safety Guidelines

Read all safety warnings and instructions before use. Ensure the product is fully assembled. Operate only at the specified voltage. Do not leave the appliance unattended while plugged in. Avoid immersion in water and use indoors only. Regularly inspect for damage and ensure all parts are secure before operation.

3.2 Electrical Safety Tips

Unplug the cleaner when not in use or before servicing. Avoid using damaged cords or plugs. Operate only at the voltage specified on the data plate. Keep the appliance dry and avoid exposure to water. Never modify electrical components or use unauthorized adapters to ensure safe operation and prevent electrical hazards.

3.3 Usage Restrictions and Precautions

Use the Hoover PowerScrub XL indoors only and avoid immersion in water. Do not operate if the product has been dropped, damaged, or exposed to water. Always fully assemble the cleaner before use and follow recommended cleaning solutions to ensure safe and effective operation. Refer to the manual for detailed guidelines.

Assembly and Setup

Begin by unpacking and inventorying all parts. Follow the step-by-step assembly instructions to ensure proper setup. Attach all accessories securely before first use. Refer to the manual for guidance.

4.1 Unpacking and Inventory of Parts

Start by carefully unpacking the Hoover PowerScrub XL. Ensure all components, including the cleaner, hose, nozzle, brushes, and tanks, are included. Check for any damage or missing items. Refer to the manual’s parts list to confirm everything is accounted for before proceeding with assembly. This step ensures a smooth setup process.

4.2 Step-by-Step Assembly Instructions

Begin by attaching the handle to the main unit, ensuring it clicks securely. Next, connect the recovery tank and align it properly. Attach the nozzle to the base, making sure it fits tightly. Finally, insert the brush roll and ensure all parts are locked in place. Follow the manual for precise alignment and secure connections.

4.3 Attaching Accessories and Attachments

Attach the hose to the designated port on the main unit, ensuring a secure connection. Next, slide the tool attachment into the hose end until it clicks. For the nozzle, align it with the base and press firmly until it locks. Finally, insert the solution bottle into the designated slot on the back of the cleaner. Ensure all connections are secure to prevent leaks during use and refer to the manual for specific accessory alignment details.

Operating the Hoover PowerScrub XL

Operate the Hoover PowerScrub XL by filling the solution tank, attaching the hose, and using the spray, scrub, and dry functions for effective carpet cleaning results.

5.1 Filling the Solution Tank

Filling the solution tank is essential for effective cleaning; Pour Hoover-recommended cleaning solution into the tank, ensuring not to exceed the max line. Securely slide the filled tank into the unit at the back. This step ensures proper distribution of cleaning solution during operation, enabling efficient stain removal and carpet renewal. Always follow manual guidelines for optimal results.

5.2 Using the Hose and Tool Attachments

Attach the hose and tool attachments securely for upholstery or tight spaces. Use the spray function to apply solution, then scrub gently. For best results, move the tool in slow, steady strokes. Regularly rinse the attachment to maintain performance and prevent clogs. Always refer to the manual for specific attachment usage guidelines.

5.3 Spray, Scrub, and Dry Functions

Press the spray trigger to release cleaning solution, then use the scrub function with the SpinScrub brushes for deep cleaning. After scrubbing, activate the dry function by pulling the unit backward to remove excess moisture. Repeat as needed for optimal results. Ensure the recovery tank is emptied regularly for proper function and efficiency.

Maintenance and Cleaning

Regularly empty and clean the recovery tank, brush roll, and nozzle. Check for blockages and ensure all parts are dry after cleaning for optimal performance.

6.1 Emptying and Cleaning the Recovery Tank

Empty the recovery tank after each use by pulling it out and disposing of the dirty water. Rinse thoroughly with clean water and allow it to dry completely to prevent odor buildup and maintain efficiency.

6.2 Cleaning the Brush Roll and Nozzle

Remove the nozzle cover and brush roll for cleaning. Use a soft brush or cloth to wipe away debris. Check for blockages and rinse the nozzle with clean water. Allow all parts to dry completely before reassembling to ensure optimal performance and prevent odor buildup.

6.3 Regular Maintenance Tips

Regularly empty and clean the recovery tank to prevent odor buildup. Check for blockages in the nozzle and hose. Inspect and replace worn brushes. Use Hoover-approved cleaning solutions to maintain performance. Store the cleaner in a dry, cool place and lubricate moving parts periodically for smooth operation.

Troubleshooting Common Issues

Identify issues like clogged nozzles or blockages. Check for error codes and refer to the manual for solutions. Contact customer support if problems persist after basic troubleshooting.

7.1 Common Problems and Solutions

Common issues include clogged nozzles, poor suction, or malfunctioning brushes. Solutions involve cleaning blockages, checking for damaged parts, or resetting the machine. For persistent problems, refer to the manual or contact Hoover support. Regular maintenance, like cleaning filters and checking belts, can prevent many issues. Always follow troubleshooting steps before seeking professional help.

7.2 Error Codes and Their Meanings

The Hoover PowerScrub XL may display error codes like E1, E2, or E3. E1 indicates a recovery tank issue, E2 signals a brush roll problem, and E3 relates to the water tank. Refer to the manual for specific solutions, such as emptying the tank or cleaning the brush. Contact support if issues persist.

7.3 When to Contact Customer Support

Contact customer support if the Hoover PowerScrub XL fails to function properly, shows persistent error codes, or sustains physical damage. Reach out for assistance with unresolved issues, such as malfunctioning parts or exposure to water. Call 1-800-944-9200 for help with repairs or troubleshooting beyond manual guidance.

Accessories and Replacement Parts

Explore Hoover PowerScrub XL accessories, including nozzles, solution bottles, and brushes. Order replacement parts online via Hoover’s official website or eBay for genuine compatibility.

8.1 Available Attachments and Accessories

The Hoover PowerScrub XL offers various attachments, including the SpinScrub nozzle, crevice tool, and upholstery brush. These accessories enhance cleaning efficiency for diverse surfaces. Additionally, solution bottles and recovery tank parts are available for replacement, ensuring optimal performance and longevity of the cleaner.

8.2 Ordering Replacement Parts Online

Replacement parts for the Hoover PowerScrub XL can be ordered directly from Hoover’s official website or through trusted retailers like eBay. Ensure to use the correct model number (e.g., FH68010) for compatibility. Popular items include the SpinScrub nozzle and recovery tank. Verify product compatibility before purchasing to avoid returns or mismatches.

8.3 Compatibility with Other Hoover Models

The Hoover PowerScrub XL is designed for specific compatibility, but some parts may work with other Hoover models like the Turbo Scrub. Always verify the model number (e.g., FH68010) for compatibility before purchasing. Hoover’s product lineup often shares interchangeable accessories, but ensure proper fitment to maintain performance and warranty validity.

Downloading the User Manual

The Hoover PowerScrub XL manual is available as a free PDF download on the official Hoover website. Use Adobe Acrobat Reader to view and save it.

9.1 Where to Find the PDF Manual

The Hoover PowerScrub XL manual is available for free on the official Hoover website. Visit the support section, enter your model number, and download the PDF. It can also be found on eBay or other authorized retailers. Ensure you have Adobe Acrobat Reader installed to view and save the document.

9.2 How to Download and Save the Manual

Visit the Hoover website, navigate to the support section, and enter your model number. Click the download link for the PDF manual. Save it to your device by right-clicking and selecting “Save As.” Ensure you have Adobe Acrobat Reader installed to view the document. This allows easy access for future reference.

9.3 System Requirements for Viewing

To view the Hoover PowerScrub XL manual, ensure your device has Adobe Acrobat Reader installed. Compatible with desktops, laptops, and tablets. Requires operating systems like Windows or macOS. For mobile devices, a PDF viewer app is necessary. A minimum screen resolution of 1024×768 pixels is recommended for optimal viewing. Ensure your browser is up-to-date.

Frequently Asked Questions (FAQs)

Common inquiries include questions about usage, maintenance, troubleshooting, and compatible accessories. The manual addresses these topics in detail, ensuring optimal performance and user satisfaction.

10.1 Common Questions About Usage

Users often ask about proper assembly, operation modes, and drying times. The manual provides clear guidance on using SpinScrub Technology and HeatForce for optimal cleaning. It also addresses common issues like clogged nozzles and malfunctioning brushes. Tips for maintaining water levels and troubleshooting are included to ensure effective and safe usage of the cleaner.

10.2 Questions About Maintenance and Repair

Common maintenance questions include cleaning the recovery tank and brush roll. Users also inquire about repairing clogged nozzles and replacing worn brushes. The manual provides step-by-step guidance for these tasks, ensuring optimal performance. Regular maintenance tips and troubleshooting solutions are included to extend the cleaner’s lifespan and address common repair issues effectively.

10.3 Questions About Accessories and Parts

Common questions include where to find replacement parts like nozzles or brushes. The manual provides guidance on ordering authentic Hoover accessories and ensuring compatibility. Tips on installing parts and maintaining performance are also covered, helping users keep their cleaner in optimal condition without voiding the warranty.

Tips for Optimal Performance

Use Hoover-recommended cleaning solutions, maintain regular filter cleaning, and avoid overloading the tank. Ensure proper brush care and check for blockages to maintain efficiency and extend lifespan.

11;1 Best Practices for Cleaning Different Surfaces

Test a small area first to ensure compatibility. Use low suction for delicate surfaces and higher settings for deep stains. Avoid excessive moisture on hardwood. For upholstery, use the tool attachment gently. Clean low-pile carpets with standard settings and adjust for thicker piles. Empty the recovery tank after each use for optimal hygiene.

11.2 How to Prolong the Life of the Cleaner

Regularly clean the brush roll and nozzle to prevent debris buildup. Empty and rinse the recovery tank after each use. Store the cleaner in a dry place to avoid mold. Use only Hoover-approved cleaning solutions to maintain performance. Follow the manual’s maintenance schedule for optimal longevity and functionality of your PowerScrub XL.

11.3 Using Recommended Cleaning Solutions

Always use HOOVER recommended cleaning solutions to ensure optimal performance and avoid damaging the cleaner. These solutions are specifically designed to work effectively with SpinScrub Technology and HeatForce. Avoid using non-recommended chemicals, as they may harm the machine or void the warranty. For best results, refer to the manual for approved products.

The Hoover PowerScrub XL is an efficient and effective carpet cleaner, offering deep cleaning and quick drying. Regular maintenance ensures long-lasting performance and reliability.

12.1 Final Thoughts on the Hoover PowerScrub XL

The Hoover PowerScrub XL is a reliable and efficient carpet cleaner, offering deep cleaning with innovative features like SpinScrub and HeatForce. Regular maintenance ensures optimal performance, making it a great investment for maintaining clean, fresh carpets. Users praise its effectiveness and ease of use, making it a top choice for home cleaning needs.

12.2 Encouragement to Follow the Manual

Adhering to the manual ensures safe and effective use of the Hoover PowerScrub XL. Proper assembly, operation, and maintenance routines are essential for optimal performance. By following the guidelines, users can avoid potential hazards and extend the cleaner’s lifespan. Regular troubleshooting and maintenance tips in the manual help maintain efficiency and reliability over time.

About the Manufacturer

Hoover is a trusted brand known for high-quality cleaning solutions. With a commitment to innovation and customer satisfaction, Hoover offers reliable products and excellent customer support services.

13.1 Hoover’s Commitment to Quality

Hoover is dedicated to delivering high-quality products that meet rigorous standards. The PowerScrub XL exemplifies this commitment, with advanced features like SpinScrub Technology and HeatForce for efficient cleaning and faster drying, ensuring durability and performance. Hoover’s focus on innovation and customer satisfaction has solidified its reputation as a leader in the cleaning industry.

13.2 Other Products in the Hoover Lineup

Hoover offers a wide range of cleaning solutions, including stick vacuums, cordless vacuums, and upright models. Products like the Hoover Turbo Scrub and Spot Cleaner complement the PowerScrub XL, providing specialized cleaning options. Each product is designed with innovative features to meet various cleaning needs, ensuring Hoover remains a trusted name in home care.

13.3 Customer Support and Warranty Information

Hoover provides comprehensive customer support, including a dedicated helpline at 1-800-944-9200. The PowerScrub XL comes with a warranty, and owners can register products online. For assistance, users can access online resources, troubleshooting guides, and downloadable manuals. Hoover’s customer service team is available to address inquiries and provide support for optimal product performance and maintenance.

hoover steamvac spinscrub instruction manual

The Hoover SteamVac SpinScrub is a powerful deep cleaner designed for effective carpet and upholstery cleaning. It features SpinScrub technology for thorough stain removal and versatility across surfaces.

1.1 Overview of the Hoover SteamVac SpinScrub Carpet Cleaner

The Hoover SteamVac SpinScrub Carpet Cleaner is a versatile and efficient deep cleaning solution designed for carpets, upholstery, and hard floors. It utilizes advanced SpinScrub technology, which employs rotating brushes to gently yet effectively remove stains and embedded dirt. The cleaner is equipped with heated cleaning capabilities to enhance stain removal and sanitize surfaces. Its lightweight design and ergonomic controls make it easy to maneuver and operate. The SteamVac SpinScrub is ideal for both small spills and deep cleaning tasks, offering a practical solution for maintaining clean and hygienic surfaces. Regular maintenance, such as cleaning filters and emptying tanks, ensures optimal performance. This cleaner is a reliable choice for homeowners seeking a comprehensive cleaning tool.

1.2 Key Features of the SteamVac SpinScrub

The SteamVac SpinScrub boasts several key features that make it a standout cleaning solution. Its SpinScrub technology uses rotating brushes to deeply penetrate carpets and upholstery, effectively removing tough stains. The cleaner also includes a heated cleaning option, which helps sanitize surfaces and enhance stain removal. Additionally, it features a large, easy-to-fill clean solution tank and a built-in water heater for consistent cleaning performance. The lightweight design and ergonomic handle provide ease of use, while the adjustable settings allow for customization based on cleaning needs. These features collectively ensure a thorough and efficient cleaning experience, making the SteamVac SpinScrub a versatile tool for various surfaces.

1.3 Importance of Following the Instruction Manual

Following the instruction manual for the Hoover SteamVac SpinScrub is essential for safe and effective operation; The manual provides critical information on assembly, usage, and maintenance, ensuring optimal performance and longevity of the cleaner. It outlines safety precautions to prevent accidents, such as electrical hazards or improper use on certain surfaces. Adhering to the guidelines helps avoid damage to the machine or cleaned surfaces. Additionally, the manual includes troubleshooting tips for common issues, which can save time and effort. Ignoring the instructions may lead to suboptimal cleaning results or even void the warranty. By following the manual, users can ensure a safe, efficient, and satisfactory cleaning experience while maintaining the product’s durability.

Safety Precautions

The Hoover SteamVac SpinScrub requires adherence to safety guidelines for optimal operation. Use indoors only, avoid immersion, and do not use as a dry vacuum. Always follow safety instructions to ensure safe and efficient cleaning experiences.

2.1 General Safety Warnings

Always follow general safety precautions when using the Hoover SteamVac SpinScrub to ensure safe and effective operation. Use the cleaner indoors only and avoid immersing it in water. Do not use it as a dry vacuum cleaner, as this may damage the unit or pose a safety risk. Ensure the upholstery fabric is marked with a “W” or “S/W” cleaning code before cleaning. Avoid using the SteamVac on hardwood floors unless specified. For liquid spills, only clean up amounts of 1 gallon or less. Keep children and pets away during operation, and never leave the machine unattended while it is in use. Proper usage ensures both safety and optimal cleaning performance.

2.2 Electrical Safety Guidelines

To ensure safe operation of the Hoover SteamVac SpinScrub, adhere to electrical safety guidelines. Avoid exposing the cleaner to water or moisture, as this can lead to electrical hazards. Use the machine only on indoor surfaces and never submerge it in water. Ensure the power cord is not damaged or frayed, and avoid overloading electrical outlets. Always plug the cleaner into a properly grounded outlet rated for its voltage requirements. Do not use the machine near water sources, such as bathtubs or swimming pools. If the cleaner malfunctions, unplug it immediately and contact an authorized service center for repairs. Follow these guidelines to prevent electrical shock or fire risks and maintain safe functionality.

2.3 Precautions for Proper Use

Always follow precautions for proper use of the Hoover SteamVac SpinScrub to ensure safe and effective cleaning. Before cleaning, check the fabric or surface to ensure it is compatible with the cleaner. For upholstery, only use the cleaner on fabrics marked with a “W” or “S/W” cleaning code. Avoid using the SteamVac on hardwood floors, as it may damage the surface. Do not use the cleaner as a dry vacuum, as it is designed for wet cleaning only. Never pick up large amounts of water or liquids, as this can damage the machine. Keep the cleaner away from children and pets during operation. Always refer to the instruction manual for specific guidelines tailored to your cleaning needs.

Assembly and Parts

Proper assembly is crucial for safe and effective use of the Hoover SteamVac SpinScrub. Familiarize yourself with all parts and components before use.

3.1 Unpacking and Inventory of Parts

When you unpack your Hoover SteamVac SpinScrub, carefully inspect all components to ensure nothing is damaged. The box should include the main unit, SpinScrub brushes, clean solution tank, recovery tank, upholstery tool, and crevice tool. Check for any missing or damaged parts by referring to the parts list in the manual. Familiarize yourself with each component’s purpose to ensure proper assembly and operation. If any parts are missing or damaged, contact Hoover customer support immediately. Proper inventory ensures all necessary tools are available for efficient cleaning and maintenance. Always refer to the manual for guidance on identifying and organizing parts effectively.

3.2 Step-by-Step Assembly Instructions

Begin by unpacking all components and verifying no parts are damaged. First, attach the recovery tank to the main unit by aligning the hooks and securing it firmly. Next, insert the SpinScrub brushes into the brush compartment, ensuring they click into place. Attach the clean solution tank by sliding it into the designated slot on the top of the machine. Connect the upholstery tool and crevice tool to their respective holders for easy access. Finally, plug in the power cord and ensure all parts are securely locked. Refer to the manual for visual guides to confirm proper assembly. Double-check that all connections are tight and no parts are loose before use.

3.4 Identifying Key Components

The Hoover SteamVac SpinScrub features several essential components designed for efficient cleaning. The clean solution tank holds the cleaning detergent and water mixture, while the recovery tank collects dirty water and debris. The SpinScrub brushes are located on the bottom and rotate to agitate carpets. The handle includes controls for solution dispersion and suction. Additional tools like the upholstery tool and crevice tool are stored on the machine for versatility. The foot pedal allows for hands-free operation, and the tank lid provides access for refilling or emptying. Understanding these components ensures proper use and maintenance of the SteamVac SpinScrub, optimizing its performance for various cleaning tasks.

Operating the SteamVac SpinScrub

Operating the Hoover SteamVac SpinScrub involves preparing the machine, filling the solution tank, and using the SpinScrub brushes for effective cleaning on carpets, upholstery, and hard floors.

4.1 Preparing for Cleaning

Before using the Hoover SteamVac SpinScrub, ensure the area is clear of clutter and large debris. Always check the surface type and cleaning code for upholstery to avoid damage. For carpets, vacuum thoroughly to remove loose dirt. Pre-treat stains or high-traffic areas with a cleaning solution before deep cleaning. Assemble the machine according to the manual, ensuring all parts are securely attached. Fill the clean solution tank with Hoover-recommended detergent for optimal results. Avoid using the SteamVac on hardwood floors or surfaces that cannot be exposed to moisture. Always refer to the manual for specific instructions to ensure safe and effective cleaning.

4.2 Filling the Clean Solution Tank

To fill the clean solution tank on your Hoover SteamVac SpinScrub, start by using Hoover-recommended Carpet/Upholstery Detergent for optimal cleaning results. Locate the clean solution tank, typically the upper tank, and remove it from the machine. Fill the tank with warm water to the recommended level, ensuring not to exceed the maximum fill line. Add the appropriate amount of detergent as specified in the manual. Avoid overfilling, as this may cause leaks or poor performance. Once filled, securely reattach the tank to the machine, making sure it clicks into place. Always refer to the manual for specific guidelines on solution ratios and tank capacity to ensure proper function and avoid damage to the machine.

4.3 Using the SpinScrub Technology

The SpinScrub technology in the Hoover SteamVac SpinScrub is designed to provide a deep and effective clean. To use this feature, ensure the machine is set to the appropriate mode for your surface type, such as carpet or hard floors. Activate the SpinScrub brushes by pressing the designated button, which will begin rotating the brushes at a high speed. Slowly move the machine forward and backward, allowing the brushes to agitate the carpet fibers or hard surface. Use overlapping passes to cover the entire area thoroughly. For tough stains, pause and let the brushes work for a few seconds before continuing. This method ensures efficient cleaning and helps maintain the longevity of your floors. Always follow the manual’s guidelines for specific surface recommendations to avoid damage.

4.4 Cleaning Different Surfaces (Carpet, Upholstery, Hard Floors)

The Hoover SteamVac SpinScrub is versatile for various surfaces. For carpets, use the SpinScrub brushes to deeply agitate fibers, removing embedded dirt. Adjust the cleaner to the appropriate mode for carpet thickness. For upholstery, attach the provided tool and ensure the fabric is labeled with a “W” or “S/W” cleaning code. Gently clean in sections, avoiding excessive moisture. On hard floors, switch to the hard-floor mode and use the appropriate cleaning path. Avoid using the SteamVac on hardwood floors, as it may cause damage. Always move slowly and overlap cleaning paths for thorough coverage. Follow the manual’s surface-specific guidelines to ensure safe and effective cleaning results across all areas.

Maintenance and Care

Regularly clean the machine, store it properly, and maintain filters to ensure optimal performance and longevity of the Hoover SteamVac SpinScrub.

5.1 Regular Cleaning of the Machine

Regular cleaning of the Hoover SteamVac SpinScrub is essential for maintaining its performance and longevity. After each use, empty the dirt tank and rinse it thoroughly with warm water. Clean or replace filters as needed to ensure proper suction and prevent clogs. Wipe down the exterior and interior surfaces with a damp cloth to remove dirt and debris. Check the brushes for hair or debris and remove any blockages. Allow all parts to dry completely before storing the machine. Regular maintenance helps prevent mold growth and keeps the cleaner functioning efficiently. Refer to the manual for specific cleaning instructions tailored to your model.

5.2 Storing the SteamVac SpinScrub

Proper storage of the Hoover SteamVac SpinScrub is crucial for maintaining its condition and longevity. After cleaning, ensure the machine and all accessories are completely dry to prevent mold or mildew growth. Store the cleaner in a cool, dry place, away from direct sunlight and moisture. Avoid storing it in areas where temperatures may fluctuate excessively. Before storage, check that all tanks, such as the clean solution tank, are empty and rinsed; Secure the power cord neatly to prevent tangling, and store any detachable parts like brushes or upholstery tools in a designated area. Regularly inspect stored components for damage or blockages before reuse.

5.3 Replacing or Cleaning Filters

Regular maintenance of the filters in your Hoover SteamVac SpinScrub is essential for optimal performance and odor control. Check and clean the filters after each use to ensure proper suction and efficiency. Rinse reusable filters with warm water and mild detergent, then allow them to air dry completely before reinstalling. Replace filters every 1-2 months or as indicated in the manual, especially if they become visibly soiled or damaged. For the best results, always use genuine Hoover replacement filters. Regular filter maintenance prevents clogs, reduces odors, and extends the lifespan of your cleaner. Refer to the manual for specific filter locations and replacement instructions.

Troubleshooting Common Issues

Troubleshooting common issues with the Hoover SteamVac SpinScrub helps maintain performance. Refer to the manual for solutions to problems like reduced suction, brush malfunctions, or water leaks.

6.1 No suction or reduced performance

If the Hoover SteamVac SpinScrub experiences no suction or reduced performance, check for blockages in the hose, wand, or cleaner head. Ensure the dirty water tank is empty, as a full tank can restrict airflow; Regularly clean or replace filters, as clogged filters may reduce suction power. Additionally, inspect the belts and brushes for damage or debris buildup. Refer to the manual for guidance on disassembling and cleaning internal components. If issues persist, consider checking for worn or loose connections in the vacuum system. Proper maintenance and regular inspection can help restore optimal performance and extend the lifespan of the cleaner.

6.2 Issues with the SpinScrub Brushes

If the SpinScrub brushes on your Hoover SteamVac SpinScrub are not rotating or are damaged, first check for tangled hair or debris wrapped around the brush assembly. Detach the brush block and clean it thoroughly with warm water and mild detergent. For worn or damaged brushes, replace them with genuine Hoover parts. Ensure the brushes are properly installed and aligned to maintain optimal cleaning performance. Regularly inspect and maintain the brushes to prevent clogging and extend their lifespan. Refer to the manual for specific guidance on brush replacement and maintenance to keep your cleaner functioning effectively.

6.3 Leaks or Water Issues

If your Hoover SteamVac SpinScrub is leaking or experiencing water issues, check the clean solution tank and dirty water tank for proper securement. Ensure all connections, such as hoses and gaskets, are tight and free from damage. Blockages in the system, like clogged filters or kinked hoses, can also cause water to leak. Regularly inspect and clean filters to maintain proper water flow. Additionally, verify that the correct Hoover-recommended cleaning solution is used, as improper detergents may cause issues. If leaks persist, empty the tanks and allow the machine to dry before further use. For unresolved problems, consult the manual or contact Hoover customer support for assistance.

Environmental Considerations

Using eco-friendly cleaning solutions and properly disposing of waste helps reduce environmental impact. Always follow guidelines for water usage and detergent disposal to minimize harm to the environment.

7.1 Eco-Friendly Cleaning Practices

Adopt eco-friendly practices when using the Hoover SteamVac SpinScrub. Opt for biodegradable cleaning solutions to minimize environmental impact. Always follow recommended detergent dosages to avoid excess chemical use. Ensure proper disposal of cleaning waste and empty tanks responsibly. For hard floors, use water-only cleaning when possible to reduce chemical usage. Regularly maintain the machine to optimize efficiency and reduce energy consumption. Consider recycling old or damaged parts when upgrading. By adhering to these practices, you contribute to a more sustainable cleaning routine while ensuring effective results for your carpets and upholstery.

7.2 Proper Disposal of Cleaning Solutions

Proper disposal of cleaning solutions used with the Hoover SteamVac SpinScrub is essential for environmental protection. Always check local regulations for disposal guidelines. Do not pour cleaning solutions down drains, as they may harm water systems. Instead, take them to designated hazardous waste facilities. Store solutions in sealed containers to prevent accidental spills. Mixed cleaning solutions should be treated as hazardous waste and disposed of accordingly. After cleaning, rinse the solution tank thoroughly and dispose of the rinse water responsibly. Encourage recycling of empty cleaning solution bottles whenever possible. By following these steps, you help protect the environment and ensure safe disposal practices for your cleaning routine.

The Hoover SteamVac SpinScrub is an effective cleaning solution for carpets and surfaces. Proper use and maintenance ensure optimal performance. For further support, refer to the official manual or Hoover’s customer service.

8.1 Summary of Key Points

The Hoover SteamVac SpinScrub is a versatile and efficient cleaning tool designed for deep carpet and surface cleaning. Its SpinScrub technology ensures thorough stain removal, while its adjustable settings cater to various surfaces. Proper assembly and maintenance, as outlined in the manual, are crucial for optimal performance. Always follow safety guidelines to avoid electrical hazards or damage. Regular cleaning of filters and tanks extends the machine’s lifespan. For additional support, refer to the official Hoover manual or contact customer service. By adhering to these guidelines, users can achieve professional-grade cleaning results while maintaining the durability of their SteamVac SpinScrub cleaner.

8.2 Where to Find Additional Support or Manuals

For additional support or manuals, visit the official Hoover website or authorized retailers like Amazon. ManualsLib and similar platforms also offer free PDF downloads of the Hoover SteamVac SpinScrub manual. Ensure to verify the model number for the correct guide. Retailers often include links to manuals on product pages. If the manual was lost, contact Hoover customer support directly for assistance. Online forums and communities may provide troubleshooting tips shared by other users. Always refer to official sources to avoid outdated or incorrect information.