crosley record player user manual

Welcome to the Crosley Record Player User Manual. This guide provides essential information for setting up, operating, and maintaining your turntable. Learn about key features, safety guidelines, and troubleshooting tips to ensure optimal performance and longevity of your device.

1.1 Product Overview

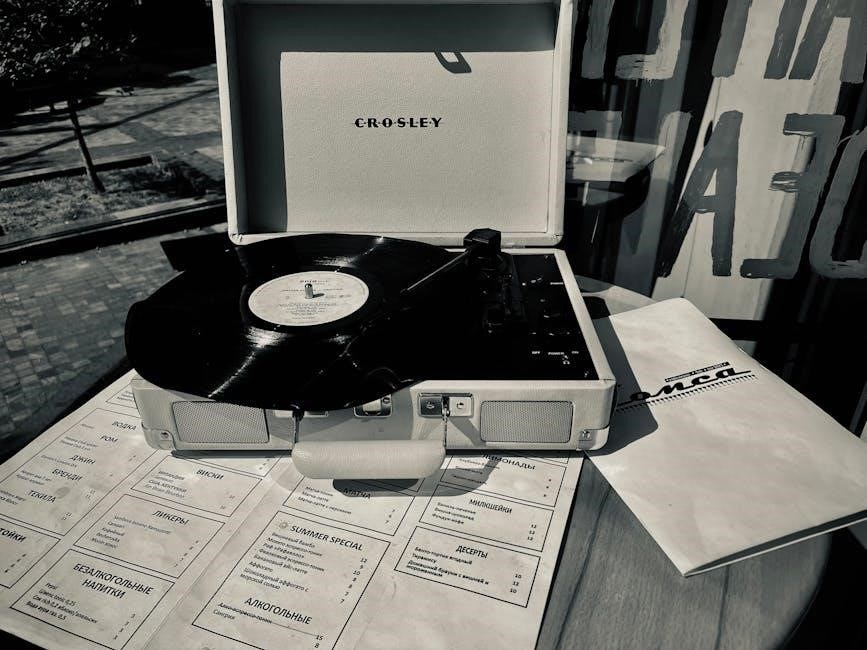
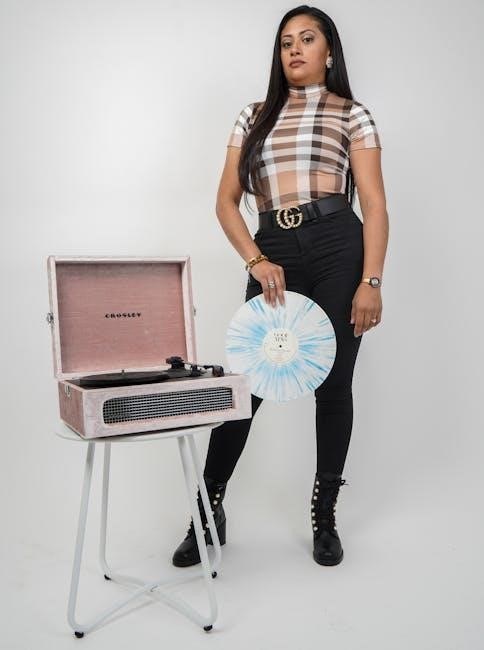
The Crosley Record Player is a versatile and feature-rich device designed to enhance your vinyl listening experience. It offers Bluetooth connectivity, USB functionality, and built-in speakers for convenient playback. With adjustable pitch control, you can customize your listening experience. The turntable supports 33 1/3, 45, and 78 RPM speeds, ensuring compatibility with various record sizes, including 7″, 10″, and 12″ formats. Its sleek design and user-friendly interface make it a perfect addition to any home audio setup. Safety features include precautions against water exposure, emphasizing proper handling to maintain performance. This manual will guide you through setup, operation, and maintenance to ensure years of enjoyable use.

1.2 Safety Precautions

To ensure safe and optimal use of your Crosley Record Player, follow these guidelines. Avoid placing the turntable near water or exposing it to extreme temperatures. Keep the device away from direct sunlight and moisture to prevent damage. Never submerge the turntable in water or clean it with wet cloths, as this may cause electrical malfunctions. Handle the power cord with care, avoiding overloading circuits or using damaged cables. Always unplug the unit before cleaning or performing maintenance. Avoid touching the record grooves or the needle to prevent dust accumulation and damage. Store records in a cool, dry place to maintain their quality. Regularly inspect the tonearm and belt for wear. Read this manual thoroughly before operation to ensure proper handling and usage. Retain this manual for future reference.

System Components

The Crosley record player consists of external components like a turntable platter, slip mat, and tonearm, while internal parts include a motor, belt, and pitch control mechanism.

2.1 External Components

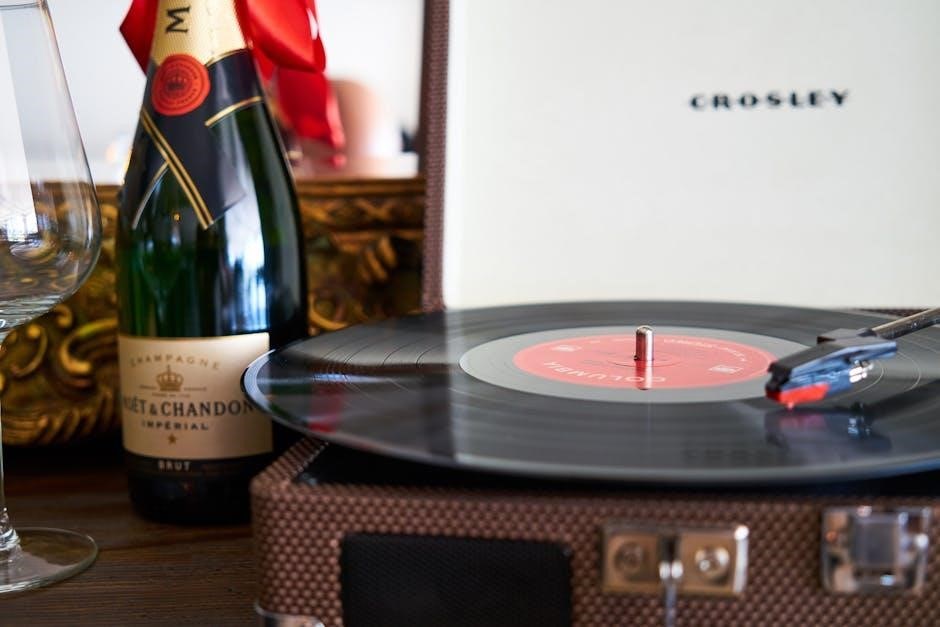
The Crosley record player features several external components designed for optimal performance. The turntable platter is the circular surface where records spin, ensuring stable playback. A slip mat is placed on top of the platter to protect records from scratches and provide cushioning. The tonearm, equipped with a cartridge and stylus, reads the grooves of the record, delivering high-quality audio. Additionally, the 45 RPM adapter is included for playing 7-inch records. External speakers or a headphone jack may also be connected for enhanced listening experiences. The power adapter is essential for powering the unit, and some models include a remote control for convenient operation. These components work together to provide a seamless and enjoyable vinyl listening experience.

2.2 Internal Parts

The internal components of the Crosley record player are crucial for its operation. The motor, located beneath the platter, powers the rotation of the turntable, ensuring consistent speed for record playback. A drive belt connects the motor to the platter, minimizing vibrations and noise. The main circuit board manages electrical connections, controlling functions like speed adjustment and USB or Bluetooth features. The cartridge and stylus, while externally visible, are internally connected to the tonearm mechanism, which reads record grooves for audio reproduction. Additionally, the counterweight on the tonearm balances its movement, ensuring proper tracking and preventing needle skips. These internal parts work together seamlessly to deliver high-quality sound and reliable performance. Regular maintenance of these components is essential for longevity and optimal functionality.

Installation and Setup

Welcome to the installation and setup section. Carefully unpack your Crosley record player, ensuring all accessories are included. Place the turntable on a stable, flat surface, away from direct sunlight and moisture. Connect the power supply and external components as described in the manual. Follow the step-by-step guide to ensure proper setup for optimal performance.

3.1 Unpacking and Accessories

Carefully unpack your Crosley record player to ensure no damage occurs. Verify all included accessories, such as the turntable, platter, slip mat, tonearm, and power adapter. Check for additional items like a 45 RPM adapter and any complementary cleaning tools. Ensure the packaging contains no missing components. Familiarize yourself with each part’s purpose before proceeding. Handle the turntable and accessories with care to avoid scratches or damage. Retain the original packaging and accessories for future reference or potential servicing. If any items are missing, contact Crosley Customer Service immediately. Properly organizing your accessories ensures a smooth setup process and optimal performance of your record player.

3.2 Placement and Environment

Place your Crosley record player on a stable, flat surface to ensure proper operation. Avoid positioning it near water or in humid environments to prevent damage. Keep the turntable away from direct sunlight and heat sources to maintain optimal performance. Ensure the area is free from vibrations or movement, as this could affect sound quality. Use a firm, non-slip surface to prevent accidental shifting. Position the turntable at least 6 inches away from any walls or obstructions for proper airflow. Maintain a clean and dust-free environment to protect the internal components. Avoid placing the turntable in areas prone to moisture or extreme temperatures, as this may damage the electronics or warping the records. Proper placement ensures longevity and optimal sound quality for your Crosley record player.

3.3 Connecting Power Supply

To power your Crosley record player, locate the DC power input on the back of the unit. Use the provided power adapter, ensuring it is securely connected to both the turntable and a nearby electrical outlet. Always plug the adapter into a grounded outlet to prevent electrical hazards. Avoid using damaged cords or adapters, as they may cause malfunctions or safety risks. Never submerge the power supply in water or expose it to excessive moisture. Before handling internal components, unplug the power cord to ensure your safety. Once connected, turn on the power switch, typically located on the front or side of the unit, to activate the turntable. Ensure the power supply matches the voltage requirements specified in the manual to avoid damage.

Operating the Turntable

Operating the Crosley turntable involves starting the motor, placing the record, and using the tonearm. Adjust speed as needed and refer to specific sections for details.

4.1 Basic Operation Steps

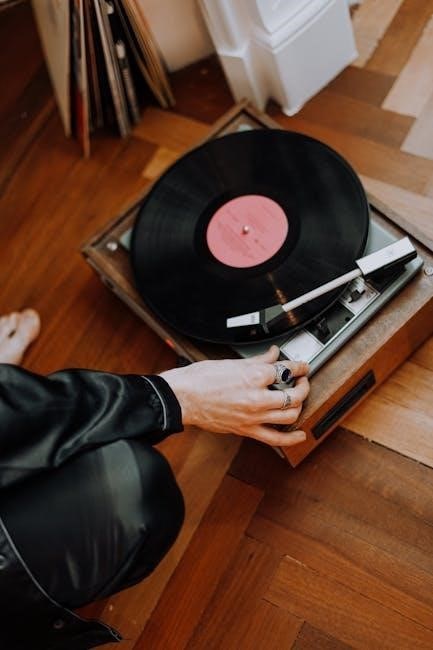
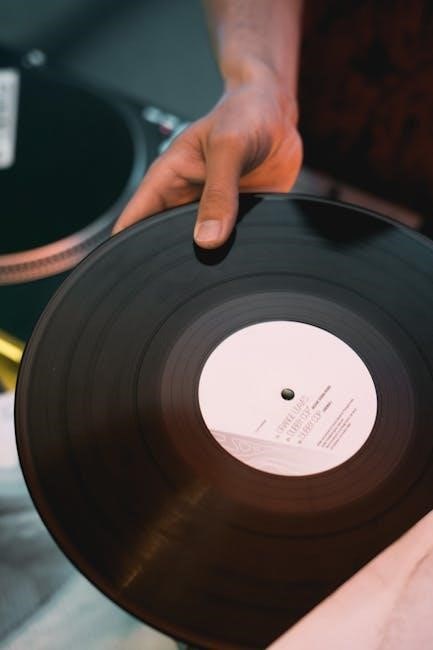
Start by powering on the turntable and selecting the appropriate record size and speed using the controls. Gently lift the tonearm and place it at the record’s edge. Ensure the record is clean and properly aligned. Once the record begins playing, adjust the volume if needed. For automatic models, the tonearm will return to its rest position after the record finishes. For manual models, lift the tonearm and turn off the power. Always handle the record by the edges to avoid fingerprints. Use the remote control for convenient operation if available. Refer to the speed and pitch control sections for fine-tuning playback. Proper handling ensures optimal performance and longevity of your Crosley turntable.

4.2 Speed and Pitch Control

The Crosley record player allows for precise speed and pitch adjustments to ensure optimal playback. Use the speed selector to choose between 33, 45, or 78 RPM, depending on the record size. The pitch control knob fine-tunes the playback speed, ideal for adjusting tempo or syncing tracks. To adjust, gently rotate the knob while monitoring the sound. For accurate playback, ensure the speed matches the record’s label specifications. Pitch control is particularly useful for DJs or vinyl enthusiasts who need precise tempo adjustments. Always refer to the manual for specific guidance on using these features effectively. Proper use of speed and pitch controls enhances your listening experience and preserves record quality.

4.3 Playing Records

To play records on your Crosley turntable, start by ensuring the power is turned on. Carefully lift the tonearm using the Tonearm Lever and gently place it on the record’s edge. Select the correct RPM (33, 45, or 78) based on the record’s size and speed. For automatic models, the tonearm will return to its rest position after playback. For manual models, use the Tonearm Lever to lift it once the record finishes. Always handle records by the edges to avoid fingerprints and scratches. Ensure the record is clean and free of dust for optimal sound quality. Refer to the manual for specific instructions on adjusting settings for different record formats. Proper handling and setup ensure a smooth and enjoyable listening experience.

4.4 Using USB and Bluetooth Features

Your Crosley record player offers convenient USB and Bluetooth connectivity for enhanced versatility. To use the USB feature, connect the turntable to your computer using the provided USB cable. Install the necessary software (often included) to digitize your vinyl records. For Bluetooth, ensure the turntable is in pairing mode, then connect your device (smartphone, speaker, or tablet) via Bluetooth settings. Once paired, you can stream audio wirelessly. Note that some models may require a PIN during pairing. Ensure your device is within range for optimal connection. Troubleshooting tips include resetting the Bluetooth connection or restarting the player. Always refer to your specific model’s manual for detailed instructions, as features may vary. This functionality allows you to modernize your vinyl experience while maintaining classic playback charm.

Maintenance and Care

Regularly clean the turntable platter, tonearm, and stylus to prevent dust buildup. Use a soft cloth and avoid harsh chemicals. Check the belt for wear and replace if necessary. Ensure the cartridge is properly aligned for optimal performance; Refer to the manual for detailed maintenance instructions to preserve your record player’s longevity and sound quality.

5.1 Cleaning the Turntable

Regular cleaning is essential to maintain your Crosley record player’s performance. Start by gently wiping the platter with a soft, dry cloth to remove dust and debris. For more thorough cleaning, use a mild soap solution on a damp cloth, ensuring no liquids seep into internal components. Avoid harsh chemicals or abrasive materials that could damage the finish or harm the equipment. Clean the tonearm and stylus with a specialized brush to remove dust. For stubborn grime, use a vinyl record cleaning solution and a microfiber cloth. Always handle the stylus carefully to prevent damage. Regular cleaning ensures optimal sound quality and extends the life of your turntable.

5.2 Troubleshooting Common Issues

If your Crosley record player experiences issues, start by checking the power supply and ensuring all connections are secure. If the turntable doesn’t spin, verify that the power button is functioning and the tonearm is not obstructed. For uneven playback, ensure the turntable is level and the record is clean. Static or distorted sound may result from a dirty stylus or improper record placement. Clean the stylus gently with a specialized brush and ensure records are free of dust. If issues persist, consult the user manual for detailed troubleshooting steps or contact Crosley customer support for assistance. Regular maintenance can prevent many common problems and ensure optimal performance.

5.3 Regular Maintenance Checks

Regular maintenance is crucial to ensure your Crosley record player performs optimally. Start by cleaning the turntable platter and slip mat with a soft cloth and mild detergent. Inspect the stylus for dust or debris and gently clean it with a specialized brush. Check the belt for wear and tear, and replace it if necessary. Ensure the platter is level and securely fastened. Lubricate the motor bearings periodically to maintain smooth operation. Additionally, verify that all electrical connections are secure and free from damage. Dust the internal components with compressed air to prevent buildup. For optimal sound quality, inspect the tonearm for proper alignment and balance. Refer to the user manual for specific maintenance schedules and guidelines to extend the lifespan of your record player.

Additional Features

Your Crosley record player includes built-in speakers, Bluetooth connectivity, and USB support for digital recording. It also features a remote control and compatibility with various accessories for enhanced functionality.

6.1 Built-in Speakers

The Crosley record player is equipped with high-quality, built-in speakers designed to deliver crisp and clear audio. These speakers provide an all-in-one solution for enjoying your vinyl records without the need for external sound systems. With balanced tone and adequate volume, they are perfect for casual listening sessions. The built-in speakers are optimized for both 33⅓ and 45 RPM records, ensuring compatibility with your entire collection. For enhanced sound quality, you can easily connect external speakers using the RCA output ports. This feature offers flexibility, allowing you to customize your listening experience according to your preferences.

6.2 Remote Control Functionality

The Crosley record player comes with a remote control, offering convenient operation from a distance. This feature allows you to control playback functions, adjust volume, and navigate tracks effortlessly. The remote is pre-programmed for seamless integration with your turntable, ensuring smooth operation. For additional devices like DVD players, the remote may require programming, as detailed in the manual. Battery installation is straightforward, and the remote’s intuitive design makes it user-friendly. Regularly check battery levels to maintain functionality. This feature enhances your listening experience, providing comfort and flexibility for music enthusiasts. The remote control adds a modern touch to the classic vinyl experience, making it easier to enjoy your records without moving from your seat.

6.3 Compatible Accessories

The Crosley record player supports a range of compatible accessories to enhance your listening experience. These include high-quality cleaning kits, designed to maintain your turntable’s performance by removing dust and debris. Additionally, replacement needles and styli are available to ensure optimal sound quality. Crosley also offers 45 RPM adapters for playing smaller records and slip mats to protect your records during playback. These accessories are specifically designed to work seamlessly with your Crosley turntable, ensuring compatibility and reliability. Regular use of these items will help preserve the longevity of your device and maintain its audio fidelity. For more details on available accessories, refer to the Crosley customer support resources or the product’s official website.

Technical Specifications

Explore the technical details of your Crosley record player, including dimensions, weight, supported record sizes, and power requirements, ensuring compatibility and proper setup for optimal performance.

7.1 Dimensions and Weight

Your Crosley record player is designed to fit seamlessly into your space. The unit measures approximately 12.2 x 10.8 x 6.3 inches and weighs around 12.1 pounds, making it compact yet sturdy. The dimensions ensure it can sit comfortably on most shelves or countertops without occupying excessive space. The weight provides stability, reducing vibration during operation. Note that dimensions may vary slightly depending on the specific model and finish. Always check the product packaging or manufacturer’s website for precise measurements to ensure proper placement in your home audio setup. This information is crucial for planning your space and ensuring the turntable operates efficiently in its intended environment.

7.2 Supported Record Sizes

Your Crosley record player is compatible with standard vinyl records in sizes of 7 inches, 10 inches, and 12 inches. It supports playing speeds of 33 1/3 RPM for LPs and 45 RPM for singles, ensuring versatility for your vinyl collection. The turntable comes equipped with a 45 RPM adapter to accommodate smaller records. Always verify the record size and speed before playback to ensure optimal performance. The player is designed to handle both vintage and modern vinyl formats, making it a versatile addition to your home audio system. Properly align the record size with the turntable’s capabilities to maintain sound quality and prevent damage to your records or the device.

7.3 Power Requirements

Your Crosley record player operates on standard household power, requiring a 120V AC, 60Hz power supply. It comes with a compatible power adapter that ensures safe and efficient operation. To avoid damage, use only the provided adapter or one with identical specifications. The turntable is designed for energy efficiency, consuming minimal power while delivering high-quality sound; Always plug the device into a grounded outlet to prevent electrical hazards. Avoid using the player near water or in humid environments, as this could compromise its functionality. For optimal performance, ensure the power cord is securely connected and free from damage. Refer to the manual or contact Crosley Customer Support for any power-related issues or concerns.

Appendix

This section includes warranty details, customer support contacts, and troubleshooting guides. Refer here for additional resources and information to assist with your Crosley record player experience.

8.1 Warranty Information

Your Crosley Record Player is backed by a limited warranty that covers manufacturing defects for a specified period. The warranty period typically starts from the date of purchase and varies depending on the model. To ensure coverage, register your product on the Crosley website within 30 days of purchase. The warranty does not cover damage caused by misuse or normal wear and tear. For warranty claims or inquiries, contact Crosley Customer Service at 1-888-CROSLEY or visit their official website. Keep your purchase receipt as proof of ownership, as it may be required for warranty validation.

8.2 Customer Support Contact

For any inquiries, technical assistance, or warranty-related issues, contact Crosley Customer Support. You can reach them by phone at 1-888-CROSLEY or visit their official website at www.crosleyradio.com for additional support resources. For email inquiries, use the contact form available on their website. Ensure to provide your product model number and a detailed description of your issue for faster assistance. Customer service representatives are available to help with troubleshooting, repair requests, or general questions about your record player. Retain your purchase receipt and warranty documentation, as they may be required for support. For international customers, refer to the website for region-specific contact information.

carrier comfort zone ii manual

The Carrier Comfort Zone II Manual provides a comprehensive guide to understanding and utilizing the advanced zoning system, designed for 2, 4, or 8 zones, ensuring energy efficiency and customized comfort control for optimal indoor climate management.

1.1 Overview of the Comfort Zone II System

The Comfort Zone II System is a advanced zoning solution designed to control temperatures and humidity in up to 8 distinct areas. It offers customizable comfort, energy efficiency, and seamless integration with heating and cooling systems. The system includes a central interface, equipment controller, and remote sensors, enabling precise control over individual zones. Its programmable scheduling and energy-saving features make it ideal for both residential and commercial applications, ensuring optimal indoor climate management.

1.2 Purpose of the Manual

The purpose of the Carrier Comfort Zone II Manual is to provide users with a detailed guide for installing, operating, and maintaining the Comfort Zone II System. It serves as a comprehensive resource, offering step-by-step instructions, troubleshooting tips, and technical specifications. The manual ensures that users can maximize the system’s potential, customize settings, and resolve common issues, thereby optimizing comfort and energy efficiency in their homes or businesses effectively.

1.3 Target Audience

The Carrier Comfort Zone II Manual is designed for homeowners, business owners, installers, and technicians. It provides essential information for setting up, operating, and maintaining the system. Whether customizing comfort settings or troubleshooting issues, this manual serves as a vital resource for all users, ensuring they can maximize the system’s energy efficiency and performance to meet their specific needs effectively.

Key Features of the Comfort Zone II System

The Comfort Zone II System offers advanced zoning capabilities for 2, 4, or 8 zones, ensuring energy efficiency and customized comfort. It features programmable thermostats, humidity management, and smart sensor integration, allowing users to optimize their indoor climate while saving energy and enhancing overall comfort.

2.1 Zoning Capabilities (2, 4, or 8 Zones)

The Comfort Zone II System offers flexible zoning capabilities, supporting 2, 4, or 8 zones, allowing precise temperature control in each area. This feature enables users to customize comfort levels, reduce energy waste, and optimize system performance. Each zone operates independently, ensuring tailored climate control for different spaces within a home or business, enhancing overall efficiency and user satisfaction.

2.2 Energy Efficiency and Customized Comfort

The Comfort Zone II System maximizes energy efficiency by allowing precise temperature control in specific zones, reducing unnecessary heating or cooling. Customized comfort is achieved through tailored settings for each zone, ensuring optimal conditions. The system adapts to your home’s needs, learning preferences to balance energy savings and comfort. Smart sensors and humidity management further enhance efficiency, making it a versatile solution for modern energy-conscious homes.

2.3 Programmable Thermostat Functionality

The programmable thermostat in the Comfort Zone II System offers flexible scheduling, allowing users to set temperature preferences up to seven days in advance. This feature ensures consistent comfort and energy savings by automating temperature adjustments. Customizable settings enable precise control, while temporary hold and override options provide flexibility for unexpected changes. The thermostat’s intuitive interface simplifies programming, making it easy to optimize your home’s climate efficiently.

2.4 Humidity Control and Management

The Comfort Zone II System includes advanced humidity control, ensuring optimal indoor air quality. It integrates seamlessly with the programmable thermostat, allowing users to set specific humidity levels for each zone. This feature prevents excessive moisture, reducing mold growth and dust mites. By managing humidity alongside temperature, the system enhances comfort and energy efficiency, providing a healthier living environment year-round. The humidity sensors and dampers work together to maintain balanced air conditions.

Installation Guide

The guide provides detailed instructions for installing the Comfort Zone II System, including pre-installation requirements, wiring diagrams, and post-installation checks to ensure proper system functionality and safety.

3.1 Pre-Installation Requirements

Before installing the Comfort Zone II System, ensure compatibility with existing HVAC equipment and verify space requirements. Conduct a site survey to identify zoning needs and optimal sensor placement. Gather all necessary tools, materials, and documentation, including wiring diagrams and system specifications. Ensure power is disconnected during installation to maintain safety and prevent electrical hazards.

3.2 Step-by-Step Installation Process

Begin by mounting the control interface in a central location, ensuring easy access. Connect the outdoor temperature sensor and remote sensors to the system. Follow the wiring diagram to link the equipment controller to the HVAC system. Connect zone dampers and thermostats, ensuring proper wiring for power and communication. Refer to the manual for specific wiring configurations and safety guidelines to ensure a successful installation.

3.3 Wiring Diagrams and Connections

Refer to the provided wiring diagrams for precise connections between the control interface, equipment controller, and zone dampers. Ensure all terminals are securely connected, and power wiring is correctly routed. Verify communication cables are properly linked to enable system coordination. Double-check all connections to avoid malfunctions and ensure compliance with safety standards outlined in the manual.

3.4 Post-Installation Checks

After installation, perform a thorough system test to ensure all components function correctly. Verify zone operations, thermostat settings, and communication between devices. Check damper functionality and validate temperature and humidity controls. Review error codes and ensure electrical connections are secure. Confirm system operation aligns with manual guidelines to optimize performance and energy efficiency. Address any issues promptly to ensure reliable system operation.

Programming and Operation

The Carrier Comfort Zone II allows users to program temperature schedules, manage humidity levels, and utilize temporary hold features for personalized comfort and energy efficiency.

4.1 Understanding the Thermostat Interface

The Carrier Comfort Zone II thermostat features an intuitive interface with a backlit display, touch-sensitive buttons, and clear status indicators. Users can easily navigate through menus to adjust temperatures, scheduling, and humidity settings. The interface provides real-time feedback, ensuring precise control over zoning preferences. Additional features include a help menu for guidance and system status updates, making it user-friendly for both homeowners and businesses to manage their indoor climate efficiently.

4.2 Setting Up Temperature Schedules

The Carrier Comfort Zone II allows users to create customized temperature schedules for up to 7 days, ensuring optimal comfort and energy efficiency. Programmable settings enable precise temperature control during different times of the day, aligning with your lifestyle. The system also features energy-saving modes and adaptive recovery, automatically adjusting temperatures before scheduled times to maintain consistent comfort while minimizing energy usage across all zones.

4.3 Managing Humidity Levels

The Carrier Comfort Zone II system includes advanced humidity control features, allowing users to set and maintain optimal moisture levels across all zones. Customizable humidity settings ensure consistent comfort while preventing mold growth and excess moisture. The system integrates seamlessly with programmable schedules, adjusting humidity levels automatically based on time and temperature preferences for enhanced energy efficiency and indoor air quality management.

4.4 Temporary Hold and Override Features

The Carrier Comfort Zone II system offers Temporary Hold and Override Features, allowing users to make immediate adjustments to temperature and humidity settings without altering programmed schedules. This feature is ideal for unexpected changes in occupancy or comfort needs. Temporary adjustments are easy to implement and revert back to the original schedule automatically, ensuring energy efficiency and maintaining customized comfort levels seamlessly.

Maintenance and Troubleshooting

Regular maintenance ensures optimal performance of the Carrier Comfort Zone II system. Check air filters, sensors, and wiring. Troubleshoot common issues like uneven temperatures or system errors by consulting the manual or contacting support for assistance.

5.1 Routine Maintenance Checks

Regular maintenance is essential for the Carrier Comfort Zone II system. Clean or replace air filters, inspect sensors, and check wiring connections. Verify humidity levels and ensure dampers function properly. Schedule annual professional inspections to maintain efficiency and prevent issues. Refer to the manual for detailed procedures and guidelines to ensure optimal performance and longevity of the system.

These checks help prevent malfunctions and ensure consistent comfort control.

5.2 Troubleshooting Common Issues

Identify issues by checking sensors, wiring, and system responses. Common problems include faulty temperature readings, uneven zone performance, or unresponsive controls. Refer to the manual for error codes and solutions. Resetting the system or replacing sensors may resolve issues. Always ensure proper connections and power supply. Regular inspections can help prevent recurring problems and maintain system efficiency.

Consult the manual for detailed troubleshooting steps.

5.3 Error Codes and Solutions

The Carrier Comfort Zone II system displays error codes to indicate specific issues. Common codes include E1 for sensor malfunctions, E2 for communication errors, and E3 for damper issues. Refer to the manual for code meanings and troubleshooting steps. Solutions may involve resetting the system, replacing sensors, or checking wiring connections. Always consult the manual for detailed repair instructions to resolve errors effectively.

Ensure proper system operation by addressing codes promptly.

5.4 Resetting the System

To reset the Carrier Comfort Zone II system, turn off power at the circuit breaker for 30 seconds. Turn power back on and allow the system to restart. This process clears temporary glitches and restores default settings. If issues persist, refer to the manual for advanced troubleshooting or contact a certified technician. Resetting ensures optimal performance and resolves minor operational errors effectively.

Always power cycle the system before attempting further repairs.

Advanced Features and Integration

The Carrier Comfort Zone II offers advanced integration with smart home systems, enabling remote monitoring and control. Smart sensors optimize performance, while energy reporting tracks savings and system updates ensure peak efficiency, enhancing overall functionality and user experience seamlessly.

6.1 Smart Sensors and Remote Monitoring

The Carrier Comfort Zone II system integrates seamlessly with smart sensors, allowing users to monitor and adjust temperatures, humidity, and zone settings remotely. These sensors enhance precision and convenience, ensuring optimal comfort levels. Remote monitoring capabilities enable real-time adjustments via mobile devices, making it easier to manage energy usage and maintain desired indoor conditions efficiently.

6.2 Compatibility with Smart Home Systems

The Carrier Comfort Zone II system is designed to integrate seamlessly with popular smart home platforms, such as Google Nest and Amazon Alexa. This compatibility allows users to control their zoning system alongside other smart devices, enabling voice commands and centralized home management. The integration enhances convenience, offering a unified smart home experience while maintaining precise temperature and humidity control across all zones.

6.3 Energy Reporting and Savings Tracking

The Carrier Comfort Zone II system offers advanced energy reporting and savings tracking features. Users can access detailed reports on energy consumption patterns, allowing for informed decisions to optimize efficiency. The system also provides insights into potential savings by adjusting temperature settings and humidity levels. These tools empower homeowners to reduce energy waste and lower utility bills while maintaining personalized comfort levels throughout their space.

6.4 System Upgrades and Updates

The Carrier Comfort Zone II system supports seamless upgrades and updates to enhance performance and compatibility. Users can easily update software and integrate new features, ensuring optimal functionality. The system allows for remote updates and compatibility with the latest smart home technologies, maintaining its efficiency and adaptability over time. Regular updates ensure the system remains current with technological advancements, providing long-term reliability and improved energy management capabilities.

Safety Considerations

The Carrier Comfort Zone II system requires adherence to electrical safety guidelines to prevent hazards. Always follow installation and operational instructions to ensure safe usage and avoid potential risks.

7.1 General Safety Precautions

Always follow the Carrier Comfort Zone II manual guidelines to ensure safe operation. Avoid exposing the system to water or extreme temperatures. Keep flammable materials away and ensure proper ventilation. Before performing any maintenance, disconnect power to prevent electrical shocks. Adhere to all safety warnings and precautions outlined in the manual to maintain system integrity and user safety.

7.2 Electrical Safety Guidelines

Follow the Carrier Comfort Zone II manual for electrical safety. Ensure all wiring matches system specifications and is installed by a licensed technician. Avoid overloading circuits and keep wires away from heat sources. Use properly rated fuses and circuit breakers. Always disconnect power before servicing to prevent shocks or component damage, adhering to local electrical codes for a safe installation and operation.

7.3 Emergency Shutdown Procedures

In case of an emergency, refer to the Carrier Comfort Zone II manual for shutdown procedures. Immediately disconnect power at the circuit breaker or switch. Use the emergency shut-off switch if available. Ensure all components stop operating to prevent damage or hazards. Always follow the manual’s guidelines to safely deactivate the system and consult a professional if unsure. This ensures safety and prevents potential risks during unexpected situations.

Technical Specifications

The Carrier Comfort Zone II system supports up to 8 zones, with compatibility for various HVAC systems. It operates on 24V power and requires specific dimensional clearances for installation. The system is designed for efficient performance across a wide range of environmental conditions, ensuring reliable control and operation in diverse settings. Always refer to the manual for exact measurements and electrical requirements.

8.1 System Compatibility

The Carrier Comfort Zone II system is compatible with a wide range of HVAC equipment, including heat pumps, dual-fuel systems, and traditional heating and cooling units. It supports integration with smart home systems and can be paired with optional smart sensors for enhanced functionality. The system works seamlessly with 2, 4, or 8-zone configurations, making it versatile for both residential and light commercial applications. Proper installation ensures optimal performance across all compatible systems.

8.2 Dimensional and Weight Requirements

The Carrier Comfort Zone II system components are designed to fit standard installation spaces. The main unit measures 3.5 inches in height, 5.75 inches in width, and 1.375 inches in depth, ensuring compatibility with most mounting configurations. The system’s weight is approximately 3.5 pounds, making it lightweight and easy to handle during installation. These dimensions and weight specifications ensure seamless integration into various residential and commercial settings without compromising performance or functionality.

8.3 Power Requirements

The Carrier Comfort Zone II system operates on a standard 24V AC power supply, ensuring compatibility with most residential and commercial electrical systems. It is designed to consume minimal power while maintaining high efficiency. The system does not require additional power supplies for basic functionality, making it a cost-effective solution. Proper adherence to these power requirements ensures optimal performance, safety, and system longevity.

8.4 Environmental Operating Range

The Carrier Comfort Zone II system is designed to operate effectively in a wide range of environmental conditions. It functions optimally in temperatures between 32°F and 90°F (0°C to 32°C) and maintains performance in humid environments, typically below 80% relative humidity. These specifications ensure reliable operation across various climates and indoor settings, adhering to the manual’s guidelines for optimal performance and system longevity.

Warranty and Support

The Carrier Comfort Zone II system is backed by a comprehensive manufacturer warranty, ensuring coverage for parts and labor. Dedicated customer support is available for troubleshooting, while online resources provide additional guidance and documentation to assist users in maintaining optimal system performance and resolving issues promptly. Proper registration is required to validate warranty terms.

9.1 Manufacturer Warranty Details

The Carrier Comfort Zone II system offers a comprehensive manufacturer warranty, providing coverage for parts and labor under specific conditions. The standard warranty typically includes a 5-year limited warranty on parts and a 1-year limited warranty on labor when installed by a certified technician. Extended warranty options may be available, offering enhanced protection for up to 10 years. Proper registration within 90 days of installation is required to activate warranty benefits. Additionally, the system must be maintained according to the manufacturer’s guidelines to ensure warranty validity. Any unauthorized modifications or improper installations may void the warranty. It is essential to review the warranty terms and conditions provided in the manual or on Carrier’s official website to understand the full scope of coverage and any applicable restrictions. By adhering to these requirements, users can enjoy peace of mind with reliable protection for their investment in the Comfort Zone II system.

9.2 Customer Support Contact Information

Carrier provides dedicated customer support for the Comfort Zone II system. Visit their official website at www.carrier.com for detailed contact information. You can reach their support team at 1-800-CARRIER for technical assistance, troubleshooting, or general inquiries; Support is available Monday through Friday, 8 AM to 6 PM EST. For efficient service, ensure to have your system’s model number ready when contacting support.

9.3 Online Resources and Documentation

Carrier offers extensive online resources for the Comfort Zone II system. Visit www.carrier.com to access PDF manuals, installation guides, and troubleshooting tips. Additionally, the Carrier website provides video tutorials, FAQs, and software updates to ensure optimal system performance. Users can also download the Comfort Zone II user manual directly from the site, available in multiple languages for global accessibility and convenience.

The Carrier Comfort Zone II Manual concludes by summarizing the system’s key benefits, including energy efficiency, zoning capabilities, and programmable features, ensuring optimal performance and comfort control for users.

10.1 Summary of Key Benefits

The Carrier Comfort Zone II system offers enhanced zoning capabilities, energy efficiency, and programmable features for customized comfort. It supports up to 8 zones, allowing independent temperature control in different areas, reducing energy waste. The system also includes humidity management and smart home compatibility, ensuring optimal performance and convenience. These features make it a comprehensive solution for modern heating and cooling needs, providing both comfort and energy savings.

10.2 Final Tips for Optimal Performance

For optimal performance, ensure routine maintenance, such as cleaning filters and checking wiring connections. Program temperature schedules to align with your daily routine and adjust humidity levels seasonally. Regularly update the system software and verify sensor accuracy. Address any error codes promptly and consider professional calibration for precise control. These practices will maximize efficiency, comfort, and system longevity, ensuring your Carrier Comfort Zone II operates at its best.

fitness industry award pay guide

The Fitness Industry Award Pay Guide outlines minimum pay rates, allowances, and entitlements for employees in the fitness industry. It ensures fair compensation and compliance with workplace laws. Access the guide via the Fair Work Ombudsman website for detailed information.

Overview of the Fitness Industry Award

The Fitness Industry Award regulates pay rates, allowances, and employment conditions for workers in the fitness sector, ensuring fair and legal workplace practices.

2.1. What is the Fitness Industry Award?

The Fitness Industry Award is a legal document that outlines the minimum pay rates, allowances, and employment conditions for employees in the fitness industry. It is designed to ensure fair compensation and compliance with workplace laws. The award applies to various roles, including personal trainers, fitness instructors, and gym staff. It covers key aspects such as hourly rates, overtime, penalties, and superannuation. Employers and employees can access the Fitness Industry Award pay guide through the Fair Work Ombudsman website to ensure compliance and understand their entitlements.

2.2. Who does the Fitness Industry Award cover?

The Fitness Industry Award covers employees working in fitness centers, gyms, and sports clubs. It applies to roles such as personal trainers, fitness instructors, and administrative staff. The award ensures fair pay and conditions for all employees in the industry, regardless of their specific role. Employers must adhere to the pay guide to maintain compliance with workplace laws. For more details, visit the Fair Work Ombudsman website. This resource provides comprehensive information on coverage, entitlements, and obligations under the Fitness Industry Award.

2.3. Key objectives of the Fitness Industry Award

The Fitness Industry Award aims to provide fair and consistent pay rates, allowances, and entitlements for employees in the fitness sector. Its primary goal is to protect workers’ rights and ensure employers meet legal obligations. The award also promotes transparency in workplace conditions and supports industry growth by setting clear standards. It covers aspects like minimum wages, overtime, and leave entitlements, ensuring equitable treatment for all employees. For detailed insights, refer to the Fair Work Ombudsman website, which offers comprehensive resources on implementing these objectives effectively.

Key Components of the Fitness Industry Award Pay Guide

The Fitness Industry Award Pay Guide includes minimum pay rates, allowances, overtime, penalties, and superannuation. It ensures fair compensation and compliance with workplace laws for all employees.

3.1. Minimum Pay Rates

The Fitness Industry Award specifies minimum hourly rates for employees based on their job classification and experience. These rates are designed to ensure fair compensation across the industry. Employers must adhere to these minimums to avoid underpayment. The pay guide outlines base rates for various roles, from entry-level positions to senior instructors. Rates are typically reviewed annually to reflect economic conditions. Employees can access current minimum pay rates through the Fair Work Ombudsman’s website or the Pay Rate Viewer tool. These rates apply to all workers, including full-time, part-time, and casual staff, ensuring consistency and fairness in the fitness industry;

3.2. Allowances

Allowances under the Fitness Industry Award are additional payments provided to employees for specific work-related expenses or conditions. These may include uniform maintenance, travel, or equipment allowances. The award details the types and amounts of allowances, ensuring transparency for both employers and employees. Allowances are typically calculated based on the nature of the work and are paid regularly alongside wages. Employers must maintain accurate records of allowance payments to ensure compliance. Employees can review their entitlements through the Fair Work Ombudsman’s resources or the Pay and Conditions Tool, which offers detailed guidance on calculating and claiming allowances within the fitness industry.

3.3. Overtime

Overtime under the Fitness Industry Award refers to work performed beyond standard hours. Employees are entitled to overtime rates when working more than 38 hours per week or outside regular hours. Full-time and part-time employees receive overtime pay at 1.5 times their ordinary rate for the first two hours and 2 times for subsequent hours. Casual employees may also be eligible for overtime, depending on their employment terms. Overtime is calculated based on the employee’s ordinary rate of pay and must be recorded accurately. Employers are required to maintain proper records to ensure compliance with the award’s provisions. Employees can access detailed overtime rules through the Fair Work Ombudsman’s resources.

3.4. Penalties

Penalties under the Fitness Industry Award apply to work performed during weekends, public holidays, or outside standard working hours. Employees are entitled to higher rates for such work, ensuring fair compensation for less desirable shifts. Penalty rates are calculated as a percentage of the ordinary hourly rate, varying depending on the day and time of work. For example, work on weekends may attract a 20% or 50% loading, while public holidays could incur higher penalties. These provisions aim to balance worker compensation with business needs. Employers must adhere to these rules to maintain compliance with the Fitness Industry Award. Further details can be found on the Fair Work Ombudsman website.

3.5. Superannuation

Superannuation under the Fitness Industry Award requires employers to contribute to employees’ superannuation funds. The standard contribution rate is 10.5% of an employee’s ordinary earnings, aligning with the Superannuation Guarantee (SG). This applies to full-time, part-time, and casual employees earning above the threshold. Employers must pay superannuation contributions quarterly, ensuring compliance with the award and relevant legislation. Employees can choose their superannuation fund, and employers must facilitate this choice. The Fitness Industry Award ensures that workers receive adequate retirement benefits, promoting long-term financial security. For detailed information, visit the Fair Work Ombudsman website.

Pay Rates Under the Fitness Industry Award

The Fitness Industry Award sets minimum pay rates for employees, covering various roles and classifications. Current rates are available via the Fair Work Ombudsman website.

4.1. Minimum hourly rates for fitness industry employees

The Fitness Industry Award specifies minimum hourly rates for employees, ensuring fair pay across all roles. Rates vary based on job classification, experience, and hours worked. Employers must adhere to these rates, which are regularly updated to reflect economic changes. For accurate and current pay rates, refer to the Fair Work Ombudsman’s Pay Rate Viewer or download the Fitness Industry Award document. Compliance with these rates is essential to avoid workplace disputes and ensure employees receive their legal entitlements.

4.2. Pay rates for different job classifications

The Fitness Industry Award provides specific pay rates for various job classifications within the fitness sector. These classifications include personal trainers, fitness instructors, and center managers, among others. Pay rates are determined based on the employee’s role, experience, and qualifications. For example, entry-level positions may have lower rates, while senior roles or those requiring specialized certifications may earn higher wages. Employers can access detailed pay rates through the Fair Work Ombudsman’s Pay Rate Viewer or by downloading the Fitness Industry Award document. This ensures compliance and fair compensation across all job levels.

4.3. Annual wage review and increases

The Fitness Industry Award undergoes an annual wage review to ensure pay rates align with economic conditions. The Fair Work Commission reviews minimum wages and may implement increases each financial year, typically effective from 1 July. These adjustments aim to reflect cost-of-living changes and promote fair compensation. Employers must update pay rates accordingly to comply with the award. The updated rates are published on the Fair Work Ombudsman’s website, ensuring transparency and accessibility for both employers and employees. This process helps maintain equitable pay standards across the fitness industry, supporting workforce stability and growth.

4.4. How to access the current pay rates

To access current pay rates under the Fitness Industry Award, visit the Fair Work Ombudsman website. Use the Pay Rate Viewer tool to explore rates for specific job classifications. The Fitness Industry Award (MA000094) document is also available for download, detailing all pay rates, allowances, and entitlements. Regularly check for updates, as rates may change following annual wage reviews. Employers and employees can rely on these resources to ensure compliance and fair compensation. This ensures transparency and accessibility for staying informed about the latest pay rates in the fitness industry.

Allowances in the Fitness Industry Award

The Fitness Industry Award includes various allowances to compensate employees for specific work conditions. These allowances cover expenses like uniforms, travel, and special duties, ensuring fair compensation beyond base pay.

5.1. Types of allowances

The Fitness Industry Award provides various allowances to employees, including uniform and laundry allowances, compensating for wardrobe maintenance. Additionally, travel allowances cover expenses for work-related journeys. Special duties may also entitle employees to first aid allowances. These allowances aim to reimburse employees for work-related costs, ensuring fair compensation. Employers must adhere to these provisions to maintain compliance with the award. For detailed information, visit the Fair Work Ombudsman website. Understanding these allowances helps both employers and employees navigate entitlements effectively.

5.2. How allowances are calculated

Allowances under the Fitness Industry Award are calculated based on specific criteria outlined in the award. They are typically expressed as flat rates or percentages of the minimum wage. For instance, uniform allowances may be a fixed amount per week, while travel allowances are often based on the distance traveled. The Fair Work Commission reviews and updates these rates periodically to ensure they align with industry standards. Employers must refer to the most current pay guide or use the Fair Work Ombudsman’s Pay and Conditions Tool to determine accurate allowance payments. This ensures compliance and fair compensation for employees.

5.3. Payment of allowances

Allowances under the Fitness Industry Award are paid to employees as part of their regular remuneration, either included in their paycheck or paid separately. Employers must ensure these payments align with the specified rates in the award. Allowances are typically paid at the same frequency as ordinary wages, such as weekly or fortnightly. The payment must be documented in the employee’s pay slip for transparency. Employers are responsible for adhering to the award’s guidelines to avoid underpayment. For accurate calculation and payment, employers can utilize the Fair Work Ombudsman’s Pay and Conditions Tool, ensuring compliance with the Fitness Industry Award requirements.

5.4. Examples of common allowances

Common allowances under the Fitness Industry Award include first aid allowances for employees who provide first aid services, uniform allowances for maintaining required work attire, and travel allowances for employees who incur costs while traveling for work. There are also meal allowances for employees working extended shifts and laundry allowances for those required to clean their uniforms. These allowances aim to compensate employees for specific work-related expenses or responsibilities. Employers must ensure they pay these allowances at the rates specified in the award. For a detailed list of allowances and their rates, refer to the Fair Work Ombudsman’s Pay and Conditions Tool or the Fitness Industry Award document.

Overtime and Penalty Rates

The Fitness Industry Award specifies overtime rates for work exceeding standard hours and penalty rates for weekends and public holidays, ensuring fair compensation for additional work.

6.1. Overtime rates for full-time and part-time employees

Overtime rates under the Fitness Industry Award are designed to compensate employees for work beyond standard hours. Full-time employees are entitled to 1.5 times their ordinary rate for overtime, while part-time employees receive the same rate once they exceed their agreed hours; Overtime is typically calculated based on the number of hours worked beyond the standard 38-hour workweek. Employers must ensure accurate record-keeping to avoid underpayment. The Fair Work Ombudsman provides detailed guidelines to help employers understand and apply these rates correctly. For specific scenarios, refer to the Fair Work Ombudsman website.

6.2. Penalty rates for weekend and public holiday work

Penalty rates under the Fitness Industry Award are higher for work performed on weekends and public holidays. For weekend shifts, employees typically receive 1.5 times their ordinary rate for Saturday work and 2 times for Sunday work. Public holiday work attracts a penalty rate of 2.5 times the ordinary rate. These rates apply to both full-time and part-time employees. The Fitness Industry Award ensures fair compensation for work during these periods, reflecting the inconvenience and additional demands placed on employees. Employers must adhere to these rates to maintain compliance with workplace laws. Visit the Fair Work Ombudsman website for detailed rate calculations and scenarios.

6.3. Calculating overtime and penalty pay

Overtime and penalty pay under the Fitness Industry Award are calculated based on the employee’s ordinary hourly rate. Overtime is typically paid at 1.5 times the ordinary rate for the first two hours and 2 times thereafter. Penalty rates for weekend and public holiday work are applied as multipliers to the ordinary rate. For example, Sunday work is paid at 2 times the ordinary rate, while public holidays attract 2.5 times. Employers must ensure accurate calculation of these rates using the Fair Work Ombudsman’s Pay and Conditions Tool. This ensures compliance and fair compensation for employees working outside standard hours.

Superannuation in the Fitness Industry

Employers must contribute to employees’ superannuation funds, typically 10.5% of ordinary earnings, ensuring compliance with workplace laws and securing employees’ future financial stability.

7.1. Superannuation obligations for employers

Employers in the fitness industry must contribute to employees’ superannuation funds, typically 10.5% of ordinary time earnings, as mandated by the Fitness Industry Award and superannuation legislation. This obligation ensures employees receive retirement benefits. Contributions must be paid quarterly to comply with the Superannuation Guarantee (SG) scheme. Employers failing to meet these obligations may face penalties from the Australian Taxation Office (ATO). The Fitness Industry Award specifies that superannuation contributions are calculated based on an employee’s ordinary time earnings, excluding allowances or overtime. Employers should regularly review and update their superannuation payments to ensure compliance with current rates and regulations, as outlined by the Fair Work Ombudsman.

7.2. Superannuation contributions for employees

Employees in the fitness industry are entitled to superannuation contributions from their employers, ensuring retirement savings. The Fitness Industry Award mandates employers contribute 10.5% of ordinary time earnings. Employees can also make voluntary contributions to boost their superannuation. Contributions are typically paid into a complying superannuation fund, chosen by the employer or employee. Employees have the right to review their superannuation statements and ensure contributions are accurately recorded. If discrepancies arise, employees can seek assistance from the Australian Taxation Office or the Fair Work Ombudsman to resolve issues related to their superannuation entitlements under the Fitness Industry Award.

Annual Leave and Sick Leave Entitlements

Fitness industry employees are entitled to annual leave and sick leave under the Fitness Industry Award. Annual leave accrues at a standard rate, while sick leave is available for health-related absences, ensuring work-life balance and employee well-being.

8.1. Annual leave entitlements

Under the Fitness Industry Award, employees are entitled to annual leave, accrued progressively throughout the year. Full-time workers typically receive four weeks of paid leave per annum, while part-time employees receive a proportionate amount based on their hours. The leave can be taken at an agreed time, ensuring work-life balance and rest. Employers must pay the employee’s ordinary rate of pay during this period. Annual leave is a key component of employment entitlements, supporting employee well-being and productivity upon return to work. Proper management of annual leave ensures compliance with the Award’s provisions and maintains a motivated workforce.

8.2. Sick leave entitlements

Employees under the Fitness Industry Award are entitled to paid sick leave, ensuring they can recover from illness without financial hardship. Full-time workers typically receive a specified number of paid sick leave days per year, while part-time employees receive a proportionate amount based on their working hours. Sick leave is accrued progressively and can be accessed when needed, with proper notice and medical certification required in some cases. This entitlement supports employee well-being and fosters a healthy workplace environment. Employers must adhere to these provisions to ensure compliance with the Award and maintain a supportive work culture for their staff.

8.3. How leave affects pay rates

Leave entitlements under the Fitness Industry Award can impact pay rates in various ways. Annual leave is typically paid at the employee’s base rate, while sick leave is also paid, ensuring continuity of income during absences. Public holidays may attract penalty rates if worked, or result in a paid day off. Unpaid leave, if approved, pauses pay entitlements temporarily. It’s important for employers to accurately calculate pay during leave periods to maintain compliance with the Award and ensure employees receive their correct entitlements. Understanding these rules helps both employers and employees manage leave effectively without disrupting pay structures or workplace obligations.

Termination Pay and Notice Periods

Termination pay and notice periods are governed by the Fitness Industry Award, ensuring employees receive fair compensation upon termination. Employers must provide the required notice period or pay in lieu, with final pay including accrued entitlements like annual leave and superannuation. The Award specifies minimum notice periods based on employment duration, protecting both parties’ rights and ensuring smooth transitions. Compliance with these provisions is essential for employers to avoid legal disputes and maintain fair workplace practices. Employees should verify their entitlements upon termination to ensure they receive all owed payments promptly and correctly.

9.1. Notice periods for termination

Notice periods for termination under the Fitness Industry Award are structured to provide fair notice for both employers and employees. Employees are entitled to a minimum notice period based on their length of service. For example, an employee with less than one year of service is entitled to one week’s notice, while those with one to three years of service receive two weeks’ notice. Employees with three or more years of service are entitled to four weeks’ notice. Employers may choose to pay the equivalent of the notice period instead of requiring the employee to work it out. This provision ensures clarity and fairness in termination processes, protecting both parties’ rights. Clear communication and documentation are essential to comply with these requirements.

9.2. Final pay and entitlements upon termination

Upon termination, employees under the Fitness Industry Award are entitled to receive their final pay, which includes unpaid wages, allowances, and any accrued entitlements such as annual leave. Employers must ensure that all payments are made in accordance with the award and relevant workplace laws. Final pay should be calculated based on the employee’s base rate of pay, including any applicable allowances or overtime. Employers are also required to make any necessary superannuation contributions up to the date of termination. A payslip must accompany the final payment, detailing the breakdown of all amounts paid. This ensures transparency and compliance with legal obligations.

Modern Awards and Compliance

Modern Awards, like the Fitness Industry Award, set minimum terms and conditions for employees. Compliance ensures employers meet these standards, providing fair pay and entitlements as required by law.

10.1. Understanding Modern Awards

Modern Awards are legally binding documents that outline the minimum pay rates, conditions, and entitlements for employees in specific industries. The Fitness Industry Award is one such modern award, created to ensure fairness and consistency across the sector. It covers various aspects of employment, including wages, allowances, and working hours, tailored to the unique needs of the fitness industry. Employers and employees must adhere to these standards to maintain compliance and avoid legal issues. Understanding modern awards is crucial for both parties to navigate workplace rights and obligations effectively.

10.2. Ensuring compliance with the Fitness Industry Award

Compliance with the Fitness Industry Award requires employers to adhere to its specific requirements, including correct pay rates, allowances, and working conditions. Regularly reviewing the Fair Work Ombudsman’s updates ensures employers stay informed about any changes. Accurate record-keeping of employee hours, wages, and entitlements is essential for audits. Employers should also consult legal or HR experts to interpret complex clauses. Additionally, providing training to staff on award entitlements fosters transparency and avoids disputes. Non-compliance can lead to penalties, making it crucial for businesses to proactively align their practices with the award’s guidelines. This ensures fair treatment of employees and maintains a positive workplace culture.

Resources and Support for Employers and Employees

The Fair Work Ombudsman website offers official resources, including the Pay Guide and Pay and Conditions Tool, to help employers and employees understand their entitlements and obligations under the Fitness Industry Award. Additionally, industry associations and legal experts provide guidance and support to ensure compliance and resolve disputes effectively.

11.1. Official resources for the Fitness Industry Award

The Fair Work Ombudsman provides official resources, including the Fitness Industry Award Pay Guide and the Pay and Conditions Tool, to help employers and employees understand their entitlements. These tools offer detailed information on pay rates, allowances, and compliance requirements. Additionally, the Fair Work Ombudsman website includes fact sheets, templates, and FAQs to address common queries. Employers and employees can also access the full text of the Fitness Industry Award (MA000094) for comprehensive guidance. For further assistance, the Fair Work Infoline is available to provide personalized support.

11.2. Where to seek advice on pay rates and conditions

For guidance on pay rates and conditions under the Fitness Industry Award, consult the Fair Work Ombudsman website. Their Pay and Conditions Tool provides interactive calculations and entitlement details. Additionally, the Award text offers comprehensive insights. For personalized advice, contact the Fair Work Infoline or visit a local office. Employers and employees can also seek assistance from industry associations or legal professionals for specialized guidance. These resources ensure accurate and reliable information to maintain compliance and fairness in the workplace.

russian navy submarines pdf

The Russian Navy’s submarine fleet is undergoing significant modernization, with advanced vessels like the Yasen-Class showcasing stealth capabilities rivaling Western counterparts, enhancing strategic deterrence and operational versatility.

Overview of the Russian Navy Submarine Fleet

The Russian Navy’s submarine fleet has significantly reduced since the Soviet era, now operating around 56 submarines, emphasizing modernization and strategic nuclear deterrence capabilities to ensure national security.

1.1. Historical Development of Russian Submarines

The Russian submarine fleet traces its roots to the Soviet era, when it was a dominant force with over 240 vessels. From 1956 to 1970, the USSR commissioned 290 submarines, establishing a robust naval presence. Post-Soviet economic challenges led to a significant reduction in fleet size, with only 56 submarines in service today. Historical milestones include the introduction of nuclear-powered submarines in the 1950s and advanced classes like Akula and Oscar-II. Recent developments, such as the deployment of mini-submarines for special operations, highlight Russia’s ongoing commitment to submarine innovation and strategic maritime capabilities.

1.2. Current Submarine Fleet Composition

The Russian Navy operates a mixed fleet of nuclear and conventional submarines, with approximately 56 vessels, down from the Soviet-era peak of 240. Key classes include the Yasen-Class, Akula-Class, Oscar-II-Class, Borei-Class, and Kilo-Class submarines. These vessels serve various roles, from strategic deterrence with ballistic missile submarines (SSBNs) to multi-role attack submarines (SSNs); The fleet also includes special purpose submarines and mini-submarines for covert operations. Modernization efforts have introduced advanced stealth technology and improved weaponry, ensuring the fleet remains capable despite its reduced size, with ongoing deployments in regions like the Black Sea and Pacific Fleet.

1.3. Strategic Importance of Submarines in the Russian Navy

Russian submarines play a critical role in strategic deterrence, providing the capability to launch nuclear ballistic missiles and conduct covert operations. They are central to Russia’s naval power, ensuring a second-strike capability and reinforcing national security. Submarines also enable the Russian Navy to project power globally, supporting anti-submarine warfare and special operations. Their strategic importance is underscored by recent deployments in the Black Sea and Pacific Fleet exercises, demonstrating their versatility in safeguarding Russian interests and maintaining regional influence. Modernized fleets, such as the Yasen-Class, highlight their enduring relevance in Russia’s military strategy.

Classes and Types of Russian Navy Submarines

Russia operates a diverse fleet of submarines, including Yasen-Class, Akula-Class, Oscar-II-Class, Borei-Class, and Kilo-Class, each designed for specific roles like multirole missions, nuclear deterrence, and anti-submarine warfare.

2.1. Yasen-Class Submarines

The Yasen-Class submarines represent the pinnacle of Russian submarine technology, featuring advanced stealth capabilities and multirole functionality. Equipped with supersonic cruise missiles and torpedoes, these submarines are designed to engage both surface and underwater targets. Their quiet propulsion systems make them highly effective in strategic operations. The Yasen-Class is a key component of Russia’s naval modernization, enhancing the country’s ability to project power on the global stage while maintaining a strong deterrent presence.

2.2. Akula-Class Submarines

The Akula-Class submarines are a cornerstone of the Russian Navy, serving as multirole nuclear-powered attack submarines. Known for their advanced sonar systems and weapon payloads, these submarines are capable of engaging surface ships, submarines, and land targets. Deployed primarily in the Northern and Pacific Fleets, the Akula-Class plays a critical role in Russia’s maritime strategy, ensuring its presence in strategic regions. Their operational versatility and reliability make them a key asset in maintaining naval dominance and deterrence capabilities.

2.3. Oscar-II-Class Submarines

The Oscar-II-Class submarines are a series of Russian Navy anti-ship submarines equipped with P-700 Granit missiles. Introduced in the 1980s, these submarines were designed to counter NATO carrier strike groups. With a length of over 500 feet, they are among the largest attack submarines in the world. Equipped with advanced sensors and weapon systems, Oscar-II-Class submarines remain operational, with some undergoing modernization to maintain their effectiveness. Their speed, endurance, and firepower make them a formidable component of Russia’s naval capabilities, ensuring their continued relevance in modern maritime operations.

2.4. Borei-Class Submarines

The Borei-Class submarines represent Russia’s latest generation of strategic nuclear-powered ballistic missile submarines. Designed to replace the aging Delta-III and Typhoon-Class submarines, the Borei-Class serves as the backbone of Russia’s naval nuclear deterrent. These submarines are armed with up to 16 Bulava intercontinental ballistic missiles, providing a robust second-strike capability. The Borei-Class features advanced stealth technology, enhanced maneuverability, and improved survivability, ensuring their effectiveness in strategic deterrence. With a focus on reliability and operational readiness, these submarines are critical to maintaining Russia’s nuclear triad and global naval influence.

2.5. Kilo-Class Submarines

The Kilo-Class submarines are advanced diesel-electric attack submarines widely used by the Russian Navy for anti-submarine and anti-surface warfare. Known for their exceptional stealth and endurance, these submarines are equipped with torpedoes, mines, and anti-ship missiles. Improved Kilo-Class variants feature enhanced acoustic quieting and weapon systems, making them highly effective in littoral and deep-water operations. Deployed across various fleets, including the Black Sea, they play a critical role in Russia’s naval strategy. Despite their age, ongoing modernization efforts ensure their relevance in contemporary naval warfare, solidifying their importance in the Russian Navy’s operational capabilities.

Modernization and Upgrades

Russia’s submarine modernization focuses on enhancing stealth, propulsion, and weaponry, aiming to counter Western advancements and maintain strategic dominance, with significant funding allocated for technological improvements.

3.1. Modernization Initiative Overview

The Russian Navy’s submarine modernization initiative aims to enhance its strategic capabilities by replacing aging Soviet-era vessels with advanced submarines. This effort focuses on improving stealth, propulsion systems, and weaponry to maintain strategic relevance. Key projects include the Yasen-Class and Borei-Class submarines, which feature quiet propulsion and advanced missile systems. Economic challenges have slowed progress, but recent funding increases have revitalized the program. The initiative also addresses maintenance and technological gaps, ensuring the fleet remains competitive. These upgrades are critical for Russia to project power and deter threats, aligning with its broader naval strategy for global influence.

3.2. Stealth Technology Advancements

Russia’s submarine modernization emphasizes stealth technology to counter adversaries’ detection capabilities. The Yasen-Class submarines feature anechoic coatings and streamlined hull designs to reduce acoustic signatures, enhancing their ability to operate undetected. Additionally, advanced propeller designs and noise-reducing materials minimize vibrations, making these vessels among the quietest in the world. These advancements enable Russian submarines to evade detection, improving their strategic effectiveness in both offensive and defensive roles. Such technological improvements are crucial for maintaining Russia’s naval competitiveness and ensuring its submarines remain viable deterrents in modern underwater warfare scenarios.

3.3. Nuclear Submarine Propulsion Systems

Russia’s nuclear-powered submarines utilize cutting-edge propulsion systems, enhancing endurance and operational range. Advanced reactors provide greater energy efficiency and quieter operation, reducing detection risks. These systems enable submarines to stay submerged longer, conduct longer missions, and maintain strategic readiness. Modernized designs emphasize safety and reliability, addressing past concerns. The improved propulsion systems are integral to Russia’s efforts to maintain a robust nuclear deterrent and ensure its submarines remain competitive in global naval operations, despite economic and technological challenges.

3.4. Missile and Weaponry Upgrades

Russian submarines are equipped with advanced missile and weaponry systems, significantly boosting their combat capabilities. The Yasen-Class submarines now carry the Kalibr-NK cruise missiles, capable of precision strikes against land and sea targets. Additionally, the modernized Akula-Class submarines feature enhanced torpedo systems and anti-submarine warfare capabilities. The integration of hypersonic missiles, such as the Tsircon, is expected to further increase their lethality. These upgrades ensure Russian submarines remain formidable in both offensive and defensive roles, maintaining their strategic relevance in global naval operations and enhancing Russia’s naval deterrence capabilities.

Strategic Deterrence and Operational Roles

Russian submarines play a critical role in strategic deterrence, deploying ballistic missiles and conducting anti-submarine warfare. Their versatile capabilities ensure naval dominance and national security interests globally.

4.1. Ballistic Missile Submarines (SSBNs)

Russian SSBNs, such as the Borei-Class, form the backbone of the navy’s nuclear deterrent. Equipped with intercontinental ballistic missiles like the Bulava, these submarines ensure strategic stability. Their ability to remain undetected and launch missiles from remote locations makes them a critical component of Russia’s nuclear triad. Regular patrols and modernization efforts ensure their readiness, underscoring their role in maintaining global strategic balance. The SSBN fleet remains central to Russia’s national security, providing a reliable second-strike capability and reinforcing its position as a nuclear power.

4.2. Attack Submarines (SSNs)

Russian attack submarines, such as the Yasen- and Akula-Class, are designed for multi-role operations, including anti-submarine and anti-surface warfare. These SSNs are equipped with advanced torpedoes, missiles, and sensors, enabling them to dominate underwater and surface environments. Their stealth technology and maneuverability make them formidable assets for intelligence gathering and special operations. The Yasen-Class, in particular, represents a leap in Russian SSN capabilities, combining versatility with state-of-the-art weaponry. These submarines play a critical role in protecting Russian naval assets and projecting power, ensuring their strategic relevance in both regional and global contexts.

4.3. Special Purpose Submarines

Russia operates a range of special purpose submarines designed for unique missions beyond traditional roles. These include deep-diving submersibles like the Losharik and Paltus, used for underwater research, rescue operations, and intelligence gathering. Some are capable of conducting clandestine missions, such as deploying mini-submarines for sabotage or reconnaissance. These specialized vessels highlight Russia’s ability to adapt submarines for unconventional tasks, enhancing their versatility in strategic operations and maintaining their relevance in modern naval warfare.

4.4. Anti-Submarine Warfare (ASW) Capabilities

Russia’s Anti-Submarine Warfare (ASW) capabilities are integral to its naval strategy, focusing on detecting, tracking, and engaging enemy submarines. The Russian Navy employs a combination of surface ships, aircraft, and submarines to maintain ASW readiness. Key assets include the Il-38 and Tu-142 aircraft for airborne surveillance, while surface ships like the Admiral Gorshkov-class frigates are equipped with advanced sonar and anti-submarine missiles. Additionally, Russian submarines, such as the Akula-class, play a dual role in both attack and ASW missions. These capabilities are critical for safeguarding Russia’s maritime borders and countering potential threats in strategic regions.

Recent Deployments and Activities

Russian submarines have been actively deployed in the Black Sea, Sea of Japan, and near Nord Stream pipelines, conducting missile launches, drills, and strategic patrols to assert presence.

5.1. Submarine Deployments in the Black Sea

Russian submarines, including Improved Kilo-class vessels, have been deployed in the Black Sea, conducting patrols and strategic missions. These deployments underscore Russia’s assertive posture in the region, enhancing its naval presence and capability to project power. The submarines are equipped with advanced weaponry, enabling them to perform a variety of tasks, from reconnaissance to combat operations. These activities reflect Russia’s ongoing efforts to maintain influence in the Black Sea and ensure maritime security in strategic areas.

5.2. Pacific Fleet Drills and Missile Launches

The Russian Navy’s Pacific Fleet has conducted extensive drills in the Sea of Japan, showcasing its operational readiness. Submarines, including the Ufa-class, have launched cruise missiles during these exercises, demonstrating their strategic capabilities. These drills highlight the fleet’s ability to project power and maintain maritime security in the Asia-Pacific region. The operations also underscore Russia’s commitment to modernizing its submarine forces, ensuring they remain a formidable component of its naval strategy. Such activities reinforce the Pacific Fleet’s role in safeguarding Russian interests and deterring potential threats in the region.

5.3. Submarine Activity in the Sea of Japan

Russian submarine activity in the Sea of Japan has increased, with reports of missile launches during Pacific Fleet drills. The Ufa-class submarine, noted for its stealth capabilities, participated in these exercises, demonstrating operational readiness. Such activities highlight the Russian Navy’s ability to project power in the region and maintain a strategic presence. These operations are part of broader efforts to ensure maritime security and deter potential threats, showcasing the Pacific Fleet’s role in advancing Russian naval interests in the Asia-Pacific area.

5.4. Mini-Submarine Operations at Nord Stream Pipelines

The Russian Navy is believed to have operated mini-submarines near the Nord Stream pipelines days before the 2022 explosions, according to German reports. These operations likely involved espionage, sabotage, or environmental monitoring. While Russia denies involvement, the incident underscores the navy’s capabilities in underwater operations. The use of mini-submarines highlights their versatility in strategic missions, raising concerns about their potential role in future conflicts or infrastructure disruptions. This activity has sparked international scrutiny, emphasizing the significance of submarine operations in modern naval strategy and geopolitical tensions.

Challenges and Limitations

Economic constraints, aging submarines, and technological gaps hinder the Russian Navy’s modernization efforts, while international sanctions further complicate maintenance and fleet expansion initiatives.

6.1. Economic Constraints and Funding Issues

Economic challenges have significantly impacted the Russian Navy’s submarine modernization efforts. Reduced funding due to financial difficulties and sanctions has delayed critical shipbuilding programs. The high cost of advanced submarines, such as the Yasen-Class, strains budgets, limiting the number of vessels that can be built. Additionally, economic sanctions have disrupted supply chains, affecting the import of essential components. These financial constraints have forced the navy to prioritize projects, leading to delays in delivering new submarines, such as the Lada-Class, which faced setbacks due to funding issues. Such economic limitations hinder the fleet’s ability to expand and modernize effectively.

6.2. Aging Submarine Fleet and Decommissioning

The Russian Navy faces challenges with an aging submarine fleet, as many vessels are nearing or exceeding their operational lifespans. Decommissioning rates have accelerated, particularly for older Soviet-era submarines, reducing the fleet’s size significantly. The navy operates approximately 56 submarines today, down from 240 in the late Soviet era. Maintenance and upkeep of aging vessels strain resources, while newer submarines, like the Improved Kilo-Class, continue to serve despite operational demands. This aging fleet raises concerns about readiness and capabilities, as modernization efforts struggle to keep pace with decommissioning rates.

6.3. Technological Gaps and Maintenance Challenges

Russia’s submarine fleet faces technological gaps, particularly in air-independent propulsion and advanced stealth systems, lagging behind Western navies. Maintenance challenges are exacerbated by limited funding, impacting the upkeep of aging vessels. The Lada-Class, for instance, has faced delays due to technical issues, highlighting struggles in modernizing capabilities. These shortcomings affect operational readiness and the navy’s ability to maintain a competitive edge, despite efforts to prioritize smaller, multirole designs. Such challenges underscore the need for sustained investment to address growing maintenance backlogs and bridge technological disparities.

6.4. International Sanctions and Their Impact

International sanctions have significantly impacted Russia’s submarine modernization efforts, restricting access to advanced technologies and components; These measures have disrupted supply chains, delaying projects like the Yasen-Class and Borei-Class submarines. Financial constraints due to sanctions have also limited the navy’s ability to replace aging vessels, further straining operational capabilities. Additionally, sanctions have hindered collaboration with foreign shipyards and technology providers, slowing the development of next-generation submarines. These challenges underscore the long-term effects of sanctions on Russia’s naval ambitions and its ability to maintain a technologically competitive submarine fleet.

Future Prospects and Developments

Russia is advancing its submarine fleet with next-generation designs, focusing on unmanned systems and improved stealth. Initiatives like the Poseidon unmanned underwater system highlight future strategic capabilities.

7.1. Upcoming Submarine Projects and Deliveries

Russia’s submarine fleet is set to expand with advanced vessels. The Yasen-Class submarines, built at Sevmash Shipyard, are expected to see continued deliveries through the late 2020s. Additionally, the Borei-Class strategic submarines, including the improved Borei-A variant, are undergoing trials and will bolster the navy’s nuclear deterrent; The Lada-Class diesel-electric submarines are also anticipated to join the fleet, enhancing Russia’s conventional submarine capabilities. Special-purpose submarines, such as the Belgorod and Khabarovsk, are nearing operational readiness, offering unique strategic roles. These projects underscore Russia’s commitment to modernizing its submarine fleet for future naval dominance.

7.2. Advancements in Autonomous Underwater Vehicles (AUVs)

Russia is actively developing Autonomous Underwater Vehicles (AUVs) to enhance its submarine fleet’s capabilities. These unmanned systems are designed for reconnaissance, mine countermeasures, and environmental monitoring. The Klavesin-2M AUV, for instance, has been deployed for deep-water operations, showcasing improved navigation and endurance. Additionally, the development of the Nemo and Bester AUVs highlights Russia’s focus on advancing underwater robotics. These systems complement traditional submarines, enabling real-time data collection and expanding operational flexibility in strategic and special missions, ensuring the Russian Navy remains competitive in underwater warfare and exploration.

7.3. Integration of Unmanned Underwater Systems

The Russian Navy is integrating unmanned underwater systems to enhance its submarine operations. These systems, including AUVs like the Klavesin-2M, enable real-time data collection for reconnaissance, mine countermeasures, and environmental monitoring. By integrating AUVs with manned submarines, Russia aims to improve situational awareness and operational flexibility. This synergy allows for more precise targeting and reduced risk to crewed vessels. The incorporation of unmanned systems also supports special missions, such as covert operations and deep-sea exploration, modernizing the fleet’s capabilities and ensuring it remains competitive in maritime warfare and strategic deterrence.

7.4. Strategic Plans for Submarine Fleet Expansion

Russia plans to expand its submarine fleet with advanced capabilities, focusing on nuclear-powered and stealth technologies. The Yasen-Class and Borei-Class submarines are central to these plans, aimed at replacing aging Soviet-era vessels; The navy seeks to enhance strategic deterrence and improve its ability to operate in multi-domain conflicts. New submarine projects, including next-generation designs, are prioritized to ensure technological parity with global competitors. Despite economic challenges, funding allocated under GPV 2020 has supported these initiatives, ensuring the Russian Navy maintains a formidable underwater presence and capability to project power in key maritime regions.

Comparative Analysis with Global Submarine Forces

Russia’s submarine fleet is increasingly comparable to Western navies, with the Yasen-Class rivaling US submarines in stealth and technology, bolstering its global strategic deterrence capabilities.

8.1. Comparison with US Navy Submarines

The Russian Navy’s Yasen-Class submarines are increasingly comparable to US Fast Attack Submarines, with advanced stealth capabilities and propulsion systems. While the US maintains numerical superiority, Russia’s focus on modernizing its fleet with technologically advanced submarines has narrowed the gap. The Yasen-Class, in particular, rivals US submarines in terms of quiet operations and firepower, making it a formidable asset. However, the US Navy’s broader operational experience and global deployment capabilities remain unmatched. This comparison highlights Russia’s efforts to challenge US dominance in underwater warfare through strategic modernization and technological advancements.

8.2. Russian Submarines vs. NATO ASW Capabilities

Russian submarines, particularly the Yasen-Class, pose a significant challenge to NATO’s anti-submarine warfare (ASW) capabilities due to their advanced stealth technology and quiet propulsion systems. While NATO has invested in improving its ASW technologies, the decline in related capabilities since the Cold War has left gaps in detecting and neutralizing modern Russian submarines. The resurgence of Russian underwater activity has prompted NATO to strengthen its ASW strategies, emphasizing international cooperation and advanced sensor systems. This evolving dynamic underscores the strategic importance of underwater warfare in shaping global naval security and deterrence capabilities.

8.3; Technological Parity and Modernization Efforts

Russia’s submarine modernization efforts have narrowed the technological gap with Western navies, particularly in stealth and propulsion systems. The Yasen-Class submarines now rival U.S. Fast Attack Submarines in quietness and lethality. Investments in advanced sonar, missile systems, and autonomous capabilities highlight Russia’s focus on achieving technological parity. However, economic constraints and maintenance challenges remain significant hurdles. Despite these limitations, Russia’s commitment to modernizing its submarine fleet underscores its determination to maintain a competitive edge in underwater warfare, ensuring its naval forces remain a formidable presence on the global stage.

Russia’s submarine fleet remains a critical component of its naval strategy, with modernization efforts enhancing its strategic deterrence capabilities and implications for global naval security dynamics.

9.1. Summary of Key Findings

The Russian Navy’s submarine fleet has undergone significant modernization, with advancements in stealth technology and missile systems enhancing its strategic deterrence capabilities. Despite economic challenges, the fleet remains a critical component of Russia’s naval power, with submarines like the Yasen-Class demonstrating parity with Western counterparts. Recent deployments in strategic regions highlight their operational versatility, while ongoing projects signal future expansion. However, aging vessels and maintenance issues pose challenges, underscoring the need for sustained investment to maintain its role as a near-peer competitor in global naval security.

9.2. Implications for Global Naval Security

The modernization of Russia’s submarine fleet poses significant implications for global naval security, as advanced vessels enhance Moscow’s ability to project power and deter adversaries. The Yasen-Class submarines, with their stealth capabilities, challenge NATO’s anti-submarine warfare effectiveness, potentially disrupting the balance in strategic waterways. Increased deployments in critical regions like the Black Sea and Pacific underscore Russia’s intent to expand its influence. These developments necessitate enhanced vigilance and cooperation among NATO allies to counter emerging threats and maintain maritime stability in key operational theaters.

9.3. Future Outlook for Russian Submarine Fleet

Russia’s submarine fleet is expected to continue its modernization trajectory, with a focus on stealth technology and strategic capabilities. Upcoming projects, including new Yasen-Class deliveries, aim to bolster the navy’s nuclear deterrent and operational versatility. Integration of autonomous systems and advanced weaponry will likely enhance their effectiveness. However, economic constraints and aging vessels remain challenges. Despite these hurdles, Russia’s submarine modernization efforts suggest a commitment to maintaining its role as a key naval power, ensuring continued relevance in global maritime security dynamics.

jlab sport earbuds manual

Welcome to the JLab Sport Earbuds manual! This guide provides essential information to help you understand and maximize the features of your earbuds, ensuring optimal performance and longevity.

Overview of JLab Sport Earbuds

The JLab Sport Earbuds are designed for active lifestyles, offering a perfect blend of comfort, durability, and high-quality sound. These wireless earbuds feature sweat and water resistance, making them ideal for workouts and outdoor activities. With their lightweight design and secure fit, they stay in place during intense movements. The earbuds support advanced audio features like EQ settings and active noise cancellation, providing an immersive listening experience. Battery life is impressive, offering up to 52 hours of playtime, or 42 hours with ANC enabled. Equipped with intuitive touch controls and seamless Bluetooth connectivity, these earbuds are built to keep up with your dynamic routine.

Importance of the Manual

The JLab Sport Earbuds manual is a crucial resource for users to unlock the full potential of their device. It provides detailed instructions on pairing, charging, and troubleshooting, ensuring seamless operation. The manual also highlights key features like EQ settings, active noise cancellation, and water resistance, helping users customize their experience. By following the guidelines, users can maintain battery health and prevent damage, extending the earbuds’ lifespan. Additionally, the manual offers insights into resolving common issues, such as connection problems or audio discrepancies, ensuring uninterrupted enjoyment. Whether you’re a new or experienced user, this guide is essential for maximizing functionality and satisfaction.

Design and Build Quality

The JLab Sport Earbuds feature a sleek, durable design with sweat and water resistance, perfect for active use. The charging case is compact and lightweight, ensuring portability.

Key Features of JLab Sport Earbuds

The JLab Sport Earbuds are designed with cutting-edge features for a seamless listening experience. They offer touch sensors for intuitive control, allowing users to manage music, calls, and voice assistants with ease. Equipped with advanced EQ settings, these earbuds deliver tailored sound quality to suit different preferences. The inclusion of active noise cancellation (ANC) ensures an immersive audio experience by minimizing ambient noise. With a focus on durability, they are sweat and water-resistant, making them ideal for workouts and outdoor activities. Additionally, the earbuds provide extended battery life, with up to 52 hours of playtime, and rapid charging capabilities for quick power-ups. These features combine to make the JLab Sport Earbuds a versatile and reliable choice for everyday use.

Water and Sweat Resistance

The JLab Sport Earbuds are designed to withstand tough workouts and outdoor activities, featuring water and sweat resistance to ensure reliability in various conditions. With an IP55 rating, they are protected against dust and moisture, making them ideal for fitness enthusiasts. The earbuds are built to endure sweat and accidental splashes, providing durability during intense exercises. However, it’s important to note that the charging case is not water-resistant, so care should be taken to keep it dry. Regular cleaning is recommended to maintain performance and prevent damage from sweat buildup. This feature enhances the earbuds’ versatility, allowing users to enjoy uninterrupted audio during workouts or in rainy environments. Proper maintenance ensures long-term functionality and sound quality.

Features and Specifications

The JLab Sport Earbuds offer premium sound quality, long battery life, and robust Bluetooth connectivity. They feature customizable EQ settings, touch controls, and water resistance for active lifestyles.

Sound Quality and EQ Settings

The JLab Sport Earbuds deliver crystal-clear sound with deep bass and balanced highs, ensuring an immersive listening experience. Users can customize their audio preferences with multiple EQ settings, such as Signature, Balanced, and Bass Boost modes, directly through the JLab Audio app. This feature allows for tailored sound that suits various music genres or personal preferences. The earbuds also support high-quality audio codecs, enhancing sound fidelity. Whether you’re enjoying music, podcasts, or calls, the sport earbuds provide clear and distortion-free audio. These customizable options make the JLab Sport Earbuds versatile for different listening needs and environments, ensuring optimal sound quality at all times.

Battery Life and Charging Times

The JLab Sport Earbuds offer impressive battery life, delivering up to 52 hours of playtime on a single charge. With active noise cancellation enabled, the battery life is reduced to 42 hours. The earbuds charge quickly, requiring approximately 2 hours for a full charge. A quick 15-minute charge provides up to 2 hours of playback, making them ideal for on-the-go use. The charging case supports wireless charging and stores enough power for up to 5 additional charges, extending total playtime to 260 hours. This long-lasting battery ensures uninterrupted listening sessions, whether you’re working out, traveling, or enjoying your favorite tracks.

Active Noise Cancellation (ANC)

The JLab Sport Earbuds feature advanced Active Noise Cancellation (ANC), designed to immerse you in pure sound by blocking out ambient noise. This technology is perfect for workouts, commutes, or focus-intensive tasks. ANC can be toggled on or off with a simple tap on the touch sensors, allowing you to switch between immersive sound and environmental awareness. The earbuds use dual microphones to detect and cancel external noise effectively, ensuring a distraction-free listening experience. With ANC enabled, the battery life is optimized to provide up to 42 hours of continuous playback, making these earbuds a versatile choice for everyday use. This feature enhances sound quality and user convenience, making it a standout attribute of the JLab Sport Earbuds.

Charging and Battery Management

Efficiently manage your JLab Sport Earbuds’ battery life by following proper charging practices. The charging case provides multiple charges on the go, ensuring uninterrupted listening. Always charge via the provided USB cable and avoid overcharging to maintain battery health. Store the earbuds in the case when not in use. Regularly clean the charging ports to prevent connectivity issues. Monitor battery levels using indicator lights and recharge when necessary. Proper care extends the lifespan of your earbuds, keeping them ready for your next adventure. This section guides you to optimize charging and maintain peak performance.

How to Charge the Earbuds

To charge your JLab Sport Earbuds, place them in the charging case, ensuring they align with the internal connectors. Connect the case to a USB port using the provided cable. The earbuds will automatically begin charging, with LED indicators showing the charging status. A full charge typically takes about 2-3 hours, providing up to 10 hours of playtime. Avoid overcharging, as it may affect battery longevity. When charging, keep the case away from moisture and extreme temperatures. Always use the original cable for optimal charging performance. Proper charging habits ensure your earbuds remain ready for use, delivering consistent audio quality and reliable battery life.

Charging Case and Battery Life

The JLab Sport Earbuds come with a compact charging case that provides multiple charges on the go. The case itself has a built-in battery, offering up to 4-5 full charges for the earbuds. With a fully charged case, you can enjoy up to 52 hours of total playtime, depending on usage and settings like ANC. The case charges via USB-C, reaching full power in about 2-3 hours. The earbuds themselves hold up to 10 hours of battery life per charge. The case features LED indicators to show its charge status, ensuring you never run out of power unexpectedly. This combination of portability and extended battery life makes the JLab Sport Earbuds ideal for long workouts, travel, or daily use.

Best Practices for Battery Health

To maintain the battery health of your JLab Sport Earbuds, follow these guidelines. Avoid extreme temperatures and keep the earbuds dry. Charge the case and earbuds regularly but avoid overcharging—ideally, unplug once fully charged. Store the earbuds in the case when not in use to prevent drained batteries. Clean the charging ports occasionally to ensure proper connection. For long-term storage, charge the earbuds to about 50% before storing. Replace the earbuds in the case correctly to ensure proper charging. By adhering to these practices, you can extend the lifespan of your earbuds’ battery and ensure consistent performance over time. Proper care will keep your JLab Sport Earbuds functioning optimally.

Pairing and Connectivity

Pair your JLab Sport Earbuds by removing them from the case and selecting them in your device’s Bluetooth settings. A blinking light indicates pairing mode is active.

Bluetooth Pairing Process

To pair your JLab Sport Earbuds, start by enabling Bluetooth on your device. Remove the earbuds from the charging case, and they will automatically enter pairing mode, indicated by a blinking light. Open your device’s Bluetooth settings and select “JLab Sport” from the list of available devices. Once connected, you’ll hear a voice prompt or see a solid light to confirm the connection. For subsequent use, the earbuds will auto-connect to your device when removed from the case. If pairing issues occur, reset the earbuds by tapping one earbud seven times while in the case. This ensures a fresh connection and resolves most Bluetooth-related problems.

Troubleshooting Connection Issues

If your JLab Sport Earbuds experience connection issues, start by resetting them. Place the earbuds in the charging case and forget the “JLab Sport” device from your Bluetooth settings; Next, quick-tap one earbud seven times while it’s in the case to reset it. Remove the earbuds and attempt pairing again. Ensure your device’s Bluetooth is enabled and that the earbuds are not connected to another device. If problems persist, restart your device and charge the earbuds for at least 30 minutes. These steps should resolve common connectivity problems and ensure a stable Bluetooth connection for uninterrupted use.

Resetting the Earbuds

Resetting your JLab Sport Earbuds is a simple process to resolve connectivity issues or prepare them for a new device. Start by placing the earbuds in the charging case. Open your device’s Bluetooth settings and forget the “JLab Sport” connection. Next, locate one of the earbuds in the case and perform a quick tap seven times on it. This action will reset the earbuds to their factory settings. Once reset, remove the earbuds from the case, and they will automatically enter pairing mode. Ensure your device’s Bluetooth is enabled to reconnect. Resetting ensures a clean connection and resolves common pairing or disconnection problems.

Controls and Functionality

The JLab Sport Earbuds feature intuitive touch sensors for seamless control over music, calls, and voice assistants. Use taps or holds to play/pause, adjust volume, or switch tracks;

Using Touch Sensors

The JLab Sport Earbuds feature intuitive touch sensors for easy control. To use them, gently tap or hold the sensors on either earbud. A single tap plays or pauses music, while a double tap skips to the next track. To adjust volume, tap and hold the left earbud to decrease volume or the right earbud to increase it. For calls, a single tap answers or ends a call, while a double tap rejects an incoming call. You can also activate voice assistants like Siri or Google Assistant by tapping and holding either earbud. Ensure your fingers make contact with the sensor for accurate response. Regularly clean the sensors to maintain functionality. Resetting the earbuds via touch sensors can resolve connectivity issues. Always refer to the manual for updated gesture controls.

Basic Controls for Music and Calls

The JLab Sport Earbuds offer straightforward controls for managing music and calls. To play or pause music, simply tap either earbud once. Skip to the next track by double-tapping the right earbud or the previous track by double-tapping the left. For volume control, tap and hold the right earbud to increase volume or the left to decrease it. For calls, a single tap answers or ends a call, while a double tap rejects an incoming call. Ensure your touch gestures are firm yet gentle for accurate response. Properly cleaning the sensors can enhance control accuracy. These intuitive controls allow seamless music and call management without needing your device.

Customizing Sound Settings

The JLab Sport Earbuds allow you to tailor your audio experience with customizable sound settings. Through the JLab app, you can adjust EQ settings, choosing from predefined options like Signature, Balanced, or Bass Boost to suit your preferences. Additionally, the earbuds feature touch sensors that enable you to cycle through different audio modes, such as ANC on, ANC off, or ambient sound mode. This level of customization ensures you can optimize sound quality for music, calls, or workouts. By exploring these features, you can enhance your listening experience and make the most of your earbuds’ advanced audio capabilities. Proper customization can significantly improve sound clarity and comfort during extended use.

Care and Maintenance

Regularly clean your JLab Sport Earbuds with a soft cloth and avoid exposing them to harsh chemicals or extreme temperatures. Store them properly in the charging case to maintain functionality and extend lifespan.

Cleaning the Earbuds

To maintain your JLab Sport Earbuds’ performance and hygiene, clean them regularly using a soft, dry cloth. Gently wipe away sweat, dirt, or earwax from the surfaces. For stubborn marks, dampen the cloth slightly with water, but avoid using harsh chemicals or submerging the earbuds in liquids. Pay special attention to the touch sensors and sound ports, as debris can affect functionality. For the charging case, use a soft cloth to remove dust or debris from the interior and exterior. Regular cleaning ensures optimal sound quality and prevents damage. Avoid using abrasive materials that might scratch the surfaces. Cleaning your earbuds and case regularly will extend their lifespan and keep them functioning at their best.

Storing the Earbuds Properly

Proper storage is crucial to maintain the performance and longevity of your JLab Sport Earbuds. Always store the earbuds in their charging case when not in use to protect them from dust and physical damage. Ensure the case is dry and free from debris before placing the earbuds inside. Avoid storing the earbuds in tight spaces or extreme temperatures, as this could warp or damage the components. For extended storage, charge the earbuds to about 50% to maintain battery health. Keep the case away from direct sunlight and moisture to prevent degradation. Proper storage habits will help preserve the sound quality, water resistance, and overall functionality of your earbuds.

Avoiding Damage

To ensure your JLab Sport Earbuds remain in optimal condition, avoid exposing them to unnecessary stress or harmful environments. Refrain from bending or twisting the earbuds excessively, as this could damage the internal components. Avoid submerging the earbuds in water beyond their IP rating, as this may compromise their water resistance. Clean the earbuds regularly with a soft cloth to remove dirt and earwax, which can affect sound quality and fit. Avoid using harsh chemicals or abrasive materials that might scratch the surfaces. Additionally, prevent the charging case from being crushed or dropped, as this could harm the internal charging circuitry. By taking these precautions, you can extend the lifespan and maintain the performance of your earbuds.

Warranty and Support

The JLab Sport Earbuds come with a one-year limited warranty, offering protection against manufacturing defects. For support, visit the official JLab website or contact their customer service team for assistance with troubleshooting, repairs, or general inquiries.

Understanding the Warranty

The JLab Sport Earbuds are backed by a one-year limited warranty, covering manufacturing defects in materials and workmanship. This warranty ensures your earbuds are free from defects under normal use. Damage caused by misuse, accidents, or unauthorized modifications is not covered. To claim warranty benefits, contact JLab support with proof of purchase. The warranty period begins from the original purchase date. JLab also offers dedicated customer service to address any concerns or issues. For more details, visit the official JLab website or refer to the warranty section in your manual. This support ensures your earbuds remain reliable and perform optimally throughout their lifespan.

Contacting JLab Support

For any inquiries, troubleshooting, or warranty claims, JLab provides comprehensive support options. Visit their official website and navigate to the support section, where you can find detailed FAQs, user manuals, and contact forms. If you need direct assistance, email support@jlabaudio.com or call their customer service team during business hours. Additionally, JLab’s social media channels are available for quick responses. Ensure to have your earbuds’ serial number and purchase details ready for efficient service. JLab’s dedicated team is committed to resolving your issues promptly, ensuring a seamless experience with your Sport Earbuds.

Downloading the Full Manual

To access the complete manual for your JLab Sport Earbuds, visit the official JLab website. Navigate to the Support section, where you’ll find a dedicated page for downloads. Look for the JLab Sport Earbuds manual or search for your specific model, such as the JBuds Air Sport or Epic Sport ANC. Click the download link to obtain the PDF version, which includes detailed instructions, troubleshooting guides, and specifications. This manual is essential for understanding advanced features and ensuring proper usage. For additional resources, explore the FAQs or product support videos available on the same page.

The JLab Sport Earbuds manual provides a comprehensive guide to unlocking their full potential. Follow the instructions to ensure optimal performance and an enhanced listening experience.

Final Tips for Optimal Use

For the best experience with your JLab Sport Earbuds, ensure a proper fit by trying different ear tips and secure placement. Regularly clean the earbuds to maintain sound quality and prevent damage. Keep the charging case topped up to avoid low battery situations. When pairing, reset the earbuds if connectivity issues arise. Customize your sound settings through the JLab app for a personalized listening experience. Store the earbuds in the case when not in use to protect them from dust and moisture. By following these tips, you’ll enjoy enhanced performance, longer battery life, and a more enjoyable listening experience with your JLab Sport Earbuds.

Exploring Additional Features

The JLab Sport Earbuds offer a range of advanced features to enhance your listening experience. Explore the customizable EQ settings through the JLab app, allowing you to tailor the sound to your preferences. Take advantage of the touch sensors to control music playback, answer calls, or activate voice assistants with ease. For those who prioritize sound quality, the earbuds support multiple audio modes, including balanced, bass boost, or treble-friendly settings. Additionally, the Active Noise Cancellation (ANC) feature helps immerse you in your music or podcasts by minimizing ambient noise. By exploring these features, you can unlock the full potential of your JLab Sport Earbuds and enjoy a personalized audio experience.

kenmore refrigerator model 111.730 manual

Welcome to the Kenmore Refrigerator Model 111.730 Manual, your comprehensive guide to understanding and maintaining your appliance. This manual provides detailed instructions for optimal performance and care.

Overview of the Manual

The Kenmore Refrigerator Model 111.730 Manual is a detailed guide designed to help users understand and maintain their appliance effectively. It covers installation, operation, and maintenance, as well as troubleshooting common issues. The manual also includes safety precautions, warranty information, and parts identification. Available in PDF format, it can be downloaded from Kenmore’s official website or other trusted sources, ensuring easy access to essential information for optimal performance and longevity of the refrigerator.

Importance of Reading the Manual

Reading the Kenmore Refrigerator Model 111.730 Manual is essential for proper installation, operation, and maintenance of your appliance. It provides critical safety guidelines, troubleshooting tips, and warranty details. By understanding the manual, you can optimize performance, prevent issues, and extend the lifespan of your refrigerator. Additionally, it ensures compliance with manufacturer recommendations, helping you make the most of your investment and maintain efficiency.

Key Features of the Kenmore Refrigerator Model 111.730

The Kenmore Refrigerator Model 111.730 features a spacious bottom-freezer design, advanced temperature controls, energy-efficient performance, and a user-friendly ice maker, ensuring optimal storage and convenience.

Design and Capacity

The Kenmore Refrigerator Model 111.730 is a bottom-freezer refrigerator designed for efficient storage. With models like 111.7303 and 111.7330, it offers a spacious interior, adjustable shelves, and ample door storage. Its design maximizes capacity while maintaining a compact footprint, making it ideal for families seeking ample refrigeration space without sacrificing kitchen layout flexibility.

Energy Efficiency and Performance

The Kenmore Refrigerator Model 111.730 is engineered for energy efficiency, featuring advanced cooling systems and eco-friendly designs. It ensures optimal temperature control while minimizing energy consumption. With features like energy-saving modes, it meets modern standards for environmental sustainability. The appliance’s performance is enhanced through smart temperature management, ensuring consistent cooling and freshness preservation for all stored items.

Installation and Setup

Proper installation ensures optimal performance and safety. Follow the manual’s guidelines for unpacking, positioning, and leveling the refrigerator. Ensure correct electrical and water connections for smooth operation.

Unpacking and Preparing the Refrigerator

Carefully unpack the Kenmore refrigerator from its packaging, ensuring no damage occurs. Remove all protective materials and inspect the appliance for any visible defects. Place the refrigerator on a level, sturdy surface, ensuring it remains upright during and after unpacking. Allow the appliance to stand for a few hours before turning it on to prevent compressor damage. Always follow the manual’s guidelines for proper preparation and setup to ensure safety and optimal performance. Save the packaging for potential future moves.

Positioning and Leveling the Appliance

Ensure the floor is level and sturdy to support the refrigerator’s weight. Adjust the appliance’s feet to achieve proper leveling, using a spirit level for accuracy. Check that all four corners are evenly supported to prevent vibration and noise. The doors should align correctly and swing smoothly. Maintain at least 1 inch of space around the refrigerator for proper airflow and ventilation. This ensures optimal performance and prevents overheating.

Connecting Water and Electrical Supply

Connect the water supply line to the refrigerator’s inlet valve, ensuring it is securely attached to prevent leaks. Plug the appliance into a grounded electrical outlet rated for 120 volts. Avoid using extension cords to maintain safety and performance. Follow the manual’s guidelines for proper installation, and consult a professional if unsure. This ensures safe and efficient operation of the ice maker and water dispenser features.

Operating the Refrigerator

Adjust temperature settings for optimal cooling, ensuring compartments are used correctly. Monitor and maintain proper temperatures for fresh and frozen food storage.

Temperature Settings and Controls

The Kenmore Refrigerator Model 111.730 features easy-to-use controls for adjusting temperature settings. Monitor and maintain optimal temperatures for fresh and frozen food storage. The refrigerator compartment typically operates between 37°F and 40°F, while the freezer should be set between 0°F and 5°F. Regularly check and adjust settings to ensure proper cooling and energy efficiency. Refer to the manual for specific guidelines on temperature calibration and maintenance.

Using the Freezer and Refrigerator Compartments

The Kenmore Refrigerator Model 111.730 offers spacious compartments for efficient food storage. The freezer compartment is ideal for preserving frozen items, while the refrigerator section keeps fresh food at the right temperature. Properly organize items to maximize space and access. Regularly clean and maintain both compartments to ensure optimal performance and food safety. Always refer to the manual for specific storage and maintenance tips.

Understanding the Ice Maker and Water Dispenser

The Kenmore Refrigerator Model 111.730 features an ice maker and water dispenser for added convenience. The ice maker automatically produces ice cubes, while the dispenser provides fresh water and ice without opening the door. Ensure the water supply is properly connected and clean the dispenser regularly for optimal performance. Refer to the manual for troubleshooting tips and maintenance guidelines to keep these features functioning smoothly.

Maintenance and Care

Regular maintenance ensures your Kenmore Refrigerator Model 111.730 runs efficiently. Clean the interior, check door seals, and defrost as needed. Schedule routine care to extend its lifespan.

Cleaning the Interior and Exterior

Regular cleaning is essential for maintaining your Kenmore Refrigerator Model 111.730. For the interior, use a mild detergent and warm water to wipe down shelves and walls. Remove all contents and check for food residue or spills. For the exterior, a soft cloth and gentle cleaner will prevent scratches. Avoid harsh chemicals and abrasive cleaners. Frequent cleaning ensures optimal performance and extends the appliance’s lifespan.

Defrosting and Maintenance Schedules

Regular defrosting is crucial for maintaining your Kenmore Refrigerator Model 111.730. Depending on usage, defrost every 3-6 months or when ice buildup exceeds 1/4 inch. Turn off the appliance and allow it to thaw naturally. For maintenance, check door seals for tightness, clean condenser coils annually, and replace water filters every 6 months. Following these schedules ensures efficient performance and prevents potential issues. Always refer to the manual for detailed instructions.

Replacing Water Filters

Regularly replacing the water filter in your Kenmore Refrigerator Model 111.730 ensures clean water and ice. The filter is typically located in the upper right corner of the refrigerator. Turn off the water supply, remove the old filter, and install the new one by twisting it into place. Replace the filter every 6 months or as indicated by the “Replace Water Filter” notification on your display.

Troubleshooting Common Issues

This section helps you identify and resolve common problems with your Kenmore Refrigerator Model 111.730, such as cooling issues, noise, or ice maker malfunctions. Step-by-step solutions are provided.

Identifying and Solving Cooling Problems

Cooling issues with your Kenmore Refrigerator Model 111.730 can often be resolved by checking temperature settings, ensuring proper air circulation, and inspecting door seals. If the fridge isn’t cooling, verify that vents aren’t blocked and the compressor is functioning. For more serious problems, like a faulty compressor or refrigerant leak, professional assistance may be required. Regular maintenance and timely repairs ensure optimal performance and food safety.

Addressing Noise and Vibration Issues

Unusual noises or vibrations from your Kenmore Refrigerator Model 111.730 can often be resolved by ensuring proper installation and leveling. Check for worn-out parts, loose components, or uneven flooring. If the issue persists, inspect the compressor, fan, or evaporator for blockages. Regular maintenance, such as cleaning condenser coils, can also reduce noise. For severe vibrations, consider placing a rubber mat under the appliance to minimize movement.

Resolving Ice Maker and Water Dispenser Malfunctions

If your Kenmore Refrigerator Model 111.730 ice maker isn’t producing ice or the water dispenser is malfunctioning, check the water supply line for kinks or blockages. Ensure the water filter is clean or replaced as needed. Inspect the dispenser switch and ice maker settings to confirm they are operational. If issues persist, consult the troubleshooting section or contact a professional for assistance. Regular maintenance can prevent such malfunctions.

Understanding the Parts and Accessories

The Kenmore Refrigerator Model 111.730 manual details essential parts and accessories like the water filter and ice maker components, available at Sears Parts Direct for easy maintenance.

Identifying Key Components of the Refrigerator

The Kenmore Refrigerator Model 111.730 manual highlights essential components such as the ice maker, water dispenser, shelves, and door seals. These parts ensure efficient operation and proper food storage. The manual provides detailed descriptions and diagrams to help users identify and locate each component easily. This knowledge is crucial for maintenance, troubleshooting, and replacing parts when necessary. Sears Parts Direct offers genuine replacement parts for these components.

Ordering Replacement Parts

To ensure compatibility and performance, order genuine replacement parts for your Kenmore Refrigerator Model 111.730 directly from Sears Parts Direct or the official Kenmore website. Enter your model number to find specific components, such as shelves, door seals, or ice maker parts. Genuine parts guarantee proper fit and functionality. Use the Kenmore manual to identify the correct part numbers for your appliance, ensuring efficient repairs and maintaining its longevity.

Safety Precautions

Always follow safety guidelines to avoid accidents. Keep flammable materials away from the appliance, and ensure proper installation. Never touch electrical components or internal parts without professional assistance.

General Safety Guidelines

Always follow essential safety measures when using the Kenmore refrigerator. Ensure proper installation and avoid placing flammable materials nearby. Keep children away from electrical components and internal parts. Never modify the appliance or use incompatible plugs. Regularly inspect cords and avoid overloading outlets. Follow the manual’s instructions for safe operation and maintenance to prevent accidents and ensure optimal performance.

Child Safety Features

The Kenmore refrigerator includes child safety features to prevent accidental injuries. Door locks and secure latches ensure children cannot access internal components or tamper with settings. These features help protect curious kids from potential hazards. Always engage these locks when not in use to maintain a safe environment for children around the appliance. Regular checks ensure these safety mechanisms remain functional and effective.

Warranty Information

The Kenmore refrigerator model 111.730 is covered by a one-year warranty against defects in material or workmanship when correctly installed and operated. Details are provided in the manual.

Understanding the Warranty Coverage

The Kenmore refrigerator model 111.730 warranty covers defects in material and workmanship for one year from the purchase date. This ensures repairs or replacements are free if issues arise due to manufacturing faults. Proper installation and usage are required for warranty validity. The manual outlines specific terms, conditions, and exclusions to help users understand their coverage thoroughly.

Registering Your Product

Registering your Kenmore refrigerator model 111.730 ensures warranty validation and access to exclusive customer support. Visit the Kenmore website, enter your model number (found in the manual or on the appliance), and provide purchase details. This process helps Kenmore track your product and provide timely assistance. Proper registration is essential for warranty claims and ensures you receive updates or recalls.

Frequently Asked Questions

This section addresses common inquiries about the Kenmore refrigerator model 111.730, covering operation, maintenance, and troubleshooting to ensure optimal performance and user satisfaction.

Common Questions About Operation and Maintenance

This section covers frequently asked questions about operating and maintaining the Kenmore refrigerator model 111.730. Topics include temperature settings, energy efficiency, troubleshooting ice maker issues, addressing noise concerns, and filter replacement. The manual provides clear solutions and maintenance tips to ensure optimal performance and longevity of your appliance.

Troubleshooting FAQs

This section addresses common issues with the Kenmore refrigerator model 111.730, such as cooling problems, unusual noises, and malfunctioning ice makers. It offers step-by-step solutions and DIY fixes to resolve these issues efficiently. The manual also provides guidance on identifying error codes and when to seek professional assistance, ensuring your appliance runs smoothly and effectively.

Downloading the Manual

The Kenmore Refrigerator Model 111.730 manual is readily available for free download on official platforms like the Kenmore website and Sears Parts Direct in PDF format.

Steps to Access the Manual Online

Visit the official Kenmore website or Sears Parts Direct. Enter your model number, 111.730, in the search bar. Select the appropriate manual from the results. Click the download link to access the PDF version. Ensure your device has a PDF viewer installed to open the file. Save or print the manual for easy reference. This process is quick and free, providing instant access to essential information.

Printing and Saving the Manual

Once downloaded, open the PDF manual using a compatible viewer. To print, select the print option and choose your preferred settings. For saving, click the save button and choose a location on your device. Ensure the file is named clearly for easy retrieval. Printed copies can be stored with appliance documentation. This ensures quick access to troubleshooting and maintenance guidelines whenever needed.

Advanced Features and Settings

The Kenmore Refrigerator Model 111.730 offers customizable temperature zones and smart features for enhanced performance. These settings allow for precise control over cooling and energy efficiency.

Customizing Temperature Zones

The Kenmore Refrigerator Model 111.730 allows users to customize temperature zones for optimal food storage. Adjust the settings to maintain ideal temperatures in both the refrigerator and freezer compartments. This feature ensures your groceries stay fresh longer and prevents freezer burn. Use the intuitive controls to set precise temperatures, balancing performance and energy efficiency. Customization options are detailed in the manual, helping you make the most of your appliance’s advanced cooling system.

Using Smart Features (if applicable)

The Kenmore Refrigerator Model 111.730 does not support smart features like Wi-Fi connectivity or app control. However, it offers reliable performance with advanced temperature controls and energy-efficient operation. For smart appliance users, this model focuses on simplicity and traditional functionality. Refer to the manual for detailed instructions on optimizing its standard features and maintaining peak performance.

Energy Efficiency Tips

Maintain optimal energy efficiency by ensuring proper door seals, adjusting temperature settings, and regular defrosting. These practices help reduce energy consumption and prolong appliance life.

Optimizing Energy Consumption

To minimize energy usage, ensure proper door seals to prevent cold air escape. Maintain consistent temperature settings between 37°F and 40°F for the refrigerator and 0°F for the freezer. Regularly defrost the freezer to avoid excessive frost buildup, which can increase energy consumption. Additionally, organize shelves to improve airflow, allowing the appliance to operate more efficiently. These practices help reduce energy costs while maintaining performance.

Understanding Energy-Saving Modes

The Kenmore 111.730 refrigerator features energy-saving modes designed to reduce power consumption. These modes adjust cooling levels based on usage patterns, ensuring efficient operation. By enabling energy-saving settings, you can lower your utility bills while maintaining optimal performance. Regularly check and adjust these settings to maximize energy efficiency without compromising freshness or convenience. Proper use of these modes helps minimize environmental impact while keeping your appliance running smoothly.

The Kenmore 111.730 manual provides essential guidance for optimal appliance performance. By following its instructions, users can ensure energy efficiency, longevity, and satisfaction. Proper maintenance is key to preserving your refrigerator’s functionality and extending its lifespan. Refer to the manual regularly for troubleshooting and care tips to keep your Kenmore refrigerator running smoothly for years to come.

Final Thoughts on Using the Manual

The Kenmore 111.730 manual is an invaluable resource for ensuring your refrigerator operates efficiently and lasts for years. By following its guidelines, you can optimize performance, troubleshoot issues, and maintain proper care. Regularly referring to the manual helps you understand advanced features and address common problems effectively. Keep it handy for quick access to essential information, ensuring your appliance remains in peak condition and continues to meet your needs reliably.

Encouragement for Proper Maintenance

Regular maintenance is key to extending the life of your Kenmore refrigerator. By following the manual’s guidelines, you can ensure optimal performance, reduce energy consumption, and prevent potential issues. Cleanliness, proper temperature settings, and timely filter replacements are crucial. Stay proactive with routine checks and enjoy a reliable, efficient appliance for years to come. Your efforts will pay off in long-term savings and uninterrupted service.

throne of glass pdf book 2

Crown of Midnight, written by Sarah J. Maas, is the second book in the Throne of Glass series, continuing Celaena Sardothien’s journey as the King’s Champion. This installment delves into her dual role, blending loyalty, rebellion, and magic, while exploring themes of betrayal and sacrifice in a gripping fantasy world.

1.1 Overview of the Book

Crown of Midnight, the second installment in the Throne of Glass series, follows Celaena Sardothien as she navigates her role as the King’s Champion. The story explores her dual life of loyalty and rebellion, blending court intrigue with dark magic; Themes of betrayal, sacrifice, and identity emerge as Celaena faces moral dilemmas and hidden threats. The book expands the series’ world-building, introducing new characters and deepening relationships, while maintaining a fast-paced, action-packed narrative that captivates readers with its twists and emotional depth.

1.2 Author and Publication Details

Sarah J. Maas, a renowned fantasy author, wrote “Crown of Midnight,” published by Bloomsbury Publishing in 2013. This book is the second in the Throne of Glass series, continuing Celaena Sardothien’s story. With its compelling narrative and intricate world-building, the novel has garnered widespread acclaim. The print length is 418 pages, and it is available in English. The ISBN-10 is 1619630635, making it easily accessible for readers worldwide. Maas’s writing style captivates fans of young adult fantasy, solidifying her reputation as a masterful storyteller in the genre.

1.3 Relevance to the “Throne of Glass” Series

“Crown of Midnight” serves as a pivotal installment in the Throne of Glass series, expanding on Celaena Sardothien’s character development and the unfolding rebellion against the King of Adarlan. The book introduces crucial plot twists and deepens the series’ lore, making it essential for understanding the subsequent novels. Themes of loyalty, betrayal, and identity are central, setting the stage for the epic conflicts ahead. This book is vital for fans seeking to follow Celaena’s journey and the evolving fantasy world she inhabits.

Plot Summary

Celaena Sardothien, now the King’s Champion, navigates a dangerous web of secrets and rebellion. As she uncovers dark truths, her loyalty is tested, and her past haunts her.

2.1 Celaena Sardothien’s Role as the King’s Champion

Celaena Sardothien, now the King’s Champion, is tasked with eliminating the king’s enemies while navigating the complexities of court life. Her role demands loyalty to the crown, but she secretly works to undermine the king’s authority. As a skilled assassin and spy, she faces moral dilemmas and internal conflicts, struggling to reconcile her duties with her growing sense of rebellion. Her position isolates her, yet it also grants her access to information crucial for her hidden agenda.

2.2 The Mystery of the King’s Orders

The king’s orders are shrouded in mystery, with Celaena tasked to eliminate enemies of the crown. As she executes her duties, she uncovers the ambiguous nature of these commands, questioning their true purpose. The orders often target rebel leaders, but their significance remains unclear, fueling her growing distrust of the monarchy. This ambiguity deepens the tension in her role as Champion, as she navigates between loyalty and rebellion, uncovering secrets that challenge her understanding of the king’s intentions and the kingdom’s fate.

2.3 The Death of Nehemia and Its Aftermath

Nehemia’s tragic death at the hands of an unknown assassin sparks chaos and heartbreak. Celaena, consumed by grief and anger, vows vengeance, leading her to uncover dark secrets about the murder. Her relationship with Chaol fractures as she blames him for failing to protect Nehemia, while her loyalty to the crown wavers. This event becomes a turning point, propelling Celaena toward rebellion and revealing the depth of her connection to her homeland, Eyllwe, and her hidden identity as Aelin Galathynius.

2.4 The Rebellion and Celaena’s Loyalties

Celaena’s loyalty is tested as she secretly aids the rebellion against the king, while publicly serving as his champion. Her dual role creates tension, especially when her actions inadvertently support the rebels. The weight of her deception strains her relationships with Chaol and Dorian, forcing her to confront the moral ambiguity of her choices. This internal conflict highlights her growing allegiance to her homeland, Eyllwe, and sets the stage for her eventual defiance against the crown.

Main Characters

Celaena Sardothien, Chaol Westfall, and Dorian Havilliard navigate a web of loyalty, betrayal, and forbidden alliances in a kingdom torn apart by dark forces and royal intrigue.

3.1 Celaena Sardothien (Aelin Galathynius)

Celaena Sardothien, now known as Aelin Galathynius, is the protagonist whose journey from assassin to leader unfolds in Crown of Midnight. Her dual identity as both the King’s Champion and the rightful heir of Terrasen drives the plot, showcasing her strength and resilience. Her relationships with Chaol and Dorian deepen, while her determination to protect her homeland and uncover hidden truths propels her into a dangerous world of magic and betrayal.

3.2 Chaol Westfall

Chaol Westfall, the Captain of the Guard, plays a pivotal role in Crown of Midnight, balancing his loyalty to the crown with his growing feelings for Celaena. His internal conflict escalates as he struggles with his duty and his conscience, particularly after Nehemia’s death. Chaol’s friendship with Dorian adds depth to his character, while his relationship with Celaena becomes more complex, forcing him to question his allegiances and confront the moral ambiguities of his actions in a world filled with betrayal and deception.

3.3 Dorian Havilliard

Dorian Havilliard, the Crown Prince of Adarlan, is a complex character whose charm and wit hide deeper struggles. His friendship with Chaol and growing feelings for Celaena add layers to his persona. Dorian’s journey explores his internal conflicts, particularly his loyalty to his father and his own moral compass. His bond with Celaena evolves, revealing a deeper connection, while his own secrets and vulnerabilities shape his character, adding depth to the story and highlighting his transformation from a carefree prince to a figure grappling with his destiny.

3.4 Nehemia Ytger

Nehemia Ytger, the princess of Eyllwe, is a strong and wise character who becomes a close friend and ally to Celaena. Her presence brings light and hope, influencing Celaena’s decisions and providing emotional support. Nehemia’s assassination is a pivotal moment, driving Celaena’s quest for justice and revealing deeper layers of loyalty and betrayal. Her memory continues to inspire Celaena, making her a significant figure in the story’s emotional landscape and thematic development.

Themes and Motifs

Loyalty, betrayal, love, and sacrifice intertwine, shaping Celaena’s journey. Identity and self-discovery drive her growth, while the struggle between duty and rebellion fuels the story’s tension and depth.

4.1 Loyalty and Betrayal

Loyalty and betrayal are central themes, as Celaena navigates her role as the King’s Champion while secretly aiding rebels. Her loyalty to the crown is tested by her growing rebellion ties, leading to morally complex decisions. Betrayal strikes when Nehemia is murdered, reshaping Celaena’s alliances and fueling her vengeance. The blurred lines between loyalty and deception drive the story’s tension, highlighting the emotional and ethical struggles of Celaena’s dual identity and her ultimate quest for justice and freedom.

4.2 Love and Sacrifice

Love and sacrifice intertwine as Celaena’s relationships with Chaol and Dorian deepen, creating emotional conflict amidst her dangerous duties. Her bond with Nehemia, cut short by tragedy, fuels her desire for vengeance and highlights the sacrifices made for those she loves. The novel explores how love can both empower and endanger, as Celaena balances romantic feelings with her quest for justice and freedom, ultimately revealing the profound impact of sacrifice on her journey and identity.

4.3 Identity and Self-Discovery

Celaena’s journey in Crown of Midnight is marked by a struggle to reconcile her dual identities as the King’s Champion and the rightful Queen of Terrasen. As she uncovers hidden truths about her past and destiny, she grapples with the weight of her responsibilities and the secrets she keeps. Her growing awareness of her true identity as Aelin Galathynius contrasts with her public role, creating internal conflict and driving her toward self-discovery and eventual rebellion against the crown.

Writing Style and Narrative Techniques

Sarah J. Maas employs descriptive language and multiple perspectives to enhance world-building and character depth, while dialogue drives emotional connections and plot progression in the story.

5.1 Use of Multiple Perspectives

Sarah J. Maas masterfully employs multiple perspectives to deepen character development and enhance suspense. By alternating viewpoints, readers gain insight into Celaena’s internal struggles, Chaol’s loyalty, and Dorian’s hidden truths. This narrative technique allows for a richer exploration of motivations, fostering emotional connections and heightening tension. The interplay of perspectives also reveals the complexity of the world, as characters like Nehemia offer contrasting views on rebellion and duty. This approach keeps readers engaged and invested in the unfolding drama.

5.2 Dialogue and Character Development

The dialogue in Crown of Midnight is crisp and evocative, revealing the depth of characters like Celaena, Chaol, and Dorian. Conversations are laced with tension, humor, and emotional weight, showcasing their unique personalities and relationships. Celaena’s witty banter with Chaol contrasts with her vulnerable exchanges with Nehemia, while Dorian’s charm and introspection are highlighted through his interactions. The dialogue drives character growth, exposing their fears, loyalties, and desires, making them feel vividly real and relatable to readers.

5.3 Descriptive Language and World-Building

Sarah J. Maas employs vivid, immersive descriptions to construct the world of Erilea, with intricate details that bring castles, forests, and cities to life. Her depiction of settings, from the opulent glass castle to the shadowy streets of Rifthold, creates a visually rich experience. The descriptive language also enhances the magical elements, such as ancient spells and mysterious forces, while character appearances and emotions are painted with precision. This masterful world-building draws readers into a realm of wonder and danger, heightening the story’s tension and magic.

Reception and Reviews

Crown of Midnight received widespread acclaim for its gripping narrative, complex characters, and darker, more mature tone. Fans and critics praised its intense plot twists and emotional depth.

6.1 Critical Acclaim

Crown of Midnight garnered widespread critical acclaim for its masterful storytelling and character development. Reviewers praised Sarah J. Maas for deepening the series’ emotional complexity and expanding its magical world. The book debuted as a New York Times bestseller, with many highlighting its darker, more mature tone. Publishers Weekly commended the novel’s ability to balance action, romance, and political intrigue seamlessly. Fans and critics alike celebrated Celaena’s growth and the shocking plot twists that kept readers captivated until the very end.

6.2 Fan Reactions

Fans of the series enthusiastically embraced Crown of Midnight, praising its intense plot twists and deeper character development. Readers connected emotionally with Celaena’s struggles, particularly her grief over Nehemia’s death. The blossoming romance between Celaena and Chaol sparked widespread excitement, while the introduction of new characters and alliances fueled speculation. Online communities buzzed with theories, fan art, and fan fiction, showcasing the book’s impact on the fandom. The novel solidified the series’ place in young adult fantasy enthusiasts’ hearts worldwide.

6.3 Comparisons to the First Book

Crown of Midnight is often praised for its darker, more intense tone compared to Throne of Glass. Fans noted a significant expansion of the world-building and deeper character development, particularly in Celaena’s moral complexity. The sequel introduces higher stakes, political intrigue, and emotional depth, surpassing the first book in complexity. Many critics and readers agree that Crown of Midnight sets a new standard for the series, with its gripping plot and character growth drawing readers further into the realm of Adarlan.

Cultural and Social Impact

Crown of Midnight has significantly influenced the YA fantasy genre, inspiring fan art, cosplay, and vibrant online communities. Its popularity has cemented Sarah J. Maas’s status as a leading author in the genre, fostering a devoted fan base and sparking discussions about strong female protagonists and morally complex storytelling.

7.1 Fan Engagement and Communities

Fans of Crown of Midnight have created vibrant online communities, sharing fan art, cosplay, and fan fiction inspired by the series. Social media platforms are filled with discussions about characters like Celaena and Chaol, while fan sites dedicated to Sarah J. Maas’s work showcase creative interpretations of the story. These engaged fans have helped spread the book’s popularity, fostering a loyal and passionate readership that continues to grow with each new release in the series.

7.2 Influence on the Young Adult Fantasy Genre

Crown of Midnight has significantly influenced the young adult fantasy genre, setting new standards for complex female protagonists and morally ambiguous storytelling. Its success helped popularize the genre, inspiring authors to explore darker themes and intricate world-building. The book’s impact is evident in its loyal fan base and the way it has reshaped expectations for character development and plot twists in modern fantasy literature.

Availability and Downloads

Crown of Midnight is widely available in various formats, including PDF, EPUB, and MOBI. Fans can purchase it officially or access free downloads through trusted platforms.

8.1 Official Purchase Options

Crown of Midnight can be purchased through major retailers like Amazon, Barnes & Noble, and Bloomsbury’s official website. It is available in hardcover, paperback, and e-book formats. Audiobook versions are also accessible on platforms like Audible. Fans can buy the book directly from publishers or trusted online stores, ensuring authenticity and quality. This ensures supporters of the series can enjoy the story legally while supporting the author and publishers.

8.2 Free PDF Downloads and Resources

Free PDF downloads of Crown of Midnight are available on various online platforms, though users should verify the legality and safety of these sources. Websites like ETTRON and Gooread offer free access to the book in EPUB and PDF formats. Additionally, fan-translated versions in languages like Russian can be found on platforms such as Litres. These resources allow readers to explore Celaena’s journey without purchasing, though it’s important to ensure compliance with copyright laws to support the author and publishers ethically.

8.3 Translations and International Availability

Crown of Midnight is widely available in multiple languages, including Russian, Bulgarian, Chinese, Czech, Dutch, Estonian, and others. This ensures global readers can immerse themselves in Celaena’s world. Notably, some translations are created by fans, reflecting the series’ passionate community; The book’s international reach highlights its popularity, making it accessible to fans worldwide who appreciate its intricate storytelling and compelling characters.

baker street alto sax sheet music pdf

“Baker Street Alto Sax Sheet Music PDF” offers musicians a detailed transcription of Gerry Rafferty’s iconic hit‚ featuring the legendary saxophone riff. Perfect for alto sax players‚ this sheet music provides precise notations‚ enabling accurate performance of the song’s memorable melody. Available in various formats‚ including digital downloads and print options‚ it caters to both beginners and experienced saxophonists‚ ensuring a seamless learning and playing experience.

Overview of the Song and Its Popularity

Gerry Rafferty’s Baker Street became an international sensation upon its 1978 release‚ topping charts worldwide and solidifying its place in pop culture. The song’s haunting saxophone riff‚ performed by Raphael Ravenscroft‚ is widely regarded as one of the most iconic in music history. Its unique blend of soulful melodies and introspective lyrics resonated with audiences‚ making it a timeless classic. The track’s enduring popularity is evident in its continued use in films‚ TV shows‚ and covers‚ as well as its consistent streaming success. Baker Street remains a staple of 70s music‚ with its sax riff being a defining element of its lasting appeal.

Importance of Sheet Music for Musicians

Sheet music is an essential tool for musicians‚ providing a visual guide to pitches‚ rhythms‚ and dynamics. For Baker Street‚ it allows saxophonists to accurately replicate the iconic riff and melody. Having access to sheet music ensures precision‚ helping musicians understand the composer’s intent. It also serves as a learning aid‚ enabling players to master complex phrases and improve their technique. Whether for practice or performance‚ sheet music is indispensable for maintaining the song’s integrity and emotional depth. It bridges the gap between composition and execution‚ making it a vital resource for both novice and experienced musicians aiming to perfect their craft.

Why “Baker Street” is a Favorite Among Saxophonists

Baker Street is a beloved choice among saxophonists due to its iconic and haunting saxophone riff‚ which has become one of the most recognizable in pop music history. The song’s melody offers a perfect blend of emotional depth and technical challenge‚ making it both rewarding and enjoyable to play. Its moderate tempo and memorable phrasing allow saxophonists to showcase their tone‚ breath control‚ and expressiveness. Additionally‚ the song’s enduring popularity ensures it resonates with audiences‚ making it a staple in many performers’ repertoires. For both beginners and advanced players‚ Baker Street provides an opportunity to connect with a timeless classic while honing their musical skills.

Background and History of “Baker Street”

“Baker Street‚” released in 1978 by Gerry Rafferty‚ became a global hit‚ topping charts worldwide. Its iconic saxophone riff‚ played by Raphael Ravenscroft‚ remains a timeless classic.

Gerry Rafferty and the Creation of “Baker Street”

Gerry Rafferty‚ a Scottish singer-songwriter‚ wrote and recorded “Baker Street” in 1978. The song became a massive hit‚ reaching number one in multiple countries. Rafferty was inspired by his own life experiences and observations of urban life; The iconic saxophone riff‚ played by Raphael Ravenscroft‚ was a last-minute addition that became the song’s defining feature. Despite its success‚ Rafferty faced legal disputes over royalties and songwriting credits. “Baker Street” remains one of the most recognizable and enduring songs of the late 1970s‚ with its haunting melody and unforgettable sax solo continuing to captivate listeners worldwide.

The Iconic Saxophone Riff and Its Significance

The iconic saxophone riff in “Baker Street” is one of the most recognizable in pop music history; Played by Raphael Ravenscroft‚ it was added at the last minute‚ yet it became the song’s defining feature. The riff’s haunting‚ melancholic tone perfectly complements Gerry Rafferty’s introspective lyrics‚ creating a timeless appeal. Its simplicity and emotional depth have made it a landmark in music‚ with the alto saxophone version being particularly popular among musicians. The riff’s memorability and cultural impact have solidified its place in music history‚ making it a must-learn piece for saxophonists worldwide.

The Song’s Impact on Popular Culture

“Baker Street” has left an indelible mark on popular culture‚ with its saxophone riff becoming synonymous with the late ’70s and early ’80s music scene. The song’s haunting melody and emotional depth have made it a favorite for various media‚ including films‚ TV shows‚ and commercials. Its influence extends beyond its era‚ inspiring countless covers and adaptations. The alto sax version‚ in particular‚ has been widely used in educational materials‚ helping aspiring musicians master the piece. The song’s enduring popularity ensures its continued relevance‚ making it a staple in both retro and contemporary playlists.

Structure and Composition of the Music

The song is composed in the key of C Major with a tempo of 90 BPM‚ featuring a memorable alto sax riff and distinct musical phrasing‚ making it a popular choice for alto sax arrangements.

The Saxophone Solo in “Baker Street”

The saxophone solo in Baker Street is one of the most recognizable in pop history‚ played by Raphael Ravenscroft on an alto saxophone. The solo’s haunting‚ melodic lines captivate listeners and have become synonymous with the song’s identity. Its structure includes an opening solo‚ a middle section‚ and a closing phrase‚ each with distinct phrasing and emotional depth. The sheet music for the solo is widely available‚ offering precise transcriptions of Ravenscroft’s performance. It’s a must-learn piece for alto saxophonists‚ challenging yet rewarding‚ and embodies the essence of the song’s timeless appeal and musical brilliance.

Key and Tempo of the Song

Baker Street is written in the key of E minor‚ with a moderate tempo of approximately 90 beats per minute. This key and tempo provide the foundational structure for the saxophone solo‚ ensuring the melody flows naturally. The sheet music reflects this‚ offering precise notation for pitch and rhythm. Musicians playing the alto saxophone must adhere to this key and tempo to accurately replicate the iconic solo. Understanding and maintaining the correct key and tempo are essential for capturing the emotional depth and groove of the song‚ making it accessible for both practice and performance. This ensures authenticity and connects players to the original recording’s essence.

Breakdown of the Musical Phrases

The Baker Street Alto Sax Sheet Music PDF meticulously breaks down the song into distinct musical phrases‚ enhancing learning and performance. The sheet music outlines the iconic opening riff‚ verses‚ choruses‚ and solos‚ each with precise notations. Musicians can follow the structured phrases to master the melody and rhythm. This clear breakdown aids in understanding the song’s flow‚ from the memorable intro to the emotive solos. By practicing each phrase‚ saxophonists can achieve a polished and authentic rendition of this beloved classic.

Sources for “Baker Street Alto Sax Sheet Music PDF”

Official publishers like Hal Leonard offer digital downloads‚ while platforms like Sheet Music Direct provide PDFs for alto sax. Free downloads are also available online.

Official Publishers and Digital Platforms

Official publishers like Hal Leonard and digital platforms such as Sheet Music Direct offer high-quality Baker Street Alto Sax Sheet Music PDF for purchase. These platforms provide digital downloads‚ ensuring easy access to the music. Many offer interactive features‚ such as transposition and playback‚ catering to different skill levels. For instance‚ Hal Leonard includes PDF files and interactive sheet music‚ allowing users to transpose the piece to their preferred key; Additionally‚ platforms like Virtual Sheet Music provide licensed PDF downloads‚ ensuring legality and quality. Prices vary‚ but most range between $4.99 to $10‚ depending on the publisher and features included.

Free Downloads and Open-Source Resources

Several websites offer free downloads of Baker Street Alto Sax Sheet Music PDF‚ providing accessible options for musicians. Platforms like MuseScore and Scribd host user-uploaded transcriptions‚ often available for free. Additionally‚ open-source repositories and forums share PDF files of the iconic saxophone solo and full arrangements. Some independent arrangers‚ such as Hein Huijskes‚ provide free downloads of their interpretations. While these resources are convenient‚ ensure the quality and accuracy of the sheet music. Many free versions include the full solo and chord progressions‚ making them suitable for practice and performance. However‚ always verify the source to avoid copyright issues and ensure the music is legally shared. These resources are ideal for musicians seeking affordable access to this beloved piece.

Transcriptions and Arrangements for Alto Sax

Various transcriptions and arrangements of Baker Street are available for alto sax‚ catering to different skill levels. Arrangers like Hein Huijskes and Nigel McGill offer detailed transcriptions‚ capturing the original saxophone solo’s essence. These arrangements often include phrasings‚ dynamics‚ and ornaments‚ ensuring authenticity. Some versions are simplified for beginners‚ while others remain faithful to the original‚ challenging even advanced players. Many transcriptions are available as PDF downloads‚ making them easily accessible. These resources help musicians master the iconic riff and perform it with emotional depth‚ preserving the song’s timeless appeal for saxophonists worldwide. They are essential for anyone aiming to recreate the magic of Baker Street on the alto sax.

Downloading and Printing the Sheet Music

To download and print Baker Street Alto Sax Sheet Music PDF‚ visit reputable platforms like Sheet Music Direct or Hal Leonard. Ensure the PDF is high-quality and print-ready‚ with clear notations for a professional performance.

Steps to Access the PDF File

To access the Baker Street Alto Sax Sheet Music PDF‚ visit platforms like Sheet Music Direct or Hal Leonard. Select the desired arrangement‚ such as the “Alto Sax Solo” version by Gerry Rafferty. Complete the purchase or download process‚ then navigate to your account or email for the download link. Click the link to save the PDF file to your device. Ensure the file is high-quality and print-ready. Some platforms offer interactive features‚ such as transposition and playback‚ while others provide MIDI files for additional convenience. Print the sheet music using a high-quality printer for clarity. Always use official sources to ensure copyright compliance and access the most accurate transcription of the iconic saxophone solo.

Software and Tools for Sheet Music Management

Managing Baker Street Alto Sax Sheet Music PDF is streamlined with tools like Adobe Acrobat for viewing and printing. Use Virtual Sheet Music for interactive playback and transposition‚ ensuring the key matches your alto sax. Hal Leonard offers digital tools for enhancing your practice. Additionally‚ MuseScore allows editing and playback‚ while forScore organizes your library efficiently. These platforms integrate seamlessly‚ enabling you to annotate‚ transpose‚ and perform the iconic riff with precision. Utilizing these tools enhances your overall learning and performance experience‚ making it easier to master the timeless melody of Baker Street on your alto sax.

Tips for Printing and Binding the Music

For optimal results when printing Baker Street Alto Sax Sheet Music PDF‚ use high-quality paper (24lb or 28lb) to ensure durability and clarity. Print in portrait orientation at 100% scale to maintain proper formatting. Consider using a laser printer for crisp notation visibility. When binding‚ spiral binding is ideal for easy page turns during performance. If unavailable‚ use a three-ring binder with page protectors to keep the sheets secure and protected. For added convenience‚ include a table of contents or section dividers to quickly locate different parts of the piece. This ensures your sheet music remains organized and performance-ready‚ enhancing your practice and performance experience with the iconic Baker Street sax solo.

Learning to Play “Baker Street” on Alto Sax

Learning to play Baker Street on alto sax is made easier with available sheet music. The PDF includes precise notations‚ tempo‚ and phrasing‚ ideal for all skill levels.

Step-by-Step Guide for Beginners

Beginners can master Baker Street on alto sax by following a structured approach. Start by familiarizing yourself with the sheet music‚ focusing on rhythm and pitch accuracy. Practice the iconic saxophone riff slowly‚ ensuring proper breath control and tone. Break the piece into smaller sections‚ such as the opening melody and chorus‚ and gradually increase tempo. Emphasize phrasing and dynamics to capture the song’s emotional depth. Use online tutorials or backing tracks to refine timing and expression. Regular practice will help build confidence and fluency‚ allowing you to perform this beloved classic with precision and passion.

Advanced Techniques for Experienced Players

Experienced saxophonists can elevate their performance of Baker Street by refining advanced techniques. Focus on subtle vibrato‚ precise dynamic control‚ and nuanced phrasing to capture the song’s emotional depth. Experiment with embellishments‚ such as grace notes or trills‚ while maintaining the iconic riff’s integrity. Study transcriptions of Raphael Ravenscroft’s original solo to master its phrasing and tone. Use software tools to loop challenging sections for detailed practice. Explore alternate fingerings for smoother transitions and improved dexterity. Additionally‚ work on interpreting the melody with your own unique style‚ blending technical precision with artistic expression to create a captivating rendition of this timeless classic.

Practice Routines and Performance Tips

To master Baker Street on alto sax‚ establish a consistent practice routine. Start with slow tempos to refine articulation and intonation‚ gradually increasing speed as confidence grows. Focus on breath control and phrasing to maintain the iconic riff’s smooth‚ haunting quality. Incorporate dynamics and vibrato to add emotional depth. Practice the solo in sections‚ looping challenging phrases to ensure accuracy. Use a metronome to perfect timing and rhythm. Engage in regular warm-ups to improve tone and dexterity. When performing‚ connect with the music’s emotional core‚ allowing your interpretation to shine. Record sessions to track progress and refine your delivery for captivating performances.

The Role of Raphael Ravenscroft

Raphael Ravenscroft’s iconic saxophone performance on Baker Street became synonymous with the song’s identity. His emotive‚ haunting solo elevated the track to timeless classic status‚ leaving a lasting legacy in music history.

The Saxophonist Behind the Legendary Solo

Raphael Ravenscroft‚ a British saxophonist‚ is renowned for his iconic performance on Baker Street. His soulful‚ haunting alto saxophone solo became the song’s defining feature. Ravenscroft’s ability to convey emotion through his instrument captivated listeners worldwide‚ making the track unforgettable. Interestingly‚ he used an alto saxophone he had in his car for the recording‚ which Gerry Rafferty later praised for its perfect fit. Ravenscroft’s contribution not only elevated the song but also left an indelible mark on pop music history‚ solidifying his legacy as one of the most influential saxophonists of all time. His work continues to inspire musicians and remains a cornerstone of saxophone repertoire.

His Contribution to the Song’s Success

Raphael Ravenscroft’s iconic saxophone riff in Baker Street became the song’s defining feature‚ propelling it to global success. His soulful‚ haunting performance added emotional depth‚ making the track unforgettable. The riff’s simplicity and uniqueness resonated with listeners‚ elevating the song to timeless classic status. Ravenscroft’s contribution not only highlighted his skill but also became synonymous with the song’s identity. His work earned significant royalties‚ with the song remaining a staple in popular culture. Ravenscroft’s solo influenced countless musicians‚ showcasing the saxophone’s power in shaping a track’s success. His legacy endures‚ with the riff continuing to inspire and captivate audiences worldwide. His impact on Baker Street remains unparalleled.

Controversies Surrounding the Sax Solo

The saxophone solo in Baker Street sparked controversy‚ particularly regarding authorship and royalties. Raphael Ravenscroft claimed he composed the riff‚ but Gerry Rafferty maintained it was his creation. This dispute led to questions about fair compensation‚ as Ravenscroft reportedly received only £27 for his work. The issue highlighted tensions between session musicians and primary artists over credits and payments. Despite this‚ the solo’s enduring popularity ensures its place in music history‚ with many saxophonists studying and performing it. The controversy underscores the complexities of collaborative creativity and the importance of proper attribution in music production. This debate remains a significant part of the song’s legacy.

Legacy and Impact of “Baker Street”

Baker Street remains a timeless classic‚ influencing countless musicians. Its iconic sax riff is a staple in pop culture‚ inspiring saxophonists worldwide. The song’s enduring success continues to captivate audiences‚ ensuring its lasting legacy in music history.

Enduring Popularity of the Song

Baker Street continues to captivate audiences decades after its release. Its haunting saxophone riff and memorable melody have solidified its place in music history. The song’s timeless appeal lies in its emotional depth and universal relatability‚ making it a favorite across generations. Its influence is evident in contemporary music‚ with many artists drawing inspiration from its iconic structure. The track’s versatility allows it to transcend genres‚ from pop to jazz‚ ensuring its lasting relevance. Even today‚ Baker Street remains a staple in playlists‚ media‚ and performances‚ proving its enduring legacy as a musical masterpiece. Its popularity endures‚ continuing to inspire saxophonists and music lovers alike.

Its Influence on Contemporary Music

Baker Street has left an indelible mark on contemporary music‚ inspiring countless artists and bands. Its iconic saxophone riff has been sampled and reinterpreted in various genres‚ from pop to electronic music. Many modern songs incorporate similar melodic motifs‚ paying homage to its influence. The track’s structure and emotional depth have become a blueprint for crafting memorable solos and hooks. Additionally‚ its success has encouraged the integration of saxophone solos in modern productions‚ reviving the instrument’s prominence in popular music. This timeless influence ensures that Baker Street remains a pivotal reference point for musicians and producers today‚ shaping the sound of future generations.

Royalties and Financial Success

Baker Street has achieved remarkable financial success‚ generating substantial royalties for Gerry Rafferty and his estate. Even decades after its release‚ the song continues to earn approximately £80‚000 annually. The track’s enduring popularity‚ driven by its iconic saxophone riff‚ has led to widespread use in films‚ TV shows‚ and commercials. This consistent exposure has maintained its revenue stream. The availability of sheet music‚ particularly for alto sax‚ further contributes to its financial success‚ appealing to musicians and educators. The song’s timeless appeal ensures ongoing royalties‚ solidifying its place as a lucrative and lasting musical legacy for Rafferty’s estate.

Performance and Interpretation Tips

Mastering the iconic sax riff and conveying emotional depth are crucial. Emphasize precise articulation and breath control for a compelling performance. Adapt the melody to showcase your unique style and connect with the audience on a deeper level.

Mastering the Solo: Challenges and Solutions

Mastering the Baker Street sax solo presents challenges like precise pitch accuracy‚ rhythmic timing‚ and emotional expression. Musicians often struggle with the song’s unique phrasing and extended notes. To overcome these‚ practice slowly with a metronome‚ focusing on intonation and breath control. Record yourself to identify and correct inaccuracies. Use the sheet music as a guide to ensure accuracy‚ especially in the iconic intro and middle solos. Break the solo into smaller sections and gradually build up speed. Emphasize vibrato and tone quality to match the original’s soulful feel. With consistent practice and attention to detail‚ saxophonists can master this beloved solo.

Interpreting the Music with Emotional Depth

Interpreting Baker Street with emotional depth requires connecting with its haunting melody and soulful phrasing. The alto sax sheet music guides musicians to convey the song’s introspective mood through subtle vibrato and dynamic control. Players should focus on expressing the longing and nostalgia embedded in the notes. By varying tone color and phrasing‚ saxophonists can add personal emotion while staying true to the original’s intent. Practicing with recordings and studying Raphael Ravenscroft’s iconic performance can inspire a deeper‚ more heartfelt interpretation‚ making the music resonate powerfully with listeners.

Bringing Your Own Style to the Piece

Bringing your own style to Baker Street involves interpreting the melody with personal flair while respecting its iconic structure. Musicians can experiment with tempo‚ dynamics‚ and phrasing to create a unique rendition. Adding subtle improvisations or modifying the saxophone riff with individualistic embellishments can make the piece distinctly yours. Exploring different articulations‚ such as legato or staccato playing‚ can also add character. Additionally‚ incorporating emotional expression through vibrato and tone color allows for a deeper connection to the music. By balancing creativity with the song’s essence‚ saxophonists can craft a performance that honors the original while showcasing their individuality and artistic voice.

Additional Resources and References

Discover tutorials‚ backing tracks‚ and saxophone communities online to enhance your Baker Street learning experience. These resources offer valuable insights and support for musicians of all levels.

Recommended Tutorials and Lessons

Enhance your learning experience with Baker Street through expert tutorials and lessons. Virtual Sheet Music offers high-quality‚ interactive sheets and playback tools. Hein Huijskes’ arrangement provides an authentic alto sax transcription‚ while Nigel McGill’s step-by-step guide breaks down the solo. Practice routines and performance tips from saxophone educators help refine your technique. Additionally‚ communities like Newbury Sax School share valuable insights and exercises tailored for intermediate learners. These resources ensure a comprehensive approach to mastering the iconic Baker Street saxophone solo‚ catering to both beginners and advanced players seeking to perfect their interpretation.

Backing Tracks and Accompaniment Options

Enhance your practice and performance of Baker Street with high-quality backing tracks and accompaniment options. Sheet Music Direct offers professional arrangements for alto saxophone‚ tenor saxophone‚ and flute‚ ensuring a rich musical experience. Additionally‚ platforms like Virtual Sheet Music provide interactive accompaniments that adapt to your tempo and key preferences. These resources are ideal for both rehearsal and live performances‚ allowing you to refine your tone and timing. Whether you’re playing solo or with an ensemble‚ these backing tracks and accompaniments will elevate your interpretation of the iconic saxophone riff and melody.

Communities and Forums for Saxophonists

Saxophonists can connect with fellow musicians and gain valuable insights through dedicated communities and forums. Platforms like Facebook groups and Reddit forums are bustling with discussions about Baker Street sheet music and saxophone techniques. Websites such as Sax on the Web and specialized music forums offer a wealth of resources‚ including tips‚ sheet music recommendations‚ and performance advice. These communities are perfect for sharing experiences‚ seeking feedback‚ and learning from seasoned players. Additionally‚ online saxophone schools like Newbury Sax School provide structured learning opportunities and access to exclusive materials. Engaging with these communities can enhance your learning journey and performance of Baker Street.

zt735 tire chains fit guide

ZT735 Tire Chains are designed for exceptional traction and durability, offering a reliable solution for driving in snowy and icy conditions. Made from high-quality materials, they ensure superior grip, reducing the risk of skidding and improving overall vehicle control. Their innovative design provides a smooth driving experience while protecting both your vehicle and the road surface. With a comprehensive fit guide, selecting the right chain for your tire size has never been easier, ensuring optimal performance and safety during winter driving.

What Are ZT735 Tire Chains?

ZT735 Tire Chains are high-performance winter traction devices designed to enhance vehicle stability and control on snowy and icy surfaces. Constructed from durable, premium materials, they provide excellent grip and minimize skidding risks. These chains are specifically engineered to fit a wide range of tire sizes, ensuring compatibility with various vehicles. Their innovative design includes a ratcheting system for easy installation and tight fit, making them a reliable choice for drivers seeking improved safety and control during harsh winter conditions.

Types of ZT735 Tire Chains

ZT735 Tire Chains are available in several types to cater to different driving needs. The Standard series offers a balance of durability and affordability, suitable for most passenger vehicles. The Heavy-Duty series is built for larger vehicles like trucks and SUVs, offering enhanced traction in extreme conditions. The Light-Duty series is designed for smaller cars, ensuring ease of installation without compromising on safety. Additionally, there’s an Automatic series that features quick-fit technology, ideal for drivers seeking convenience. Each type is tailored to specific tire sizes and vehicle models, ensuring a perfect fit and optimal performance.

Key Features of ZT735 Tire Chains

ZT735 Tire Chains are crafted from high-quality steel alloy, ensuring durability and resistance to wear. They feature a unique tread pattern that maximizes traction on snowy and icy surfaces. The chains are equipped with a built-in tensioning system, eliminating the need for frequent adjustments. Additionally, they include an anti-slip coating to prevent shifting during driving. Their lightweight design makes them easy to install, while their robust construction ensures long-lasting performance. These chains are also compatible with a wide range of tire sizes, making them a versatile choice for various vehicles. Their innovative design enhances safety and driving stability in harsh winter conditions.

Why Use ZT735 Tire Chains?

ZT735 Tire Chains deliver exceptional traction, enhancing safety and control on snowy and icy roads. Their durable design ensures long-lasting performance, while easy installation makes them convenient for winter driving.

Improved Traction in Snowy Conditions

ZT735 Tire Chains provide superior traction on snowy and icy surfaces, ensuring vehicle stability and control. Their robust design enhances grip, reducing the risk of skidding and sliding, thus improving overall safety. The chains are specifically engineered to maximize contact with the road, offering consistent performance even in extreme winter conditions. This makes them an essential accessory for drivers navigating through harsh, snow-covered terrains, providing peace of mind and reliability during challenging weather situations.

Compliance with Winter Driving Regulations

ZT735 Tire Chains are designed to meet winter driving regulations in regions where snow and ice are prevalent. Many areas require vehicles to use tire chains during extreme weather conditions to ensure public safety. By installing ZT735 chains, drivers comply with these regulations, avoiding potential fines and penalties. Their durability and reliability make them a trusted choice for meeting legal standards while maintaining vehicle performance. This ensures safe passage through regulated zones and adherence to local winter driving laws.

Protection for Sensitive Road Surfaces

ZT735 Tire Chains are crafted to minimize damage to sensitive road surfaces, making them ideal for use in areas with pavement protection requirements. Their unique design distributes vehicle weight evenly, reducing pressure points that can harm roads. This feature is particularly beneficial in urban or environmentally sensitive areas where road preservation is critical. By using ZT735 chains, drivers can maintain traction without compromising road integrity, ensuring safer and more responsible winter driving practices. This balance of performance and protection makes them a preferred choice for eco-conscious and safety-minded drivers.

ZT735 Tire Chains offer a precise fit for various tire sizes, ensuring optimal performance and safety. Their adjustable design accommodates different wheel configurations, providing a secure and even grip on snowy surfaces. With a user-friendly installation process, these chains are ideal for drivers seeking reliable traction without compromising vehicle maneuverability. The fit guide helps determine the correct size, ensuring a seamless and safe winter driving experience tailored to your vehicle’s specific needs.

How to Determine the Correct Size for Your Tires

To ensure a proper fit, start by locating your tire’s size, found on the sidewall or in your vehicle’s owner’s manual. Measure the tire’s diameter and width to match it with the ZT735 chains. Use a compatibility guide or consult the manufacturer’s sizing chart to confirm the correct chain size. Ensure the chains are neither too tight nor too loose, as this can affect traction and safety. Proper sizing ensures optimal performance and prevents damage to both the chains and your vehicle, guaranteeing a secure and stable drive in snowy conditions.

Choosing the Right Chain Type for Your Vehicle

Selecting the right ZT735 Tire Chains involves considering your vehicle type, tire size, and driving conditions. For SUVs and trucks, heavy-duty chains are ideal, while passenger cars may prefer lighter options. Assess whether you need chains for occasional use or frequent winter driving. Consider features like anti-vibration systems for smoother rides or reinforced links for added durability. Always consult the ZT735 fit guide to match your tire specifications and ensure compatibility. Proper chain selection enhances safety, performance, and longevity, making winter driving more manageable and controlled.

Pre-Installation Checks and Preparations

Before installing ZT735 Tire Chains, ensure your vehicle is compatible by consulting the fit guide. Inspect the chains for any damage or wear. Verify that your tire size matches the chain specifications. Lay out the chains flat to avoid tangles and ensure proper fitting. Check that your vehicle has enough clearance for the chains without causing damage. Gather necessary tools like gloves and tensioners. Always install chains on a level surface and ensure the area is clear of obstacles. Proper preparation ensures a safe and efficient installation process.

Step-by-Step Installation Process

Begin by preparing your vehicle and chains. Lay chains flat, ensuring proper alignment. Mount them securely on the tires, then tighten systematically for a snug fit.

Preparing Your Vehicle and Chains

Before installation, ensure your vehicle is parked on a flat, stable surface and apply the parking brake. Check your tire size to confirm chain compatibility. Lay the chains flat to remove any tangles or twists. Inspect the chains for damage or wear, and clean them if necessary. Refer to your vehicle’s manual for specific preparation steps. Gather all necessary tools, such as gloves and tighteners, to ensure a smooth process. Proper preparation ensures a safe and efficient installation of your ZT735 Tire Chains.

Mounting the Chains on the Tires

Start by positioning the ZT735 Tire Chains over the tire, ensuring the chains are centered and the hooks are facing outward. Gently pull the chains taut to cover the tread area evenly. Secure the chains by hooking the ends to the tire’s rim. For dual tires, ensure chains are properly spaced to avoid interference. Tighten the chains by driving forward slightly or using a chain tightener. Check the fit to ensure there’s no loose material that could cause damage or uneven wear. Proper mounting ensures safety and optimal performance on snowy roads.

Tightening the Chains for Optimal Fit

After mounting, move the vehicle forward slightly to settle the chains. Check the tightness by pulling on the chains; they should fit snugly without sagging. Use the provided chain tightener to ensure an even fit, starting from the center and working outward. Avoid over-tightening, as this could damage the chains or tires. Double-check the tension to ensure proper contact with the tread for maximum traction. Properly tightened chains enhance safety and performance, ensuring a secure fit on snowy or icy surfaces.

Safety Precautions and Driving Tips

Always reduce speed when using ZT735 chains, avoiding sudden acceleration or braking. Maintain a safe distance from other vehicles. Use chains only on snowy or icy surfaces to prevent damage. Ensure chains are properly fitted to avoid damage to your vehicle. Never exceed the recommended speed limit with chains installed. Follow local regulations and driving guidelines for safe winter travel.

Maximum Speed Limits with Chains

When using ZT735 tire chains, it is crucial to adhere to maximum speed limits to ensure safety and prevent damage. The recommended speed limit with chains installed is typically between 25-35 mph (40-56 km/h), depending on road conditions and local regulations. Exceeding this limit can lead to reduced traction, chain damage, or loss of control. Always check local guidelines and manufacturer recommendations for specific speed restrictions. Driving at appropriate speeds minimizes risks and ensures optimal performance of the chains in snowy or icy conditions.

Driving Techniques in Snowy Conditions

When driving with ZT735 tire chains, maintain a cautious approach to ensure safety. Reduce your speed significantly, staying below the recommended 30-35 mph limit, to avoid losing control. Increase following distance to allow more time for braking. Avoid sudden acceleration or sharp turns, as these can destabilize your vehicle. Use gentle, gradual movements for steering, braking, and accelerating. Keep your headlights on low beam to improve visibility without blinding others. Always stay alert and keep emergency supplies handy. Proper driving techniques enhance safety and control on snowy or icy roads.

Troubleshooting Common Issues

Check for loose chains and tighten them immediately to avoid poor traction and damage. Inspect for uneven wear, which can affect performance. Ensure proper fit to prevent issues.

Resolving Fit Problems

Addressing fit issues with ZT735 Tire Chains is crucial for optimal performance. Start by double-checking your tire size against the chain’s specifications using the provided fit guide. Ensure the chains are properly aligned and seated on the tire. If they feel too tight or loose, adjust the positioning or consult the user manual for guidance. For persistent issues, consider using a compatibility chart or contacting manufacturer support for personalized assistance. Proper fit ensures safety, traction, and extends the lifespan of both the chains and your tires.

Addressing Chain Damage

If your ZT735 Tire Chains sustain damage, inspect them immediately for broken links, stretching, or corrosion. Replace any damaged sections to maintain performance and safety. For minor issues, tighten loose parts using the provided tools. Apply rust-inhibiting lubricants to prevent corrosion. Store chains properly when not in use to avoid further damage. Regular inspections and timely repairs ensure longevity and reliability, keeping your vehicle secure on snowy roads. Always follow the manufacturer’s guidelines for repairs and maintenance to guarantee optimal functionality.

Maintenance and Storage

Regularly clean and lubricate ZT735 Tire Chains to prevent rust and ensure smooth operation. Store them in a dry, cool place, away from direct sunlight, in a breathable bag to maintain their condition and longevity.

Cleaning and Lubricating the Chains

Cleaning and lubricating ZT735 Tire Chains is essential for maintaining their performance and longevity. Start by brushing off dirt and debris with a stiff brush. Use mild soap and warm water to scrub the chains, ensuring all surfaces are clean. Rinse thoroughly and dry with a clean towel to prevent rust. Apply a rust-inhibiting lubricant to all metal parts, focusing on hinges and links. Regular lubrication ensures smooth operation and protects against corrosion. Re-lubricate after exposure to wet or salty conditions for optimal durability.

Proper Storage to Extend Lifespan

To extend the lifespan of ZT735 Tire Chains, store them in a cool, dry place away from direct sunlight. Use a protective case or breathable bag to keep them clean and dust-free. Allow the chains to air dry completely after cleaning and before storage to prevent rust. Avoid stacking heavy objects on top of the chains, as this can cause deformation. Check for any damage or wear before storing and address issues promptly. Proper storage ensures the chains remain in excellent condition for future use during winter driving.

Frequently Asked Questions

Common questions include compatibility with vehicle types, warranty details, and proper fitment. Users often inquire about installation tips, maintenance, and optimal usage in snowy conditions.

Compatibility with Different Vehicle Types

ZT735 Tire Chains are compatible with a wide range of vehicles, including passenger cars, SUVs, and light trucks. They are designed to fit various tire sizes, ensuring versatility for different models. However, compatibility depends on factors like tire size, load rating, and wheel configuration. It’s essential to consult the fit guide to ensure proper sizing and safe installation. Additionally, some vehicles with advanced systems like ABS or traction control may require specific chain types to maintain functionality. Always check manufacturer recommendations for optimal performance.

Warranty and Manufacturer Support

ZT735 Tire Chains come with a limited warranty that covers manufacturing defects for a specified period. The manufacturer provides dedicated customer support to address queries and concerns. Warranty details vary by region, so it’s important to review the terms and conditions. Additionally, the manufacturer offers resources like installation guides and troubleshooting tips to ensure optimal performance. For any issues, customers can contact the support team directly through phone or email. Proper registration and maintenance are required to uphold warranty validity, ensuring long-term satisfaction and reliability.

ZT735 Tire Chains provide a reliable solution for winter driving, ensuring safety and traction. Their durability and performance make them a top choice for challenging road conditions.

Final Thoughts on ZT735 Tire Chains

ZT735 Tire Chains are an excellent choice for winter driving, offering unmatched traction, durability, and ease of use. Their robust design ensures long-lasting performance, while the fit guide guarantees compatibility with your vehicle. Whether you’re navigating icy roads or deep snow, these chains provide the confidence to drive safely. Their innovative features, such as easy installation and optimal tire protection, make them a top pick for drivers seeking reliability. With ZT735, you can trust your safety on winter roads, making them a worthwhile investment for any driver.

Recommended Resources for Further Reading

For more detailed information on ZT735 Tire Chains, explore the official manufacturer’s website, which offers comprehensive manuals and fit guides. Additionally, instructional videos on YouTube provide step-by-step installation tips. Automotive forums like Reddit and specialized tire chain communities share user experiences and troubleshooting advice. Safety guidelines from the National Highway Traffic Safety Administration (NHTSA) are also essential for understanding proper usage. Visit these resources to enhance your knowledge and ensure safe, effective use of ZT735 Tire Chains during winter driving conditions.

wwe 2k24 trophy guide

Welcome to the WWE 2K24 Trophy Guide! This comprehensive guide helps you unlock all 63 trophies across MyRISE‚ MyFACTION‚ MyGM‚ and more in this epic wrestling game.

Overview of WWE 2K24 and Its Trophy System

WWE 2K24 features a trophy system with 63 achievements‚ including 58 bronze‚ 3 silver‚ 1 gold‚ and 1 platinum trophy. Players can earn these by completing specific tasks across various game modes like MyRISE‚ MyFACTION‚ MyGM‚ and Universe Mode. Some trophies are straightforward‚ while others require significant effort and grind. The system rewards progression‚ storytelling‚ and skill mastery‚ making it a balanced challenge for both casual and dedicated players. This guide covers tips and strategies to unlock every trophy‚ ensuring a smooth journey to the prestigious platinum;

Importance of Completing Trophies for Platinum

Earning the platinum trophy in WWE 2K24 is the ultimate achievement‚ requiring completion of all 63 trophies. This prestigious award symbolizes mastery of the game‚ showcasing dedication and skill. Achieving platinum not only highlights your proficiency in various modes like MyRISE and MyFACTION but also unlocks bragging rights. Each trophy contributes to the journey‚ with challenges designed to test your understanding of gameplay mechanics and storytelling. Completing all trophies ensures a polished profile and a sense of accomplishment‚ making the grind worthwhile for true wrestling gaming enthusiasts.

MyRISE Mode Trophies

MyRISE Mode offers two compelling storylines‚ Undisputed and Unleashed‚ each with unique objectives and trophies. Completing both stories unlocks key achievements‚ including championship wins and pivotal narrative milestones.

Undisputed ⎼ Complete Undisputed MyRISE Story

Earning the Undisputed trophy requires completing the MyRISE story mode‚ where you navigate a compelling narrative filled with challenges and pivotal decisions. This bronze trophy is unlocked by progressing through the story‚ making key choices‚ and achieving specific milestones. One of the critical objectives is defeating Cody Rhodes‚ a showdown that tests your skills and storytelling immersion. Additionally‚ you must make a deal with Dominik‚ a storyline twist that advances your character’s journey. Completing the Undisputed MyRISE story also involves winning the WWE World Heavyweight Championship‚ a crowning achievement that signifies your character’s rise to the top. This mode offers a mix of drama and gameplay‚ making it a rewarding experience for players.

Unleashed ⎼ Complete Unleashed MyRISE Story

Earning the Unleashed trophy involves completing the second MyRISE story mode‚ which offers a unique narrative with its own set of challenges and decisions. This bronze trophy is achieved by progressing through the story‚ completing key objectives‚ and overcoming specific matchups. One of the main requirements is winning the WWE Women’s World Championship‚ showcasing your character’s dominance. Additionally‚ you must defeat The Manifestation‚ a pivotal storyline opponent‚ and stand up for yourself in front of the WWE Universe‚ highlighting your character’s growth and resilience. Completing the Unleashed MyRISE story also involves getting cast in a major motion picture‚ adding a cinematic twist to your journey. This mode provides a fresh and engaging storyline‚ making it a must-play for trophy hunters.

Key Objectives and Tips for MyRISE Trophies

Completing both Undisputed and Unleashed MyRISE stories is crucial for earning trophies. Make strategic choices to shape your character’s journey. Win key matches‚ such as the WWE Women’s World Championship and Undisputed WWE Universal Championship. Defeat pivotal opponents like Cody Rhodes and The Manifestation. Complete optional storylines‚ such as Psycho Sally’s and Dominik’s arcs. Use finishers effectively and avoid relying on Paybacks on higher difficulties. Manage stamina and timing to succeed in mini-games like the Trading Blows mechanic. These tips ensure a smooth path to unlocking trophies like Disputed No More and The Showcase.

MyFACTION Mode Trophies

MyFACTION mode offers various trophies for completing Proving Grounds Towers‚ defeating Faction Wars bosses‚ earning Loyalty Rewards‚ and managing Superstars. Focus on upgrades and challenges to succeed.

Complete a Proving Grounds Tower in MyFACTION

Completing a Proving Grounds Tower in MyFACTION is a key achievement in WWE 2K24. This trophy requires strategic planning and team management. Start by selecting a well-rounded roster of Superstars‚ ensuring a balance of skills and strengths. Upgrade your wrestlers regularly to enhance their abilities and improve your chances of success. Focus on completing challenges within the tower‚ as each victory brings you closer to the top. Pay attention to weekly events and updates‚ as they often provide boosts or unique opportunities. Experiment with different strategies to adapt to tougher opponents. Persistence and smart team management are essential to conquering the Proving Grounds Tower!

Complete 15 Lifetime Challenges in MyFACTION

Earning this trophy requires completing 15 Lifetime Challenges in MyFACTION‚ a silver trophy. Begin with easier challenges to build momentum and upgrade your Superstars. Focus on specific wrestlers suited for each challenge type‚ like technical or powerhouse moves. Regularly check updates for new challenges and plan strategically. Patience is key‚ as this trophy demands time and dedication. Use resources wisely to strengthen your roster and tackle harder challenges later. Stay consistent‚ and you’ll unlock this achievement‚ showcasing your mastery of MyFACTION’s depth and variety.

Defeat 30 Faction Wars Bosses in MyFACTION

Defeating 30 Faction Wars Bosses in MyFACTION is a challenging but rewarding objective. Start by upgrading your Superstars and equipping powerful cards to enhance their abilities. Focus on weaker bosses first to build momentum and resources. Use special moves and paybacks strategically to gain an edge. Regularly update your roster and experiment with different team compositions to counter tough opponents. Consistency is key‚ as this trophy requires repeated victories. Stay patient‚ and with time‚ you’ll reach the 30-boss milestone‚ showcasing your dominance in MyFACTION’s competitive mode.

Earn a Loyalty Reward in MyFACTION

Earning a Loyalty Reward in MyFACTION requires consistent participation and progression. Focus on completing daily and lifetime challenges to accumulate loyalty points. Regularly log in to collect rewards and participate in events to maximize your progress. As you complete specific objectives‚ you’ll unlock exclusive content and bonuses. Stay dedicated‚ as loyalty rewards are granted over time‚ reflecting your commitment to building a dominant faction. This trophy is a testament to your dedication and strategy in MyFACTION mode.

MyGM Mode Trophies

MyGM Mode Trophies reward strategic management and key decisions. Lead your brand to success‚ complete trades‚ and achieve Hall of Fame status to unlock these prestigious achievements.

ENTER THE HoF in FIRST PLACE with ECW

To unlock this trophy‚ play as ECW in MyGM mode with EXTREME AI and GAME difficulties. Lead ECW to Hall of Fame status in first place by managing finances‚ booking matches‚ and maintaining superstar morale. Win championships‚ host profitable events‚ and ensure high ratings to build your brand. Use ECW’s hardcore style to differentiate from competitors. Make strategic trades and upgrades to dominate the wrestling world. Consistently achieving high ratings and championship wins will secure your path to the Hall of Fame with ECW.

Book a Fatal 4-Way Title Match with Immortal Talent

Complete MyGM mode by booking a Fatal 4-Way title match using Immortal Talent. This requires selecting four legendary wrestlers and ensuring the match is for a championship. Set the stipulation to Fatal 4-Way under match rules. Use Immortal Talent to ensure the match features iconic superstars. Win the match to secure the title‚ boosting your brand’s reputation. This trophy highlights your ability to create engaging and historic matches in MyGM mode‚ showcasing your managerial skills and knowledge of WWE history with Immortal Talent.

Boost a Tier 7 Crew‚ Special Effects‚ or Advertisement Logistics

In MyGM mode‚ focus on upgrading your Crew‚ Special Effects‚ or Advertisement Logistics to Tier 7. Earn in-game currency by successfully booking shows and events. Allocate funds to the desired asset under Show Logistics. Upgrading enhances match quality‚ presentation‚ or ratings. Reaching Tier 7 maximizes these benefits‚ showcasing your managerial expertise. This trophy requires strategic financial management and progression through MyGM mode‚ highlighting your ability to build a top-tier brand in WWE 2K24.

Play Mode Trophies

Master Play Mode trophies by executing specific in-match actions‚ such as freezing opponents or winning with a Fireball. These achievements test your strategic gameplay and mastery of WWE 2K24 mechanics.

Stop an Opponent via Freeze and Follow Up with a Successful Attack

To unlock the “Red Light‚ Green Light” trophy‚ you must stop an opponent using the Freeze mechanic and immediately follow up with a successful attack. This achievement is earned in Play Mode against AI. Initiate the Freeze by pressing the designated button during a match‚ momentarily stunning your opponent. Quickly capitalize on their vulnerability by performing a high-impact move or finisher. Ensure the attack connects to secure the trophy. Timing is crucial‚ as the opponent will recover if the follow-up is delayed. This trophy tests your reflexes and strategic thinking in the ring.

Win a Normal 1-on-1 Match via Pinfall After a Fireball

Earning this trophy requires securing a pinfall victory after landing a Fireball move in a one-on-one match. Choose a superstar with the Fireball ability and execute it during a match. Build momentum by performing high-impact moves to wear down your opponent. Once the Fireball is successfully landed‚ immediately go for the pin. Ensure no distractions or interruptions occur. The match must end with a clean pinfall after the Fireball to unlock the trophy. Practice timing and strategy to master this achievement in WWE 2K24.

Win an Ambulance Match Without Losing the Mini-Game

To unlock this trophy‚ you must win an Ambulance Match without losing the mini-game. Start by selecting a superstar with high strength and durability. During the match‚ focus on wearing down your opponent with power moves and grapples to build momentum. When the ambulance is in position‚ initiate the mini-game by pressing the interact button near it. Rapidly mash the prompted button to load your opponent first. Avoid letting the opponent reverse the process‚ as this will reset the mini-game. Maintain control by countering their moves and using paybacks strategically. Win the mini-game on your first attempt to secure the victory and the trophy.

Universe Mode Trophies

Dominate Universe Mode by forcing a superstar to leave via a Loser Leaves Town rivalry and spending 50 momentum in a single rivalry for these trophies.

Force a Superstar to Leave via a Loser Leaves Town Rivalry

To unlock this trophy‚ create a rivalry in Universe Mode and set the stipulation to “Loser Leaves Town.” Win the rivalry match to force the opposing superstar to leave your brand. This can be achieved in both Universe Classic or Superstar Mode. Ensure the rivalry is set to “Loser Leaves Town” in the rivalry settings for the trophy to trigger. Winning on Legend difficulty adds to the challenge but isn’t required. Strategically choose a weaker superstar to increase your chances of success and secure this bronze trophy.

Spend 50 Momentum or More in a Single Rivalry

Earning this trophy requires strategic use of Momentum in Universe Mode rivalries. Momentum is earned through match wins‚ promos‚ and other in-game actions. To reach 50‚ focus on dominating your rivalry by winning multiple matches and utilizing promos effectively. Higher difficulty levels yield more Momentum‚ so playing on Legend can accelerate progress. Ensure you don’t end the rivalry prematurely‚ as Momentum resets post-rivalry. This bronze trophy tests your ability to maintain control and dominance‚ making it a challenging yet achievable goal for dedicated players aiming to master Universe Mode dynamics.

Secret and Platinum Trophies

The Ragin’ Climax and Complete All Intro Challenges in MyFACTION are key secret and platinum trophies. Crown Champion of WrestleMania and master MyFACTION challenges to unlock these prestigious achievements.

The Ragin’ Climax ⏤ Crown Champion of WrestleMania

The Ragin’ Climax is a secret trophy requiring you to crown a champion at WrestleMania in Showcase Mode. Play through the Showcase Mode storyline‚ defeating key opponents like Roman Reigns as Bruno Sammartino on Legend difficulty. Winning the main event at WrestleMania is essential. This trophy symbolizes ultimate victory‚ making it a standout achievement. Ensure to avoid using Paybacks for a true challenge. This trophy is a must for completing the platinum and showcasing your in-ring mastery.

Complete All Intro Challenges in MyFACTION

Complete All Intro Challenges in MyFACTION is a bronze trophy requiring you to finish the introductory challenges in the MyFACTION mode. These challenges teach you the basics of managing your faction‚ such as recruiting superstars‚ upgrading cards‚ and competing in matches. Completing all intro challenges unlocks rewards and sets the foundation for progressing further in MyFACTION. Focus on winning matches and managing your faction’s resources effectively. This trophy is a great starting point for newer players and helps you understand the mode’s mechanics. Earning this trophy is straightforward and essential for your MyFACTION journey.

Additional Tips and Strategies

Mastering WWE 2K24 requires strategic planning and efficient use of in-game resources. Focus on completing daily challenges‚ upgrading your faction‚ and experimenting with different match types to maximize progress and trophy unlocks.

General Gameplay Tips for Earning Trophies

To efficiently earn trophies in WWE 2K24‚ focus on completing objectives in each mode; In MyRISE‚ follow the storyline and make key decisions to unlock achievements. In MyFACTION‚ prioritize daily and lifetime challenges to progress. For Play Mode‚ practice specific moves like freezing opponents and using super finishers. Managing momentum in Universe Mode and strategically booking matches in MyGM are also crucial. Utilize paybacks and super finishers wisely to gain an edge in matches and accelerate your journey to the platinum trophy.

Using Paybacks and Super Finishers Effectively

Mastering Paybacks and Super Finishers is key to dominating in WWE 2K24. Paybacks‚ such as reversals and counterattacks‚ can turn the tide of a match instantly. Use them strategically to catch opponents off guard. Super Finishers‚ when fully charged‚ deliver devastating moves that often lead to victories. Timing is crucial—activate Paybacks during enemy attacks and save Super Finishers for critical moments‚ like after a series of combos. These tools are especially vital in harder difficulties and competitive modes‚ helping you secure wins and progress toward trophies efficiently.

Congratulations! You’ve navigated the ultimate WWE 2K24 Trophy Guide. With persistence and strategy‚ earning all 63 trophies is achievable. Enjoy the journey through MyRISE‚ MyFACTION‚ and more!

Final Tips for Completing All Trophies

To conquer all 63 trophies in WWE 2K24‚ explore every game mode thoroughly. Master MyRISE‚ MyFACTION‚ and MyGM by completing storylines and challenges. Use Super Finishers strategically in matches and don’t hesitate to exploit Paybacks for tough wins. In MyFACTION‚ focus on upgrading superstars and tackling Proving Grounds Towers. For MyRISE‚ patience is key—follow the narrative meticulously. Lastly‚ stay persistent with Universe Mode rivalries and spend momentum wisely. With dedication and these tips‚ you’ll unlock the elusive Platinum trophy and solidify your status as a WWE 2K24 champion!