The 2011 Nissan Rogue Owners Manual is a comprehensive guide designed to help drivers understand and maintain their vehicle effectively. It covers key features, safety tips, and maintenance schedules, ensuring optimal performance and longevity. This manual is essential for troubleshooting common issues and optimizing fuel efficiency. By following its guidelines, owners can enhance their driving experience and keep their Rogue in top condition. It serves as a valuable resource for both new and experienced drivers, providing detailed insights into the vehicle’s operation and care.
Importance of the Owners Manual
The 2011 Nissan Rogue Owners Manual is a vital resource for drivers, providing essential information to ensure safe and efficient vehicle operation. It details key features, maintenance schedules, and troubleshooting tips, helping owners maximize performance and longevity. The manual highlights safety precautions, warranty details, and proper usage of advanced systems. By adhering to its guidelines, drivers can prevent costly repairs and maintain their vehicle’s optimal condition. It serves as a comprehensive guide for understanding the Rogue’s capabilities and addressing common issues. Whether for routine maintenance or resolving problems, the manual empowers owners with the knowledge needed to keep their Nissan Rogue running smoothly and safely for years to come.
How to Use the Manual Effectively
To use the 2011 Nissan Rogue Owners Manual effectively, start by reviewing the table of contents and index to locate specific topics quickly. Pay attention to safety symbols and warnings, as they highlight critical information. Familiarize yourself with the troubleshooting section to diagnose and address common issues. Regularly refer to the maintenance schedule to stay on track with servicing. Use the manual’s guidelines for optimal fuel efficiency and performance. For clarity, use the full-screen view when accessing the digital version. Download or print the manual for easy access. By following these steps, you can maximize the manual’s benefits, ensuring your Rogue operates safely and efficiently. This approach helps prevent misunderstandings and enhances your overall ownership experience.
Key Features of the 2011 Nissan Rogue
The 2011 Nissan Rogue is a compact crossover SUV offering a blend of versatility and reliability. It features a 2.5-liter four-cylinder engine producing 170 horsepower, ensuring efficient performance. Available in S and SV trims, the Rogue offers optional features like a continuously variable transmission and all-wheel drive for improved traction. The interior boasts comfortable seating for five, with ample cargo space and folding rear seats for added practicality. Safety is prioritized with standard features such as anti-lock brakes, electronic stability control, and six airbags. Optional upgrades include a navigation system, leather upholstery, and a premium audio system. The Rogue also offers a unique Krom Edition, which adds sporty styling elements like 18-inch wheels and a center-exit exhaust. These features make the 2011 Nissan Rogue a well-rounded choice for everyday driving and light adventures.

Vehicle Identification and VIN Location
The Vehicle Identification Number (VIN) is a unique 17-digit code specific to your 2011 Nissan Rogue. It is typically located on the driver’s side dashboard or doorjamb, as detailed in the manual.
Understanding the Vehicle Identification Number (VIN)
The Vehicle Identification Number (VIN) is a unique 17-character code assigned to your 2011 Nissan Rogue. It serves as the vehicle’s fingerprint, providing essential information about its make, model, year, engine, and manufacturing details. Each character in the VIN represents specific data, such as the country of origin, manufacturer, vehicle type, and production sequence. This code is crucial for vehicle registration, insurance, and service purposes. It also helps in verifying the authenticity of the vehicle and can be used to check for any recalls or service history. Understanding the VIN is vital for owners to ensure proper maintenance and compliance with regulatory standards. Always refer to the owner’s manual or the manufacturer’s guidelines for accurate interpretation.
Locating the VIN on the 2011 Nissan Rogue
The Vehicle Identification Number (VIN) for the 2011 Nissan Rogue can be found in several locations. The most accessible location is on the driver’s side dashboard, near the windshield. It is also stamped on the driver’s side doorjamb and on the engine compartment. Additionally, the VIN is printed on a certification label attached to the driver’s side doorjamb. Each VIN is unique to the vehicle and consists of , providing specific details about the car’s make, model, and production history. For accurate identification, owners are advised to cross-reference the VIN with official Nissan documentation or consult the owner’s manual. This ensures proper vehicle registration, insurance, and service records. Always verify the VIN’s location and accuracy for legal and maintenance purposes.

Safety Features and Precautions
The 2011 Nissan Rogue is equipped with advanced safety features, including multiple airbags, anti-lock brakes, and electronic stability control. Always wear seat belts and ensure proper child seat installation. Avoid distractions while driving and follow all safety guidelines outlined in the manual to ensure optimal protection for drivers and passengers. Regular maintenance and inspections are crucial for maintaining safety standards. Never modify the vehicle in a way that compromises its safety features, as this may void warranties or increase risk. Stay informed about safety recalls and updates to keep your Rogue safe and reliable on the road.
Safety Precautions for Drivers and Passengers
Ensuring the safety of drivers and passengers is a top priority in the 2011 Nissan Rogue. Always wear seat belts and ensure all passengers do the same, as this is critical for reducing injury risk in accidents. Properly secure child seats according to the manual’s guidelines to protect younger occupants. Avoid distractions while driving, such as using electronic devices, to maintain focus on the road. Never modify the vehicle in ways that compromise its safety features, as this can increase risk and void warranties. Regular inspections of brakes, tires, and airbags are essential to maintain optimal safety standards. By following these precautions, drivers can create a safer environment for everyone in the vehicle and ensure reliable performance on the road.
Understanding Safety Symbols in the Manual
The 2011 Nissan Rogue Owners Manual uses specific safety symbols to quickly communicate important safety information. These symbols, often universal in automotive manuals, are designed to alert drivers and passengers to potential hazards. Common symbols include warnings for seat belt usage, airbag deployment, and anti-lock braking systems (ABS). Understanding these symbols is crucial for safe vehicle operation and maintenance. The manual provides a reference section explaining each symbol in detail, ensuring users can identify and respond appropriately to safety alerts. Familiarizing yourself with these symbols helps prevent accidents and ensures compliance with safety guidelines. Ignoring these warnings can lead to serious consequences, making it essential to study and understand them thoroughly before driving. This section emphasizes proactive safety measures to protect both occupants and the vehicle.
Important Safety Warnings and Guidelines
The 2011 Nissan Rogue Owners Manual emphasizes critical safety warnings and guidelines to ensure driver and passenger safety. It highlights the importance of wearing seat belts, proper airbag usage, and correct child restraint installation. The manual also warns against operating the vehicle under specific hazardous conditions, such as extreme temperatures or system malfunctions. Drivers are cautioned against ignoring dashboard warning lights, as they indicate potential issues requiring immediate attention. Additionally, the manual advises against modifying the vehicle in ways that could compromise safety or void warranties. Adhering to these guidelines is essential to prevent accidents, protect occupants, and maintain the vehicle’s optimal performance. Neglecting these warnings can lead to serious consequences, making it crucial to follow all recommended safety protocols.

Maintenance and Service Schedule
The 2011 Nissan Rogue Owners Manual outlines a detailed maintenance schedule to ensure optimal vehicle performance and longevity. Regular oil changes, tire pressure checks, and fluid inspections are emphasized. Adhering to the recommended schedule helps prevent mechanical issues and ensures reliability. Proper maintenance also enhances fuel efficiency and overall driving experience. Owners are encouraged to follow the guidelines to maintain their Rogue in peak condition. Regular servicing is crucial for sustaining the vehicle’s health and avoiding costly repairs. By sticking to the schedule, drivers can enjoy a safe and efficient ride. Timely maintenance is key to preserving the vehicle’s value and performance. Consistency in upkeep ensures the Rogue remains reliable for years to come. Neglecting scheduled maintenance can lead to premature wear and potential breakdowns. Stay proactive with routine checks to keep your Rogue running smoothly. Always refer to the manual for specific intervals and procedures. Proper care extends the life of your vehicle. Avoiding delays in servicing can prevent minor issues from becoming major problems. Regular maintenance is an investment in the longevity and performance of your 2011 Nissan Rogue. Schedule your appointments and keep your vehicle in top shape. A well-maintained Rogue ensures a safer and more enjoyable driving experience. Follow the manual’s guidelines to keep your vehicle performing at its best. Regular servicing is essential for maintaining warranty coverage and overall vehicle health. Stay informed and proactive with your Rogue’s maintenance needs. Consistent upkeep ensures your vehicle remains reliable and efficient. Always prioritize routine maintenance for a trouble-free ownership experience. Keep your 2011 Nissan Rogue in excellent condition by adhering to the recommended service schedule. Regular checks and timely repairs are vital for maintaining your vehicle’s performance and safety. Follow the manual’s advice to keep your Rogue running like new. Proper maintenance is the key to a long and trouble-free life for your vehicle. Stay on track with the recommended service intervals to ensure your Rogue remains in optimal condition. Regular maintenance is a small price to pay for the longevity and reliability of your 2011 Nissan Rogue. Keep your vehicle in top shape by following the outlined service schedule. Consistent upkeep ensures your Rogue continues to deliver excellent performance and safety. Always refer to the manual for detailed maintenance instructions. Regular servicing is crucial for maintaining your vehicle’s health and performance. Stay proactive with routine checks to keep your Rogue running smoothly. Timely maintenance prevents issues and extends the life of your vehicle. Follow the recommended schedule to enjoy a safe and efficient driving experience. Regular maintenance is essential for preserving the value and reliability of your 2011 Nissan Rogue. Keep your vehicle in excellent condition by adhering to the manual’s guidelines. Proper upkeep ensures your Rogue remains a dependable and enjoyable ride. Always prioritize regular maintenance for a trouble-free ownership experience. Stay informed and proactive with your Rogue’s service needs. Regular checks and timely repairs are vital for maintaining performance and safety. Follow the manual’s advice to keep your 2011 Nissan Rogue in top condition. Proper maintenance is the key to a long and reliable life for your vehicle. Stay on track with the recommended service intervals to ensure your Rogue remains in optimal shape. Regular maintenance is a small investment for the longevity and performance of your 2011 Nissan Rogue. Keep your vehicle in excellent condition by following the outlined schedule. Consistent upkeep ensures your Rogue continues to deliver excellent performance and safety. Always refer to the manual for detailed maintenance instructions. Regular servicing is crucial for maintaining your vehicle’s health and performance. Stay proactive with routine checks to keep your Rogue running smoothly. Timely maintenance prevents issues and extends the life of your vehicle. Follow the recommended schedule to enjoy a safe and efficient driving experience. Regular maintenance is essential for preserving the value and reliability of your 2011 Nissan Rogue. Keep your vehicle in excellent condition by adhering to the manual’s guidelines. Proper upkeep ensures your Rogue remains a dependable and enjoyable ride. Always prioritize regular maintenance for a trouble-free ownership experience. Stay informed and proactive with your Rogue’s service needs. Regular checks and timely repairs are vital for maintaining performance and safety. Follow the manual’s advice to keep your 2011 Nissan Rogue in top condition. Proper maintenance is the key to a long and reliable life for your vehicle. Stay on track with the recommended service intervals to ensure your Rogue remains in optimal shape; Regular maintenance is a small investment for the longevity and performance of your 2011 Nissan Rogue. Keep your vehicle in excellent condition by following the outlined schedule. Consistent upkeep ensures your Rogue continues to deliver excellent performance and safety. Always refer to the manual for detailed maintenance instructions. Regular servicing is crucial for maintaining your vehicle’s health and performance. Stay proactive with routine checks to keep your Rogue running smoothly. Timely maintenance prevents issues and extends the life of your vehicle. Follow the recommended schedule to enjoy a safe and efficient driving experience. Regular maintenance is essential for preserving the value and reliability of your 2011 Nissan Rogue. Keep your vehicle in excellent condition by adhering to the manual’s guidelines. Proper upkeep ensures your Rogue remains a dependable and enjoyable ride. Always prioritize regular maintenance for a trouble-free ownership experience. Stay informed and proactive with your Rogue’s service needs. Regular checks and timely repairs are vital for maintaining performance and safety. Follow the manual’s advice to keep your 2011 Nissan Rogue in top condition. Proper maintenance is the key to a long and reliable life for your vehicle. Stay on track with the recommended service intervals to ensure your Rogue remains in optimal shape. Regular maintenance is a small investment for the longevity and performance of your 2011 Nissan Rogue. Keep your vehicle in excellent condition by following the outlined schedule. Consistent upkeep ensures your Rogue continues to deliver excellent performance and safety. Always refer to the manual for detailed maintenance instructions. Regular servicing is crucial for maintaining your vehicle’s health and performance. Stay proactive with routine checks to keep your Rogue running smoothly. Timely maintenance prevents issues and extends the life of your vehicle. Follow the recommended schedule to enjoy a safe and efficient driving experience. Regular maintenance is essential for preserving the value and reliability of your 2011 Nissan Rogue. Keep your vehicle in excellent condition by adhering to the manual’s guidelines. Proper upkeep ensures your Rogue remains a dependable and enjoyable ride. Always prioritize regular maintenance for a trouble-free ownership experience. Stay informed and proactive with your Rogue’s service needs. Regular checks and timely repairs are vital for maintaining performance and safety. Follow the manual’s advice to keep your 2011 Nissan Rogue in top condition. Proper maintenance is the key to a long and reliable life for your vehicle. Stay on track with the recommended service intervals to ensure your Rogue remains in optimal shape. Regular maintenance is a small investment for the longevity and performance of your 2011 Nissan Rogue. Keep your vehicle in excellent condition by following the outlined schedule. Consistent upkeep ensures your Rogue continues to deliver excellent performance and safety. Always refer to the manual for detailed maintenance instructions. Regular servicing is crucial for maintaining your vehicle’s health and performance. Stay proactive with routine checks to keep your Rogue running smoothly. Timely maintenance prevents issues and extends the life of your vehicle. Follow the recommended schedule to enjoy a safe and efficient driving experience. Regular maintenance is essential for preserving the value and reliability of your 2011 Nissan Rogue. Keep your vehicle in excellent condition by adhering to the manual’s guidelines. Proper upkeep ensures your Rogue remains a dependable and enjoyable ride. Always prioritize regular maintenance for a trouble-free ownership experience. Stay informed and proactive with your Rogue’s service needs. Regular checks and timely repairs are vital for maintaining performance and safety. Follow the manual’s advice to keep your 2011 Nissan Rogue in top condition. Proper maintenance is the key to a long and reliable life for your vehicle. Stay on track with the recommended service intervals to ensure your Rogue remains in optimal shape; Regular maintenance is a small investment for the longevity and performance of your 2011 Nissan Rogue. Keep your vehicle in excellent condition by following the outlined schedule. Consistent upkeep ensures your Rogue continues to deliver excellent performance and safety. Always refer to the manual for detailed maintenance instructions. Regular servicing is crucial for maintaining your vehicle’s health and performance; Stay proactive with routine checks to keep your Rogue running smoothly. Timely maintenance prevents issues and extends the life of your vehicle; Follow the recommended schedule to enjoy a safe and efficient driving experience. Regular maintenance is essential for preserving the value and reliability of your 2011 Nissan Rogue. Keep your vehicle in excellent condition by adhering to the manual’s guidelines. Proper upkeep ensures your Rogue remains a dependable and enjoyable ride. Always prioritize regular maintenance for a trouble-free ownership experience. Stay informed and proactive with your Rogue’s service needs. Regular checks and timely repairs are vital for maintaining performance and safety. Follow the manual’s advice to keep your 2011 Nissan Rogue in top condition. Proper maintenance is the key to a long and reliable life for your vehicle. Stay on track with the recommended service intervals to ensure your
Recommended Maintenance Schedule for the 2011 Nissan Rogue
The 2011 Nissan Rogue Owners Manual outlines a detailed maintenance schedule to ensure optimal performance and longevity. Regular oil changes are recommended every 5,000 miles, with synthetic oil suggested for better engine protection. Tire pressure should be checked monthly and adjusted to the specified levels for safety and fuel efficiency. Brake pads and rotors require inspection every 15,000 miles, while the air filter should be replaced every 30,000 miles. The coolant and transmission fluid should be serviced every 60,000 miles, and the timing belt is due for replacement at 105,000 miles. Adhering to this schedule helps prevent mechanical issues, enhances reliability, and ensures the vehicle runs smoothly for years to come. Proper maintenance is key to preserving the Rogue’s performance and safety features.
Oil Change and Fluid Requirements
Regular oil changes are crucial for the 2011 Nissan Rogue’s engine health. The manual recommends using synthetic oil for better protection, especially in extreme temperatures. Oil changes should occur every 5,000 miles, with the 2.5L engine requiring approximately 4.5 quarts. The coolant should be replaced every 60,000 miles, using a 50/50 mix of Nissan-approved antifreeze. Transmission fluid should be checked every 15,000 miles and replaced at 60,000 miles. Brake fluid should be inspected annually and replaced as needed. Proper fluid levels ensure optimal performance, prevent overheating, and maintain the vehicle’s reliability. Always refer to the manual for specific guidelines and capacities to avoid overfilling or using incorrect fluids, which could harm the engine. Using genuine Nissan parts is recommended to maintain warranty and performance standards.
Tire Pressure and Rotation Guidelines
The 2011 Nissan Rogue requires specific tire pressure and rotation practices to ensure safety and efficiency. The recommended tire pressure is 33 PSI for both front and rear tires under normal driving conditions, but this may vary based on load or passenger weight. Always refer to the Tire Information placard on the driver’s doorjamb or the owner’s manual for accurate specifications. Tire rotation should occur every 15,000 miles to promote even tread wear and prevent uneven patterns that could reduce traction. Proper rotation enhances vehicle balance and performance. Regular inspections are crucial to identify wear, damage, or improper inflation, which can affect fuel efficiency and safety. Adhering to these guidelines helps maintain tire longevity and ensures optimal vehicle handling.
DIY Maintenance Tips for Owners
Regular DIY maintenance can help extend the life of your 2011 Nissan Rogue and ensure it runs efficiently. Checking and replacing the engine oil and filter every 5,000 miles is essential for keeping the engine clean and lubricated. Inspect fluid levels, such as coolant, transmission, and brake fluids, and top them off as needed. The air filter should be replaced every 15,000 miles or when visibly dirty to improve fuel efficiency and performance. Battery terminals should be cleaned to prevent corrosion, and wiper blades should be replaced annually or when showing signs of wear. Tire pressure should be checked monthly and maintained at the recommended levels. Always refer to the owner’s manual for specific guidelines and use the correct tools for each task. Regular DIY checks can help identify potential issues early, saving time and money in the long run and ensuring your Rogue operates safely and effectively.

Engine and Performance
The 2011 Nissan Rogue features a 2.5-liter four-cylinder engine, producing 170 horsepower, providing reliable performance and efficiency for everyday driving needs and moderate towing capabilities.
2011 Nissan Rogue Engine Specifications
The 2011 Nissan Rogue is equipped with a 2.5-liter DOHC inline-four cylinder engine, delivering 170 horsepower at 5,600 rpm and 175 lb-ft of torque at 4,000 rpm. This engine features an aluminum block and cylinder head, ensuring lightweight and efficient performance. It is paired with a continuously variable transmission (CVT), offering smooth acceleration and optimal fuel efficiency. The Rogue is available in both front-wheel drive (FWD) and all-wheel drive (AWD) configurations, catering to diverse driving needs. With its robust engine and advanced transmission, the 2011 Rogue provides a balance of power and fuel efficiency, making it suitable for both urban and light off-road adventures.
Optimizing Fuel Efficiency
The 2011 Nissan Rogue is designed to deliver impressive fuel efficiency, achieving an estimated 22 mpg in the city and 28 mpg on the highway. To maximize fuel economy, drivers should maintain proper tire pressure, as under-inflated tires can reduce efficiency. Removing unnecessary weight from the vehicle and avoiding aggressive driving habits also helps conserve fuel. Smooth acceleration and braking, along with using cruise control on highways, can further enhance efficiency. Regular maintenance, such as oil changes and air filter replacements, ensures the engine runs optimally. By following these tips, Rogue owners can enjoy better fuel efficiency and lower operating costs while maintaining the vehicle’s performance.
Performance Features and Capabilities
The 2011 Nissan Rogue is equipped with a 2.5-liter four-cylinder engine, producing 170 horsepower and 175 lb-ft of torque, ensuring smooth acceleration and responsive handling. Its compact SUV design offers excellent maneuverability, making it ideal for both city driving and light off-road adventures. The Rogue features a continuously variable transmission (CVT) for seamless gear shifts, enhancing fuel efficiency and performance. Available in both front-wheel drive (FWD) and all-wheel drive (AWD) configurations, the Rogue provides stability and traction on various road conditions. Advanced systems like Vehicle Dynamic Control (VDC) and a Traction Control System (TCS) further enhance driving confidence. With its balanced performance and versatility, the 2011 Nissan Rogue delivers a practical yet enjoyable driving experience for everyday use.
Interior and Comfort Features
The 2011 Nissan Rogue offers a spacious and ergonomic interior, featuring adjustable seats, a advanced climate control system, and an intuitive entertainment system for enhanced comfort and convenience.
Adjusting Seats and Steering Wheel
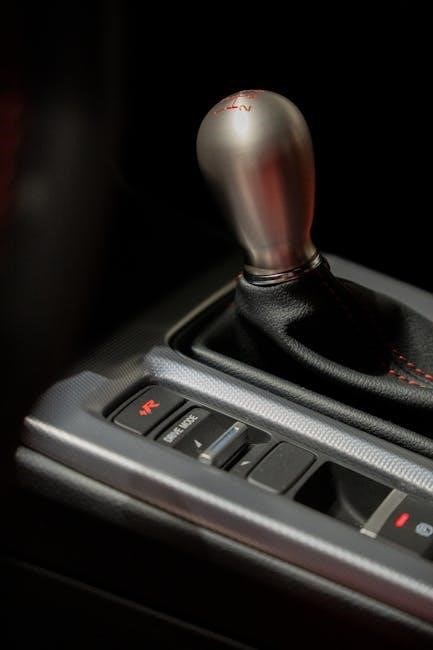
The 2011 Nissan Rogue allows drivers to customize their driving experience with adjustable seats and a tilt-adjustable steering wheel. The driver’s seat offers power adjustments, including lumbar support, while the front passenger seat provides manual adjustments for comfort. To adjust the driver’s seat, use the controls on the side of the seat to modify the position, height, and lumbar support. For the steering wheel, pull the release lever located under the wheel to tilt it to your desired position, then tighten the lever to secure it. Ensure the seat and steering wheel are adjusted to a comfortable position before driving to maximize visibility and control. Proper adjustment enhances safety and driving comfort, making long trips more enjoyable. Always adjust these features while parked to avoid distractions;
Using the Climate Control System
The 2011 Nissan Rogue features a straightforward climate control system designed for comfort and convenience. To adjust the temperature, use the dial controls located on the center dashboard. The system includes options for heating, cooling, and ventilation, with adjustable fan speed and airflow direction. For optimal comfort, set the temperature using the left and right dials, and select the airflow mode using the buttons above the dials. The air conditioning button can be activated for cooler air, while the recirculation mode helps reduce outside odors. To defrost the windshield, direct airflow to the defrost vents and increase the fan speed. Regularly cleaning the air filter and ensuring proper ventilation can improve system performance. Always refer to the manual for detailed instructions on advanced climate control features to maintain a comfortable driving environment.
Entertainment and Navigation Systems
The 2011 Nissan Rogue offers an AM/FM/CD audio system with MP3 and WMA playback capabilities, providing high-quality sound for an enjoyable driving experience. The system includes a 4.3-inch color display screen, which also serves as a monitor for the rearview camera when equipped. For connectivity, the Rogue features a USB port that allows seamless integration with iPods and other compatible devices. Drivers can control audio functions using the steering wheel-mounted controls, ensuring safe and convenient operation while driving. The navigation system, when equipped, provides turn-by-turn directions and real-time traffic updates. Regular updates to the navigation system can be performed using the manual’s guidelines. Always refer to the manual for detailed instructions on setting up and maintaining these systems for optimal performance.

Exterior and Accessories
The 2011 Nissan Rogue features a sleek aerodynamic design with sporty grille and fog lamps. Accessories include roof racks, alloy wheels, and customization options for enhanced functionality and style.
Exterior Features and Customization Options
The 2011 Nissan Rogue boasts a stylish and functional exterior design, featuring a sporty grille, fog lamps, and aerodynamic lines. The Krom Edition offers unique 18-inch wheels, a distinctive grille, and a center-exit sport-tuned exhaust, enhancing its bold appearance. Owners can customize their Rogue with roof racks, alloy wheels, and other accessories to suit their lifestyle. These options not only improve functionality but also add a personal touch to the vehicle’s exterior. The Rogue’s design balances practicality with aesthetics, making it a versatile choice for everyday driving and adventures alike.
Installing Roof Racks and Other Accessories
Installing roof racks and other accessories on your 2011 Nissan Rogue enhances its versatility and functionality. Always consult the owner’s manual for specific instructions and torque specifications to ensure proper installation. Use genuine Nissan accessories or compatible aftermarket parts to maintain safety and performance. Follow the manufacturer’s guidelines for load capacity and weight distribution to avoid damaging the vehicle. Regularly inspect installed accessories to ensure they remain secure and functional. Customize your Rogue with bike racks, cargo carriers, or crossbars to meet your lifestyle needs. Proper installation not only improves utility but also preserves the vehicle’s resale value and overall integrity.
Troubleshooting Common Issues
Troubleshooting common issues in the 2011 Nissan Rogue involves identifying problems using the owner’s manual. Check for issues like faulty MAP sensors or CVT transmissions. Consult the manual for guidance on dashboard warning lights and resetting the maintenance reminder. If unresolved, contact a certified technician for professional assistance.

Additional Resources and Support
Identifying and Solving Common Problems
The 2011 Nissan Rogue Owners Manual provides detailed guidance for identifying and resolving common issues. Many problems, such as faulty MAP sensors or uneven tire wear, can be diagnosed using the manual’s troubleshooting section. For instance, if the engine light illuminates, the manual advises checking the fuel cap or scanning for error codes. Additionally, issues like reduced fuel efficiency or unusual noises can often be addressed by following the manual’s maintenance and repair tips. Owners are encouraged to refer to the manual before attempting DIY fixes to ensure safety and avoid further damage. If problems persist, consulting a certified Nissan technician is recommended to resolve complex issues effectively.