The Redline Transmission Fluid Manual provides essential guidance on selecting and using high-performance lubricants for both automatic and manual transmissions․ It covers key products, benefits, and application tips to ensure optimal performance and protection for your vehicle’s transmission system․
Overview of Redline Transmission Fluids
Redline Transmission Fluids are high-performance lubricants designed for both automatic and manual transmissions․ They offer superior wear protection, improved shifting, and enhanced thermal stability․ Redline ATF D6 is ideal for automatic transmissions, while MTL and MT-90 cater to manual transmissions, providing excellent gear and synchronizer protection․ These fluids are preferred by enthusiasts and drivers seeking better cold-weather performance and durability compared to OEM options․ Their balanced formulations ensure optimal friction and longevity for smooth, precise shifting in various driving conditions․
Types of Redline Transmission Fluids
Redline offers three primary transmission fluids: ATF D6 for automatics, MTL for manuals, and MT-90 for high-performance gears, each optimized for specific driving needs and conditions․
Redline ATF D6: Automatic Transmission Fluid
Redline ATF D6 is a premium automatic transmission fluid designed for smooth shifting and optimal performance in modern automatic transmissions․ Formulated with full synthetic base stocks, it provides superior low-temperature fluidity and high-temperature stability․ ATF D6 is compatible with most automatic transmissions, offering excellent wear protection and friction control․ It is favored by enthusiasts for its ability to reduce shifting delays and improve overall transmission responsiveness, making it a top choice over OEM fluids for enhanced reliability and performance in demanding conditions․
Redline MTL: Manual Transmission Lubricant
Redline MTL is a high-performance, synthetic 75W80 GL-4 gear oil designed for manual transmissions, transaxles, and hypoid gears․ It provides exceptional wear protection, reduces gear noise, and ensures smooth, precise shifting․ MTL is formulated to maintain viscosity in extreme temperatures, making it ideal for both street and racing applications․ Its balanced coefficient of friction minimizes synchronizer wear while offering crisp, responsive shifts․ Compatible with most manual transmissions, Redline MTL is a popular choice for enthusiasts seeking superior lubrication and durability over OEM fluids․
Redline MT-90: 75W90 GL-4 Gear Oil
Redline MT-90 is a high-performance, fully synthetic 75W90 GL-4 gear oil designed for manual transmissions, transaxles, and hypoid gears․ It provides exceptional wear protection, reduces gear noise, and ensures smooth, precise shifting․ Formulated for high-stress applications, MT-90 maintains consistent viscosity across temperature ranges, offering excellent cold-weather performance․ Its balanced friction coefficient minimizes synchronizer wear while delivering crisp, responsive shifts․ Popular among enthusiasts, MT-90 is a reliable choice for vehicles requiring GL-4 specifications, ensuring long-term durability and optimal transmission health;
Key Differences Between Redline ATF D6 and MTL
Redline MT-90 is a 75W90 GL-4 synthetic gear oil designed for manual transmissions and transaxles․ It offers excellent gear protection, smooth shifting, and consistent viscosity across temperatures․ Formulated for high-performance applications, MT-90 reduces wear and noise while providing crisp, precise gear engagement․ Its balanced friction coefficient ensures optimal synchronizer operation, making it a top choice for vehicles requiring GL-4 specifications and high-stress driving conditions․
Viscosity Levels: 75W80 vs․ 75W90
Redline MTL is a 75W80 GL-4 lubricant, offering lighter viscosity for smoother shifting in colder temperatures, while MT-90 is a 75W90 GL-4 gear oil, providing thicker viscosity for enhanced gear protection․ MTL is designed for manual transmissions requiring lower viscosity, while MT-90 is suited for high-stress applications or where GL-4 specifications are mandatory․ Both ensure optimal performance but cater to different driving conditions and transmission requirements․ Always choose based on your vehicle’s specifications and operating environment for best results․
GL-3 vs․ GL-4 Specifications
GL-3 and GL-4 specifications define the performance and additive packages of gear oils․ GL-3 is typically used in older or less demanding applications, offering basic gear protection․ GL-4, found in Redline MTL and MT-90, provides superior wear protection and higher shear strength, making it suitable for modern, high-performance manual transmissions․ GL-4 ensures better durability and resistance to wear under heavy loads, while GL-3 may be sufficient for lighter use․ Choose based on your vehicle’s requirements to ensure optimal performance and longevity․
Automatic vs․ Manual Transmission Compatibility
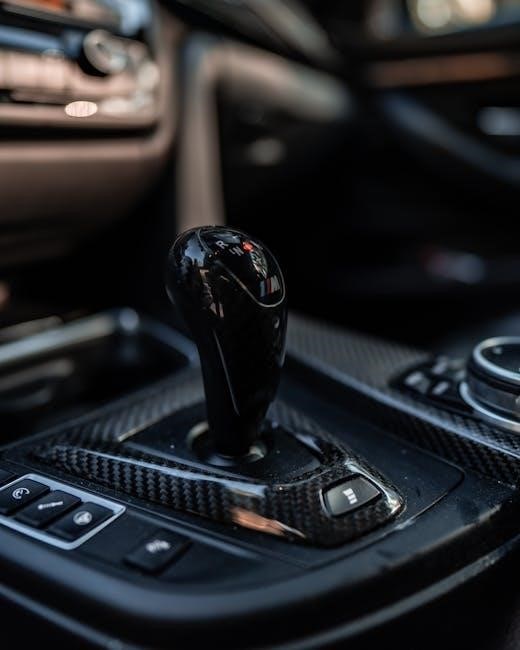
Redline ATF D6 is specifically designed for automatic transmissions, offering smooth torque converter engagement and friction stability․ In contrast, Redline MTL is formulated for manual transmissions, providing the correct coefficient of friction for precise shifting and synchronizer durability․ Using ATF in a manual transmission can lead to poor shifting and wear, while manual-specific fluids like MTL ensure optimal performance and protection in manual gearboxes․ Always match the fluid to your transmission type for best results․
Why Choose Redline Over OEM Fluids?
Redline transmission fluids offer superior performance, improved shifting, and enhanced protection for gears and synchronizers compared to OEM fluids, making them a top choice for enthusiasts and drivers․
Improved Shifting Performance
Redline transmission fluids are renowned for enhancing shifting smoothness and precision․ Users report reduced notchiness and more consistent gear engagement, particularly in cold conditions․ The synthetic formulation ensures optimal viscosity, preventing thinning under heat and maintaining film strength․ This results in crisper shifts and better synchronizer alignment․ Many drivers, including those with BMW E60 535xi and Jeep Wrangler 6-speed manuals, have experienced noticeable improvements․ The balanced friction properties of Redline fluids minimize wear while optimizing performance, making every shift feel more controlled and precise․
Better Cold Weather Performance
Redline transmission fluids excel in cold weather, offering superior low-temperature flow and viscosity stability․ This ensures smooth shifting and rapid engagement of gears, even in freezing conditions․ Users report reduced hesitation and improved drivability during winter months․ The advanced synthetic base stocks maintain consistent lubrication, preventing the fluid from thickening and ensuring reliable performance․ Whether driving in sub-zero temperatures or icy roads, Redline fluids provide the necessary protection and responsiveness for seamless operation, making them a top choice for cold climate drivers․
Enhanced Gear and Synchronizer Protection
Redline transmission fluids are formulated with advanced additives that provide exceptional protection for gears and synchronizers․ Their synthetic base stocks maintain film strength under high-stress conditions, reducing wear and tear․ Manual transmissions benefit from improved gear engagement and reduced synchro wear, ensuring smoother operation over time․ Users report less gear noise and extended component life, making Redline a top choice for drivers seeking durability and reliability in their vehicles’ transmission systems․
Vehicle-Specific Applications
Redline fluids are ideal for specific vehicles like the BMW E60 535xi 6-Speed Manual, Toyota manual transmissions, and Jeep Wrangler 6-Speed Manual, offering enhanced performance․
BMW E60 535xi: 6-Speed Manual Transmission
The BMW E60 535xi with a 6-speed manual transmission benefits significantly from Redline MTL 75W80 GL-4 gear oil․ This fluid is specifically designed to provide smooth shifting, especially in cold weather, and offers superior protection for gears and synchronizers․ Many owners have reported improved performance and reduced friction after switching to Redline, making it a top choice for enthusiasts seeking enhanced drivetrain responsiveness and durability․
Toyota Manual Transmissions: Avoiding Royal Purple
Toyota manual transmissions require careful fluid selection to maintain optimal performance․ While Royal Purple is often suggested, it can degrade when mixed with residual OEM fluid, leading to subpar performance․ Redline MTL 75W80 GL-4 is a superior alternative, offering excellent cold-weather shifting and gear protection․ This fluid is specifically formulated to meet Toyota’s requirements, ensuring smooth operation and longevity of the transmission system․ Avoiding Royal Purple helps prevent potential compatibility issues and ensures consistent drivetrain performance․
Jeep Wrangler 6-Speed Manual Transmission
For a 2014 Jeep Wrangler 6-speed manual transmission, Redline MTL 75W80 GL-4 gear oil is a suitable replacement․ It meets Chrysler MS-9224 specifications and offers improved shifting, especially in cold weather․ Users report smoother operation and better gear protection with this fluid․ Approximately 1․8 to 1․9 quarts are needed for a full fill․ This fluid is designed to provide consistent performance and durability, making it a reliable choice for Jeep owners seeking enhanced transmission reliability and smoother shifting․
Common Misconceptions and Myths
Many believe ATF and MTL are interchangeable, but they serve different purposes․ GL-3 and GL-4 specs are often confused, affecting gear protection and compatibility․
ATF in Manual Transmissions: Why It’s Not Recommended
ATF (Automatic Transmission Fluid) is not designed for manual transmissions due to insufficient shear strength, which can fail to protect gears and synchronizers․ Manual transmissions require gear-specific lubricants like Redline MTL or MT-90, which provide proper friction and wear protection․ Using ATF can lead to poor shifting, accelerated wear, and potential damage․ Always use fluids specifically formulated for manual transmissions to ensure optimal performance and longevity․
GL-4 vs․ GL-3: The Debate
GL-4 and GL-3 are gear oil specifications with distinct performance levels․ GL-4 offers superior wear protection, especially for high-stress applications, while GL-3 is designed for lighter loads․ GL-4 provides better resistance to pitting and gear wear, making it ideal for racing or heavy-duty use․ GL-3, however, is often recommended for everyday driving․ Users debate which is better, but Redline MT-90 (GL-4) and MTL (GL-3) cater to both needs, ensuring optimal performance based on vehicle requirements and driving conditions․
User Experiences and Feedback
Users report improved shifting smoothness and reduced noise with Redline fluids․ Cold weather performance is notably better, with easier gear engagement․ Many prefer Redline over OEM for its consistency and protection, ensuring reliable transmission operation across various driving conditions․
Improved Shifting with Redline MTL
Redline MTL has received widespread praise for enhancing shifting performance․ Users report smoother transitions between gears, particularly in cold weather, where traditional fluids often fall short․ The balanced friction properties of MTL reduce gear chatter and wear, making it ideal for both street and track use․ Many drivers have noted a significant reduction in notchy or stiff shifts, especially in vehicles with high mileage, leading to a more enjoyable driving experience overall․
Cold Weather Performance: User Reports
Users consistently highlight Redline fluids’ exceptional cold weather performance․ Many report improved gear engagement and smoother shifts in freezing conditions․ For instance, Jeep Wrangler owners using Redline MTL noticed easier shifting in winter, while BMW E60 535xi drivers observed reduced hesitation in cold starts․ The fluid’s low viscosity ensures consistent lubrication, preventing the stiffness often associated with cold temperatures, thus enhancing overall drivability and reliability during harsh winter driving conditions․
Comparison with OEM Fluids: User Preferences
Users often prefer Redline transmission fluids over OEM options due to their improved shifting performance and durability․ Many report that Redline fluids provide smoother engagement and better synchronization, especially in cold weather․ While OEM fluids are reliable, Redline’s synthetic formulations are seen as superior in protecting gears and extending transmission life․ Although slightly more expensive, the enhanced performance and protection make Redline a popular choice among enthusiasts and drivers seeking optimal transmission health․
Safety and Compatibility
Using the wrong transmission fluid can damage your vehicle․ Always ensure Redline fluids are compatible with your transmission type and vehicle specifications to avoid potential risks․
Avoiding the Wrong Fluid: Potential Risks
Using the incorrect transmission fluid can lead to premature wear, gear damage, and synchronizer failure․ Incorrect viscosity or specifications may cause hard shifting, slippage, or even transmission failure․ Always verify compatibility with your vehicle’s make and model to prevent these risks․ Mixing incompatible fluids can degrade performance and shorten component lifespan․ Ensure proper research and adherence to manufacturer guidelines when selecting transmission fluids․
Ensuring Compatibility with Your Vehicle
Always match your vehicle’s transmission type and specifications when selecting Redline fluids․ Consult your owner’s manual or manufacturer guidelines to confirm viscosity and GL ratings․ For manual transmissions, Redline MTL or MT-90 are ideal, while ATF D6 suits automatics․ Ensure the fluid meets your vehicle’s specific requirements, especially for high-performance or racing applications․ Compatibility guarantees optimal performance, protection, and longevity for your transmission system․

Step-by-Step Guide to Changing Transmission Fluid
Gather tools and materials, drain the old fluid, inspect the pan, refill with the appropriate Redline transmission fluid, and check for leaks before test driving․
Preparation and Tools Needed
To change your transmission fluid, gather essential tools: a drain pan, socket or wrench, new filter (if applicable), gasket, Redline transmission fluid, a funnel, rags, and safety gloves․ Warm up the car with a short drive to circulate the fluid․ Locate the transmission pan, typically underside of the car, and position the drain pan․ Consult your vehicle’s manual for specific instructions and torque specifications․ Always drain the old fluid completely before refilling․
Draining the Old Fluid
Begin by locating the transmission pan, usually found underneath the vehicle․ Use a socket or wrench to remove the drain plug, allowing the old fluid to flow into the drain pan․ Be cautious as the fluid may drain quickly․ Once fully drained, inspect the fluid for color and consistency—dark or gritty fluid indicates contamination․ Replace the plug securely, ensuring it’s tightened to the manufacturer’s torque specification to avoid leaks․
Refilling with Redline Transmission Fluid
After draining, consult your vehicle’s manual to determine the correct Redline fluid type and capacity․ Use a fluid pump or pour directly from the bottle into the filler hole․ Ensure the fluid level matches the manufacturer’s specifications․ Replace the filler plug securely․ For most manual transmissions, 1․8 to 2 quarts of Redline MTL or MT-90 are typically required․ Start the engine, shift through gears to circulate the new fluid, then check for leaks․ Proper refilling ensures smooth shifting and optimal transmission performance․
Environmental Considerations
Redline transmission fluids are formulated with eco-friendly properties, minimizing environmental impact․ Proper disposal through recycling or designated facilities ensures responsible handling of used lubricants․
Eco-Friendly Properties of Redline Fluids
Redline transmission fluids are designed with eco-friendly properties, incorporating synthetic esters for improved biodegradability; These formulations reduce environmental impact while maintaining high performance․ They are free from harmful additives and toxins, ensuring safer handling and disposal․ By using advanced lubricant technology, Redline helps minimize ecological damage without compromising on the protection and efficiency of your vehicle’s transmission system․
Proper Disposal of Used Fluid
Proper disposal of used Redline transmission fluid is crucial to protect the environment․ Always check local regulations for hazardous waste disposal․ Use a sealed, leak-proof container to store the used fluid․ Do not dispose of it in drains, sewers, or regular trash․ Take it to an authorized recycling center or service station that accepts automotive fluids․ This ensures responsible handling and minimizes ecological impact, aligning with environmentally responsible practices․
The Redline Transmission Fluid Manual is a valuable resource for optimizing performance and protection․ It offers clear guidance, ensuring your transmission operates at its best․
Redline transmission fluids offer superior performance and protection for both automatic and manual transmissions․ They provide improved shifting smoothness, enhanced gear and synchronizer protection, and excellent cold-weather performance․ Redline fluids are designed to extend the life of transmission components and are compatible with a wide range of vehicles․ Many users prefer Redline over OEM fluids due to their high-quality formulation and consistent reliability in various driving conditions․
Recommendations for Future Use
For optimal performance, regular fluid checks and maintenance are recommended․ Ensure compatibility with your vehicle’s specifications and avoid mixing Redline fluids with other brands․ Always follow the manufacturer’s guidelines for transmission fluid changes․ Redline’s high-quality formulations provide excellent wear protection and smooth shifting, making them a reliable choice for future use in both automatic and manual transmissions․ Regular maintenance will help extend the life of your transmission and maintain its efficiency over time․

Additional Resources and References
Visit Redline Oil’s official website for detailed product specifications․ Explore forums like BobIsTheOilGuy and Reddit for user reviews and discussions․
Links to Manufacturer Specifications
For precise technical details, visit Redline Oil’s official website, which provides comprehensive product sheets and viscosity charts․ Additionally, forums like BobIsTheOilGuy and Reddit communities often host discussions with links to manufacturer specifications․ Ensure compatibility by cross-referencing your vehicle’s make and model with Redline’s recommended applications․ These resources offer invaluable insights for making informed decisions about transmission fluid selection․
Forum Discussions and User Reviews
Online forums and user reviews highlight widespread satisfaction with Redline transmission fluids․ Many enthusiasts report improved shifting performance and smoother operation, particularly in cold weather․ For example, Jeep Wrangler owners praise Redline MTL for enhanced gear engagement, while BMW E60 535xi drivers note reduced clutch wear․ Users consistently favor Redline over OEM fluids, citing better durability and protection․ These firsthand experiences underscore the reliability and effectiveness of Redline products for various manual and automatic transmissions․